Programvare for podkastopptak blir viktig når du endelig bestemmer deg for å lansere din første podkast, men sliter med uklar lyd, bakgrunnsstøy eller kompliserte innspillingsverktøy. Enten du planlegger å spille inn soloepisoder, eksterne intervjuer eller iPhone-podkaster, dekker denne veiledningen utstyret, innspillingsmetodene og de praktiske verktøyene som trengs for å lage podkastepisoder av profesjonell kvalitet.
Del 1. Viktig utstyr for podkastopptak
Mikrofoner: Den viktigste investeringen
Lydkvaliteten din er direkte proporsjonal med kvaliteten på mikrofonen du bruker til podkasten din. Balansert lyd og klarhet holder lytterne engasjerte og genererer profesjonelle podkaster.
1. USB-mikrofoner
USB-mikrofoner er superenkle å bruke, gir direkte tilkobling til enheten din og støtter utviklingen av enkle podkaster. Derfor er de flotte for nybegynnere, ettersom de er helt tilstrekkelige for online intervjuer og dedikerte hjemmestudioer.
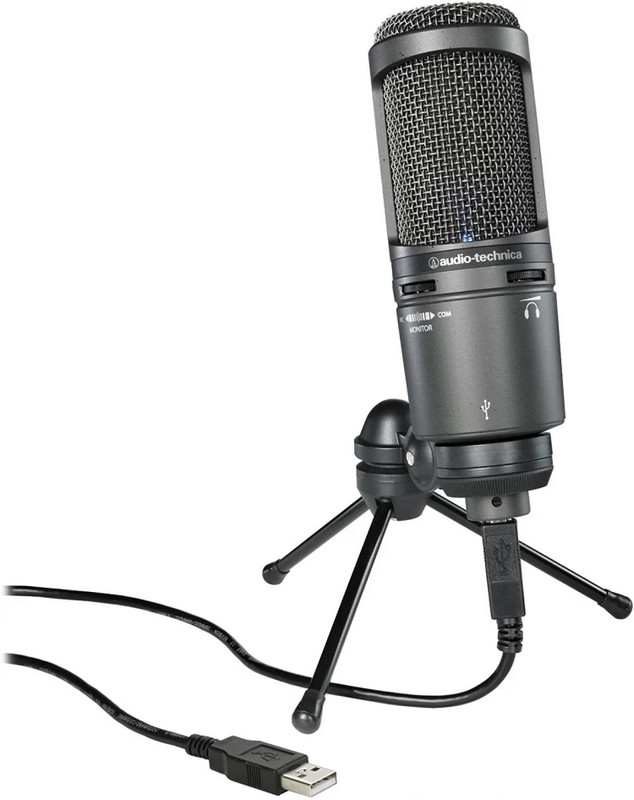
Noen vanlige USB-mikrofoner er:
- Blå Yeti
- Audio-Technica AT2020USB+
- Røde NT-USB
2. XLR-mikrofoner
XLR-mikrofoner er det stikk motsatte. De gir lydinngang av høy kvalitet og kontroll over hvordan lyden høres ut. Dette er gode investeringer for avanserte podkastoppsett. Disse skiller seg fra USB-mikrofoner ved at XLR-mikrofoner krever et lydgrensesnitt eller en mikser.
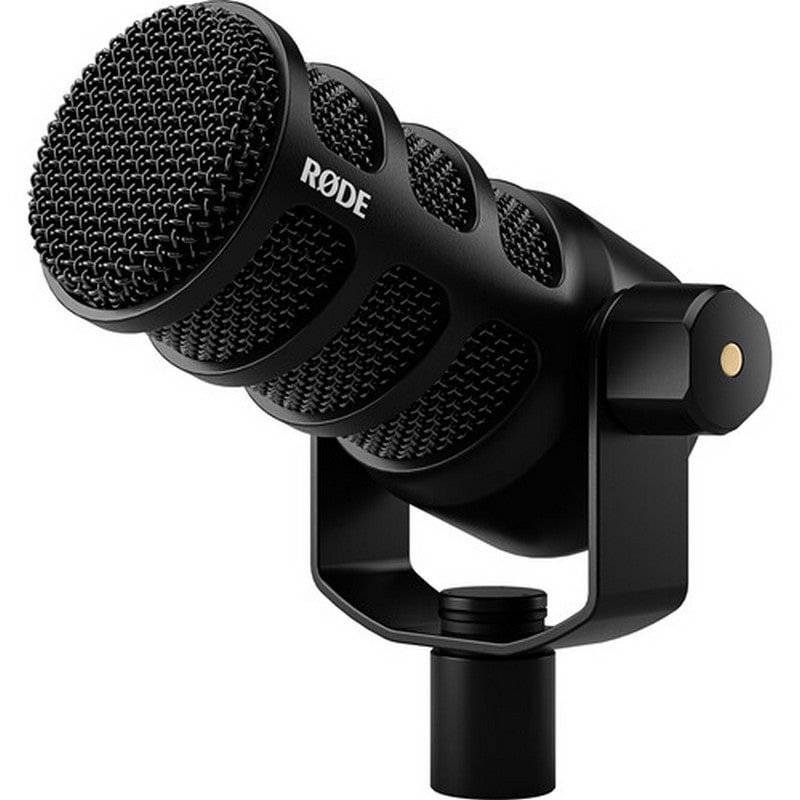
Noen vanlige XLR-mikrofoner er:
- Shure SM7B
- Rød PodMic
- Electro-Voice RE20
Lydgrensesnitt (for XLR-mikrofoner)
Et lydgrensesnitt er en perfekt partner for XLR-mikrofonen din, ettersom det forbedrer kvaliteten på opptakene dine og konverterer lyden til et digitalt format som datamaskinen din kan forstå. Denne prosessen eliminerer også et godt støynivå fra opptakene dine og lar deg til og med spill musikk mens du spiller inn.
Noen gode lydgrensesnitt er:
- Focusrite Scarlett 2i2
- PreSonus AudioBox USB 96
- Universal Audio Volt 2
Hodetelefoner
Det å kunne overvåke lyden din mens du spiller inn og kontrollere ekkolydlekkasje inn i mikrofonen er noen fordeler med å ha lukkede hodetelefoner av god kvalitet.
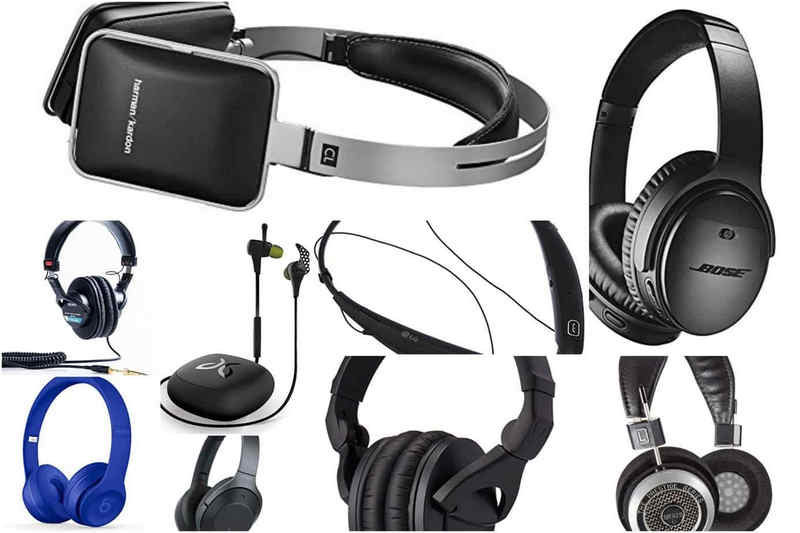
Noen gode podkasthodetelefoner:
- Audio-Technica ATH-M50x
- Sony MDR-7506
- Beyerdynamic DT 770 Pro
Tilbehør
Et av de viktigste kjøpene for å forbedre komforten og lyden din under opptak er ekstra tilbehør.
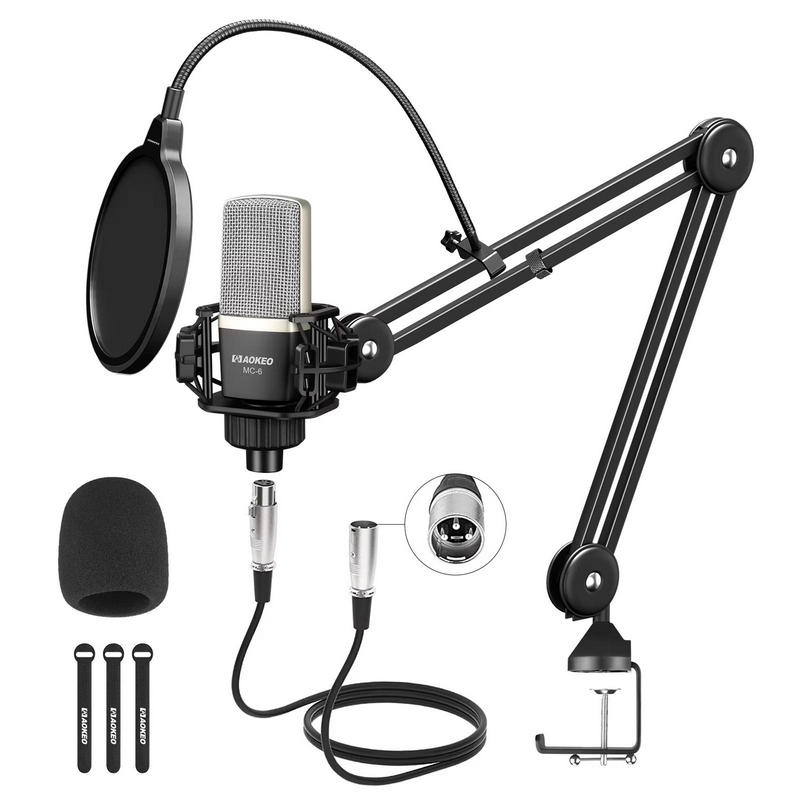
- Popfilter: Disse brukes til å dempe lyden av hard popping som bokstaver som P og B lager.
- Bomarm: Disse holder mikrofonen stabil samtidig som de frigjør plass på skrivebordet.
- Akustiske skumpaneler: Disse er supre for å forbedre akustikken i rommet ditt, samtidig som de kontrollerer ekkoet.
- Støtdemper: En støtdemper minimerer vibrasjoner og skrivebordsstøy under opptak.
Del 2. Beste podkastopptaksmetoder
Metode 1: Spill inn en podkast med AVAide Screen Recorder
Innspilling av podkaster med AVAide skjermopptaker er enkelt og pålitelig. Det er et av de beste programmene som tar opp skjerm, webkamera og lyd samtidig, og det tar også opp telefonskjermen din. Programvaren er forsinkelsesfri og ideell for eksterne intervjuer, podkastøkter, reaksjonsvideoer, pedagogiske podkaster og videopodkaster.
- Tar opp mikrofon- og systemlyd samtidig.
- Tar opp webkamera og skjerm samtidig for videopodkaster.
- Støtter fullskjerm, vindu eller tilpasset opptaksområde.
- Tilbyr annoteringsverktøy under opptak.
- Eksporterer opptak i formater som MP4, MP3, AAC, FLAC og mer.

 Sikker nedlasting
Trinn 1Last ned og installer programvaren
Gå til det offisielle nettstedet til AVAide for å laste det ned til Windows- eller Mac-datamaskinen din. Installer programvaren ved å følge instruksjonene og ledeteksten.
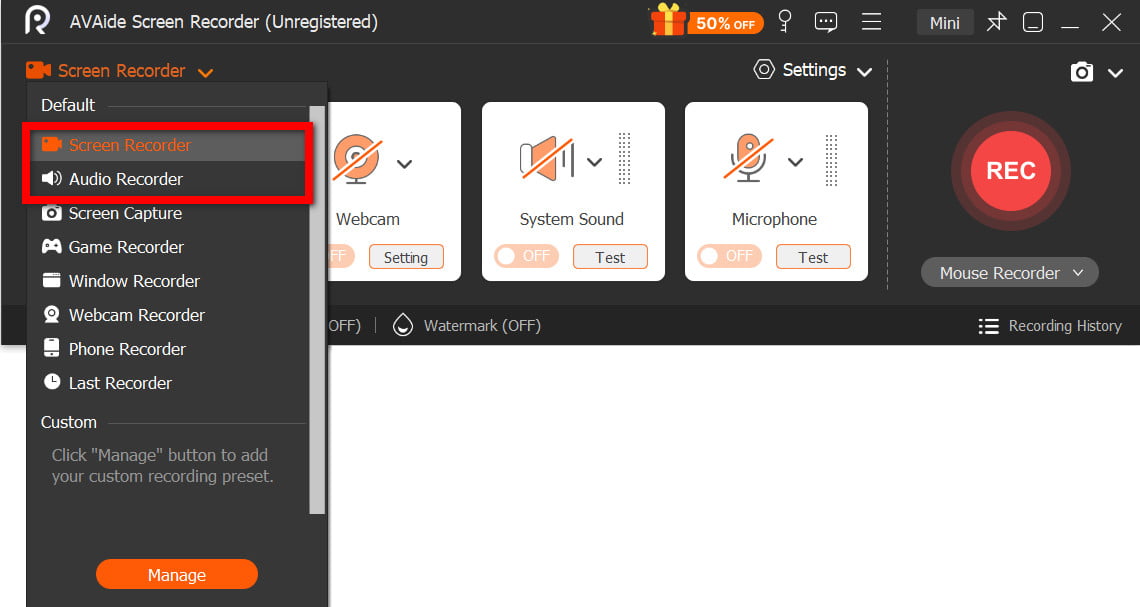
Steg 2Velg lyd- eller videoopptaker
Åpne programvaren og klikk på enten Lydopptaker eller Skjermopptaker, avhengig av om du vil lage en podkast med kun lyd eller video.
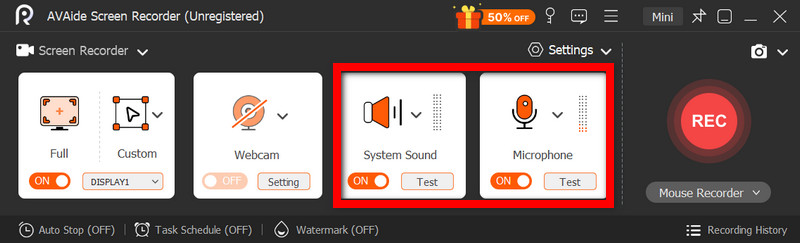
Trinn 3Slå på mikrofon og systemlyd
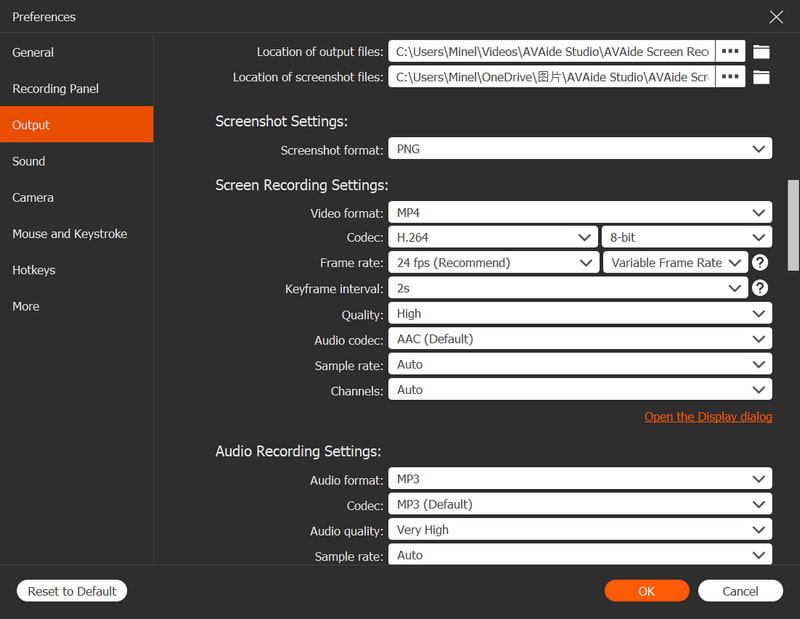
Aktiver Mikrofon å spille inn stemmen din. Systemlyd bør være aktivert for å ta opp onlineintervjuer, musikk og gjestelyd.
Trinn 4Angi opptaksinnstillinger
Velg ønsket lydformat og kvalitet under Innstillinger meny. For videopodkaster angir du opptaksområde og webkameraoverlegg.
Trinn 5Ta opp
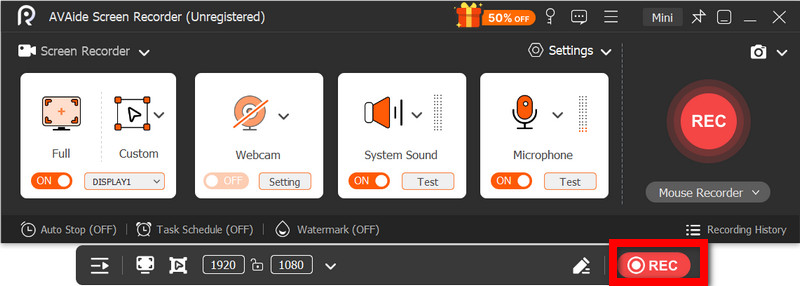
Etter at du har truffet REC knappen, starter du opptaket av podkastøkten din. Du har muligheten til å legge til notater eller høydepunkter når som helst.
Trinn 6Lagre og forhåndsvis
Etter å ha truffet Stoppe -knappen, kan du lagre podkasten din etter at du har trimmet uønskede deler. Du kan også forhåndsvise arbeidet ditt.
Metode 2: Spill inn en podkast med Audacity
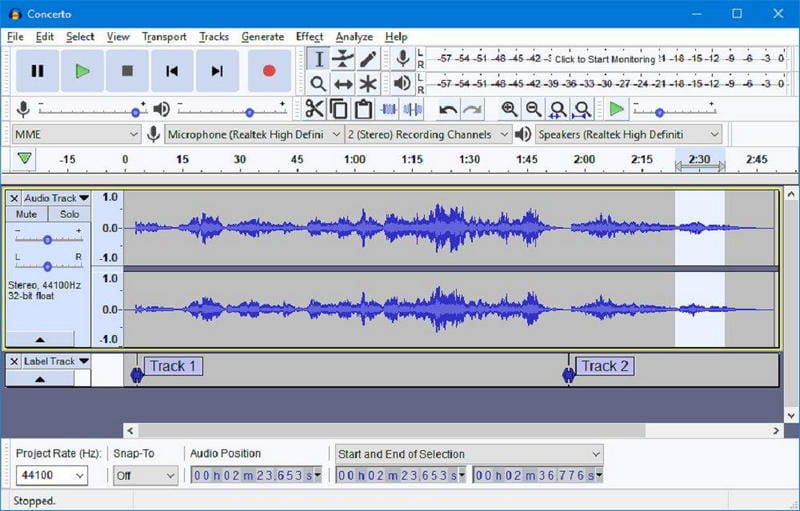
Audacity er et av de mest populære programmene som brukes til å spille inn og redigere lyd for podkasting. Det er et gratis program med åpen kildekode som lar brukere spille inn lyd og redigere den med nyttige funksjoner som støyreduksjon, lydeffekter og flersporsstøtte. Med disse funksjonene er det mulig å lage podkastopptak av profesjonell kvalitet raskt og enkelt med Audacity.
Trinn 1Last ned Audacity fra det offisielle nettstedet til Audacity og installer det på datamaskinen din.
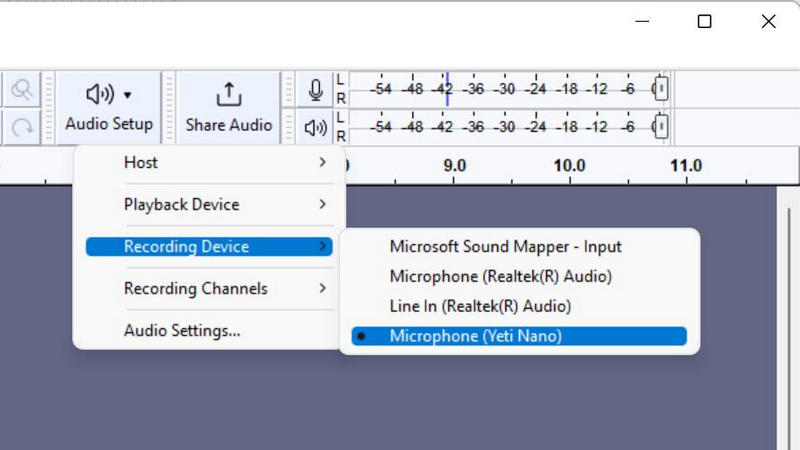
Steg 2Bruk en USB- eller XLR-mikrofon og angi den som opptaksenhet i Audacity.
Trinn 3Angi opptakskanalene og lydkvaliteten som passer til behovene til podkasten din.
Trinn 4Klikk på Ta opp -knappen og si innholdet ditt inn i mikrofonen.
Trinn 5 Rediger podkasten din for å fjerne eventuelle feil, legg til intromusikk eller legg til lydeffekter ved hjelp av redigeringsverktøyet i Audacity.
Trinn 6Lagre podkasten din ved å eksportere lyden som en MP3- eller WAV-fil.
Metode 3: Spill inn en podkast med Adobe Audition
Med Adobe Audition får du lyd av mer profesjonell kvalitet til podkastene dine. Adobe Audition har flotte funksjoner for lydredigering til podkaster av høy kvalitet, som støyreduksjon og lydgjenoppretting. Det er også et flott flersporsredigeringsprogram.
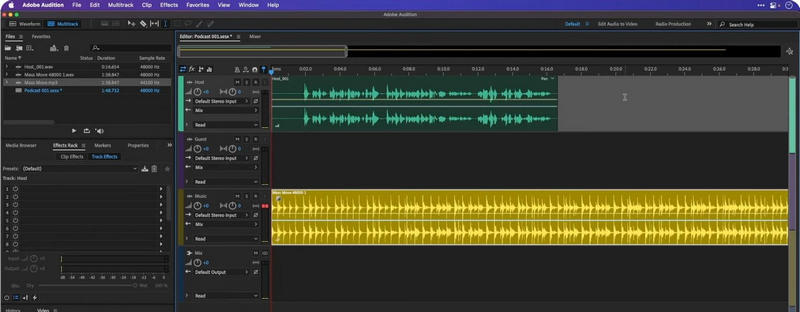
Trinn 1 Last ned Adobe Audition fra det offisielle Adobe-nettstedet og installer det på enheten din.
Steg 2 Åpne programmet og opprett og konfigurer en ny podkastøkt med flere spor.
Trinn 3Bruke Lydmaskinvare innstillinger for å velge mikrofon og hodetelefoner.
Trinn 4Velg lydsporet du vil spille inn på.
Trinn 5Start podkastøkten din ved å klikke på Ta opp knapp.
Trinn 6Rediger podkastøkten din med redigeringsverktøyene i Adobe Audition, og du er ferdig.
Del 3. Slik spiller du inn en podkast eksternt
Riverside.fm er et av de beste og mest pålitelige nettstedene for fjernopptak av podkaster. I stedet for å ta opp lyd og video via internett, tar de opp lyd og video av høy kvalitet, lokalt på hver maskinvare. Riverside.fm er et flott verktøy for videopodkaster, webinarer, talkshow på nett og intervjuer fordi det gir klare opptak, selv når internett er ustabilt, og fungerer godt sammen med verktøy som ... beste skjermopptaker for Mac for sikkerhetskopiering eller opptaksstøtte.
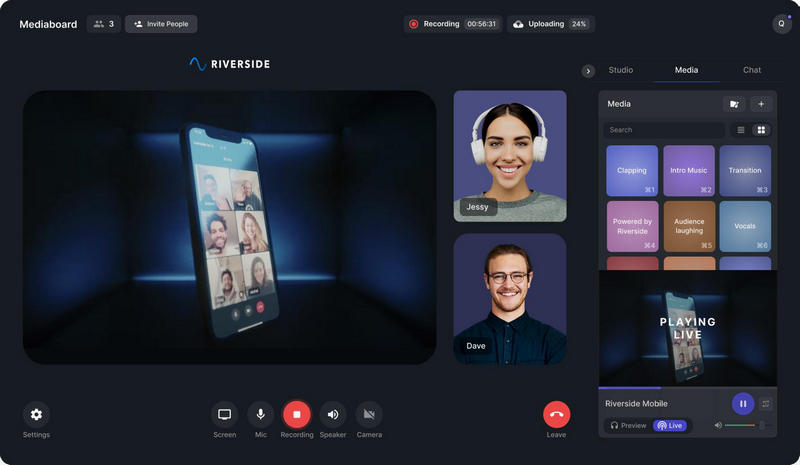
Trinn 1Gå til Riverside.fm-nettstedet og opprett en konto. Logg inn i studioet etter registrering.
Steg 2Klikk på Opprett studio -knappen, og velg podkastinnstillingene dine. Bestem om du vil spille inn en podkast med bare lyd eller video.
Trinn 3Send invitasjonslenken til podkastgjestene dine. De kan bli med via en nettleser og trenger ikke å laste ned noe programvare.
Trinn 4Velg mikrofon, hodetelefoner og webkamera du foretrekker før du går inn i studioet, og sørg for å teste lyden før du forlater studioet for å sikre at det ikke er noen tekniske problemer.
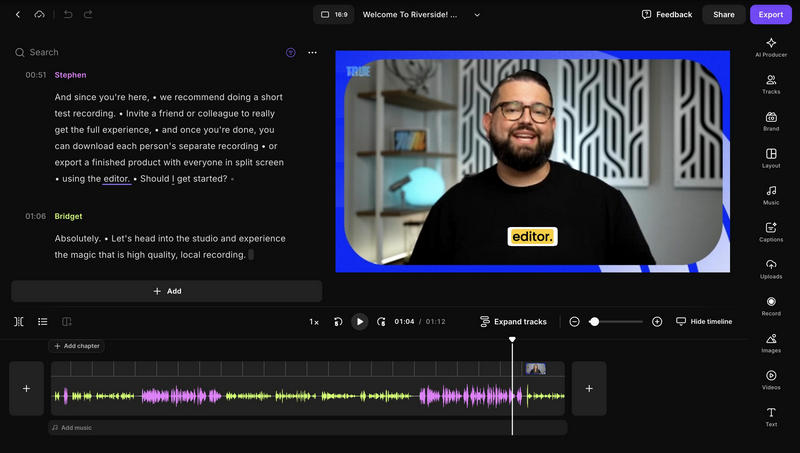
Trinn 5Når du er klar, klikker du på Ta opp knapp. Riverside.fm tar opp all lyd og video lokalt i høy kvalitet.
Del 4. Slik spiller du inn en podkast på iPhone
GarageBand er den foretrukne appen for podkastopptak for mange iPhone-brukere som ønsker noe utover den innebygde Voice Memos-appen. Den tillater flersporsopptak, lydeffekter og bakgrunnsmusikk i tillegg til å tilby et imponerende utvalg av redigeringsverktøy.
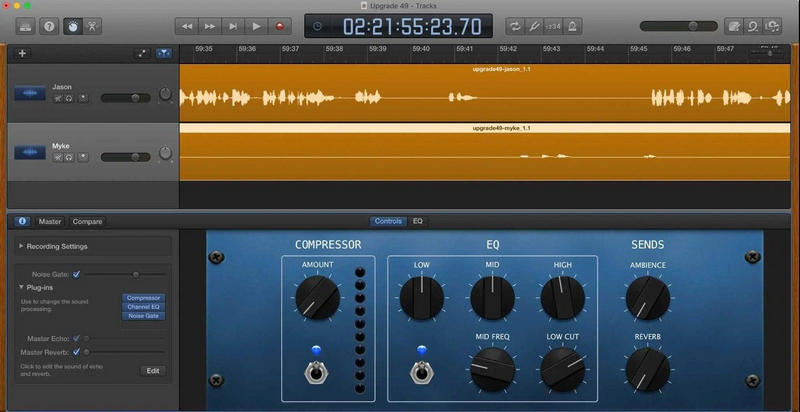
Trinn 1For å laste ned GarageBand, gå til App Store og sjekk om det allerede er installert på iPhonen din. Hvis ikke, installer det.
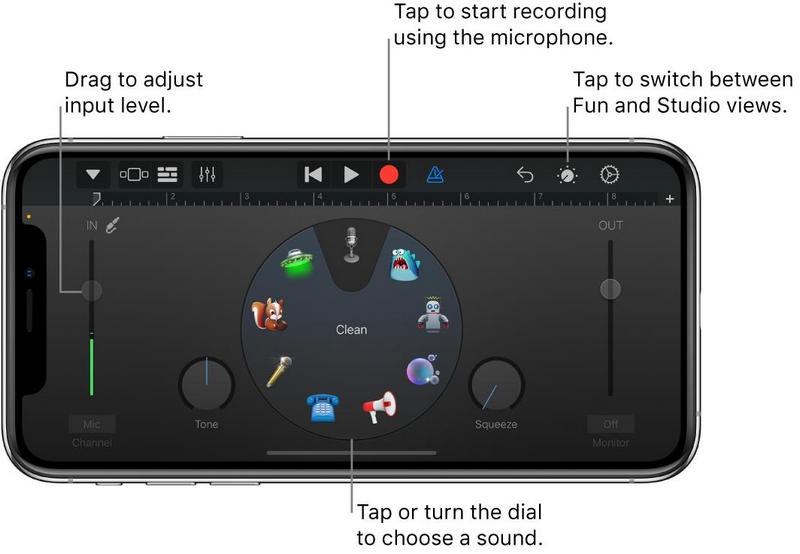
Steg 2Når du åpner GarageBand, velger du Lydopptaker fra de tilgjengelige opptaksverktøyene.
Trinn 3Podkastene dine vil høres mye mer profesjonelle ut hvis du bruker en ekstern mikrofon. De vil også høres klarere ut, og du vil høre mindre forstyrrelser.
Trinn 4Overvåking er nyttig for å sjekke lydnivået mikrofonen din fanger opp og for å sikre at det er klart og ukomprimert.
Trinn 5Du kan umiddelbart starte innspillingen av podkasten din ved å trykke på Ta opp knapp. Opptaket kan avbrytes ved å sette det på pause og gjenopptas etter at pausen er avsluttet.
Trinn 6Feil kan redigeres ut, og lydnivåer kan justeres i GarageBand ved hjelp av trim-funksjonen. Du kan også legge til musikk.
Trinn 7Podkasten du har brukt så mye tid på å øve på, spille inn og redigere kan eksporteres og lagres på iPhonen din. Du kan også dele podkasten din.
Setter opp til spille inn en podkast er praktisk, med riktig utstyr og programvare. Du kan podcaste fra datamaskinen din, fra eksterne steder med gjester, eller spille inn direkte fra iPhonen din med godt utstyr. Du vil produsere podcaster av høy kvalitet hver gang.
OM FORFATTEREN

Fang skjermaktiviteter med lyd, nettmøter, spillvideoer, musikk, webkamera osv.