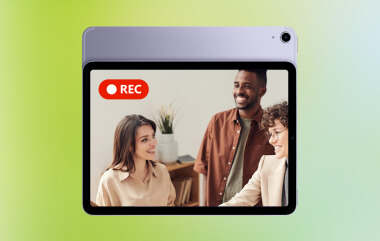
Kako snimiti ekran na Lenovo prijenosnom računalu ovisi o alatu koji odaberete, od ugrađenih značajki sustava Windows do naprednog softvera. Ovaj vodič prikazuje jednostavne, jasne i učinkovite metode za snimanje zaslona na Lenovo uređajima, bilo da se radi o tutorijalima, sastancima, igranju ili svakodnevnom snimanju.
Metoda 1. Korištenje Xbox Game Bara
Ugrađena značajka snimanja Xbox Game Bara je Microsoftova, besprijekorno se integrira sa sustavom Windows i najpraktičnije je rješenje za snimanje za Lenovo korisnike. Stvorena je za igranje igara, a služi i kao standardni snimač aplikacija, program za izradu tutorijala i snimač preglednika. Najveća prednost je što ne zahtijeva postavljanje; odmah je spremna za upotrebu.
Ali postoje definitivni nedostaci. Ne snima radnu površinu ili File Explorer, a prilagodba je ograničena na profesionalne alate. Međutim, i dalje je jedna od najpraktičnijih ugrađenih opcija za povremene sesije gdje kvaliteta i trud nisu toliko važni.
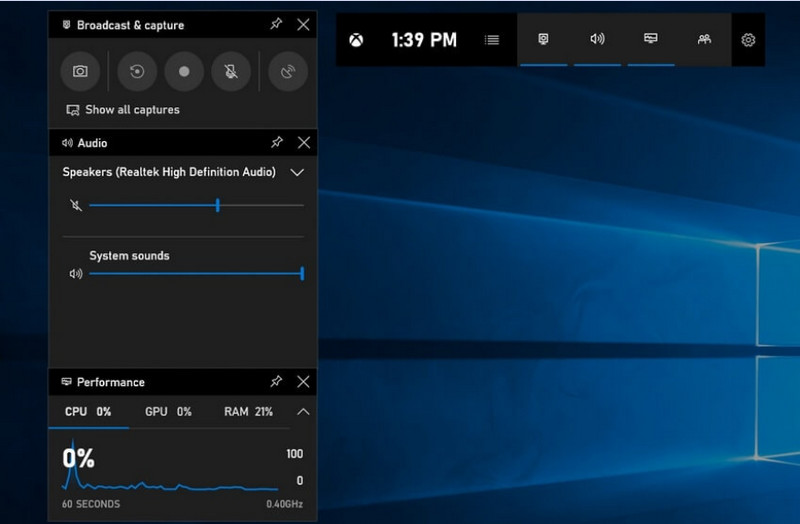
Korak 1Za otvaranje Xbox Game Bara pritisnite Windows + G na tipkovnici.
Korak 2Naći Uhvatiti panela ili kliknite na njega iz Widgeti izbornik.
Korak 3Kliknite na Zapis (●) gumb ili pritisnite Windows + Alt + R.
4. korakAko želite snimati glas, omogućite Mikrofon.
Korak 5Pritisnite Windows + Alt + R ponovno ili kliknite Zaustavi (■) dovršiti.
Korak 6Svoju snimku ćete pronaći u Videozapisi > Snima.
Metoda 2. Korištenje Lenovo Vantagea
Lenovo Vantage nije snimač zaslona; to je paket za upravljanje sustavom i optimizaciju. Više je indirektno uključen u snimanje, s vrlo malo značajki koje pomažu procesu snimanja na neki način, ovisno o modelu uređaja za snimanje, ili čak s nekim uređajima koji nude prečace ili alate za kameru/prikaz koji mogu pomoći u procesu snimanja.
Ovo je velika varijacija u performansama i dostupnosti. Osnovne funkcije snimanja mogu biti podržane na nekim Lenovo uređajima, ali drugi ih možda uopće nemaju. Ograničen je i donekle nedosljedan u onome što može učiniti za snimače preko cijelog zaslona, ali bi mogao biti vrijedan korisnicima koji žele ostati unutar Lenovo ekosustava ili snimanje podcasta sadržaj s osnovnim alatima.
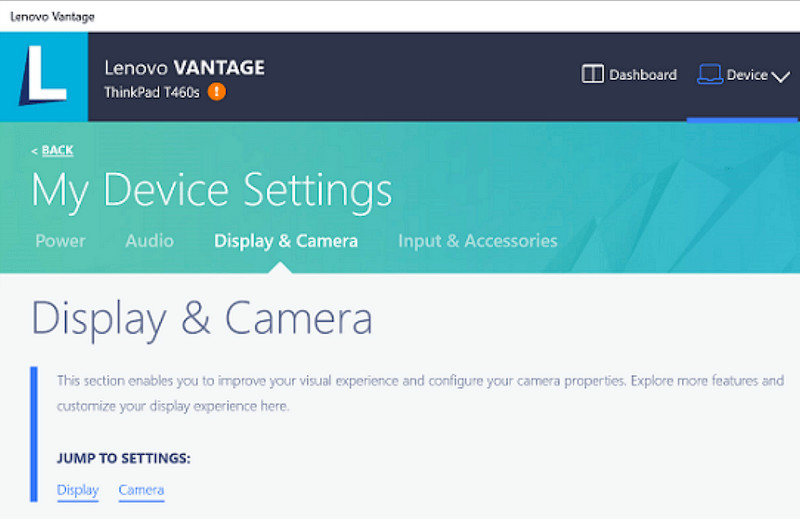
Korak 1Idite na Početak izbornik i kliknite na Lenovo Vantage.
Korak 2Dodirnite Postavke mog uređaja > Zaslon i kamera.
Korak 3Provjerite snimke ili druge dostupne funkcije.
4. korakOmogućite sve potrebne opcije ili prečace.
Korak 5Snimite glazbu koristeći predviđenu funkciju (ako je moguće).
Korak 6Pronađite snimke koje ste spremili u mapi Videozapisi.
Metoda 3. Korištenje Legion Zone / Lenovo Nerve Centera
Lenovo Nerve Center (ili Legion Nerve Center - noviji alati tvrtke Legion zamijenili su Nerve Sense) optimiziran je za Lenovo uređaje, posebno za prijenosna računala Lenovo Legion, namijenjena igračima. Također je čvrsto integriran s alatima za poboljšanje performansi igara, tako da korisnici mogu snimati snimke zaslona svojih igara dok prate i optimiziraju sistemske resurse.
Međutim, to je prilično osnovni snimač. Više se radi o praktičnosti nego o prilagodbi i nudi samo osnovne opcije snimanja s ograničenom kontrolom nad rezolucijom, brzinom prijenosa i naprednim postavkama. Također, dostupan je samo na nekim novijim sustavima, a drugi su ga zamijenili ili uklonili sa svojih sustava, tako da nije pouzdan kao što je nekad bio.
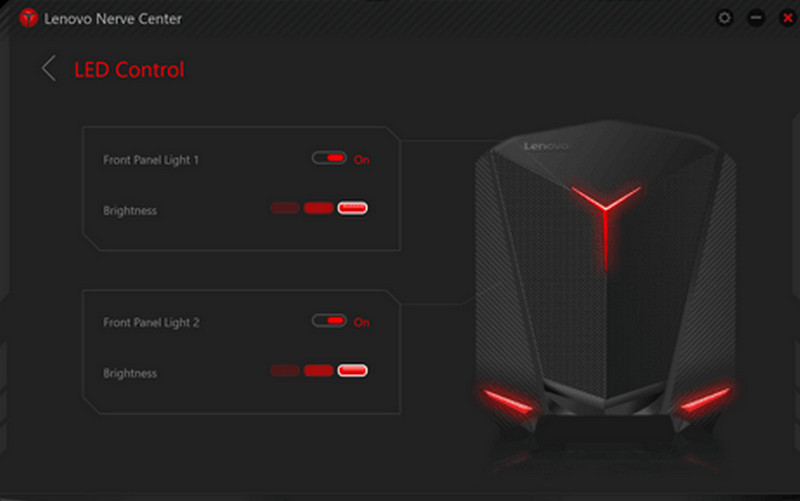
Korak 1Pristupite Lenovo nervni centar ili Zona Legije s uređaja.
Korak 2Idite na alate za snimanje i/ili igranje.
Korak 3Ako postoji izbor, promijenite postavke snimanja, kao što su razlučivost ili kvaliteta zvuka.
4. korakPokrenite igru ili aplikaciju.
Korak 5Snimanje pomoću zadanog prečaca ili gumba.
Korak 6Zaustavite snimanje i pogledajte u svoj Videozapisi mapu kako biste vidjeli je li datoteka snimljena.
Metoda 4. Korištenje AVAide Screen Recordera
AVAide Screen Recorder je sofisticiraniji i svestraniji snimač zaslona za Lenovo od ugrađenog snimača zaslona. Napravljen je za one koji žele kvalitetu videa, glatkiji rad i veću kontrolu snimanja. Savršen je alat za izradu tutorijala, snimanje sastanaka ili snimanje igre, bez kompliciranog postavljanja, sve na profesionalnoj razini.
Iako može snimati zvuk sustava, ulaz mikrofona, web kameru i područja zaslona, također podržava snimanje u punoj HD, pa čak i 4K rezoluciji s minimalnim kašnjenjem u usporedbi s osnovnim snimačima. To ga čini sveobuhvatnom aplikacijom za snimanje zaslona za posao i slobodno vrijeme.
- Snimajte videozapise u 1080p ili 4K rezoluciji s glatkim radom bez kašnjenja.
- Snimajte u načinu rada CIJELOG ili PRILAGOĐENOG zaslona, ovisno o vašim potrebama.
- Istovremeno snimajte i interni zvuk i glas s jasnim izlazom.
- Dodajte snimanje Facecamom za tutorijale, prezentacije ili videozapise igranja.
- Obrežite, komprimirajte i poboljšajte snimke nakon snimanja.

 Sigurno preuzimanje
Korak 1Preuzmite i instalirajte softver
Posjetite službenu web stranicu AVAide Screen Recordera. Preuzmite Windows Installer, instalirajte ga na svoje Lenovo prijenosno računalo i pokrenite ga.
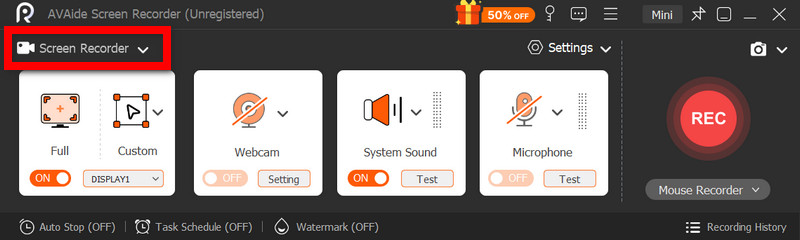
Korak 2Odaberite način snimanja
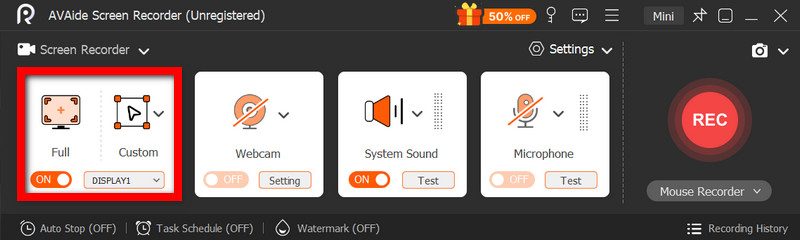
Otvorite softver, a zatim kliknite Screen RecorderSnimite cijeli zaslon pomoću Pun ili dio ekrana s Prilagođen.
Korak 3Konfiguriranje postavki zvuka
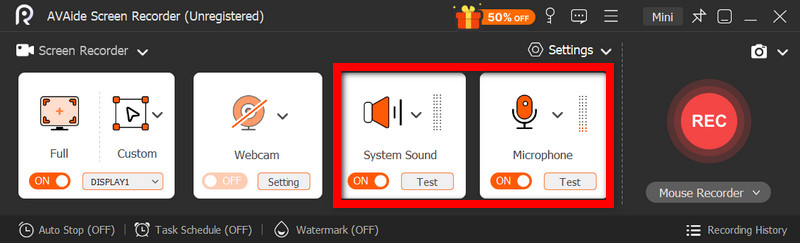
Za snimanje bilo kojeg zvuka koji proizvodi računalo, aktivirajte Zvuk sustavaDa biste uključili vlastiti glas, aktivirajte MikrofonWeb-kamera se također može uključiti po potrebi.
4. korakPrilagodite postavke snimanja
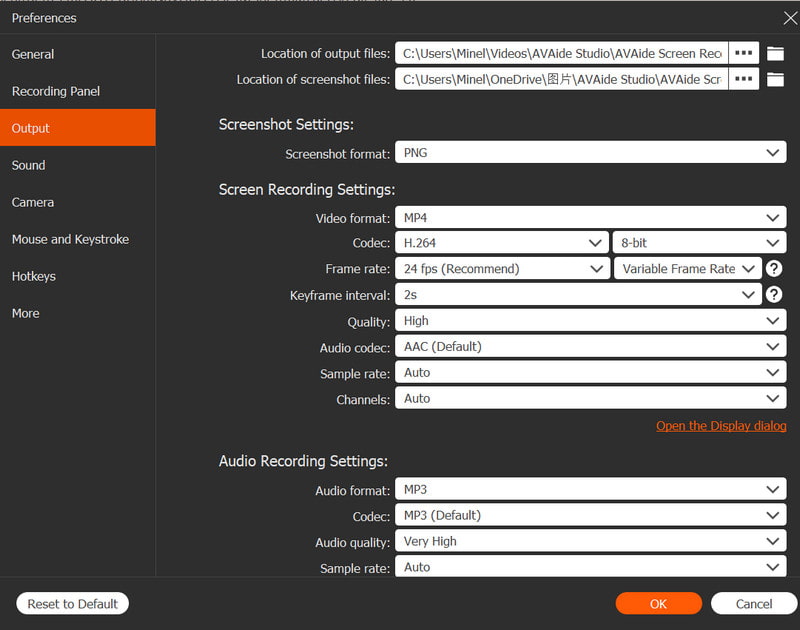
Koristiti Postavke gumb za konfiguriranje kvalitete videa, razlučivosti, broja sličica u sekundi i izlaznog formata kako biste postigli optimalne performanse snimanja.
Korak 5Započni snimanje
pritisni REC gumb za početak snimanja. Snimke Google Meeta, tutorijali, igranje ili bilo koja aktivnost na zaslonu mogu se snimati bez problema.
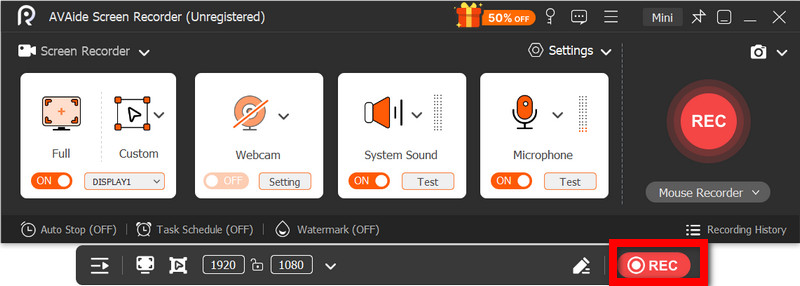
Korak 6Zaustavi i spremi snimku
Kada završite, kliknite na Stop gumb. Pregledajte snimku, brzo je uredite ako je potrebno i odmah je spremite na računalo.
Metoda 5. Korištenje brzih postavki
Na Lenovo Android tabletima postoji ugrađena opcija snimanja zaslona u brzim postavkama. Najbolji način za snimanje tutorijala, igranja ili aktivnosti aplikacija na tabletu je bez preuzimanja aplikacija trećih strana. Jednostavan, brz i optimiziran za mobilnu upotrebu, idealan je za brza snimanja u pokretu.
Nedostaju mu napredne značajke uređivanja i prilagodbe koje se nalaze u drugim alatima za snimanje zaslona, ali je dovoljan za jednostavne snimke zaslona sa zvukom.
Korak 1Prijeđite prstom prema gore od dna zaslona da biste otvorili Brze postavke.
Korak 2Potražite Snimanje zaslona ili Screen Recorder gumb. Ako ga nema, kliknite na Uredi gumb i dodajte ga na svoju ploču.
Korak 3Klik Screen Recorder, a zatim odaberite željene postavke.
4. korakDodirnite Početak za početak snimanja. Prije početka snimanja bit će odbrojavanje.
Korak 5Dodirnite plutajuću alatnu traku ili traku s obavijestima, a zatim pritisnite Stop za završetak snimanja.
Rješavanje uobičajenih problema sa snimanjem zaslona na Lenovo uređajima
Možete pročitati savjete o rješavanju uobičajenih problema prilikom snimanja zaslona na Lenovo uređaju.
Iako općenito nema većih komplikacija sa snimanjem zaslona na Lenovo uređajima, uvijek postoji mogućnost problema ovisno o alatu ili uređaju za snimanje zaslona koji se koristi. U nastavku su navedeni najčešći problemi i kako ih riješiti.
- Snimač zaslona ne radi: Ponovno pokrenite uređaj i pokušajte ponovno. Za ugrađene alate poput Xbox Game Bara, provjerite jesu li omogućeni u postavkama sustava Windows pod Igre.
- Nema zvuka u snimci: Prije snimanja provjerite je li uključen zvuk sustava ili mikrofon. Također, provjerite je li zvuk sustava isključen.
- Usporen ili nekvalitetan video: Smanjite kvalitetu videa ili zatvorite aplikacije u pozadini. Nadogradnja upravljačkih programa za grafičku karticu također može poboljšati performanse.
- Ne mogu snimati radnu površinu ili preglednik datoteka: Ovo je jedno od uobičajenih ograničenja Xbox Game Bara. Ako želite snimiti zaslon i sve snimiti, upotrijebite napredni program kao što je AVAide Screen Recorder, jedan od najbolji snimači zaslona za Mac i Windows.
- Snimka se ne sprema: Provjerite je li vaša pohrana puna i provjerite zadanu lokaciju za spremanje. U postavkama promijenite izlaznu mapu i pokušajte.
Lenovo tipka za snimanje zaslona Opcije se razlikuju ovisno o vašem uređaju i alatu koji koristite. Sveukupno, ugrađene značajke i aplikacije trećih strana olakšavaju snimanje, pružajući vam fleksibilne načine za učinkovito snimanje, spremanje i upravljanje aktivnostima na zaslonu na Lenovo uređajima.
O AUTORU

Snimite aktivnosti na ekranu uz zvuk, sastanke na mreži, videozapise igranja, glazbu, web kameru itd.
Snimanje zaslona
- Snimanje zaslona u sustavu Windows
- Snimanje uživo na Instagramu
- Ripni videozapise s Tubija
- Pretvori YouTube videozapise u MP3
- Preuzmite videozapise s Fanslyja
- Preuzimanje JW Player videa
- Preuzmite Bilibili videozapise
- Preuzmite Patreon videozapise
- Preuzmite SpankBang videozapise
- Preuzmite Discord videozapise
- Preuzmite DoodSream video