File formats play a critical role in how textures are edited, stored, and displayed in game development. One of the common conversions 3D artists, modders, and developers face is transforming from DDS files to PNG, short for Portable Network Graphics. DDS is indeed useful for optimized real-time rendering in game applications, yet it comes with compatibility issues. On the other hand, PNG offers broader compatibility. The idea is that PNG is more platform-friendly than DDS. Despite this dilemma, this guide will explore tools for DDS to PNG conversion. Stick with us and come up with a better choice of tools for this conversion.
Part 1: DDS vs PNG - Why Convert DDS to PNG
The DDS or DirectDraw Surface and PNG or Portable Network Graphics formats serve a unique purpose in digital graphics. Each format comes with strengths designed for specific workflows.
DDS is a specialized format created for real-time rendering in games as it supports features, including GPU-friendly compression, cube maps, and mipmaps. These optimizations are valuable for faster texture loading and reduced memory usage. Thus, DDS is ideal for game engines, including Unreal Engine and Unity. But this specialization comes with trade-offs. DDS files are often unreadable by standard image viewers and editors. It will require plugins and dedicated software for proper handling and to make it readable.
On the contrary, PNG is a universally compatible, lossless image format, excelling in editing, accessibility, and platform compatibility. Best of all, PNG files can be viewed virtually in any image editor and viewer, including web browsers and Photoshop. With the right tools, you can even improve JPEG/JPG/PNG resolution without losing quality. On top of that, this format offers support for transparency or alpha channels, making it ideal for storing high-quality textures while keeping the details. That means that PNG is useful for textures that need further editing, concept art, and UI assets.
| Feature | DDS (DirectDraw Surface) | PNG (Portable Network Graphics) |
| Developed By | Microsoft | October 1, 1996 |
| Primary Purpose | Game textures, like cubemaps, mipmaps, and model assets | Web graphics, like logos, transparent images |
| MIME Type | image/vnd.ms-dos | image/png |
| Compression | Lossy (BCn/DXT) or uncompressed | Lossless (DEFLATE) |
| Strengths | • Small size with good quality • GPU-optimized for fast rendering • Supports mipmaps/cubemaps | • Ideal for web/editing • Perfect transparency support • Universally supported |
| Best For | eal-time 3D rendering, game engines | Web design, digital art, and transparency assets |
Part 2: The Easiest Way to Convert DDS to PNG Online
So many of the key reasons and details about DDS and PNG, here is AVAide Video Converter, offering an efficient way to handle this conversion. This program offers support to specialized formats like DDS. While primarily designed for video conversion, its image conversion module shines by offering various helpful benefits. It can handle files in batches, allowing you to convert many DDS texture files at once. Additionally, this tool is perfect for the preservation of transparent backgrounds during format conversions and optimized output that keeps the original image quality. If you are unsure how to make a transparent PNG, you can check a guide about it. Nonetheless, the inclusion of DDS format support specifically addresses the needs of gaming application workflows. Here is how you convert from .dds to .png using AVAide.
Step 1Download and install the app by clicking the Free Download button, referring to the OS that your computer is running. Then, launch the tool on your computer.

FREE DOWNLOAD For Windows 7 or later
 Secure Download
FREE DOWNLOAD For Mac OS X 10.13 or later
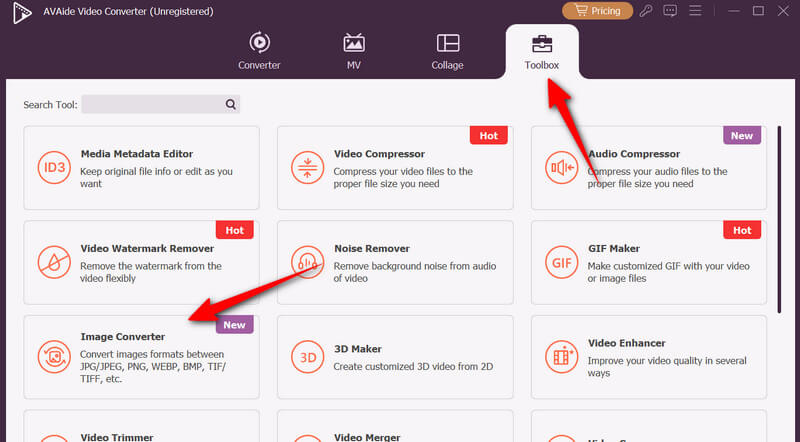
Secure DownloadStep 2After launching the tool, you should see the main interface of the program. Now, go to the More Tools tab located at the top of the window. From here, look for the Image Converter option.
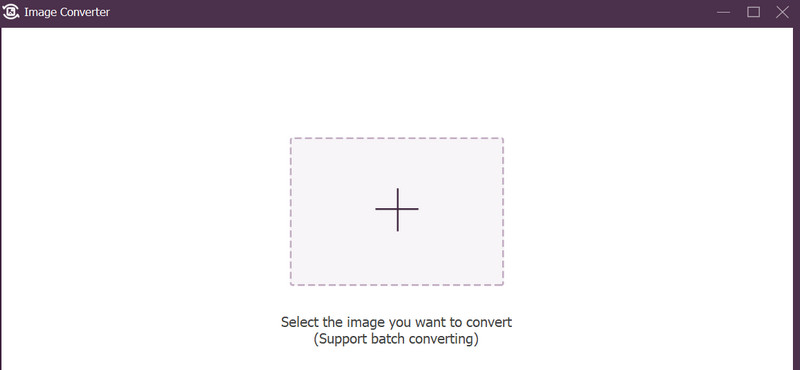
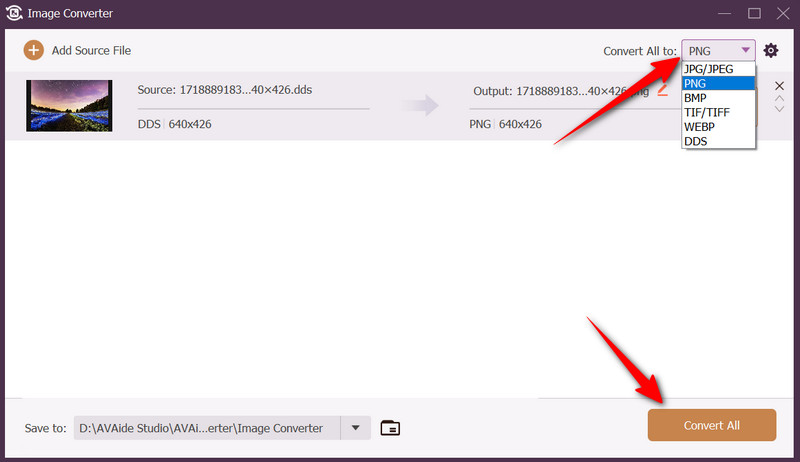
Step 3Then, insert the DDS file you need to change into the tool. To do that, click the plus button and click on your chosen DDS file.
Step 4Next, you will be redirected to the Image Converter window. Now, unfold the Profile dropdown menu and select DDS as the output format. Finally, click the Convert All button.
Part 3: How to Convert DDS to PNG in Photoshop
Photoshop is an industry-standard image editing software. It is widely used by photographers, designers, and game artists due to its powerful tools. Primarily, this tool works with common formats, such as JPEG, TIFF, and PNG. Surprisingly, it also handles DDS format with the help of plugins. It will only require a proper setup to ensure seamless compatibility and preserve texture quality to convert DDS to PNG. But it is safe to say that it is feasible. Here is a guide you can follow to use this program to convert from .dds to PNG:
Step 1You may begin by installing the NVIDIA Texture Tools for Photoshop plugin. You may also infuse the Intel Texture Works to allow the tool to open and export DDS files.
Step 2After installing the plugin, open the DDS file that you want to save as PNG. You can also make necessary edits, including transparency, colors, and layers, before exporting it as a PNG.
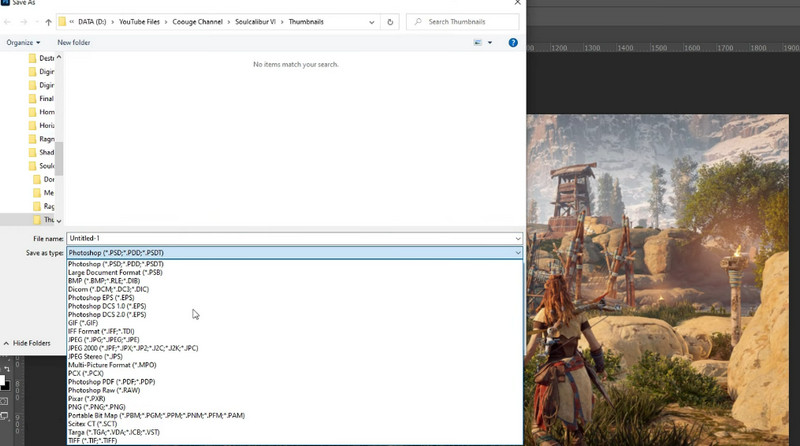
Step 3After all the changes, go to File > Save As. Then, a dialog box will appear. Now, choose PNG from the Format dropdown.
Step 4Finally, choose a location where you wish to save the changed file and click the Save button to save your PNG file.
Part 4: How to Convert DDS to PNG with XnConverter
XnConvert is also an excellent cross-platform converter, supporting over 500 formats, like DDS. It comes with advanced processing options, scripting capabilities and a lightweight interface. What sets this tool apart is it preserves metadata for precise quality adjustments. Here are the steps to convert DDS to PNG:
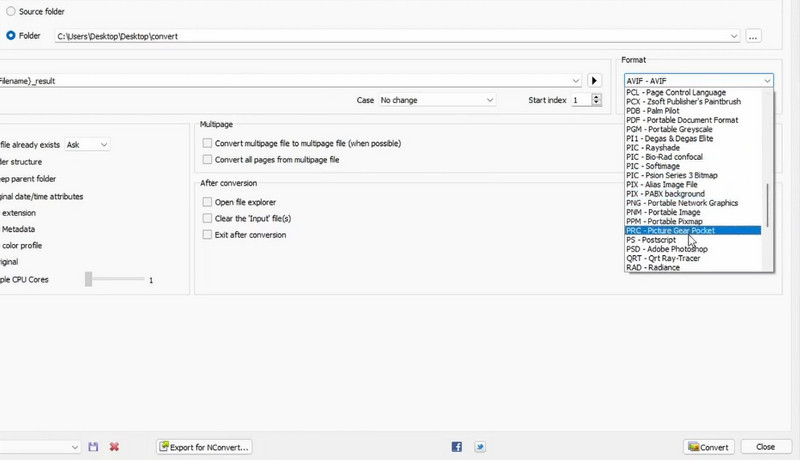
Step 1Get XnConvert from its official site and launch it. From the main interface, click Input, followed by the Add files button to import your DDS files.
Step 2Choose PNG as the output format and set a destination under the directory.
Step 3Once all is set, click Convert to process the DDS textures.
Part 5: How to Convert DDS to PNG with FreeConvert
If you want a user-friendly tool that allows you to convert directly from your browser, you should go for FreeConvert. The platform handles DDS to PNG conversion with automatic deletion after processing. This is ideal for one-time and quick conversions. Here is how to operate it:
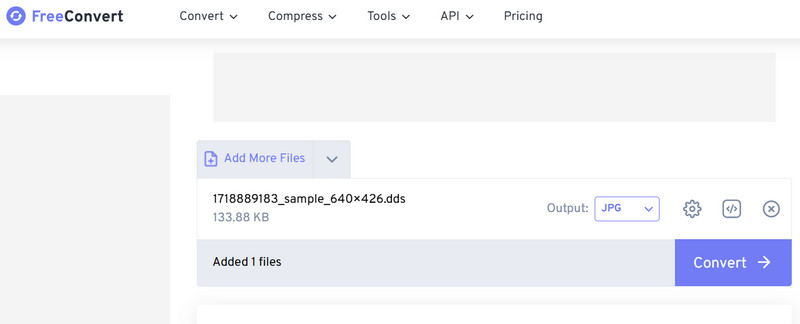
Step 1Open any browser and go to the official web page of the program. Next, upload your DDS files by clicking Choose Files and importing from your device.
Step 2Adjust the settings by enabling Preserve Transparency for DDS that contains an alpha channel.
Step 3Then, hit Convert to PNG to start processing the file and click Download PNG once the process is complete.
By following this guide, you will be able to bridge the gap between game-ready texture files and universally compatible images. You can now batch convert DDS to PNG, edit with precision, or perform quick conversions. By selecting the tool that fits your preference, you can transition between formats without sacrificing quality and detail.
Your complete video toolbox that supports 350+ formats for conversion in lossless quality.