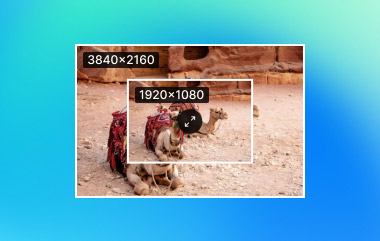
You found a photo you really like, but it is too small for printing, posting on social media, or using on your website. The easiest solution is to enlarge it, making your photo bigger while keeping control over how much you increase it.
In this post, you will find out exactly how to enlarge a picture. You will also discover essential details about photo enlargement and helpful tips to make sure your images stay sharp, clear, and looking great, no matter how big you make them.
Part 1: Will Enlarging the Picture Result in Quality Loss
Enlarging a picture may sound simple, but it can affect the clarity. Every digital image is made of thousands of pixels. These pixels sit in a fixed spot. When you make the picture bigger, the pixels stretch to cover more space. It can make the image look blurry, soft, or pixelated.
Even if new pixels are added to make the image larger, the extra pixels are guessed based on the surrounding ones. This process is called interpolation. It can blur edges and reduce sharpness.
Below are the main reasons why quality loss happens:
- Each photo has a fixed number of pixels. Stretching them over a larger area makes the pixels visible as tiny squares.
- New pixels are created by estimating colors and details between existing pixels. It can make the image less detailed.
- Small imperfections or digital noise in the original photo become more obvious after enlarging.
Understanding this helps you know why some images lose clarity and how to minimize problems when enlarging.
Part 2: How to Enlarge a Photo Without Quality Loss
Enlarging a photo without quality loss is real, and you can truly get it with AVAide Image Upscaler. It helps your image grow bigger while staying clear and sharp. No blur. No messy pixels. Just clean results you can trust. It works with one click, so you save time and effort. You upload a photo, and it does the hard work for you.
It also supports bulk processing, which means you can enlarge many photos at once. It is perfect when you have more images to fix. AVAide Image Upscaler also supports many image formats. You can upload photos in JPG, JPEG, or BMP without trouble. On top of that, everything works online and for free.
Follow the steps below to learn how to enlarge a picture without losing quality using AVAide Image Upscaler:
Step 1Open AVAide Image Upscaler in your browser
First, open your favorite web browser. Next, go to the official AVAide Image Upscaler website. You do not need to install anything. It works fully online. It makes it fast and easy to start right away.
Step 2Add the photo you want to enlarge
After the page loads, click the Choose a Photo button. It lets you import the picture you want to enlarge. If you have many images, use the Upload Photos in Batches option. It helps you work on several photos at the same time and saves effort.

Step 3Let the tool process & preview the image
Once uploaded, AVAide Image Upscaler starts working on your photo. It uses smart AI to improve quality. Soon after, you will see a preview. The original photo is shown on the left. The upscaled photo appears on the right. Move your cursor over the image to zoom in. It helps you check sharpness and small details.

Step 4Choose the right magnification level
Now, go to the Magnification option. You can pick 2×, 4×, 6×, or 8×. Each option increases the image size while keeping it clear. AVAide Image Upscaler boosts details and reduces blur. It helps avoid quality loss even at larger sizes.

Step 5Save the enlarged photo without a watermark
For the last step, click the Save button once you are happy with the result. The image downloads to your device. Open the file to check it. You will see the photo is larger and clean. The quality stays sharp. The watermark is gone!

Features you may like about it:
- Exports photos with no watermark added.
- Keeps your files safe and protects your private data.
- Enlarges small images from 2× to 8× while keeping them sharp.
- Fix blurry picture, remove noise, and instantly improve your photo's clarity.
- Works best on photos with people, products, animals, cars, or clear objects.
Part 3: Tips When Enlarging a Picture
Photos can lose quality when enlarged, but it does not have to happen. If you want to know how to enlarge an image the right way, use these practical tips to make your pictures bigger and still look great.
1. Use High-Resolution Images
Start with the largest and clearest photo you can. High-resolution images have more pixels, which gives you more detail to work with. Anything over 300 PPI or DPI is considered high resolution. You can check this by right-clicking the image, choosing Properties, and looking at the Details tab.
2. Resize in Small Steps
Do not make the image bigger all at once. Making small adjustments keeps it sharp and reduces pixelation. Step-by-step changes let you monitor clarity closely.
3. Maintain Original Aspect Ratio
Keep the height and width proportional when enlarging. If you stretch the image unevenly, parts can look distorted and blurry.
4. Use the Right Dimensions
Consider where your image will be used. Social media usually needs smaller images. Websites or prints may need larger sizes. Common dimensions like 600-1200 pixels work well for many digital images. You can experiment to see what looks best.
5. Choose the Best File Formats
Some formats preserve clarity better than others. PNG and TIFF are great because they do not lose data when resized. JPEG compresses the image, which can reduce clarity, especially after enlargement.
6. Use Tools to Reduce Noise and Sharpen
Before enlarging, remove digital noise from the image. After resizing, apply a slight sharpening filter to make the details clear.
7. Check Sharpness at 100%
View your photo at full size on your screen. It helps spot any blur or noise before saving your enlarged picture.
8. Set Correct Print Settings
If you plan to print your image, knowing how to enlarge a picture for printing is essential. Make sure it is set to 300 DPI to ensure the print will be sharp and clear. Using a lower DPI can make the image look blurry or pixelated on paper, especially for larger prints.
Following these tips helps your enlarged images stay sharp and clear. It also reduces the chance of pixelation, blur, or distorted details.
Whether you want to learn how to enlarge an image for printing, social media, websites, or personal projects, there is the AVAide Image Upscaler can help you.
You can enlarge your image up to 8× with top-notch clarity and sharpness. It works quickly, keeps your photos detailed, and is easy to use right in your browser. Try it now and see how simple it is to enlarge an image without losing quality!

Our AI technology will automatically enhance the quality of your images, remove noise and fix blurry images online.
PROCESS NOW