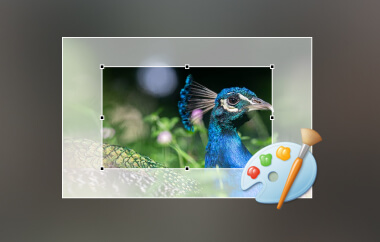
Some people believe that Paint is not capable of transparency. The notion is based on unsuccessful experiences rather than facts. Paint is, in a sense, transparent, though in particular aspects only. The boundaries are due to the type of files and the choice of tools. When such limits are not followed, then the outcome is unsuccessful. As soon as they are comprehended, the task will be easy. This guide explains how to make the background transparent in Paint with clear and proven steps. It begins with simple tools of Windows, proceeds to more advanced built-in tools, and concludes with the simplest way of getting clean results.
Part 1: How to Make a Transparent Background in MS Paint
Creating a transparent background in MS Paint works differently from what most people expect. Paint does not remove backgrounds directly. Instead, it isolates the subject and moves it away from the background. Once this logic is clear, the process is easy to follow. To create a Microsoft Paint transparent background, follow these steps.
Step 1Open Microsoft Paint on your computer. Click File, then Open, and select the image you want to edit.
Step 2Go to the top menu and click Select. From the dropdown list, enable Transparent selection. This setting allows the background to remain clear when the image is moved.
Step 3Open the Select menu again and choose Free-form selection. This tool lets you trace the subject without shape limits.
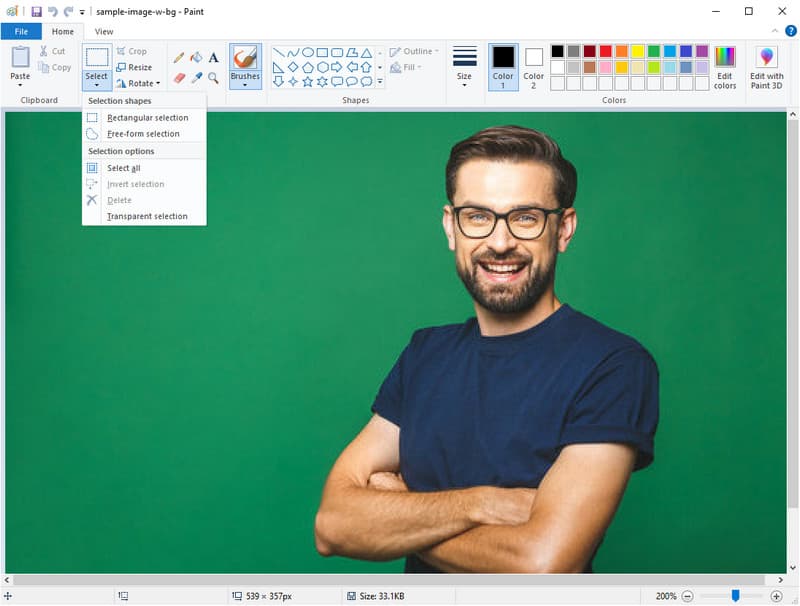
Step 4Carefully tick and drag your cursor around the object you want to keep. Stay close to the edges. Everything outside the selection will act as the background.
Step 5Right-click on the selected object and choose Cut. This removes the object from the original background.
Step 6Open a new Paint window. Press Ctrl and V, or right-click and select Paste, to place the object on a blank canvas. Save the image or place it over another background as needed.
Part 2: How to Make a Transparent Background in Paint.Net
Paint.NET is much more controllable than the simple Paint, particularly at the edges that need to appear smooth. In contrast to auto selection, tracing, layers and using feathering are used to come up with a smoother output in this method. If you have struggled with rough cutouts in a Windows Paint transparent background workflow, this approach offers a noticeable upgrade.
Step 1Open Paint.NET and load your image. Make a new layer above the image layer. This layer will be used only for tracing.
Step 2Pick a bright color that stands out from the image and set it as your primary color. Select the Line or Paintbrush tool. Keep the line width thin for accuracy.
Step 3On the new layer, trace around the object you want to keep. Make sure the outline is fully closed with no gaps. Zoom in as needed to improve precision. You can adjust lines if mistakes occur.
Step 4Select the Magic Wand tool. Click inside the traced outline. Set tolerance between 40 and 60 if needed. Press Ctrl and I to invert the selection.
Step 5Switch back to the original image layer. Press Ctrl and X to cut the selected area. Delete the tracing layer afterward. Open the Feather effect by pressing Ctrl and F. Adjust the feather value until the edges look smooth and natural. With this tutorial, you can make a transparent PNG when it has a background.

Part 3: How to Make a Transparent Background in Paint 3D
Paint 3D is more advanced than classic Paint, but the goal stays the same. You isolate the subject, remove the background, and save the result in a format that supports transparency. The tools are more visual, yet the logic still applies if you have worked with a MS Paint transparent background before. Follow these actions to remove the background using Paint 3D.
Step 1Open Paint 3D on your computer. Tick Menu in the top left corner, then press Open and Browse files to add your image.
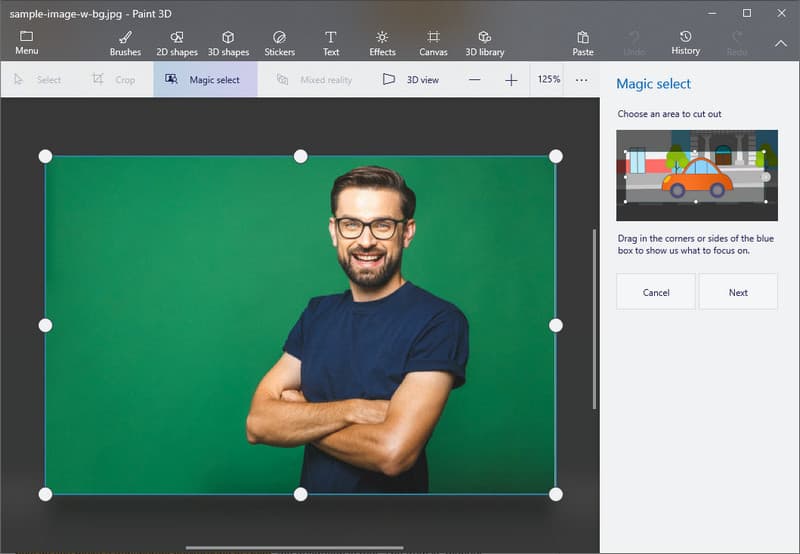
Step 2Click Magic Select from the top toolbar. Adjust the selection box so it fits tightly around the object you want to keep. Click Next.
Step 3Review the selection. Paint 3D may miss some areas. Use the Add and Remove tools to refine the edges. Click Done once the object looks correct.
Step 4Delete the unwanted background area if it is still visible around the object. Click Canvas in the toolbar. Turn on the Transparent canvas option. This removes the solid background behind the object.
Step 5Click Menu, then Save As, and choose Image. Save the file as a PNG to keep the transparent background. This transparent logo background maker surely satisfies your needs in turning your image background into a transparent one.
Part 4: The Easiest Way to Make an Image Background Transparent on Windows and Mac
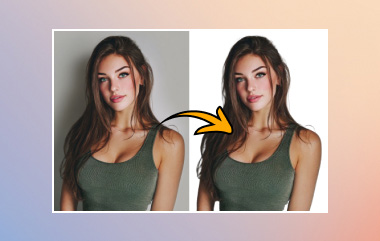
Many people spend minutes or even hours trying to remove a background in Paint, tracing edges, fighting file formats, and still ending up with jagged results. If you have asked yourself how do you make a transparent background in Paint, the frustration is real. The truth is, manual tools were never designed for speed or precision. There is a simpler way that does not require tracing, layers, or guesswork.

AVAide Background Eraser uses AI to do the work in seconds. It runs online, on Windows and Mac, without any installation. It is web-based, it works with Windows and Mac, and it does not need to be installed. The subject is automatically detected, and the background is automatically removed by the tool even around the difficult parts, such as hair, shadows or fine details. It accepts numerous formats, including PNG and JPG, and allows one to either download the output or paste it onto a new background right away. This is a quicker, smarter and much more dependable option to anyone sick and tired of wrestling with Paint.
Removing backgrounds in Paint and its variations can be tricky and time-consuming, from MS Paint to Paint.Net and Paint 3D. This article has shown clear, step-by-step methods for each tool while also pointing out faster, smarter alternatives. Learning how to remove background in Paint gives you the skills to handle images confidently, save time, and achieve clean, professional results without frustration.

Uses AI and automated background removal technology to capture complex backgrounds from JPG, JPEG, PNG, and GIF.
PROCESS NOW