คุณน่าจะคุ้นเคยกับเรื่องนี้ดีอยู่แล้ว โปรแกรมบันทึกหน้าจอ OBSโดยเฉพาะอย่างยิ่งหากคุณสตรีมหรือบันทึกวิดีโอ แต่คุณรู้จริงๆ หรือไม่ว่ามันทำอะไรได้มากกว่าพื้นฐาน? คุณรู้หรือไม่ว่าการตั้งค่าต่างๆ ของมันสามารถช่วยปรับปรุงคุณภาพการบันทึกของคุณได้อย่างไร?
ถ้ายังไม่เคยใช้ บทความนี้เหมาะสำหรับคุณ เราจะครอบคลุมทุกอย่างเกี่ยวกับมัน ตั้งแต่ประวัติ คุณสมบัติหลัก ข้อดีข้อเสีย ประสิทธิภาพ และการตั้งค่าที่ถูกต้อง เมื่ออ่านจบ คุณจะรู้วิธีใช้ให้ดีขึ้นและได้รับประโยชน์สูงสุดจากมัน
สรุปโดยย่อ: OBS Studio เหมาะสำหรับใคร
OBS Studio มอบเครื่องมืออันทรงพลังสำหรับการสตรีมและการบันทึก เหมาะสำหรับผู้ใช้ที่ต้องการควบคุมเนื้อหาของตนเองได้มากขึ้น
- ดีที่สุดสำหรับ
- สตรีมเมอร์สดบน Twitch, YouTube และ Facebook Live
- ผู้สร้างคอนเทนต์ที่ใช้แหล่งวิดีโอและเสียงหลายแหล่ง
- ผู้ใช้งานที่ต้องการเอฟเฟ็กต์ฉากหลังสีเขียวและการควบคุมเสียงขั้นสูง
- ผู้ที่ต้องการเครื่องมือฟรีที่มีฟังก์ชันการทำงานระดับมืออาชีพ
- ผู้ใช้งานขั้นสูงที่ชอบปรับแต่งการตั้งค่าการบันทึกและการสตรีม
- ไม่เหมาะสำหรับ
- เหมาะสำหรับผู้เริ่มต้นที่ต้องการติดตั้งอย่างรวดเร็วและง่ายดาย
- ผู้ใช้งานทั่วไปที่ต้องการเพียงเครื่องมือบันทึกเสียงพื้นฐาน
- เหมาะสำหรับผู้สร้างคอนเทนต์บนมือถือเป็นหลัก เนื่องจาก OBS ถูกสร้างขึ้นมาเพื่อใช้งานบนเดสก์ท็อปเป็นหลัก
- ผู้ใช้งานกำลังมองหาโปรแกรมตัดต่อวิดีโอแบบครบวงจรสำหรับงานหลังการผลิต
ข้อดีและข้อเสียโดยสรุป
ที่นี่ คุณจะเห็นจุดแข็งและข้อจำกัดหลักของ OBS Screen Recorder ได้ทันที เพื่อให้คุณทราบว่าจะต้องคาดหวังอะไรบ้างก่อนใช้งาน
- ข้อดี
- ฟรีและโอเพนซอร์สโดยสมบูรณ์
- ไม่มีการสมัครสมาชิก ไม่มีค่าใช้จ่าย หรือลายน้ำใดๆ ทั้งสิ้น
- สามารถปรับแต่งได้อย่างหลากหลายเพื่อให้เหมาะกับการตั้งค่าการสตรีมและการบันทึกที่แตกต่างกัน
- รองรับเว็บแคม รูปภาพ ข้อความ แหล่งข้อมูลจากเบราว์เซอร์ และอื่นๆ อีกมากมาย
- เครื่องมือเสียงขั้นสูงช่วยปรับปรุงความคมชัดของเสียง
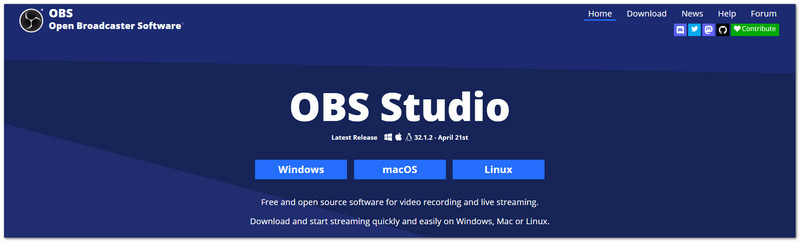
- ใช้งานได้บน Windows, Mac และ Linux
- ถ่ายทอดสดไปยัง YouTube, Twitch, Facebook และแพลตฟอร์มอื่นๆ ได้โดยตรง
- ข้อเสีย
- อาจเป็นเรื่องยากสำหรับผู้เริ่มต้นเรียนรู้
- การตั้งค่าใช้เวลาและอาจทำให้รู้สึกสับสนในตอนแรก
- ไม่มีเครื่องมือตัดต่อวิดีโอในตัว
- ต้องใช้โปรแกรมแยกต่างหากสำหรับการตัดต่อและแก้ไขวิดีโอ
- อาจทำงานช้าบนคอมพิวเตอร์รุ่นเก่าหรือสเปคต่ำ
- ต้องมี RAM และพลังประมวลผลกราฟิกที่เพียงพอเพื่อให้การทำงานราบรื่น
- การสนับสนุนส่วนใหญ่มาจากฟอรัมชุมชนและคู่มือต่างๆ
OBS Studio คืออะไร: ภาพรวมโดยละเอียด
OBS Studio Screen Recorder เป็นหนึ่งในเครื่องมือยอดนิยมสำหรับการบันทึกหน้าจอและการสตรีมสด มีฟีเจอร์ทรงพลังให้ผู้ใช้ใช้งานได้ฟรี ได้รับความไว้วางใจจากผู้เริ่มต้น ครีเอเตอร์ ครู ธุรกิจ และสตรีมเมอร์มืออาชีพทั่วโลก
ประวัติและชื่อเสียง
OBS Studio ได้รับการยอมรับว่าเป็นมาตรฐานอุตสาหกรรมสำหรับการบันทึกและการถ่ายทอดสด มีชื่อเสียงในด้านเครื่องมือที่ทรงประสิทธิภาพ ผลลัพธ์ที่ยอดเยี่ยม และการเข้าถึงที่ไม่จำกัด ผู้ใช้จำนวนมากไว้วางใจในโปรแกรมนี้ทั้งในโครงการส่วนตัวและระดับมืออาชีพ
คุณสมบัติที่สำคัญ
คุณสามารถใช้แหล่งข้อมูลต่างๆ เพื่อสร้างฉากที่ไม่ซ้ำใครด้วย OBS Studio ได้ ไม่ว่าจะเป็นเว็บแคม หน้าจอ หน้าต่างเกม โอเวอร์เลย์จากเบราว์เซอร์ รูปภาพ และข้อความ ทั้งหมดนี้สามารถรวมเข้าไว้ในเลย์เอาต์เดียวได้ นอกจากนี้ยังมีมิกเซอร์เสียงในตัว และคุณยังสามารถใช้ฟิลเตอร์เพื่อเพิ่มความคมชัดของเสียง ลดเสียงรบกวนพื้นหลัง และปรับระดับเสียงได้อีกด้วย
สำหรับการสตรีมและการบันทึก OBS Studio ใช้การเร่งความเร็วฮาร์ดแวร์เพื่อให้ประสิทธิภาพการทำงานที่ราบรื่นและวิดีโอที่มีความคมชัดสูง โหมดสตูดิโอช่วยให้คุณดูตัวอย่างการเปลี่ยนแปลงก่อนที่จะออกอากาศจริง ซึ่งจะช่วยสร้างการออกอากาศที่ดูเป็นมืออาชีพมากขึ้น
อะไรที่ทำให้มันแตกต่าง
ข้อได้เปรียบที่สำคัญที่สุดของ OBS Studio คือมันใช้งานได้ฟรีและเป็นโอเพนซอร์สอย่างสมบูรณ์ ฟีเจอร์ทั้งหมดใช้งานได้โดยไม่ต้องสมัครสมาชิก ไม่มีค่าใช้จ่าย หรือมีลายน้ำ
โปรแกรมนี้ใช้งานได้บน Windows, Mac และ Linux ทำให้ผู้ใช้จำนวนมากสามารถเข้าถึงได้ นอกจากนี้ยังรองรับปลั๊กอินและเครื่องมือที่สร้างโดยชุมชนจำนวนมาก ซึ่งเพิ่มคุณสมบัติใหม่ๆ เข้ามา
อีกหนึ่งคุณสมบัติที่โดดเด่นคืออินเทอร์เฟซที่สามารถปรับแต่งได้ คุณสามารถย้าย ซ่อน หรือจัดเรียงแผงต่างๆ ใหม่ให้เข้ากับขั้นตอนการทำงานและการตั้งค่าหน้าจอของคุณได้
รายละเอียดคุณสมบัติหลัก
OBS Studio ช่วยให้คุณควบคุมวิดีโอ เสียง และการถ่ายทอดสดได้อย่างเต็มที่ คุณสามารถตรวจสอบคุณสมบัติแต่ละอย่างได้ด้านล่าง!
1. การจัดการฉากและแหล่งที่มา
OBS Studio ช่วยให้คุณสร้างฉากได้ไม่จำกัดสำหรับการตั้งค่าการบันทึกหรือการสตรีมที่หลากหลาย คุณสามารถรวมภาพหน้าจอ เว็บแคม รูปภาพ หน้าต่างเบราว์เซอร์ และอื่นๆ ไว้ในเลย์เอาต์เดียวได้ นอกจากนี้ยังมีเครื่องมือสำหรับใส่เอฟเฟ็กต์ ปรับสี และออกแบบเองได้อีกด้วย
2. การผสมเสียงและการบันทึกเสียงหลายแทร็ก
คุณสามารถจัดการแหล่งเสียงทั้งหมดได้ด้วยมิกเซอร์เสียงในตัว ตัวกรองเสียงช่วยให้คุณลดเสียงรบกวนพื้นหลังและเปลี่ยนระดับเสียงได้ สำหรับการแก้ไขที่ง่ายขึ้น การบันทึกแบบหลายแทร็กช่วยให้คุณบันทึกเสียงไมโครโฟน เสียงระบบ และแหล่งเสียงอื่นๆ ได้อย่างอิสระ
3. การบันทึกคุณภาพสูง
OBS Studio รองรับการบันทึกวิดีโอความละเอียดสูงและอัตราเฟรมสูง โดยใช้การเร่งความเร็วฮาร์ดแวร์เพื่อช่วยให้วิดีโอมีความราบรื่นและลดภาระของระบบ นอกจากนี้ยังรองรับรูปแบบไฟล์ยอดนิยม เช่น MP4 และ MKV
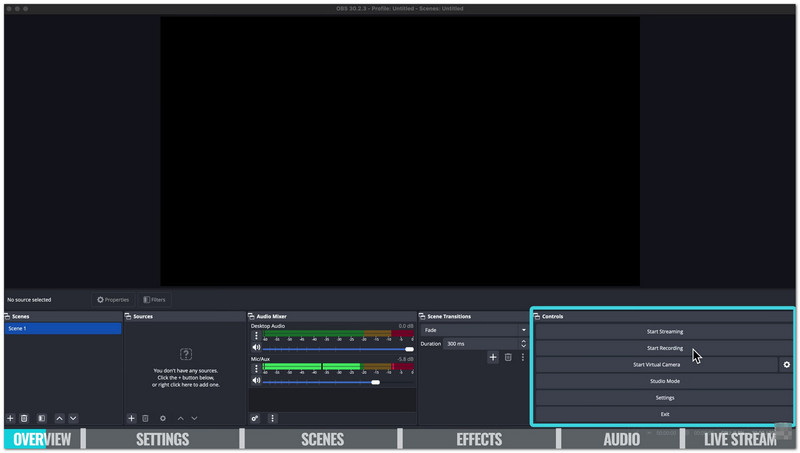
4. การถ่ายทอดสด
คุณสามารถถ่ายทอดสดไปยัง Facebook, Twitch, YouTube และเว็บไซต์อื่นๆ ได้โดยตรง OBS Studio มีฟีเจอร์ต่างๆ เพื่อให้การสตรีมของคุณราบรื่น เช่น การแสดงตัวอย่างสด การเชื่อมต่อที่เสถียร และการเชื่อมต่อใหม่โดยอัตโนมัติ
5. ปุ่มลัดและทางลัด
ปุ่มลัดแบบกำหนดเองช่วยเพิ่มความเร็วในการสตรีมและการบันทึก คุณสามารถตั้งค่าปุ่มลัดเพื่อเริ่มการบันทึกใน OBS และหยุดได้ทุกเมื่อด้วยการกดปุ่มเพียงครั้งเดียว นอกจากนี้ คุณยังสามารถควบคุมการกระทำอื่นๆ ด้วยแป้นพิมพ์ ปิดเสียง และเปลี่ยนฉากได้อย่างง่ายดาย
คุณภาพการแสดงและการบันทึกเสียง
OBS Studio สามารถสร้างวิดีโอที่คมชัดและราบรื่นได้เมื่อตั้งค่าอย่างถูกต้อง การตั้งค่าที่เหมาะสมจะช่วยปรับปรุงคุณภาพวิดีโอและลดอาการเบลอ ความหน่วง และเฟรมภาพตกหล่น
1. วิธีการบันทึกวิดีโอคุณภาพสูง
เพื่อให้ได้ผลลัพธ์ที่ดีที่สุด ให้ใช้ตัวเข้ารหัสฮาร์ดแวร์ เช่น NVENC, AMD AMF หรือ Intel Quick Sync ตั้งค่า Base Canvas และ Output Resolution ให้เท่ากันเพื่อหลีกเลี่ยงการสูญเสียความคมชัด สิ่งสำคัญคือต้องรู้วิธีเพิ่มคุณภาพการบันทึกของ OBS โดยไม่ทำให้ระบบทำงานช้าลงหรือสูญเสียรายละเอียด
A. การตั้งค่าที่เหมาะสมที่สุดสำหรับวิดีโอความละเอียด 1080p 60fps:
- ความละเอียดพื้นฐาน (ผืนผ้าใบ): 1920×1080
- ความละเอียดภาพที่ส่งออก: 1920×1080
- เฟรมต่อวินาที: 60
- โหมดเอาต์พุต: ขั้นสูง
- รูปแบบไฟล์บันทึก: MKV หรือ MP4 ที่แบ่งส่วนแล้ว
- ตัวเข้ารหัส: ตัวเข้ารหัสฮาร์ดแวร์
- การควบคุมอัตรา: CQP
- ระดับ CQ: 16
- ช่วงเวลาคีย์เฟรม: 2
การตั้งค่าเหล่านี้ให้วิดีโอที่คมชัดและการเคลื่อนไหวที่ราบรื่น ในขณะที่ขนาดไฟล์ยังคงอยู่ในระดับที่เหมาะสม
B. สำหรับการตั้งค่าการบันทึกวิดีโอ 4K:
- ความละเอียด: 3840×2160
- เฟรมต่อวินาที: 60
- ตัวเข้ารหัส: ตัวเข้ารหัสฮาร์ดแวร์ GPU เฉพาะ
- การควบคุมอัตรา: CQP
- ระดับ CQ: 18-20
บันทึกวิดีโอลงใน SSD จะช่วยป้องกันเฟรมภาพตกหล่นและปัญหาในการบันทึก
2. ทำไมวิดีโอที่บันทึกด้วย OBS ถึงดูเบลอ
ทำไมวิดีโอที่บันทึกด้วย OBS ถึงเบลอ? นี่เป็นปัญหาที่พบได้บ่อย วิดีโอที่เบลอส่วนใหญ่มักเกิดจากการตั้งค่าที่ไม่ถูกต้องหรือข้อจำกัดของระบบ
สาเหตุทั่วไป:
- ค่าบิตเรตหรือคุณภาพการตั้งค่าต่ำเกินไป
- ความละเอียดพื้นฐานและความละเอียดเอาต์พุตไม่ตรงกัน
- การตั้งค่าตัวกรองลดขนาดไม่เหมาะสม
- ตัวเข้ารหัสทำงานหนักเกินไปเนื่องจากการใช้งานระบบอย่างหนัก
- สำหรับเกม ให้ใช้ Window Capture แทน Game Capture
การแก้ไข:
- ควรใช้ CQP แทนการตั้งค่าการบันทึกที่มีบิตเรตต่ำ
- ตั้งค่าระดับ CQ ไว้ที่ประมาณ 16 เพื่อคุณภาพที่ดีขึ้น
- ปรับความละเอียดของฐานข้อมูลและเอาต์พุตให้ตรงกัน
- ใช้ฟิลเตอร์ลดขนาด Lanczos เมื่อทำการปรับขนาดวิดีโอ
- บันทึกเกมด้วยฟังก์ชัน Game Capture ทุกครั้งที่ทำได้
- เรียกใช้ OBS ในฐานะผู้ดูแลระบบเพื่อปรับปรุงประสิทธิภาพ
- เพื่อเพิ่มทรัพยากรระบบ ให้ปิดโปรแกรมที่ไม่จำเป็นทั้งหมด
การเปลี่ยนแปลงการตั้งค่าเพียงเล็กน้อยก็สามารถสร้างความแตกต่างอย่างมากได้ ด้วยการตั้งค่าที่เหมาะสม OBS Studio สามารถบันทึกวิดีโอได้คมชัด ราบรื่น และดูเป็นมืออาชีพ
ความพร้อมใช้งานของแพลตฟอร์ม: คุณสามารถใช้ OBS บนมือถือได้หรือไม่
ความจริงนั้นง่ายมาก ไม่มีแอป OBS Studio อย่างเป็นทางการสำหรับอุปกรณ์พกพา เช่น iPhone หรืออุปกรณ์ Android เนื่องจาก OBS Studio ถูกสร้างขึ้นสำหรับ Windows, Mac และ Linux เท่านั้น แต่คุณก็ไม่ได้ถูกจำกัดอยู่แค่นั้น ยังมีวิธีอื่นๆ ที่จะใช้โทรศัพท์ของคุณกับเครื่องมือ OBS ได้
สิ่งที่คุณสามารถทำได้:
- ใช้โทรศัพท์ของคุณเป็นกล้องหรือไมโครโฟน
คุณสามารถเปลี่ยนโทรศัพท์ของคุณให้เป็นเว็บแคมไร้สายได้ แอปอย่าง DroidCam, OBS หรือ NDI สามารถช่วยได้ - สตรีมเกมมือถือไปยัง OBS บนพีซี
คุณสามารถสะท้อนหน้าจอโทรศัพท์ของคุณไปยังคอมพิวเตอร์ได้โดยใช้เครื่องมือต่างๆ เช่น AirPlay หรือ Let'sView - ควบคุม OBS จากโทรศัพท์ของคุณ
คุณสามารถใช้ OBS WebSockets ร่วมกับแอปต่างๆ เช่น Touch Portal หรือ Deckboard ได้ ซึ่งจะช่วยให้คุณเริ่มหรือหยุดการสตรีม และสลับฉากได้ - ใช้แอปพลิเคชันสตรีมมิ่งบนมือถือจากผู้ให้บริการภายนอก
แอปอย่าง Streamlabs Mobile หรือ Prism Live Studio ช่วยให้คุณสตรีมได้โดยตรงจากโทรศัพท์ของคุณ แอปเหล่านี้ไม่ใช่แอป OBS อย่างเป็นทางการ แต่ทำงานในลักษณะคล้ายกัน
OBS Studio ปะทะคู่แข่ง
OBS Studio เป็นเครื่องมือที่มีประสิทธิภาพสำหรับการบันทึกและถ่ายทอดสด แต่ก็อาจใช้งานยากสำหรับผู้เริ่มต้น ดังนั้นจึงมีเครื่องมืออื่นๆ ที่คุณสามารถนำมาเปรียบเทียบได้ ซึ่งมีข้อดีคือใช้งานง่ายกว่า ตั้งค่าได้เร็วกว่า และมีฟีเจอร์การบันทึกพื้นฐานมากกว่า
1. โปรแกรมบันทึกหน้าจอ AVAide
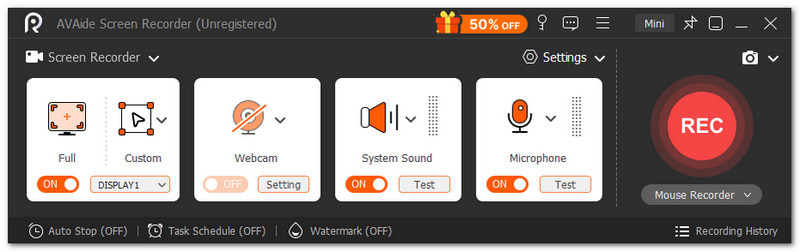
ดีที่สุดสำหรับ: โปรแกรมบันทึกเสียงแบบง่ายๆ ครบวงจร สำหรับผู้เริ่มต้น
การเปรียบเทียบ OBS: โปรแกรม OBS Screen Recorder มีประสิทธิภาพสูง แต่ไม่เหมาะสำหรับผู้เริ่มต้นใช้งาน ต้องใช้เวลาในการเรียนรู้ และขั้นตอนการตั้งค่าอาจดูซับซ้อน โปรแกรมบันทึกหน้าจอ AVAide ง่ายกว่ามากและเหมาะสำหรับผู้เริ่มต้นมากกว่า

ดาวน์โหลดฟรี สำหรับ Windows 7 หรือใหม่กว่า
 ดาวน์โหลดอย่างปลอดภัย
ดาวน์โหลดฟรี สำหรับ Mac OS X 10.13 หรือใหม่กว่า
ดาวน์โหลดอย่างปลอดภัยโปรแกรมนี้ช่วยให้คุณบันทึกหน้าจอ เว็บแคม ไมโครโฟน และเสียงระบบได้พร้อมกัน นอกจากนี้ยังมีฟีเจอร์การวาดภาพแบบเรียลไทม์ การกำหนดตารางเวลา การใส่คำอธิบายประกอบ และเครื่องมือแก้ไขอย่างง่าย คุณสามารถบันทึกเกม สัมมนา และการประชุมได้อย่างรวดเร็ว ออกแบบมาเพื่อการใช้งานที่รวดเร็ว ตั้งค่าได้ง่าย และควบคุมได้ราบรื่นยิ่งขึ้น
2. แบนดิแคม
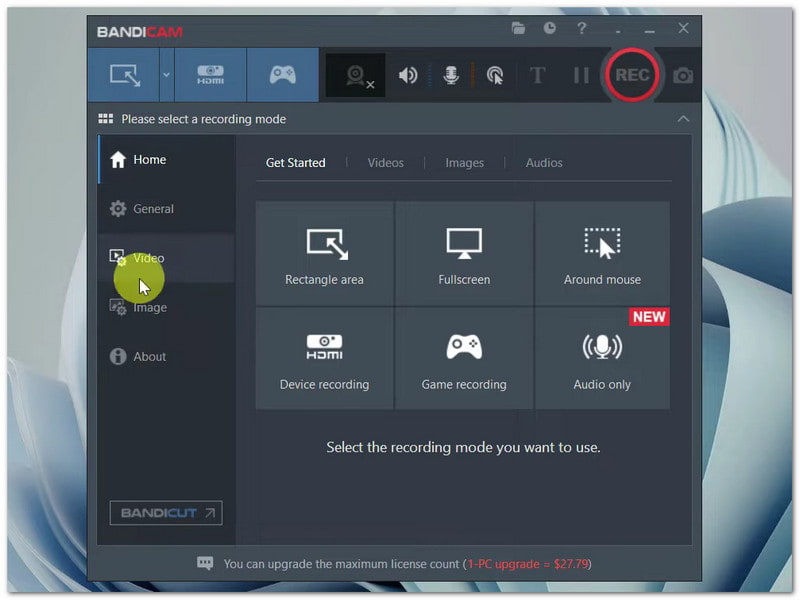
ดีที่สุดสำหรับ: การบันทึกเกมบน Windows ที่ให้เฟรมเรตเสถียรและขนาดไฟล์เล็ก
การเปรียบเทียบ OBS: Bandicam ออกแบบมาเพื่อการบันทึกวิดีโอเกมได้อย่างราบรื่นโดยใช้ทรัพยากรระบบน้อย เป็นโปรแกรมแบบเสียเงินที่มีข้อจำกัดในเวอร์ชันฟรี ส่วน OBS เป็นโปรแกรมบันทึกหน้าจอฟรี โอเพนซอร์ส และไม่มีลายน้ำ แต่ใช้พลังระบบมากกว่า
3. แชร์เอ็กซ์
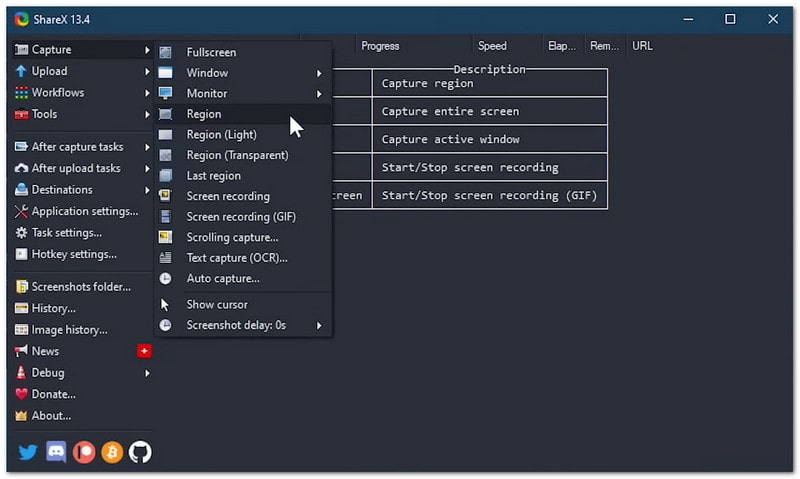
ดีที่สุดสำหรับ: การจับภาพหน้าจอและกระบวนการจับภาพหน้าจออย่างรวดเร็ว
การเปรียบเทียบ OBS: ShareX เป็นโปรแกรมขนาดเล็กที่เชี่ยวชาญด้านการบันทึกสั้นๆ การสร้าง GIF และการจับภาพหน้าจอ รองรับการอัปโหลดไปยังคลาวด์และมีฟีเจอร์การทำงานอัตโนมัติ ในขณะที่ OBS เป็นโปรแกรมบันทึกหน้าจอที่มีฟีเจอร์การสตรีมแบบเต็มรูปแบบ การจัดการฉาก และฟีเจอร์เสียงที่ซับซ้อนกว่า แต่มีขนาดใหญ่กว่า
4. แถบเกมของ Windows
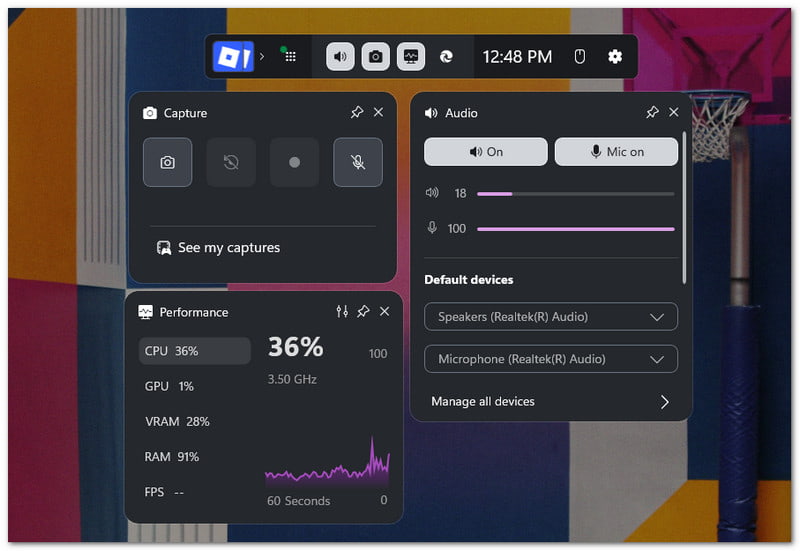
ดีที่สุดสำหรับ: บันทึกได้อย่างรวดเร็วโดยไม่ต้องติดตั้งซอฟต์แวร์เพิ่มเติม
การเปรียบเทียบ OBS: Game Bar เป็นโปรแกรมที่มีมาให้ใน Windows และใช้งานง่ายมาก มันใช้งานได้ดีแม้กระทั่งกับงานง่ายๆ เครื่องบันทึกเกม การบันทึกด้วย OBS ให้คุณภาพที่สูงกว่า มีตัวเลือกการตั้งค่ามากกว่า และควบคุมการสตรีมได้อย่างเต็มที่ แต่ต้องตั้งค่าด้วยตนเอง
5. สกรีนพาล
ดีที่สุดสำหรับ: เครื่องมือตัดต่อที่ใช้งานง่าย เหมาะสำหรับผู้บันทึกมือใหม่
การเปรียบเทียบ OBS: ScreenPal ใช้งานง่ายและมีฟังก์ชันแก้ไขในตัว เครื่องบันทึกเว็บแคมและคำอธิบายประกอบ OBS มีประสิทธิภาพและความยืดหยุ่นมากกว่าสำหรับการสตรีมแบบมืออาชีพ แต่ต้องใช้เวลาในการเรียนรู้มากกว่า
ปัญหาที่พบบ่อยใน OBS และวิธีแก้ไข
เราปฏิเสธไม่ได้ว่า OBS Studio เป็นโปรแกรมที่มีฟีเจอร์มากมายสำหรับการบันทึกและสตรีมมิ่ง แต่ปัญหาก็อาจเกิดขึ้นได้ในระหว่างการใช้งาน แต่ไม่ต้องกังวลไป ปัญหาเหล่านี้ส่วนใหญ่สามารถแก้ไขได้ด้วยการเปลี่ยนแปลงการตั้งค่าอย่างง่ายๆ
ปัญหาที่ 1: OBS กระตุกขณะบันทึก (แต่เกมเล่นได้ปกติ)
หาก OBS เกิดอาการกระตุกขณะบันทึกหรือสตรีม แต่เกมเล่นได้ปกติ ลองทำตามนี้ดู:
- เรียกใช้ OBS ในฐานะผู้ดูแลระบบ
- จำกัดอัตราเฟรมของเกมของคุณ
- ลดการตั้งค่ากราฟิกของเกมลง
- ปิดใช้งาน Psycho Visual Tuning
ปัญหาที่ 2: OBS ไม่บันทึกเสียง
- ตรวจสอบไอคอนปิดเสียงใน Audio Mixer เมื่อ OBS ไม่ได้บันทึกเสียง
- ปรับระดับเสียงเดสก์ท็อปและไมโครโฟนให้ดังขึ้น
- ตั้งค่าอุปกรณ์ให้ถูกต้องใน การตั้งค่า > เสียง
- ตรวจสอบคุณสมบัติเสียงขั้นสูงและเปิดใช้งานแทร็กที่ถูกต้อง
ปัญหาที่ 3: OBS ไม่ยอมหยุดบันทึก (ค้างอยู่ที่ "กำลังหยุด")
- หาก OBS ไม่ยอมหยุดบันทึก ให้เปลี่ยนรูปแบบการบันทึกเป็น MKV
- ลดค่าการตั้งค่าตัวเข้ารหัสหรืออัตราบิตลง
- หากจำเป็น ให้รีสตาร์ท OBS
ปัญหาที่ 4: "เกิดข้อผิดพลาดในการเข้ารหัสขณะบันทึก"
หากเกิดข้อผิดพลาดในการเข้ารหัสขณะบันทึกด้วย OBS ให้ลองทำตามนี้:
- อัปเดตไดรเวอร์การ์ดจอ
- เปลี่ยนตัวเข้ารหัสเป็น ×264 (โดยใช้ซอฟต์แวร์)
- ตรวจสอบโปรแกรมป้องกันไวรัสและอนุญาตให้ OBS เข้าถึงได้
ปัญหาที่ 5: ข้อผิดพลาด "การตั้งค่าการเข้ารหัสไม่รองรับ"
- ปรับความละเอียดให้ตรงกับจอภาพของคุณ
- ใช้เฉพาะเฟรมเรต 30 หรือ 60 เท่านั้น
- หากจำเป็น ให้รีเซ็ตการตั้งค่าวิดีโอ
- ปิดการจำกัดการสตรีมแบบเข้มงวด โดยเฉพาะอย่างยิ่งเมื่อจำเป็นต้องแก้ไขปัญหาการบันทึกจาก OBS ที่ใช้การตั้งค่าการเข้ารหัสที่ไม่รองรับ
ปัญหาที่ 6: ไฟล์บันทึกมีขนาดใหญ่เกินไป
- แทนที่จะใช้ lossless ให้ใช้ CQP หรือ CRF แทน
- ตั้งระดับ CQ ไว้ที่ประมาณ 20-23
- หลีกเลี่ยงไฟล์รูปแบบที่ไม่บีบอัด
- หากต้องการไฟล์ขนาดเล็กกว่า ให้ลดคุณภาพลงเล็กน้อย
คู่มือการตั้งค่า OBS
ด้านล่างนี้คือคู่มือการตั้งค่า OBS แบบง่ายๆ ซึ่งให้การตั้งค่า OBS ที่ดีที่สุดสำหรับการบันทึกและการสตรีมมิ่ง
| พื้นที่ | การตั้งค่า | คุ้มค่าที่สุด |
| เอาท์พุต | โหมด | ขั้นสูง |
| เอาท์พุต | ตัวเข้ารหัส | NVENC (NVIDIA) / AMF หรือ HEVC (AMD) |
| เอาท์พุต | การควบคุมอัตรา | ซีบีอาร์ |
| เอาท์พุต | อัตราบิต (1080p 60fps) | 6000 kbps |
| เอาท์พุต | อัตราบิต (720p 30fps) | 3500 kbps |
| เอาท์พุต | ช่วงเวลาคีย์เฟรม | 2 |
| เอาท์พุต | ค่าที่ตั้งไว้ล่วงหน้าของ CPU (×264) | เร็วมากหรือเร็วกว่านั้น |
| เอาท์พุต | ประวัติโดยย่อ | สูง |
| วีดีโอ | ความละเอียดพื้นฐาน | จอภาพสำหรับการแข่งขัน (เช่น 1920×1080) |
| วีดีโอ | ความละเอียดเอาต์พุต | เลือกความละเอียดที่ต้องการ (1080p หรือ 720p) |
| วีดีโอ | ตัวกรองลดขนาด | ลานโซส |
| วีดีโอ | เฟรมต่อวินาที | 60 หรือ 30 |
| วีดีโอ | อัตราตัวอย่าง | 48 kHz |
OBS บันทึกวิดีโอไว้ที่ใด

แล้ว OBS บันทึกวิดีโอไว้ที่ไหน?
OBS จะบันทึกวิดีโอลงในโฟลเดอร์เริ่มต้นของคอมพิวเตอร์ของคุณ บน Windows โฟลเดอร์นั้นคือ... วิดีโอ โฟลเดอร์ บน Mac คือโฟลเดอร์ Movies คุณยังสามารถเปิดไฟล์เหล่านั้นได้อย่างรวดเร็วใน OBS โดยการคลิก ไฟล์ > การแสดงการบันทึกมันจะเปิดไปยังตำแหน่งที่บันทึกไฟล์โดยตรง หากคุณเปลี่ยนเส้นทางการบันทึกในตั้งค่า OBS จะใช้โฟลเดอร์ที่กำหนดเองนั้นแทน
รายละเอียดมากมายเกี่ยวกับ บันทึกหน้าจอ OBSใช่ไหม? ปัจจัยเหล่านี้ล้วนเป็นสิ่งสำคัญที่ควรพิจารณาหากคุณวางแผนที่จะใช้งาน มันอาจทรงพลัง แต่ก็ต้องใช้เวลาและความพยายามในการเรียนรู้ หากคุณต้องการตัวเลือกที่ง่ายกว่า คุณสามารถลองดู โปรแกรมบันทึกหน้าจอ AVAideใช้งานง่ายกว่าและเหมาะสำหรับผู้เริ่มต้นมากกว่า
เกี่ยวกับผู้เขียน

จับภาพกิจกรรมบนหน้าจอด้วยเสียง การประชุมออนไลน์ วิดีโอการเล่นเกม เพลง เว็บแคม ฯลฯ