ซอฟต์แวร์บันทึกพอดแคสต์ คู่มือนี้จึงมีความสำคัญอย่างยิ่งเมื่อคุณตัดสินใจที่จะเริ่มทำพอดแคสต์ครั้งแรก แต่กลับประสบปัญหาเรื่องเสียงไม่ชัด เสียงรบกวน หรือเครื่องมือบันทึกเสียงที่ซับซ้อน ไม่ว่าคุณจะวางแผนบันทึกตอนเดี่ยว สัมภาษณ์ทางไกล หรือพอดแคสต์ด้วย iPhone คู่มือนี้จะครอบคลุมอุปกรณ์ วิธีการบันทึก และเครื่องมือที่จำเป็นในการสร้างพอดแคสต์คุณภาพระดับมืออาชีพ
ส่วนที่ 1. อุปกรณ์สำคัญสำหรับการบันทึกพอดแคสต์
ไมโครโฟน: การลงทุนที่สำคัญที่สุด
คุณภาพเสียงของคุณขึ้นอยู่กับคุณภาพของไมโครโฟนที่คุณใช้สำหรับพอดแคสต์โดยตรง เสียงที่สมดุลและชัดเจนจะช่วยดึงดูดความสนใจของผู้ฟังและทำให้พอดแคสต์ของคุณดูเป็นมืออาชีพ
1. ไมโครโฟน USB
ไมโครโฟน USB ใช้งานง่ายมาก สามารถเชื่อมต่อกับอุปกรณ์ของคุณได้โดยตรง และรองรับการทำพอดแคสต์แบบง่ายๆ จึงเหมาะสำหรับผู้เริ่มต้น เพราะเพียงพอสำหรับการสัมภาษณ์ออนไลน์และสตูดิโอที่บ้านโดยเฉพาะ
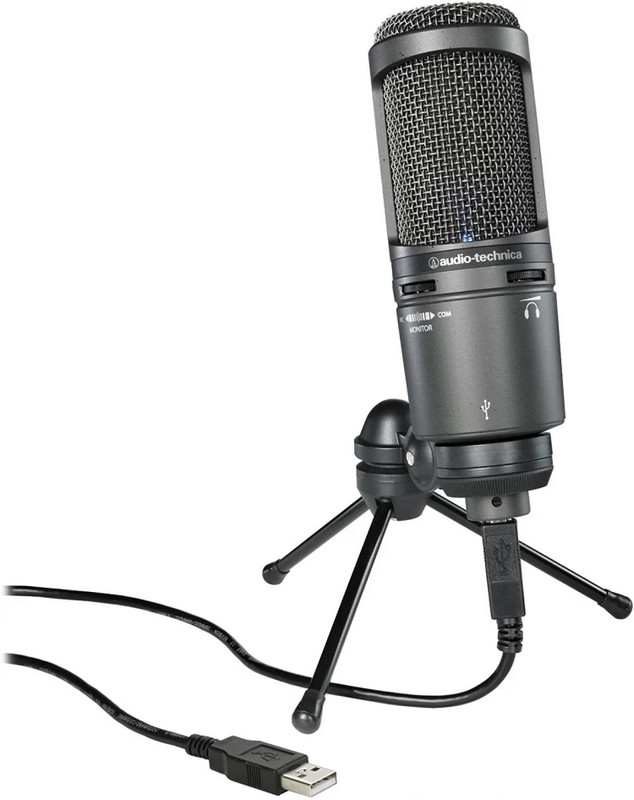
ไมโครโฟน USB ที่ใช้กันทั่วไปบางรุ่น ได้แก่:
- บลูเยติ
- ออดิโอ-เทคนิคา AT2020USB+
- ร็อด NT-USB
2. ไมโครโฟน XLR
ไมโครโฟน XLR นั้นตรงกันข้ามโดยสิ้นเชิง ให้คุณภาพเสียงที่ดีเยี่ยมและควบคุมเสียงได้อย่างแม่นยำ นับเป็นการลงทุนที่คุ้มค่าสำหรับอุปกรณ์ทำพอดแคสต์ขั้นสูง ความแตกต่างจากไมโครโฟน USB คือ ไมโครโฟน XLR ต้องใช้อินเทอร์เฟซเสียงหรือมิกเซอร์

ไมโครโฟน XLR ที่ใช้กันทั่วไปบางรุ่น ได้แก่:
- ชูร์ SM7B
- ไมโครโฟน Rode PodMic
- อิเล็กโทร-วอยซ์ RE20
อินเทอร์เฟซเสียง (สำหรับไมโครโฟน XLR)
อินเทอร์เฟซเสียงเป็นอุปกรณ์ที่เหมาะสมอย่างยิ่งสำหรับไมโครโฟน XLR ของคุณ เนื่องจากช่วยเพิ่มคุณภาพการบันทึกและแปลงเสียงเป็นรูปแบบดิจิทัลที่คอมพิวเตอร์ของคุณสามารถเข้าใจได้ กระบวนการนี้ยังช่วยลดเสียงรบกวนจากการบันทึกของคุณได้ในระดับหนึ่ง และยังช่วยให้คุณสามารถ... เปิดเพลงไปด้วยขณะบันทึกเสียง.
อินเทอร์เฟซเสียงที่ดีบางรุ่นได้แก่:
- โฟกัสไรต์ สการ์เล็ต 2i2
- Presonus AudioBox USB 96
- ยูนิเวอร์แซล ออดิโอ โวลต์ 2
หูฟัง
การสามารถตรวจสอบเสียงขณะบันทึกและควบคุมการรั่วไหลของเสียงสะท้อนเข้าสู่ไมโครโฟน เป็นข้อดีบางประการของการมีหูฟังแบบปิดคุณภาพดี
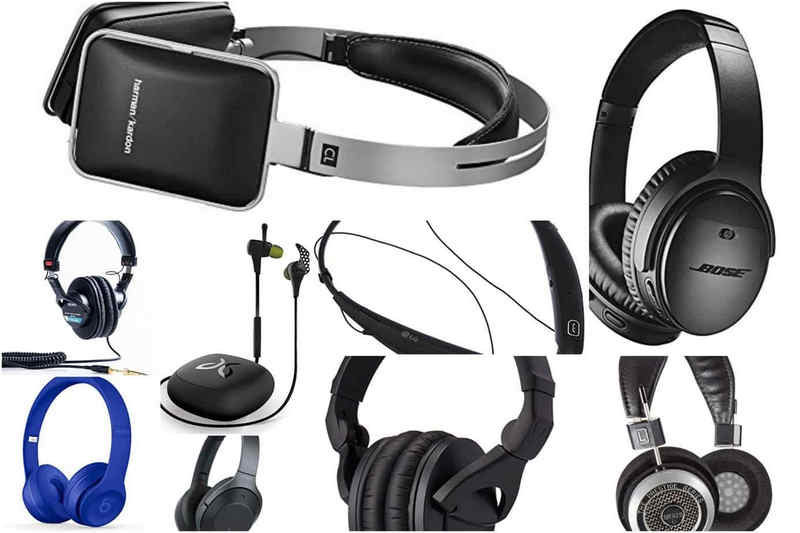
หูฟังสำหรับฟังพอดแคสต์คุณภาพดีบางรุ่น:
- หูฟัง Audio-Technica ATH-M50x
- โซนี่ MDR-7506
- เบเยอร์ไดนามิก DT 770 โปร
เครื่องประดับ
หนึ่งในสิ่งที่ควรซื้อเพิ่มเติมเพื่อเพิ่มความสะดวกสบายและคุณภาพเสียงขณะบันทึกคืออุปกรณ์เสริมเพิ่มเติม

- ตัวกรองเสียงป๊อป: สิ่งเหล่านี้ใช้เพื่อลดเสียงแตกดังที่เกิดจากตัวอักษร เช่น P และ B
- แขนบูม: อุปกรณ์เหล่านี้ช่วยให้ไมโครโฟนของคุณตั้งได้อย่างมั่นคง และยังช่วยประหยัดพื้นที่บนโต๊ะทำงานอีกด้วย
- แผ่นโฟมกันเสียง: สิ่งเหล่านี้เหมาะอย่างยิ่งสำหรับการปรับปรุงคุณภาพเสียงภายในพื้นที่ของคุณ พร้อมทั้งช่วยลดเสียงสะท้อนได้ด้วย
- ตัวยึดกันกระแทก: ขาตั้งกันกระแทกช่วยลดการสั่นสะเทือนและเสียงรบกวนจากโต๊ะขณะบันทึกเสียง
ส่วนที่ 2. วิธีการบันทึกพอดแคสต์ที่ดีที่สุด
วิธีที่ 1: บันทึกพอดแคสต์ด้วยโปรแกรมบันทึกหน้าจอ AVAide
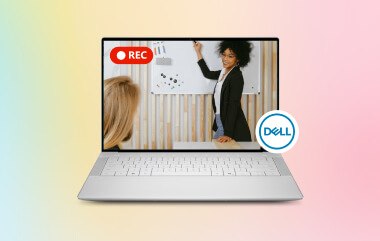
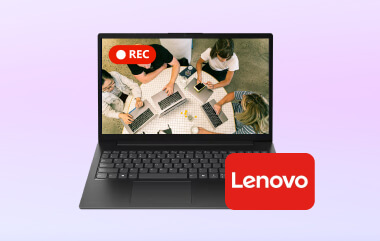
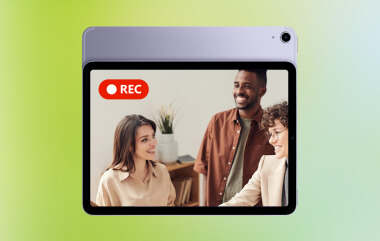
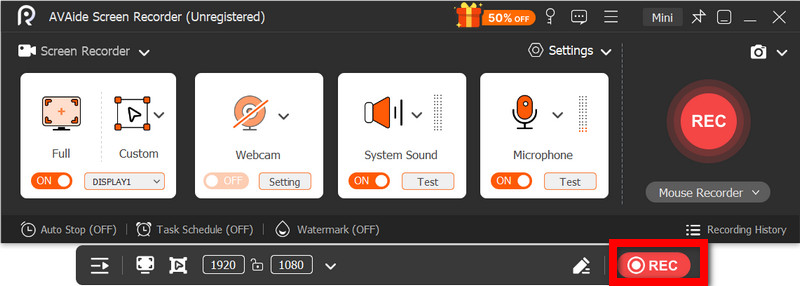
การบันทึกพอดแคสต์โดยใช้ โปรแกรมบันทึกหน้าจอ AVAide ใช้งานง่ายและเชื่อถือได้ เป็นหนึ่งในโปรแกรมที่ดีที่สุดที่สามารถบันทึกหน้าจอ เว็บแคม และเสียงได้พร้อมกัน และยังสามารถบันทึกหน้าจอโทรศัพท์ของคุณได้อีกด้วย โปรแกรมนี้ทำงานได้อย่างราบรื่นและเหมาะอย่างยิ่งสำหรับการสัมภาษณ์ทางไกล การบันทึกพอดแคสต์ วิดีโอแสดงความคิดเห็น พอดแคสต์เพื่อการศึกษา และพอดแคสต์วิดีโอ
- บันทึกเสียงจากไมโครโฟนและเสียงจากระบบพร้อมกัน
- บันทึกภาพจากเว็บแคมและหน้าจอพร้อมกันสำหรับการทำพอดแคสต์วิดีโอ
- รองรับการบันทึกแบบเต็มหน้าจอ แบบหน้าต่าง หรือแบบกำหนดพื้นที่เองได้
- มีเครื่องมือสำหรับใส่คำอธิบายประกอบระหว่างการบันทึก
- ส่งออกไฟล์บันทึกเสียงในรูปแบบต่างๆ เช่น MP4, MP3, AAC, FLAC และอื่นๆ

 ดาวน์โหลดอย่างปลอดภัย
ขั้นตอนที่ 1ดาวน์โหลดและติดตั้งซอฟต์แวร์
เข้าไปที่เว็บไซต์อย่างเป็นทางการของ AVAide เพื่อดาวน์โหลดโปรแกรมสำหรับคอมพิวเตอร์ Windows หรือ Mac ของคุณ ติดตั้งซอฟต์แวร์โดยทำตามคำแนะนำและขั้นตอนที่ปรากฏ
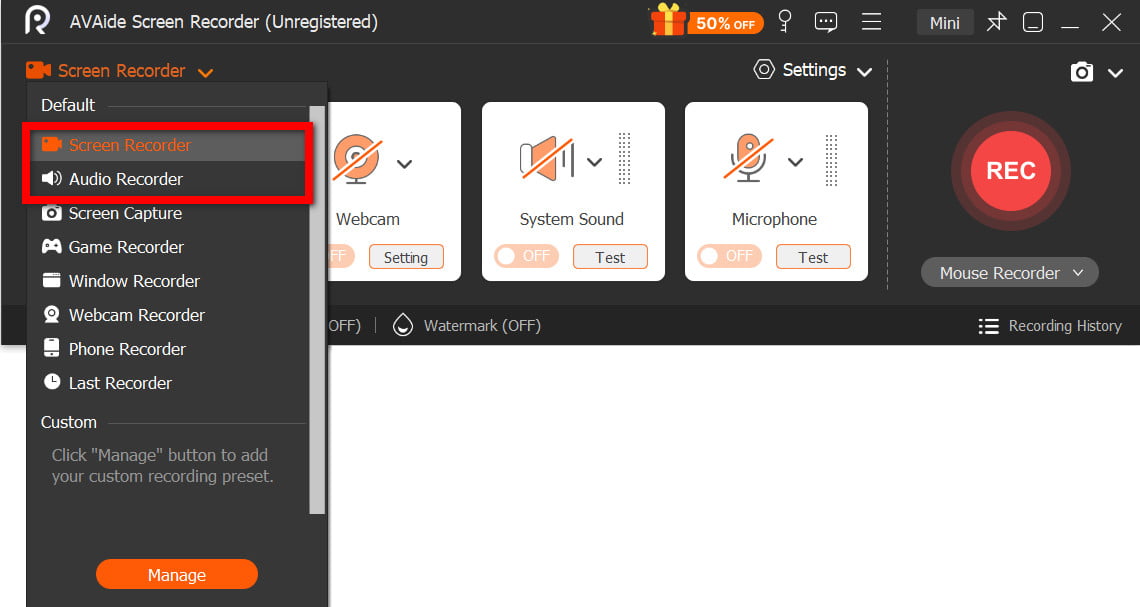
ขั้นตอนที่ 2เลือกเครื่องบันทึกเสียงหรือเครื่องบันทึกวิดีโอ
เปิดโปรแกรมแล้วคลิกอย่างใดอย่างหนึ่ง บันทึกเสียง หรือ บันทึกหน้าจอขึ้นอยู่กับว่าคุณต้องการทำพอดแคสต์แบบเสียงอย่างเดียวหรือแบบวิดีโอ
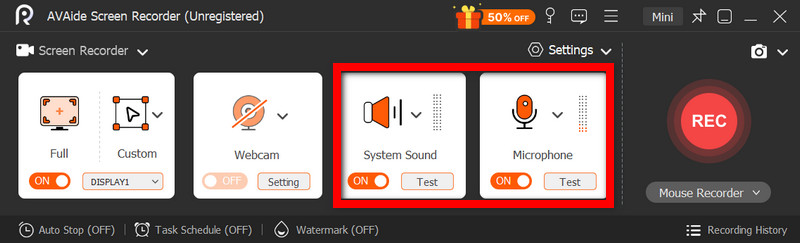
ขั้นตอนที่ 3เปิดใช้งานไมโครโฟนและเสียงระบบ
เปิดใช้งาน ไมโครโฟน เพื่อบันทึกเสียงของคุณ ระบบเสียง ควรเปิดใช้งานการบันทึกการสัมภาษณ์ออนไลน์ ดนตรี และเสียงของแขกรับเชิญ
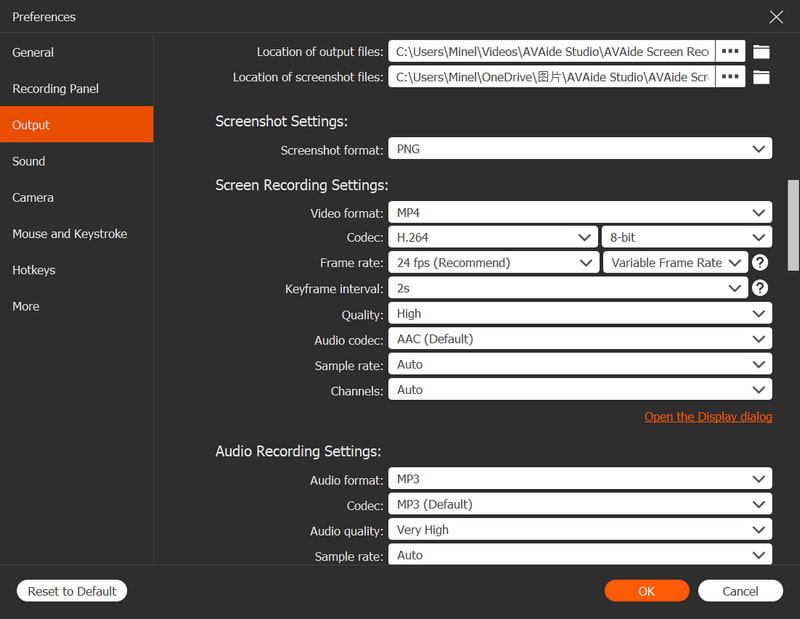
ขั้นตอนที่ 4ตั้งค่าการบันทึก
เลือกรูปแบบและคุณภาพเสียงที่คุณต้องการได้ด้านล่าง การตั้งค่า เมนู สำหรับพอดแคสต์วิดีโอ ให้ตั้งค่าพื้นที่บันทึกและโอเวอร์เลย์เว็บแคมของคุณ
ขั้นตอนที่ 5บันทึก
หลังจากที่คุณตี REC กดปุ่มเพื่อเริ่มบันทึกพอดแคสต์ของคุณ คุณสามารถเพิ่มบันทึกย่อหรือไฮไลต์ได้ตลอดเวลา
ขั้นตอนที่ 6บันทึกและดูตัวอย่าง
หลังจากตี หยุด ปุ่มนี้ช่วยให้คุณบันทึกพอดแคสต์ได้หลังจากตัดส่วนที่ไม่ต้องการออกแล้ว นอกจากนี้คุณยังสามารถดูตัวอย่างผลงานของคุณได้อีกด้วย
วิธีที่ 2: บันทึกพอดแคสต์ด้วย Audacity
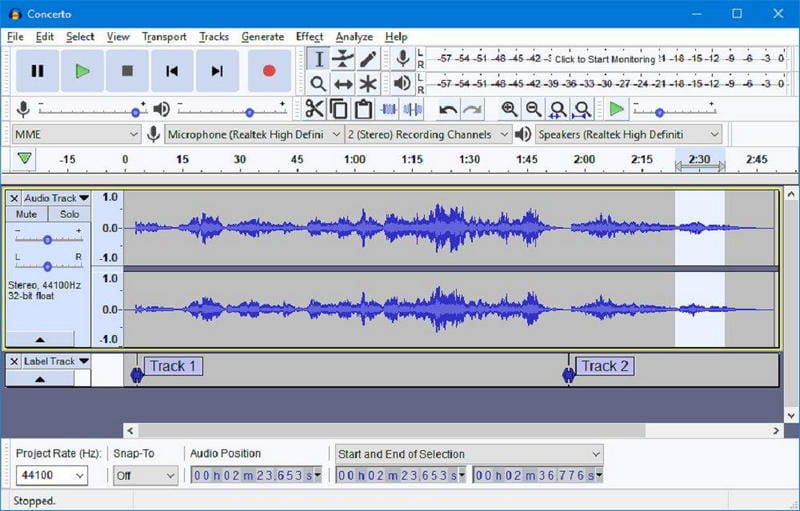
Audacity เป็นหนึ่งในโปรแกรมยอดนิยมที่ใช้สำหรับการบันทึกและตัดต่อเสียงเพื่อทำพอดแคสต์ เป็นโปรแกรมฟรีที่มีโค้ดแบบโอเพนซอร์ส ซึ่งช่วยให้ผู้ใช้สามารถบันทึกและตัดต่อเสียงได้ด้วยฟังก์ชันที่มีประโยชน์ เช่น การลดเสียงรบกวน เอฟเฟ็กต์เสียง และการรองรับมัลติแทร็ก ด้วยคุณสมบัติเหล่านี้ ทำให้สามารถสร้างพอดแคสต์คุณภาพระดับมืออาชีพได้อย่างรวดเร็วและง่ายดายด้วย Audacity
ขั้นตอนที่ 1ดาวน์โหลดโปรแกรม Audacity จากเว็บไซต์ทางการของ Audacity และติดตั้งลงในคอมพิวเตอร์ส่วนตัวของคุณ
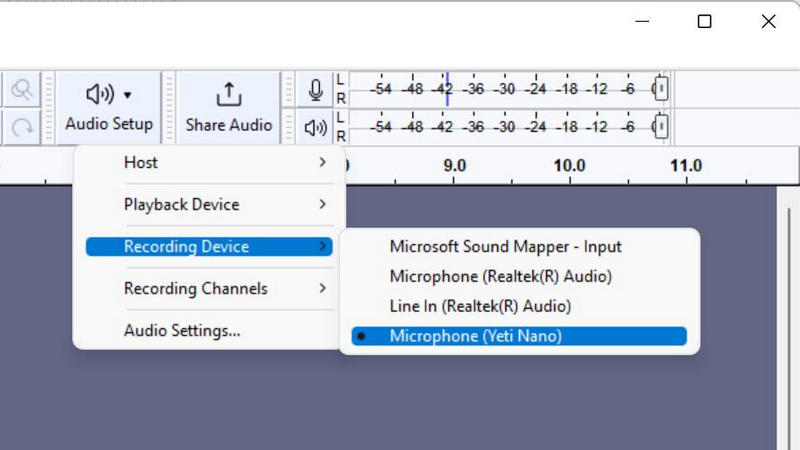
ขั้นตอนที่ 2ใช้ไมโครโฟนแบบ USB หรือ XLR แล้วตั้งค่าเป็นอุปกรณ์บันทึกเสียงในโปรแกรม Audacity
ขั้นตอนที่ 3ตั้งค่าช่องบันทึกเสียงและคุณภาพเสียงให้เหมาะสมกับความต้องการของพอดแคสต์ของคุณ
ขั้นตอนที่ 4คลิก บันทึก กดปุ่มและพูดเนื้อหาของคุณลงในไมโครโฟน
ขั้นตอนที่ 5 แก้ไขพอดแคสต์ของคุณเพื่อลบข้อผิดพลาด เพิ่มเพลงประกอบ หรือเพิ่มเอฟเฟ็กต์เสียงโดยใช้เครื่องมือแก้ไขของ Audacity
ขั้นตอนที่ 6บันทึกพอดแคสต์ของคุณโดยส่งออกไฟล์เสียงเป็นไฟล์ MP3 หรือ WAV
วิธีที่ 3: บันทึกพอดแคสต์ด้วย Adobe Audition
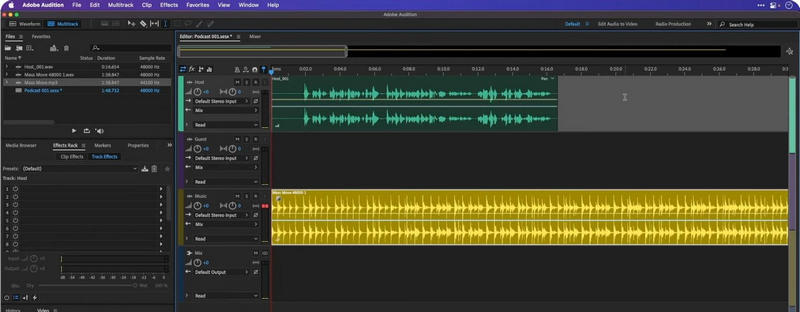
ด้วย Adobe Audition คุณจะได้เสียงคุณภาพระดับมืออาชีพมากขึ้นสำหรับพอดแคสต์ของคุณ Adobe Audition มีฟีเจอร์ที่ยอดเยี่ยมสำหรับการแก้ไขเสียงเพื่อให้ได้พอดแคสต์คุณภาพสูง เช่น การลดเสียงรบกวนและการปรับปรุงคุณภาพเสียง นอกจากนี้ยังเป็นโปรแกรมแก้ไขเสียงแบบหลายแทร็กที่ยอดเยี่ยมอีกด้วย
ขั้นตอนที่ 1 ดาวน์โหลด Adobe Audition จากเว็บไซต์ทางการของ Adobe และติดตั้งลงในอุปกรณ์ของคุณ
ขั้นตอนที่ 2 เปิดโปรแกรมและสร้างและตั้งค่าเซสชันพอดแคสต์แบบมัลติแทร็กใหม่
ขั้นตอนที่ 3ใช้ อุปกรณ์เสียง การตั้งค่าเพื่อเลือกไมโครโฟนและหูฟังของคุณ
ขั้นตอนที่ 4เลือกแทร็กเสียงที่คุณต้องการบันทึก
ขั้นตอนที่ 5เริ่มฟังพอดแคสต์ของคุณโดยคลิกที่นี่ บันทึก ปุ่ม.
ขั้นตอนที่ 6แก้ไขไฟล์เสียงพอดแคสต์ของคุณโดยใช้เครื่องมือแก้ไขของ Adobe Audition เพียงเท่านี้ก็เสร็จแล้ว
ส่วนที่ 3 วิธีการบันทึกพอดแคสต์จากระยะไกล
Riverside.fm เป็นหนึ่งในเว็บไซต์ที่ดีที่สุดและน่าเชื่อถือที่สุดสำหรับการบันทึกพอดแคสต์ระยะไกล แทนที่จะบันทึกเสียงและวิดีโอผ่านทางอินเทอร์เน็ต เว็บไซต์นี้จะบันทึกเสียงและวิดีโอคุณภาพสูงลงในอุปกรณ์แต่ละเครื่องโดยตรง Riverside.fm เป็นเครื่องมือที่ยอดเยี่ยมสำหรับพอดแคสต์วิดีโอ เวบินาร์ รายการสนทนาออนไลน์ และการสัมภาษณ์ เพราะให้การบันทึกที่ชัดเจน แม้ในขณะที่อินเทอร์เน็ตไม่เสถียร และทำงานได้ดีร่วมกับเครื่องมืออื่นๆ เช่น โปรแกรมบันทึกหน้าจอที่ดีที่สุดสำหรับ Mac สำหรับการสำรองข้อมูลหรือการบันทึกข้อมูล
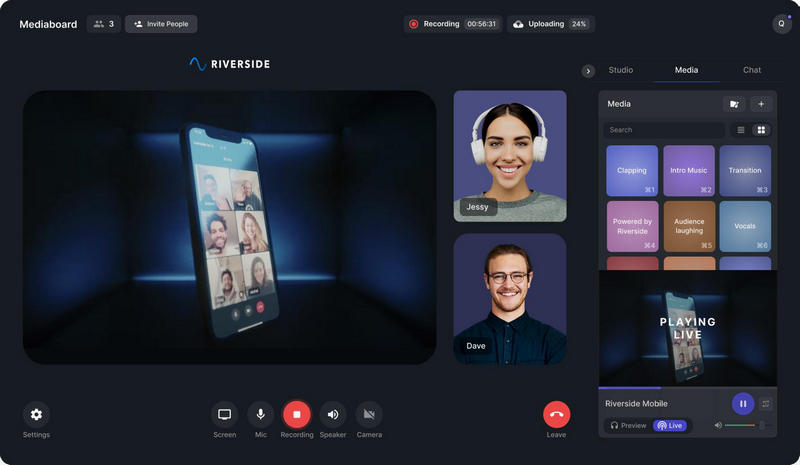
ขั้นตอนที่ 1เข้าไปที่เว็บไซต์ Riverside.fm และสร้างบัญชีผู้ใช้ หลังจากลงทะเบียนแล้ว ให้ล็อกอินเข้าสู่สตูดิโอ
ขั้นตอนที่ 2คลิก สร้างสตูดิโอ กดปุ่ม แล้วเลือกการตั้งค่าพอดแคสต์ของคุณ กำหนดว่าจะบันทึกพอดแคสต์แบบเสียงอย่างเดียวหรือแบบวิดีโอ
ขั้นตอนที่ 3ส่งลิงก์เชิญให้แขกรับเชิญในพอดแคสต์ของคุณ พวกเขาสามารถเข้าร่วมได้ผ่านเว็บเบราว์เซอร์และไม่จำเป็นต้องดาวน์โหลดซอฟต์แวร์ใดๆ
ขั้นตอนที่ 4เลือกไมโครโฟน หูฟัง และเว็บแคมที่คุณต้องการก่อนเข้าสตูดิโอ และอย่าลืมทดสอบเสียงก่อนออกจากสตูดิโอเพื่อให้แน่ใจว่าไม่มีปัญหาทางเทคนิคใดๆ
ขั้นตอนที่ 5เมื่อคุณพร้อมแล้วให้คลิกที่ บันทึก ปุ่ม. Riverside.fm บันทึกเสียงและวิดีโอแต่ละรายการในพื้นที่ด้วยคุณภาพสูง
ตอนที่ 4 วิธีการบันทึกพอดแคสต์บน iPhone
GarageBand เป็นแอปบันทึกพอดแคสต์ยอดนิยมสำหรับผู้ใช้ iPhone หลายคนที่ต้องการอะไรที่เหนือกว่าแอปบันทึกเสียงในตัวเครื่อง แอปนี้รองรับการบันทึกเสียงหลายแทร็ก ใส่เอฟเฟ็กต์เสียง และเพลงประกอบได้ นอกจากนี้ยังมีเครื่องมือแก้ไขที่น่าประทับใจให้เลือกใช้มากมาย
ขั้นตอนที่ 1ในการดาวน์โหลด GarageBand ให้ไปที่ App Store และตรวจสอบว่าได้ติดตั้งไว้ใน iPhone ของคุณแล้วหรือไม่ ถ้ายังไม่ได้ติดตั้ง ให้ติดตั้งก่อน
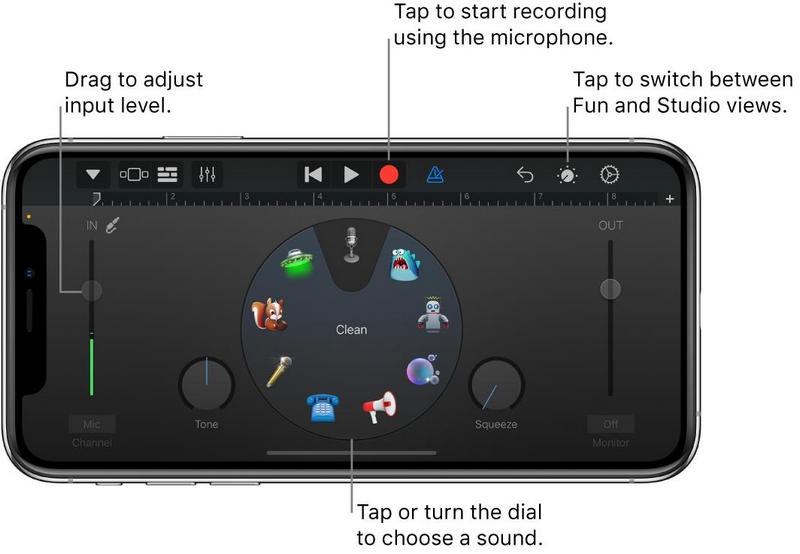
ขั้นตอนที่ 2เมื่อเปิด GarageBand ให้เลือก บันทึกเสียง จากเครื่องมือบันทึกที่มีอยู่
ขั้นตอนที่ 3การใช้ไมโครโฟนภายนอกจะทำให้พอดแคสต์ของคุณฟังดูเป็นมืออาชีพมากขึ้น เสียงจะชัดเจนขึ้น และมีเสียงรบกวนน้อยลงด้วย
ขั้นตอนที่ 4การตรวจสอบระดับเสียงมีประโยชน์ในการตรวจสอบระดับเสียงที่ไมโครโฟนของคุณรับได้ และเพื่อให้แน่ใจว่าเสียงนั้นชัดเจนและไม่ถูกบีบอัด
ขั้นตอนที่ 5คุณสามารถเริ่มบันทึกพอดแคสต์ได้ทันทีโดยแตะที่ไอคอน บันทึก ปุ่มนี้ใช้สำหรับบันทึก และสามารถหยุดการบันทึกชั่วคราวได้โดยการกดเล่นต่อ
ขั้นตอนที่ 6สามารถแก้ไขข้อผิดพลาดและปรับระดับเสียงได้ใน GarageBand โดยใช้ฟีเจอร์ตัดแต่ง นอกจากนี้ยังสามารถเพิ่มเพลงได้อีกด้วย
ขั้นตอนที่ 7พอดแคสต์ที่คุณใช้เวลามากมายในการฝึกฝน บันทึก และตัดต่อ สามารถส่งออกและบันทึกไว้ใน iPhone ของคุณได้ นอกจากนี้คุณยังสามารถแชร์พอดแคสต์ของคุณได้อีกด้วย
กำลังตั้งค่าเพื่อ บันทึกพอดแคสต์ การทำพอดแคสต์สะดวกสบาย หากมีอุปกรณ์และซอฟต์แวร์ที่เหมาะสม คุณสามารถทำพอดแคสต์จากคอมพิวเตอร์ จากสถานที่ห่างไกลกับแขกรับเชิญ หรือบันทึกโดยตรงจาก iPhone ของคุณหากมีอุปกรณ์ที่ดี คุณจะผลิตพอดแคสต์คุณภาพสูงได้ทุกครั้ง
เกี่ยวกับผู้เขียน

จับภาพกิจกรรมบนหน้าจอด้วยเสียง การประชุมออนไลน์ วิดีโอการเล่นเกม เพลง เว็บแคม ฯลฯ