With the power of Photoshop, there is almost nothing you cannot do. It has always been the trusted tool for artists, whether you are just starting out or have years of experience. Its wide range of features allows you to fix, improve, and transform your images with ease. In this post, we will show you how to unblur an image in Photoshop and share five useful methods you can try today.
- Method 1: How to Unblur Images in Photoshop with the Shake Reduction Tool
- Method 2: How to Unblur an Image in Photoshop with The Sharpen Filter
- Method 3: How to Unblur Images in Photoshop with Unsharp Mask
- Method 4: How to Unblur an Image in Photoshop with Sharpen More
- Method 5: How to Unblur an Image in Photoshop with Smart Sharpen
- Bonus: How to Unblur an Image Free Online
Method 1: How to Unblur Images in Photoshop with the Shake Reduction Tool
The Shake Reduction Tool is made for fixing motion blur. It works best when your photo is slightly shaky, like when the camera moves as you take the shot. This method doesn't need much manual input. It's fast and often gives decent results.
Here's how to use the Shake Reduction Tool:
Step 1Launch Adobe Photoshop, create a new project, and open the image you want to edit.
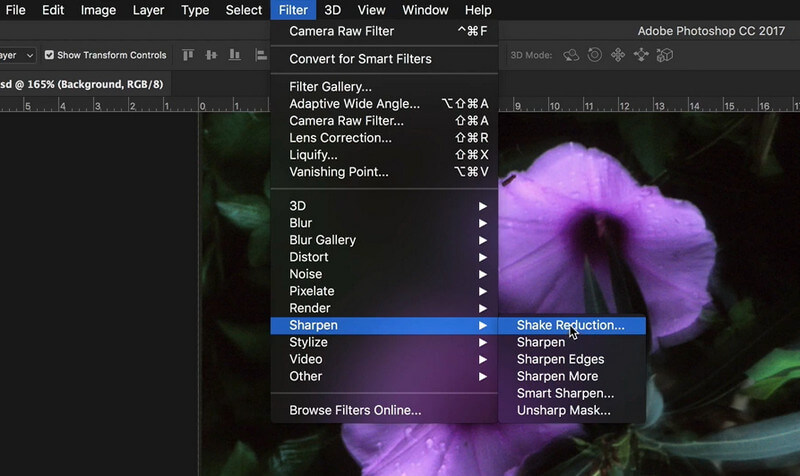
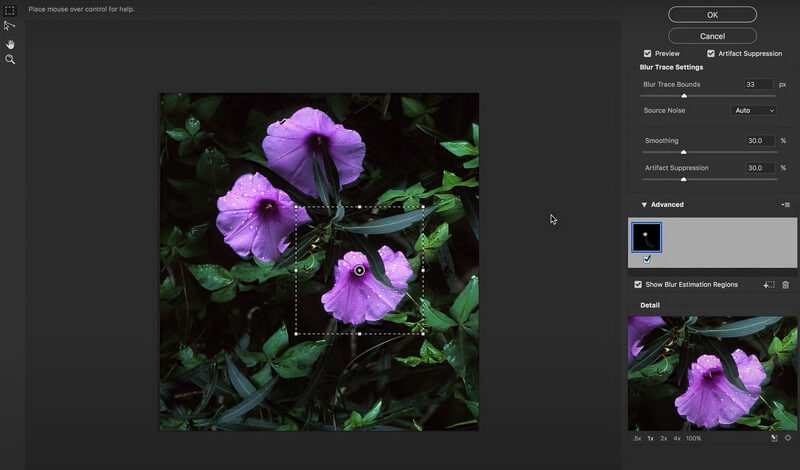
Step 2At the top menu, click Filter, hover over Sharpen, and then select Shake Reduction from the dropdown.
Step 3Use the left mouse button to select the area you want to unblur. In the panel on the right, adjust the Blur Trace Settings. Once you're happy with the changes, click OK to apply them.
It may not work well on heavily blurred images or those with soft focus. If that's the case, try other tools or combine methods for a more effective approach. The Shake Reduction Tool is a good first step before doing deeper edits. If you don't like the outcome, you can just press Ctrl+Z (or Cmd+Z on Mac) to undo it.
Method 2: How to Unblur an Image in Photoshop with The Sharpen Filter
The Sharpen Filter is one of the simplest tools in Photoshop. It increases the contrast between edges in your photo, making details appear clearer. If you have any image and you want to highlight a certain structure or pattern, this tool is perfect for the job.
Here's how to use the Sharpen Filter:
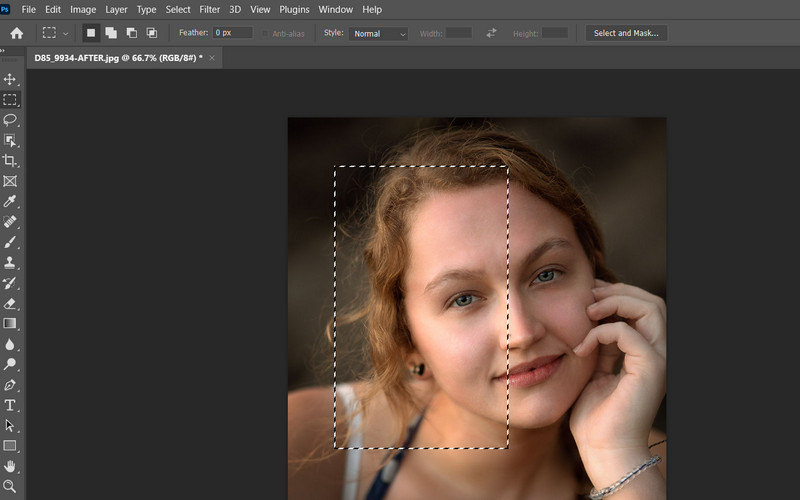
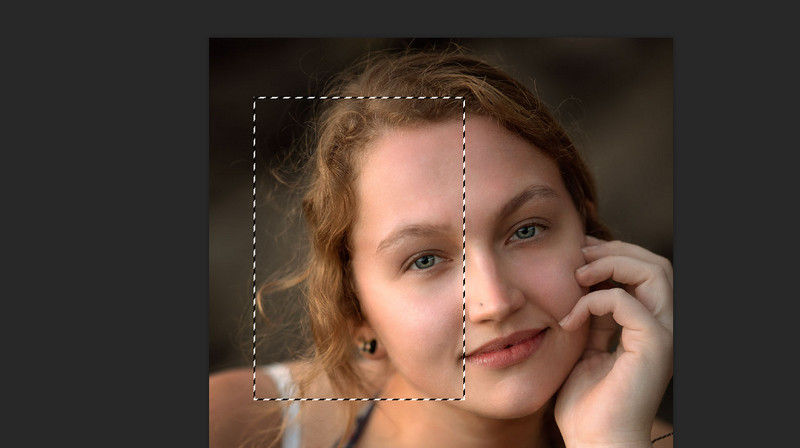
Step 1Open Photoshop and start a new project with your image. Use your left mouse button to click and drag over the area you want to sharpen. If you want to sharpen the entire image, there's no need to make a selection.
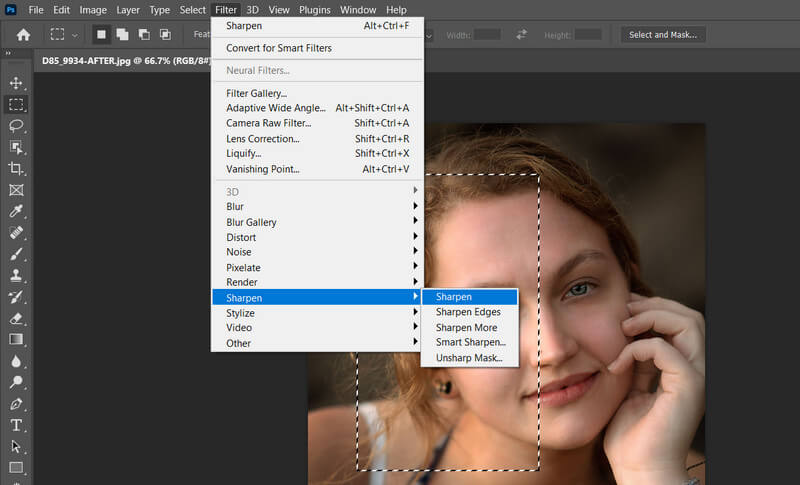
Step 2Go to the top menu, click Filter, then choose Sharpen, and click Sharpen again. That's it! You can repeat the process on other parts of the image or apply it to the whole image.
Method 3: How to Unblur Images in Photoshop with Unsharp Mask
The Unsharp Mask gives you more control than the basic Sharpen Filter. Despite its name, it's a sharpening tool, not a blurring one. This tool works well on portraits, landscapes, and detailed shots. It helps bring back clarity without over-processing the image.
Here's a quick way to apply Unsharp Mask:
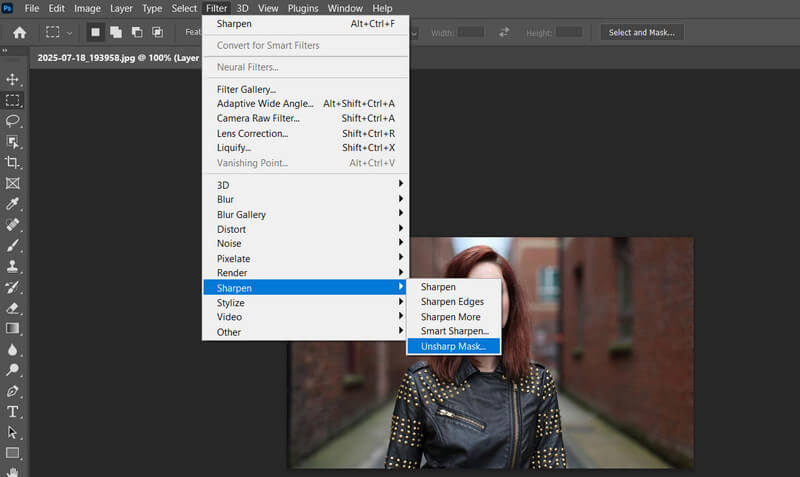
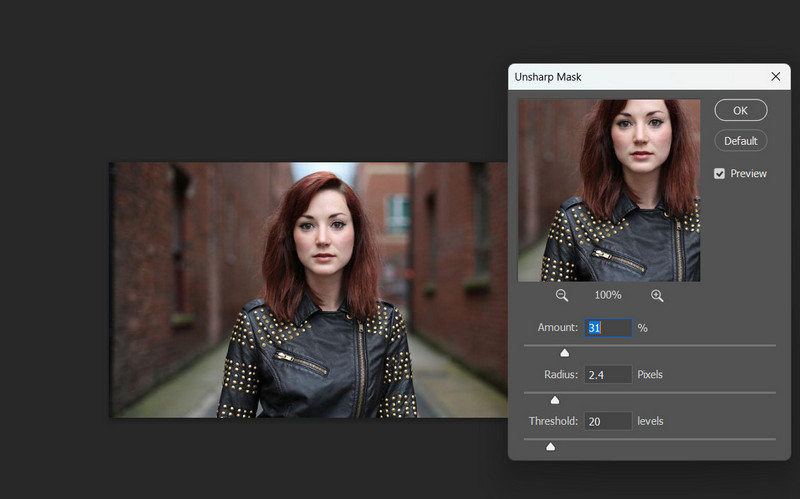
Step 1Open Photoshop and load your image into a new project. In the Layers panel at the lower right, select your image layer and duplicate it by pressing Ctrl+J (or Cmd+J on Mac). Then, go to the top menu, click Filter, choose Sharpen, and select Unsharp Mask.
Step 2At this point, you can manually adjust the settings. A good starting point is setting the Amount to 150 percent, the Threshold to 0, and the Radius to 1 pixel. You can increase the radius if needed. Once you're satisfied, click OK to apply the effect.
Method 4: How to Unblur an Image in Photoshop with Sharpen More
"Sharpen More" is like the Sharpen Filter, but stronger. It doesn't give you control over settings. Still, it can work for quick edits. Because it's automatic, it might not suit professional work or high-resolution prints. But for casual use, Sharpen More is a fast way to make a blurry photo look sharper. Again, if you want to resize an image in Photoshop, do it before applying this filter to avoid over-sharpening pixel edges.
Here's how to use the Sharpen More tool:
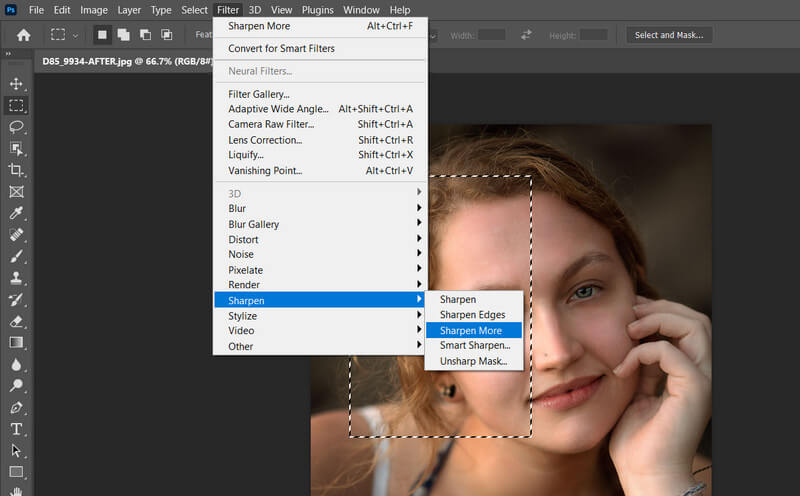
Step 1Open Photoshop and start a new project with your image. Use your left mouse button to click and drag over the area you want to sharpen.
Step 2Go to the top menu, click Filter, then choose Sharpen, and click Sharpen More. That's it!
Photoshop will apply a more intense sharpening than the basic Sharpen Filter. If it looks too harsh or noisy, press Ctrl+Z (or Cmd+Z on Mac) to undo.
Method 5: How to Unblur an Image in Photoshop with Smart Sharpen
Smart Sharpen gives you the most control of all sharpening tools in Photoshop. It gives better edge definition without wrecking the image. But it takes more time to tweak properly. It works best on photos with consistent blur.
Here's how to use the Smart Sharpen tool:
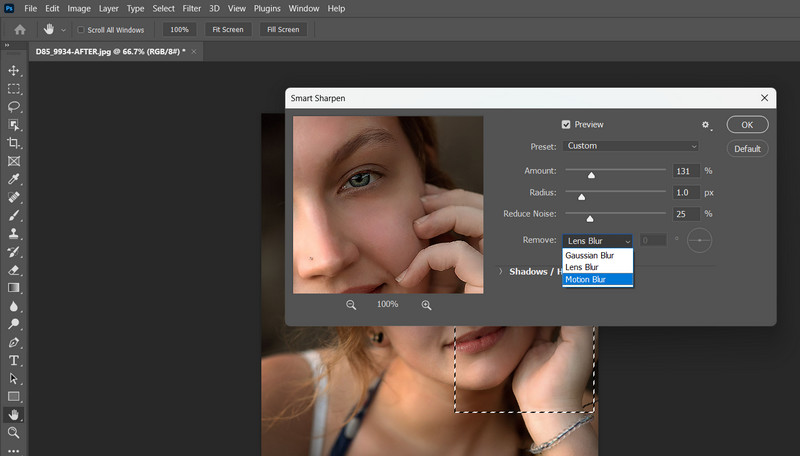
Step 1Open Photoshop and load your image. Use your mouse to select the area you want to sharpen. Then go to the top menu, click Filter, hover over Sharpen, and select Smart Sharpen.
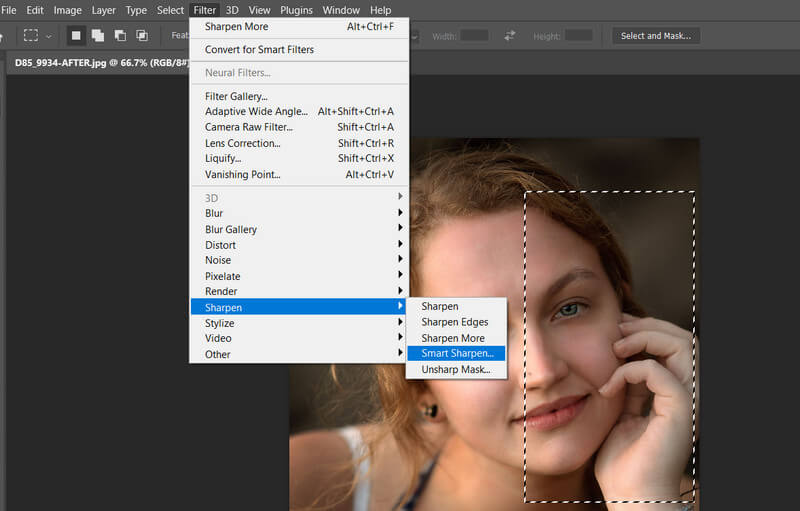
Step 2A new panel will appear with advanced options similar to the Unsharp Mask tool. You can choose a blur type to remove, such as Lens Blur, Gaussian Blur, or Motion Blur. You'll see a live preview of the changes. Once you're happy with the result, click OK to apply it.
Bonus: How to Unblur an Image Free Online
Suppose you want to just unblur an image and even enlarge it for greater detail. In that case, you can use a free tool online that allows you to import an image, and it will use AI to analyze and resize your images to your liking. Try the following software:
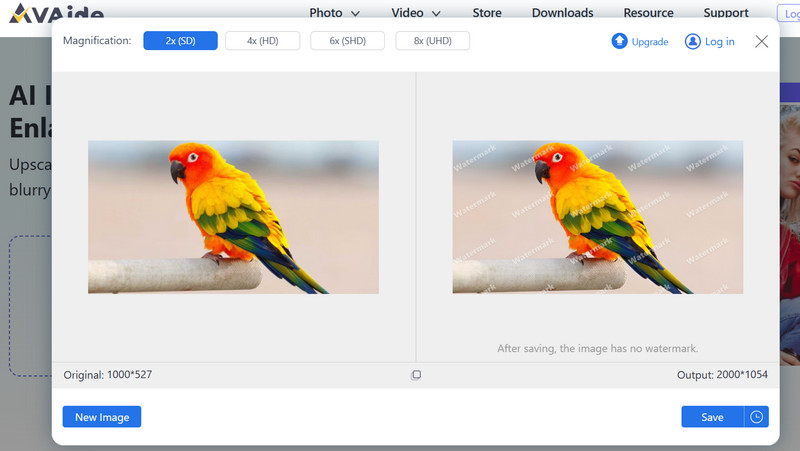
AVAide Image Upscaler is an easier and quicker way to unblur images. It can also upscale images to 2×, 4×, 6×, and even 8×. It does make things easier since you don't have to download anything; you can just import the image and get things done quickly. Not only that, it utilizes AI analysis to fix blurry images.
Here's how to use AVAide Image Upscaler:
Step 1To access the tool, go to avaide.com. On the navigation bar, click the Photo and select the Image Upscaler.
Step 2Click on the Choose Photo button and select the image you want to unblur. Alternatively, you can just drag and drop the image on the page. For those who purchase the premium plan, you can access the Upload Photo in Batches.
Step 3The image will be processed upon uploading. When it's done,You can see the preview of the output, and you can select the resolution of up to 8×. Click the Save button to get the result.
That's basically the steps on how to unblur an image in Photoshop; it gives more flexibility and precision options to its user to do any artistic work that comes to mind. But that's given to those who already have a subscription. For those who want to fix a few images for free, simply try AVAide Image Upscaler. It is online and highly convenient to unblur an image without downloading anything.

Our AI technology will automatically enhance the quality of your images, remove noise and fix blurry images online.
PROCESS NOW