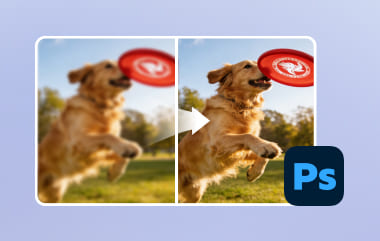
Sharpness is not a filter. It is a corrective step that restores information lost before the image reaches the screen. Sensors soften detail, and resizing weakens edges. Photoshop gives you control over both if you know where to look. This article covers how to sharpen an image in Photoshop, on the behavior of digital images in the real world. Both methods are concerned with accuracy and not strength. The aim is to be clear and format independent. We will initially appraise desktop applications, then take a look at tablet applications before offering an easier alternative to quick edits.
Part 1: How to Sharpen an Image in Photoshop
There are seven consistent sharpening techniques in Photoshop as demonstrated below. Both procedures are applicable to a given type of imaging problem or blur. The steps are to be followed strictly, and the technique selected to suit your photo and output purpose.
1. How to Use Unsharp Mask to Sharpen Images
When you are asking how do I sharpen an image in Photoshop without the complicated arrangement, the Unsharp Mask is the one to begin with. It increases contrast of edges to regain peripheral sharpness, which is lost with soft lenses or resizing.
Step 1Open Photoshop and go to File > Open. Select your image, then duplicate the layer by right-clicking and choosing Duplicate Layer or pressing Ctrl + J on Windows or CMD + J on Mac.
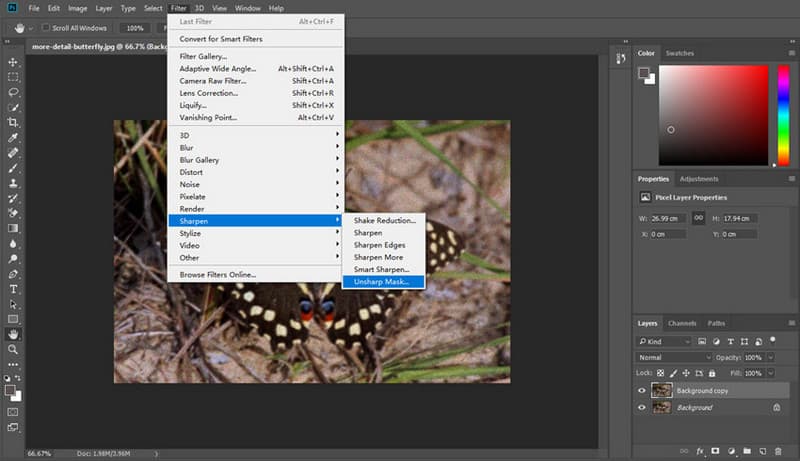
Step 2Go to Filter > Sharpen > Unsharp Mask.
Step 3Set the Amount between 50 and 100 percent for natural sharpening. Set the Radius to 1.0 - 1.5 px for small images or up to 2.0 px for high-resolution images. Set the Threshold between 1 and 5 to protect smooth areas like skin.
Step 4Click OK, then export the image using File > Save As at maximum quality.
2. How to Use Smart Sharpen for Motion Blur
Smart Sharpen is perfect when you have to sharpen image Photoshop files that have been compromised by a minor movement, lens soft, or low light noise.
Step 1Always work on a duplicated layer to keep edits reversible. Go to Filter > Sharpen > Smart Sharpen.
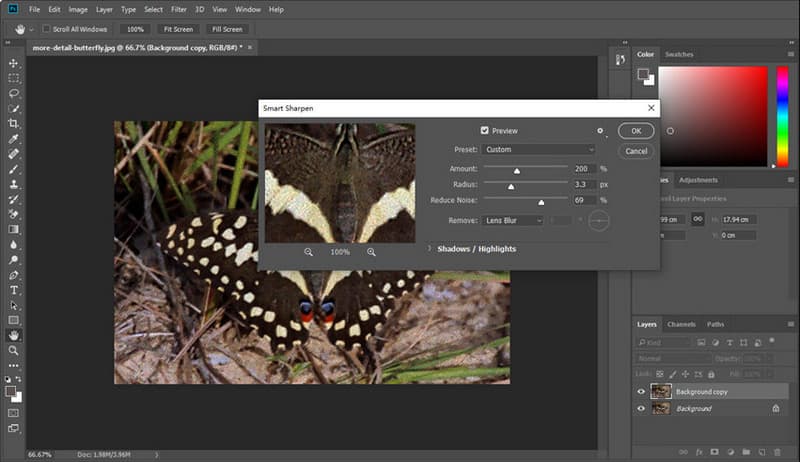
Step 2Set the Amount to 50 - 100 percent for light sharpening or up to 150 percent for low-resolution images. Set Radius to 1.0 - 1.5 px for most images or up to 2.5 px for larger files.
Step 3Use Reduce Noise to control grain. Choose Lens Blur for general sharpening or Motion Blur for camera movement. Click OK and inspect edges at 100 percent zoom. If you want to crisp the details on your image, then use the PNG upscaler feature next.
3. How to Use a High-Pass Filter for Crisp Edges
High Pass is effective when learning how to sharpen images in Photoshop while keeping backgrounds smooth and controlled.
Step 1Create a duplicate layer before applying filters.
Step 2Go to Filter > Other > High Pass. Use Radius 1.0–1.5 px for small images, 2.0–3.0 px for high resolution images, and up to 5 px for strong architectural edges.
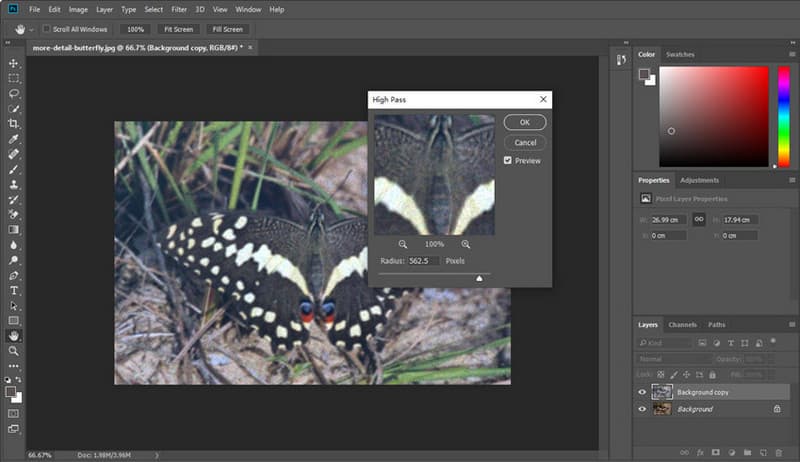
Step 3Click OK, then set the layer blending mode to Overlay or Soft Light. Lower the layer opacity until the sharpness looks natural.
4. How to Use the Sharpen Tool for Local Areas
If you need to know how to make an image sharper in Photoshop for specific details like eyes or text, the Sharpen tool gives precise control.
Step 1In the toolbar, right-click the Blur tool and select the Sharpen Tool.
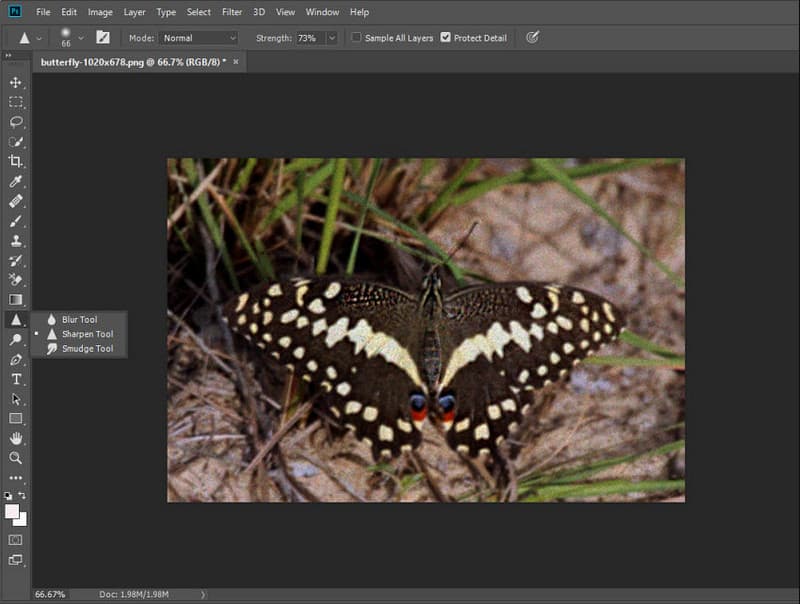
Step 2Set Brush Size to match the area > Set Strength to 10 - 20 percent > Enable Protect Detail to avoid harsh edges > Enable Sample All Layers if working with multiple layers.
Step 3Brush gently over the areas you want to sharpen. Avoid repeated strokes to prevent noise and halos.
5. How to Use Shake Reduction for Camera Shake
Shake Reduction is designed for users who need to know how to sharpen a blurry image in Photoshop caused by hand movement.
Step 1Go to Filter > Sharpen > Shake Reduction.
Step 2Photoshop will automatically detect motion patterns and apply corrections.
Step 3Adjust Blur Trace Bounds if needed. Use Smoothing and Artifact Suppression to reduce unwanted effects.
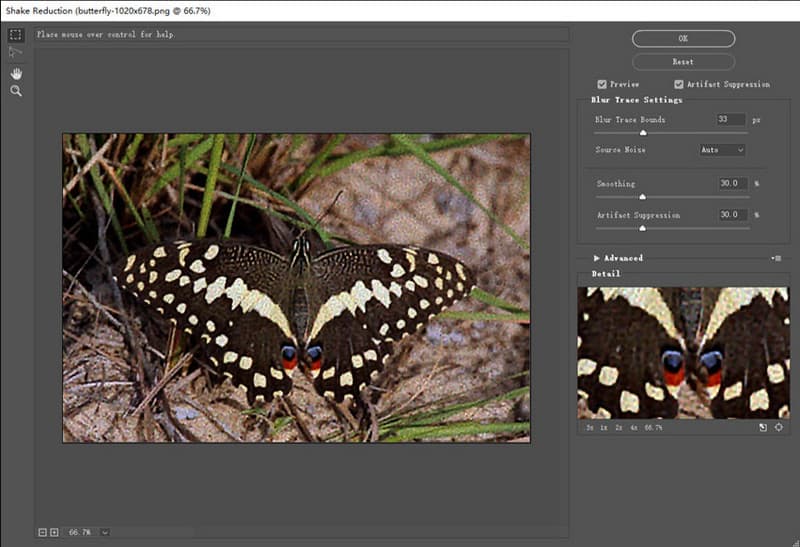
Step 4Click OK once the image looks balanced.
6. How to Use Camera Raw Filter for Natural Sharpening
Camera Raw is the best choice if you want how to make an image sharp in Photoshop while preserving a realistic look, especially for RAW files.
Step 1Go to Filter > Camera Raw Filter. Scroll to the Detail panel.
Step 2Set the Amount to around 50 for subtle sharpening or up to 100 for stronger results. Set the Radius to 0.5 - 1.0 px for portraits and up to 1.5 px for landscapes. Adjust Detail based on texture level. Increase Masking to limit sharpening to edges and reduce noise.
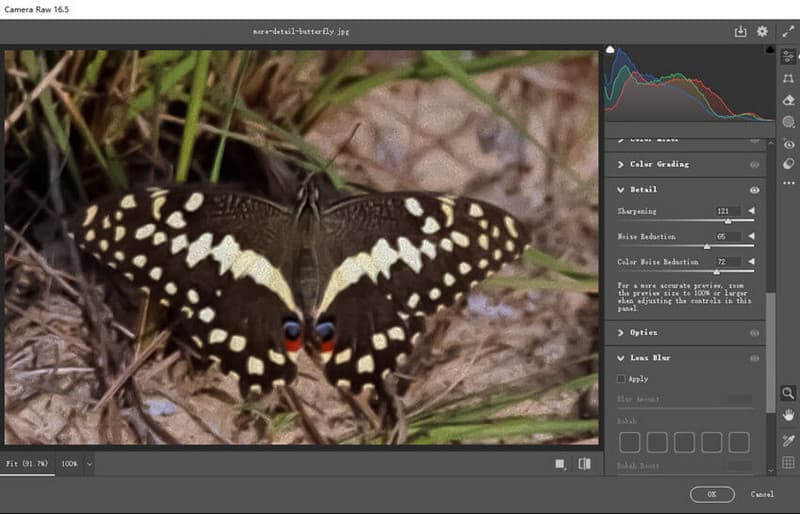
Step 3Click OK and review the image at full size.
7. How to Use Super Resolution to Upscale and Sharpen
Super Resolution is useful when you need to sharpen blurry image files while increasing resolution using AI.
Step 1Open the image through Adobe Bridge and launch Camera Raw.
Step 2Right-click the image preview and select Enhance. Check Super Resolution in the dialog box.

Step 3Click Enhance, and Photoshop will create a new, higher-resolution file with improved sharpness.
This completes the desktop sharpening methods. Next, we move on to how to sharpen images in Photoshop on iPad, where the workflow changes, but precision is still possible.
Part 2: How to Sharpen an Image in Photoshop on iPad
Photoshop on iPad does not utilize the same filters of sharpening filters as the desktop version. Rather, it dwells upon selective edge control. The method is most effective when you need to focus on sharpening blur images in Photoshop without smoothing backgrounds or adding noise. Refine Edge allows you to isolate the detail and sharpen only the important areas.
Step 1Open your image in Photoshop on iPad. Select the Selection tool and draw a rough outline around the subject or area you want to sharpen.
Step 2In the selection toolbox at the bottom center of the screen, hit the More menu, then select Refine Edge.
Step 3Inside the Refine Edge workspace, adjust the brush size using the sliders on the right. Turn on Smart Radius to allow Photoshop to detect edges automatically.
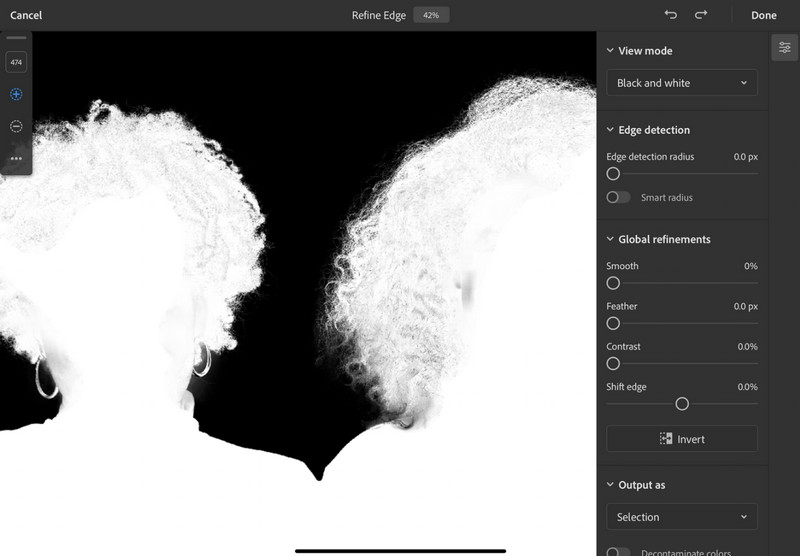
Step 4Paint over the edges using the plus button to add areas to the selection. Use the minus button to remove areas that should stay soft.
Step 5Once the edges are refined, apply sharpening using the available adjustment or filter options in Photoshop on iPad, then review the result and save your image.
Part 3: The Easiest Photoshop Alternative to Sharpen an Image
AVAide Image Upscaler is a simplified tool to improve your photos. It is web-based and thus requires no installation, and the learning curve is perfect. The tool has the capacity to sharpen images, remove blurs, correct color, and even upscale those images to a higher level than is normally available with professional editors, such as Photoshop. Also, it is suitable for batch processing, which means you can improve a number of images without delay.
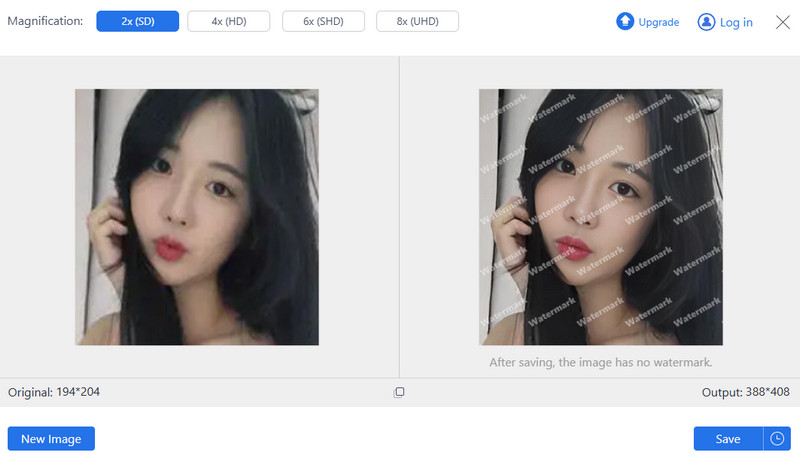
If you want a quick and easy way to AI-sharpen images in Photoshop without using desktop software, it is an AI image upscaler that works well, is effective, and is a beginner-friendly option.
How do I sharpen an image in Photoshop? Has this question kept bothering you? Well, this has been resolved with the help of the detailed tutorials we have here. If you want to have your image sharpened with the help of AI on the web, then try to use the AVAide tool that has to offer.
ABOUT THE AUTHOR


Our AI technology will automatically enhance the quality of your images, remove noise and fix blurry images online.
PROCESS NOW