Smartphones, especially Android devices, have come a long way and are now more than just tools for calling or texting. For photography lovers, your phone's camera is a key feature to consider when upgrading.
But sometimes, large photos take up too much space, and small photos may be too tiny to share or print. That is why knowing how to resize an image on Android is so useful. In this guide, we will show you how to do it using your gallery, third-party apps, and online tools.
Part 1: How to Resize an Image in an Android Phone's Gallery
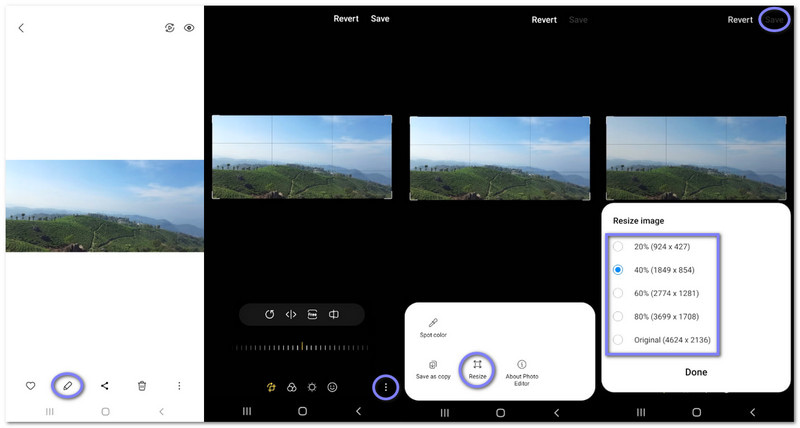
Resizing an image on an Android phone is simple and fast using the Gallery app. The built-in editor lets you change photo size with ease. It helps when sharing images or saving storage space on your device.
Step 1Launch Gallery on your Android phone. Next, press the image you want to resize.
Step 2Tap the Edit button below the image. Then, look for the three-dot menu in the lower-right corner.
Step 3Tap the three dots menu and select Resize, and the resize options will appear on the screen.
Step 4Choose a percentage or a preset resolution. After that, press Done to apply the new size.
Step 5Finally, press Save to finish the process. Keep in mind that the Gallery app replaces the original photo. To keep a copy, move the photo to another folder first.
Part 2: How to Resize an Image on Android with Photo Resizing Apps
1. Photo & Picture Resizer
Offered by Farluner Apps & Games with 10,000,000+ downloads, Photo & Picture Resizer focuses on fast and easy image resizing. It keeps photo clarity while reducing file size. It supports batch resize and common social sizes. The resized photos save automatically in a separate folder, so you do not need to save them manually.
Find out how to resize an image on Android using Photo & Picture Resizer below:
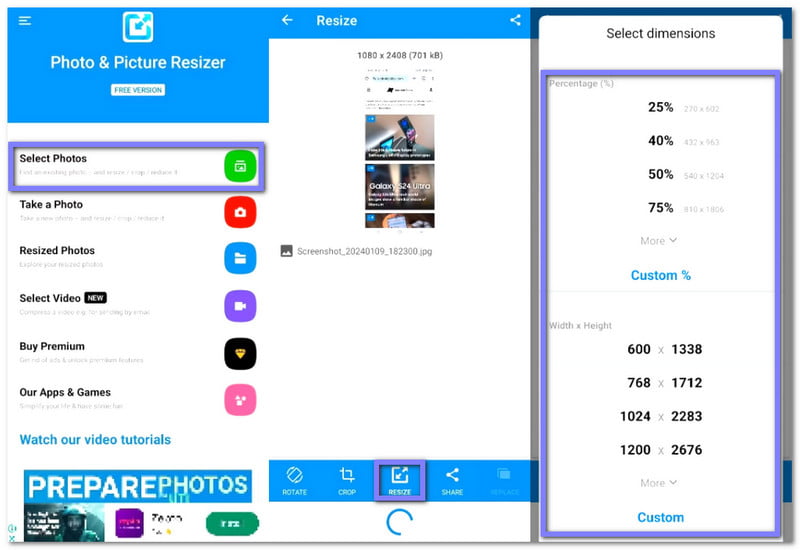
Step 1Install Photo & Picture Resizer from the Play Store. Once installed, open the app and press Select Photos to begin.
Step 2Choose the image you want to resize. Then, the image will load on the screen right away.
Step 3Tap Resize to continue. Next, choose a percentage, resolution, or file size. You can also enter custom values if needed.
Step 4Confirm your choice and let Photo & Picture Resizer process the image. Your resized picture will be saved in your folder.
2. Image Size - Photo Resizer
With 5,000,000+ downloads and offered by Codenia, Image Size - Photo Resizer lets you resize images using pixels or real-world units. You can lock the aspect ratio with one tap. It also supports crop and rotate. The resized images can be saved, shared, printed, or emailed if you want.
Find out how to resize an image for printing on Android using Image Size - Photo Resizer below:
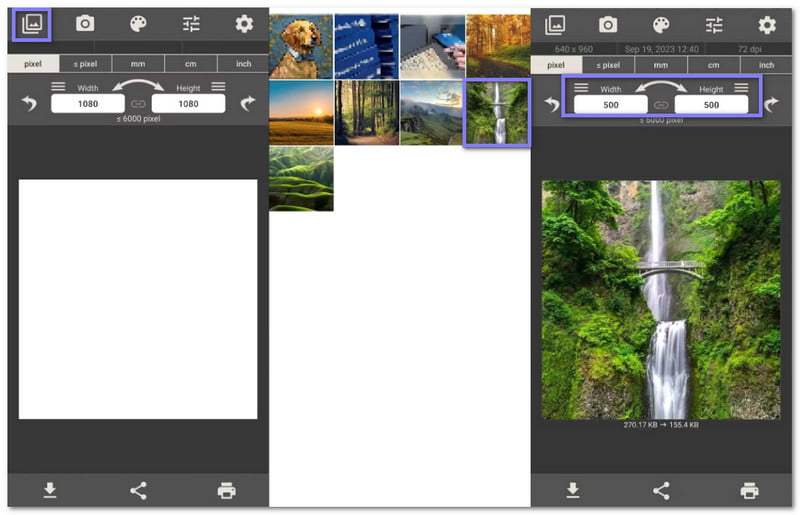
Step 1Get the Image Size - Photo Resizer from the Play Store. Launch it and press the Photo button in the upper-left corner.
Step 2Pick an image from your gallery, and you will see the size details below it.
Step 3What you need to do now is enter the new width and height.
Step 4Once you are done, press the Download button in the lower-left corner.
3. Photo Resizer HD
Developed by mp4android and used by 1,000,000+ people, Photo Resizer HD is made for simple image resizing. It lets you resize one photo or many at once through batch share. You can also sharpen photos after resizing, keep EXIF data, save to an SD card, and share images with other apps easily.
Discover how to resize an image on an Android phone using Photo Resizer HD below:
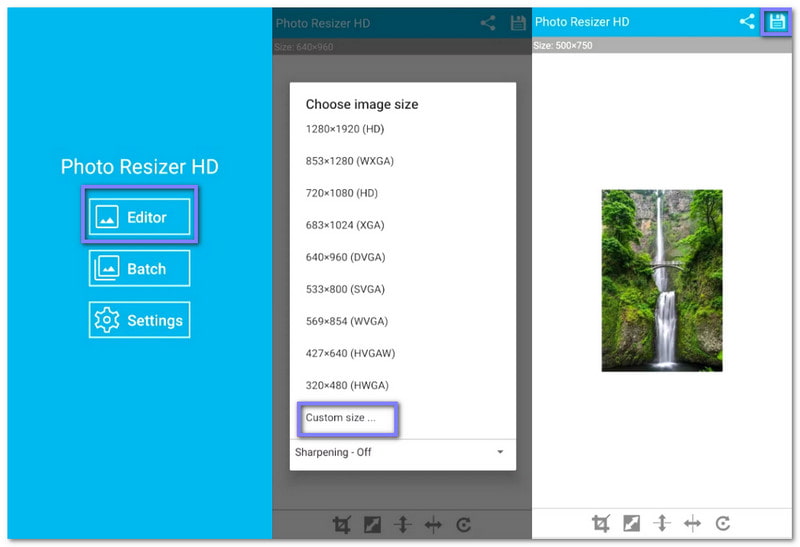
Step 1Download Photo Resizer HD on your Android phone. Then, run the app and select Editor to start.
Step 2Choose the photo you want to resize. Once chosen, the image will appear inside the editor.
Step 3Press Custom size and enter the width and height. After that, press OK to apply the new size.
Step 4Press the Save button in the upper-right corner, and Photo Resizer HD will automatically create a folder for your resized image.
Part 3: How to Resize Images on Android Without Losing Quality Online
1. AVAide Image Upscaler
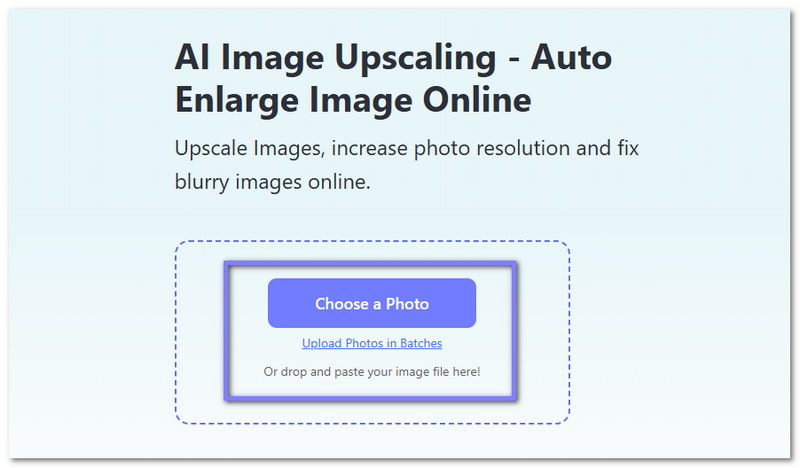
If your goal is to enlarge your image without losing clarity, you can depend on AVAide Image Upscaler. It lets you resize JPG, PNG, BMP, and other popular formats, making it easy to know how to resize an image on Android.
With just one click, it can enlarge your image 2×, 4×, 6×, or 8×. It makes your pictures sharper and more detailed, even when bigger. It works completely online, so there is nothing to install. And you know what? It is free to use and does not add any watermark.
Step 1To use AVAide Image Upscaler, open your browser on your Android phone and go to the official website.
Step 2Click the Choose a Photo button to add the image you want to resize by enlarging it. If you want to resize many images at once, you can press Upload Photos in Batches, but you need to upgrade your plan to use this feature.
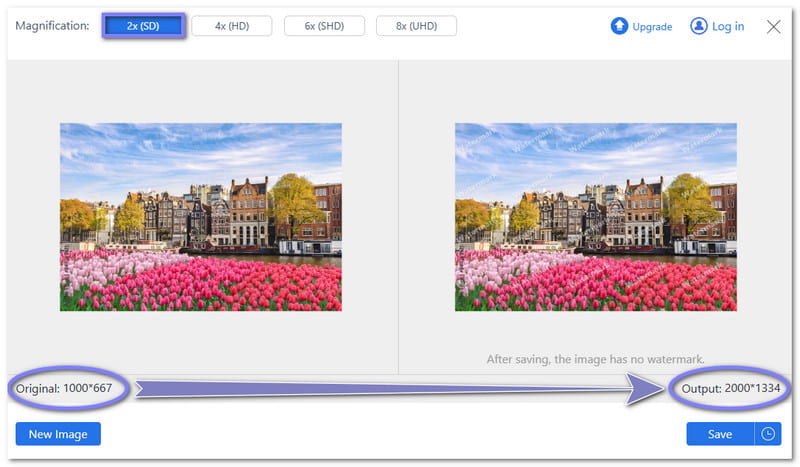
Step 3Please wait a few seconds while AVAide Image Upscaler processes your image. By default, it enlarges your image 2×. For example, an image 1000×667 pixels will become 2000×1334 pixels.
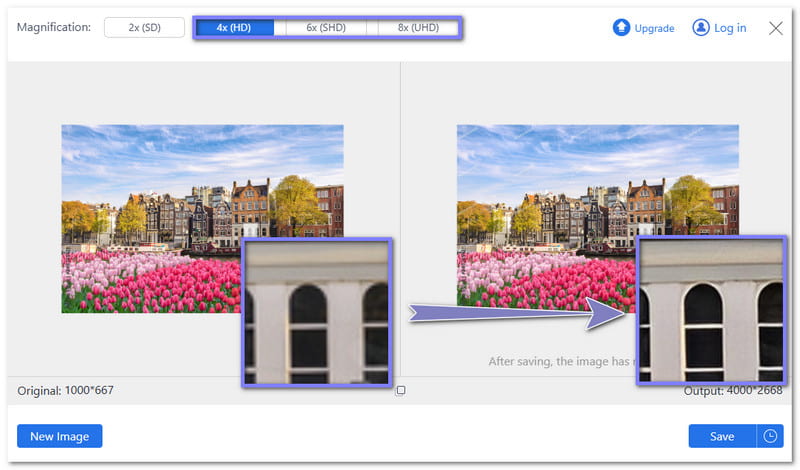
Step 4You can make your image even bigger by selecting 4×, 6×, or 8×. Free users can only go up to 4×. You can also hover over parts of your image to see the details and check the quality. The more you enlarge, the sharper it becomes.
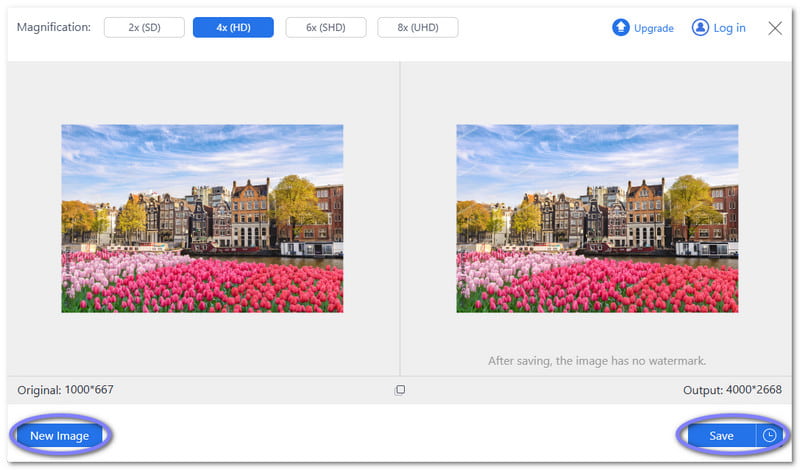
Step 5If you are happy with the new size, click the Save button. To resize another image, just click the New Image button and repeat the steps.
Tip: AVAide Image Upscaler also works to resize images on iPhone. It works the same way as on Android and keeps your pictures clear and sharp, even if they are bigger.
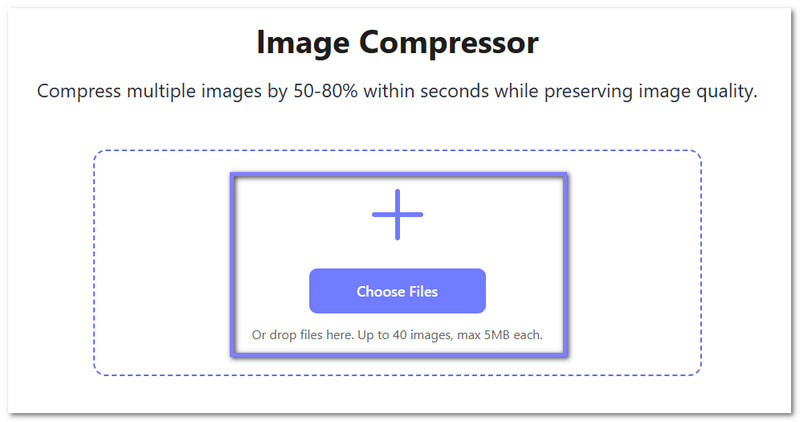
2. AVAide Image Compressor
If AVAide Image Upscaler can enlarge your image, AVAide Image Compressor does the opposite. It reduces your file size while preserving the image clarity for free, making it a helpful platform for how to resize images on Android.
The impressive thing is that you can upload up to 40 images at the same time. And it can compress them by 50% to 80% in just a few seconds. In addition, it supports almost all popular formats like JPG, PNG, BMP, and GIF.
Step 1Just like AVAide Image Upscaler, head to AVAide Image Compressor using your browser.
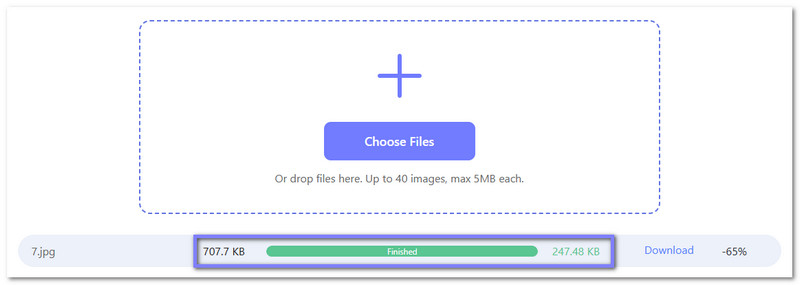
Step 2Tap the Choose Files button. It will open your local folder automatically. There, pick the image you want to reduce the size. Note that you can import up to 40 pictures with a maximum of 5 megabytes each.
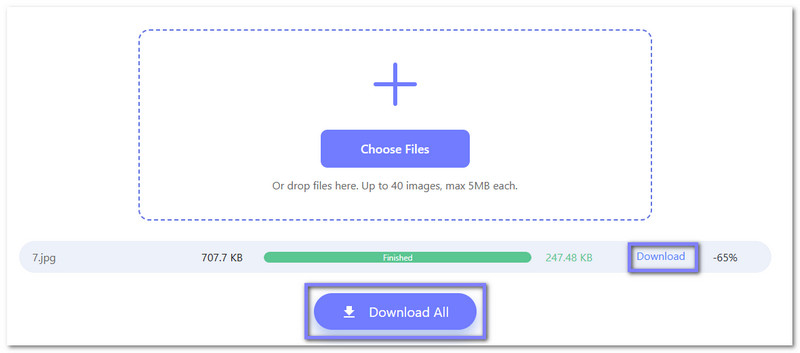
Step 3AVAide Image Compressor will start compressing your image right away. Once the word Finished appears in green, it means the compression is successfully done. For example, from 707.7 KB, it can become 247.48 KB, which is a -65% reduction.
Step 4Once you are satisfied with the size, click Download if you only have one image, or Download All if you compressed many images at once.
So, rely on AVAide Image Compressor to compress your photos for email, Facebook, Instagram, PowerPoint, Word, and more!
Whether you want to reduce or enlarge your image, the tools mentioned above are dependable. You can use the built-in method, third-party apps, or online tools like AVAide Image Upscaler and AVAide Image Compressor.
Both online tools can help you resize an image on Android for free, without downloading anything. You can do your task right away in your browser, which saves time and effort.
ABOUT THE AUTHOR


Our AI technology will automatically enhance the quality of your images, remove noise and fix blurry images online.
PROCESS NOW