How to resize an image on an iPhone? Resizing an image is the best way for you to make your images fit perfectly for printing, sharing, and saving storage space. With the help of built-in tools and third-party resizers, you can instantly and effectively resize your images without affecting the quality. In this guide, we will give a step-by-step process on how to resize your photos on an iPhone to achieve your desired result. Thus, read here and learn more about the discussion.
Part 1. Built-In Way to Resize an Image on iPhone
Do you want an easier and faster method of resizing your images? In that case, you can use the Photos app. This app can offer its built-in cropper feature. With this feature, you can crop and resize your images based on your needs. What we like here is that the process of cropping your images is simple, making it suitable for all users. To use this photo resizer, you can use the steps below and learn how to resize iPhone photos.
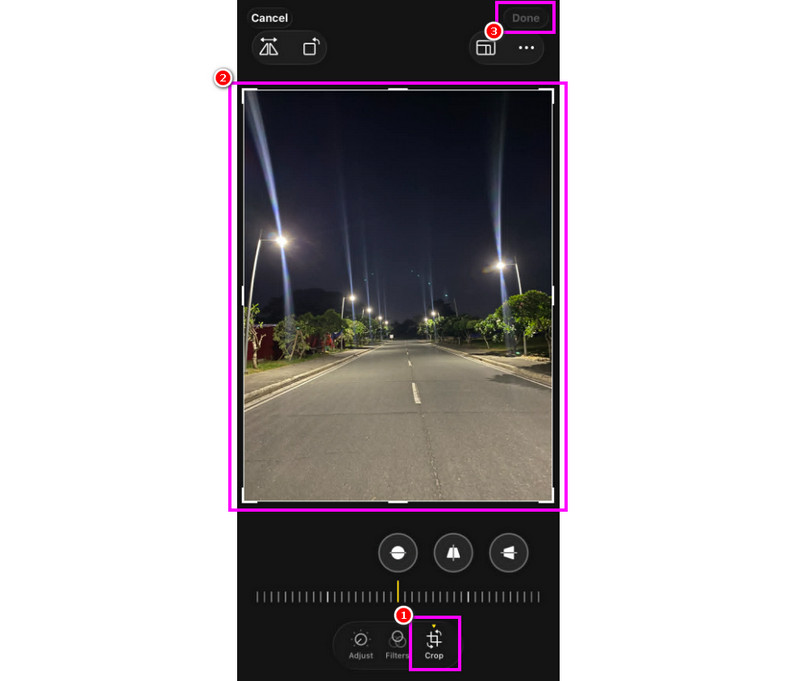
Step 1On your iPhone, tap and open the Photos application. Then, choose the image you want to resize.
Step 2Then, press the Edit function from the bottom interface. Then, you can start cropping and resizing the photos.
Step 3After the resizing process, you can hit the Done button above to save the cropped image to your Photos app.
Part 2. Resize Image on iPhone Using the Mail App
Besides the Photos app, you can also use the Mail app to resize your images. The app lets you choose your preferred image size, from small, medium, large, and actual size. This feature is ideal for reducing file size when sharing photos without compromising too much on the quality.
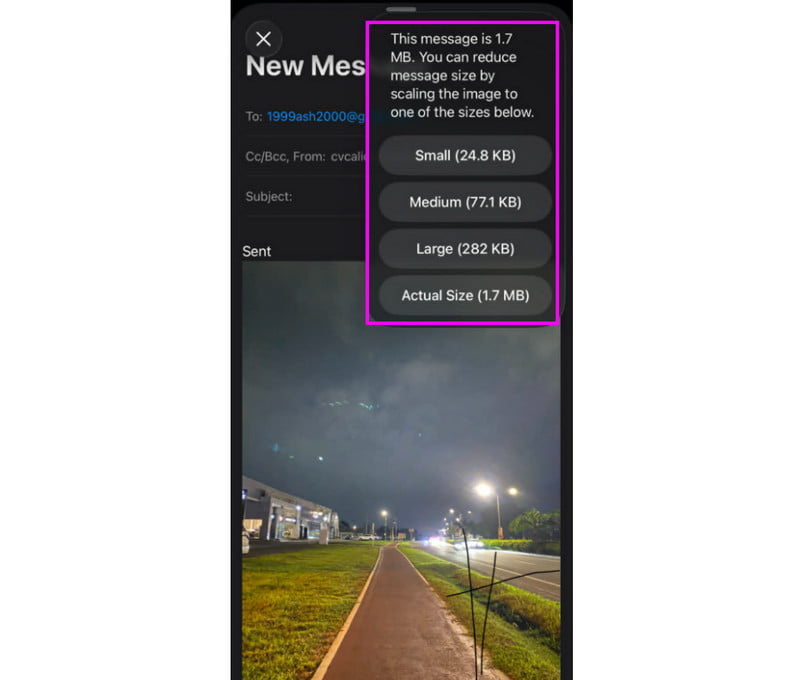
Step 1On your iPhone, open the Mail app. Then, you can start adding the email of the user whom you want to send the image to.
Step 2Then, click the Attach option to start uploading the image from your iPhone.
Step 3Once done, click the Arrow Up button from the top interface. You can now start choosing your preferred size, from small, medium, large, and actual size. Once done, send your email.
Part 3. Resize Image on iPhone Using the Shortcuts App
If you want another app you can rely on when it comes to resizing your iPhone photos, you can also access your Shortcut app. It is a helpful resizer since it lets you automate the method and apply consistent dimensions to any images with just a single tap. Unlike manual resizing, you can create a custom shortcut that asks for a specific width and height, making the resizing process faster and smoother. Use the steps below and learn how to resize a picture on an iPhone.
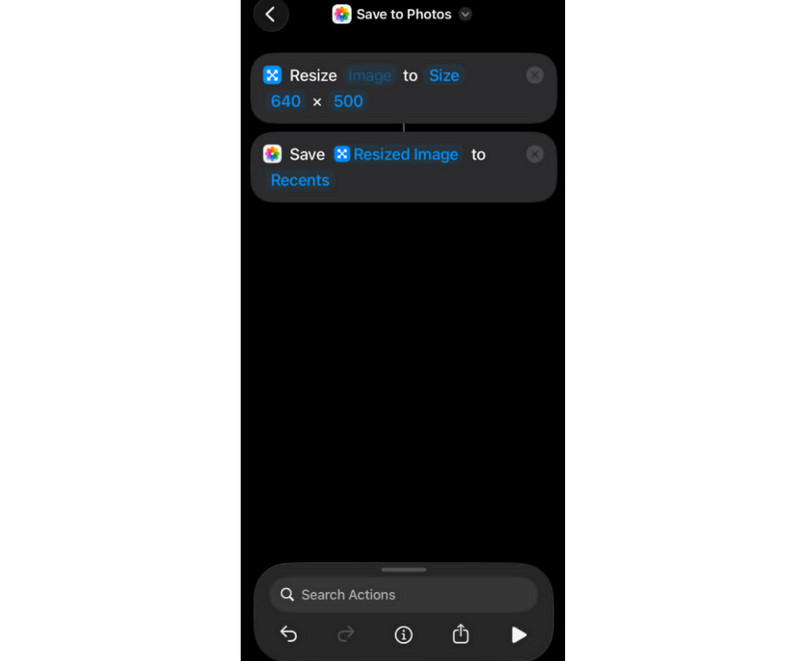
Step 1Launch the Shortcut app on your iPhone. Then, click the + button to create a new shortcut.
Step 2Add the action Resize Image from the list of available actions below. Then, you can start inserting your desired width and height.
Step 3You can add another action, like Save to Photo Album, to decide what happens to the resized photos. Finally, you can tap Done and run the shortcut when you need to resize your images.
Part 4. Resize Image on iPhone Using iOS 26's New Preview App
With the new iOS 26 version, Apple introduced the Preview app. It brings desktop-like editing features to the iPhone. With this app, you can open a photo and resize it by setting up your desired pixel dimensions. This app is powerful for users who need precise control over image size without relying on any third-party resizers. This is also ideal if you want to resize a photo for a passport, printing, a banner, or more. Learn the steps below on how to adjust the photo size on an iPhone.
Step 1Open the Preview and choose the photo you want to resize. You can also go to the photos, select the image, tap share, and select the Preview app.
Step 2Tap the Edit option and choose the Adjust Size from the Toolbar. With that, you can begin entering your desired pixel for your image.
Step 3The Preview app will instantly show you the result. Hit the Done button to start saving the resized image.
Part 5. Resize Image Using AVAide Tools
Do you want to resize your images online? In that case, you can use the two tools from AVAide. To learn all of them, see all the methods below.
1. Resize Image Using AVAide Image Upscaler
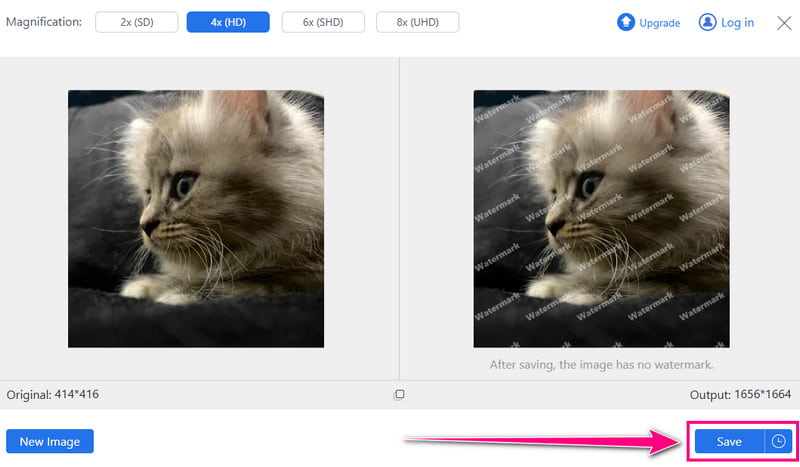
If your main goal is to upscale and increase the size of your images, feel free to access AVAide Image Upscaler. This tool is perfect when it comes to upscaling your pictures for up to 2×, 4×, 6×, and 8×. It also has a smooth upscaling and resizing process, thanks to its easy-to-use user interface. The tool can also support batch processing, making the resizing fast when dealing with multiple images. To learn how to upscale and resize your photos, see the instructions below.
Step 1Access AVAide Image Upscaler on your browser. Then, hit the Upload Your Image to start uploading the photo you want to resize.

Step 2You can now start resizing the image by choosing your preferred upscaling option from the Magnification section.
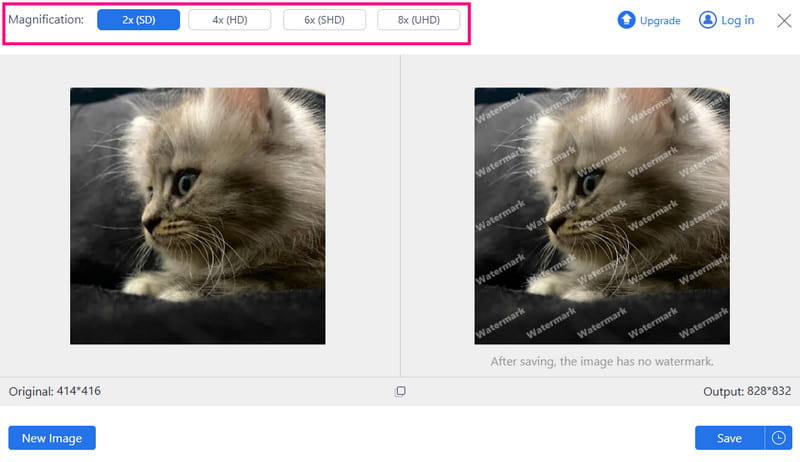
Step 3After the process, hit Save to start saving the resized image on your device.
2. Resize Image Using AVAide Image Compressor
Do you want to decrease the size of your image? In that case, you can try using AVAide Image Compressor. When it comes to compressing your images, there is no doubt that this upscaler is ideal since it ensures to give the result you want while maintaining the image quality. It can even let you compress multiple images at once by 50% in just a second, making it more powerful and reliable. So, if your goal is to reduce the size of your images, it would be better to try this tool right away.
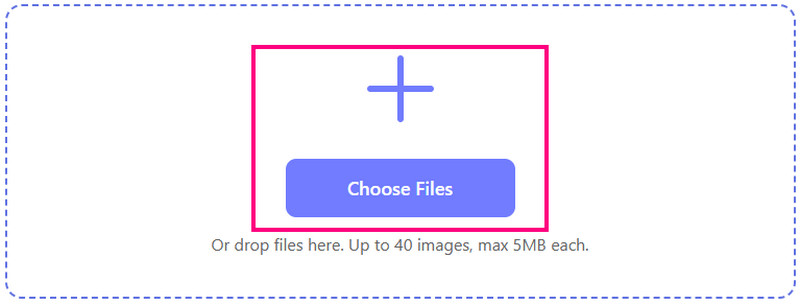
Step 1Navigate to the main website of AVAide Image Compressor. Then, click Choose Files to start uploading the images you want to deal with.
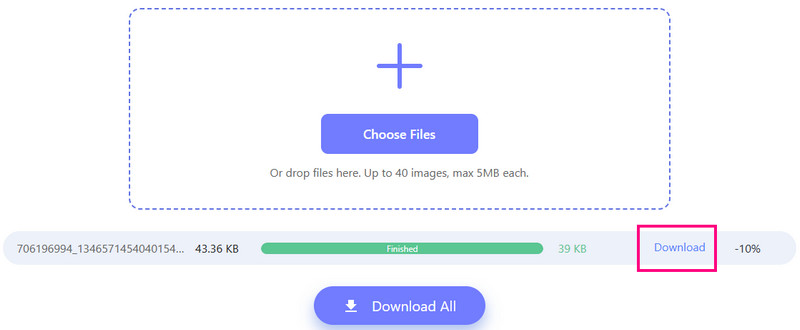
Step 2After the uploading process, the tool will automatically compress the images.
Step 3Click Download to begin saving the resized photo.
Pro Tips for Resizing Images on iPhone
- Change Camera Setting for Future Proof - You have to adjust your camera resolution in Settings > Camera to capture images at a size based on your needs.
- Use Optimize iPhone Storage - Always enable the Optimize iPhone Storage in the Settings > Photos to automatically store smaller versions of your pictures. At the same time, your device keeps the original resolution in iCloud.
- Duplicate Before Editing - Always duplicate your photos before editing. This way, you can still have the original photos for preservation purposes.
- Stick to Aspect Ratio - You have to maintain the aspect ratio when resizing your images. It ensures that your images are compatible with any social media platform.
Now you have learned how to reduce the photo size on your iPhone with the help of various applications on your device. You even learned some tips for better image resizing processes. Plus, if you want to upscale your images up to 8×, we suggest using AVAide Image Upscaler. It is perfect if you want to enlarge your images with the best quality. You can also use AVAide Image Compressor to reduce the file size of your photos. It lets you compress your images while preserving the quality. Thus, rely on these tools to get better versions of your images.
ABOUT THE AUTHOR


Our AI technology will automatically enhance the quality of your images, remove noise and fix blurry images online.
PROCESS NOW