Struggling with grainy or pixelated images? Noise reduction using Photoshop is the key to restoring clarity and detail, especially in low-light photos. In this tutorial, you'll learn everything you need to know about reducing image noise using Photoshop. We'll start by explaining what noise reduction is, then walk you through how to remove noise manually in Photoshop. Next, we'll look at the powerful AI Denoise tool found in newer versions. Then we will review the amazing AI Denoise tool that is available in the newer versions. Also, we will provide you with an uncomplicated method for removing noise from a photo if Photoshop is not your first option. Let's get started improving your images!
Part 1: What Is Noise Reduction?
Luminance noise and color noise are the two primary types of noise found in digital imaging. Luminance noise is a grainy appearance of brightness levels in the image, while color noise appears as irregular patches of red, green or blue. Both luminance noise and color noise reduce sharpness, accuracy and further degrade the image. Reducing noise during the editing stage will ensure clarity and visual intrigue.
Noise reduction works by interpreting the image and smoothing the areas that contain random pixel variations while carefully ensuring any necessary detail, such as edges, textures, and contrast, is preserved. By effectively reducing noise, the clarity of the image can be restored to a visually interesting image that does not have the artificial look of being blurry or altered.
In Photoshop, noise reduction tools allow users to manually adjust the level of luminance and color noise reduction, giving full control over the outcome. Recent iterations of Photoshop also incorporate AI-based technologies that will identify and eliminate noise with breathtaking accuracy.
Regardless of whether you're a photographer, an artist, or a fast-casual editor, understanding noise reduction is essential to photo quality. This is an important skill to have when dealing with a photo taken in low light, or an old camera, or in just a bad situation. Given the right tool and process, you can turn noise or poor-quality images into sharp, professional-quality images.
Part 2: How to Remove Noise in Photoshop
Removing noise in Photoshop is a simple yet powerful way to enhance photo quality, especially when dealing with grainy or low-light images. Photoshop provides built-in ways to decrease luminance and color noise while preserving important details that are crucial, such as edges and textures. In this section of the chapter, you will learn how to open and use all of Photoshop's noise reduction features. If you are trying to restore old photos in Photoshop, this comprehensive step-by-step guide will help you clean your images with little effort and ultimately create smoother and cleaner images by making some simple adjustments.
Step 1The first step is to launch Photoshop. After launching, the next step is to import the image you want to reduce noise.
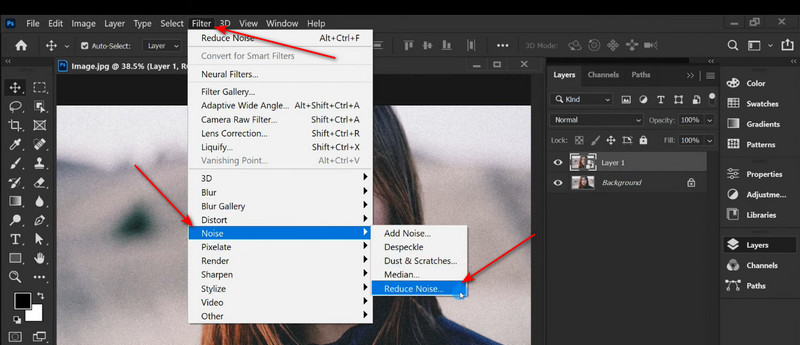
Step 2After importing the image, we will now start the process of reducing the noise from your image. Click on Filter > Noise > Reduce Noise, which will show another window where you will be able to adjust the noise, and click the Basic preset manually. After selecting the basic preset, click on OK.
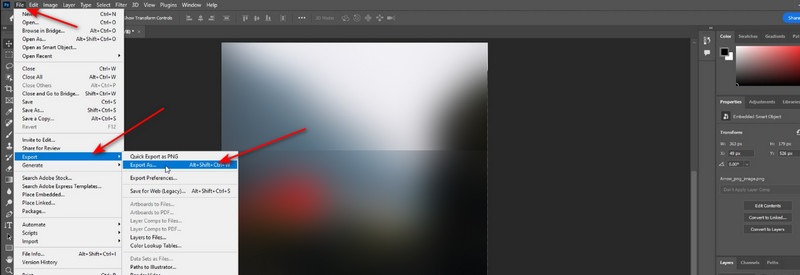
Step 3After you have made the adjustment for your image, you can now start exporting it. Click on File > Export > Export As, and another window will appear that lets you set the resolution you want. After setting the resolution you want, click on the Export button to export your image. Your saved image will be available in the local directory of the application.
Part 3: How to Use Photoshop AI Denoise
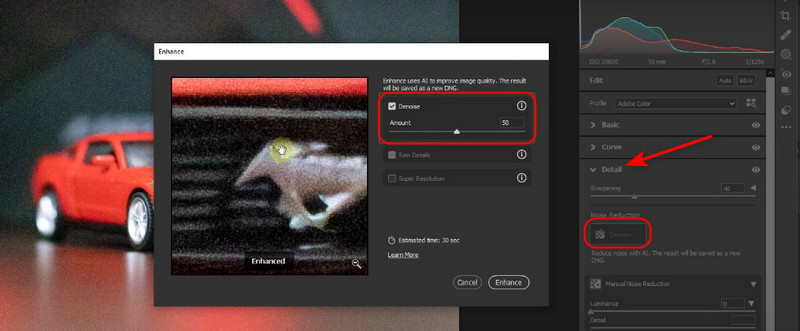
The AI Denoise tool in Photoshop is a game changer, as it uses artificial intelligence to remove noise from photos and increase image resolution in Photoshop more accurately and with less effort. It is useful for high ISO images or low light sources, as it saves the important aspects of the photos while getting the files much clearer. The AI Denoise feature scans the entire photo and intelligently applies adjustments to eliminate grain to improve image clarity. In this section, you'll understand how to use the AI Denoise feature in Adobe Camera Raw. From beginners to pros, the powerful AI Denoise feature will provide faster, easier, and better noise reduction than anyone has ever had.
Step 1The first thing you want to do is import the raw image into Photoshop. You can do that by dragging the file into the software or manually importing it through the software.
Step 2After you have imported the raw image, you can now start denoising it. Start by clicking on Detail > Denoise, which will open another window that can be toggled to minimize your image noise. We recommend that you set it to 85.
Step 3After you have denoised your image, you can export it. Your exported image will be saved in the software's local directory. Just open that folder to view your edited image.
Part 4: The Easiest Photoshop Alternative to Denoise a Photo
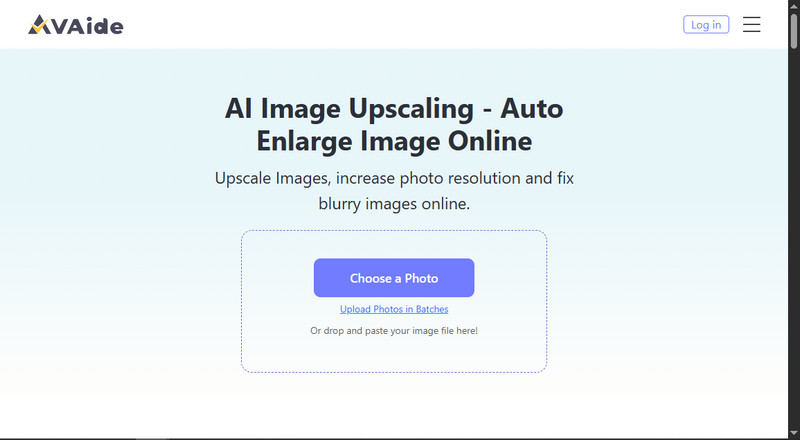
Not everyone can access Photoshop or has the time to learn its complicated tools. If you want a simpler and quicker way to reduce noise in your photos, AVAide Image Upscaler is a great option. This easy-to-use online tool uses AI technology to automatically improve and clean your images, removing unwanted noise while keeping sharp details intact. Whether you're fixing blurry photos, low-resolution images, or grainy shots taken in poor lighting, AVAide Image Upscaler can do the job with just a few clicks, no technical skills required. It's ideal for beginners, casual users, or anyone who wants quick results without installing heavy software. In this section, we'll introduce you to how AVAide works and show you how to use it step-by-step. If you want clean, crisp images without the hassle of Photoshop, this is the easiest solution to try.
Step 1Launch Software
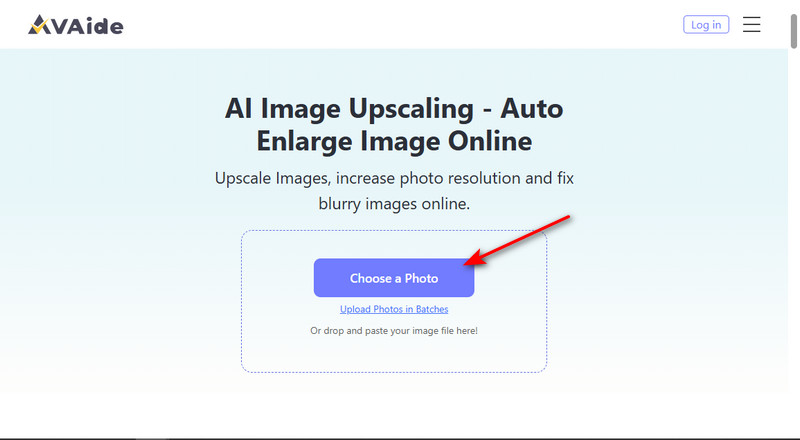
The first step is to access the online software. You can accomplish that by clicking the anchor text above. Be aware that there are lots of tools like this one, so refer to the photo given below to access the right one.
Step 2Import Raw Images
After accessing the right tool, make sure you have a stable connection for a fast denoising process. The next step is to import the raw images you want to denoise. Do that by clicking the Choose a Photo button in the center of the site. Doing this will open your local directory, where you can find the raw images.
Step 3Download Image
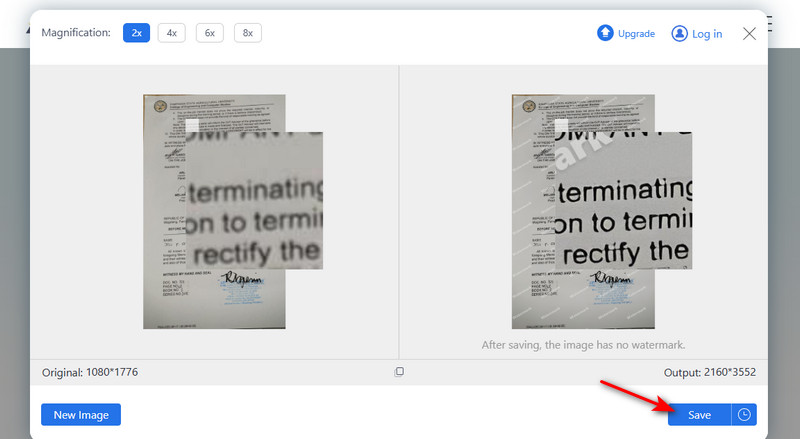
After you have upscaled and denoised the raw image, you can now save the image. Do that by clicking the Save Image button in the bottom-right corner of the site. Your downloaded images will be available in your download folder.
Learning Photoshop AI denoise and its alternatives makes it easy to turn grainy images into clear, high-quality photos. Whether you prefer manual editing, AI tools, or quick online solutions, these methods help restore detail and improve overall image clarity.

Our AI technology will automatically enhance the quality of your images, remove noise and fix blurry images online.
PROCESS NOW