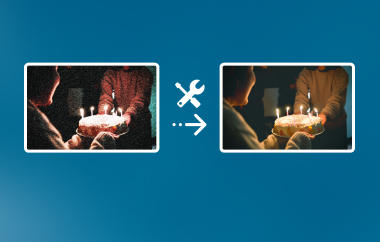
Old photos hold memories of loved ones and special moments. But time can cause fading, scratches, and damage. So, learning how to restore old photos in Photoshop lets you save these memories digitally. You can repair, enhance, retouch, and even colorize old images.
In this post, you will learn step-by-step how to bring your photos back to life and preserve them for the future.
Part 1. Detailed Guide to Restore Old Photos in Photoshop
Learn how to restore old photos in Photoshop and bring damaged images back to life with clear, detailed steps. This guide helps you improve quality, repair imperfections, and make your pictures look fresh and natural again.
Step 1Scan the photo in high resolution before you edit it. A setting of 300 to 600 dpi helps keep small marks and face details clear. Save the file on your computer, then open it in Adobe Photoshop.
Right away, duplicate the Background layer. Keep the original layer hidden so you always have a clean backup if you need to compare your work later.
Step 2Pick the Crop tool and remove empty borders, torn edges, or dark corners. If the photo looks tilted, drag outside the crop box to rotate it until the image looks level. Press Enter when it looks right.
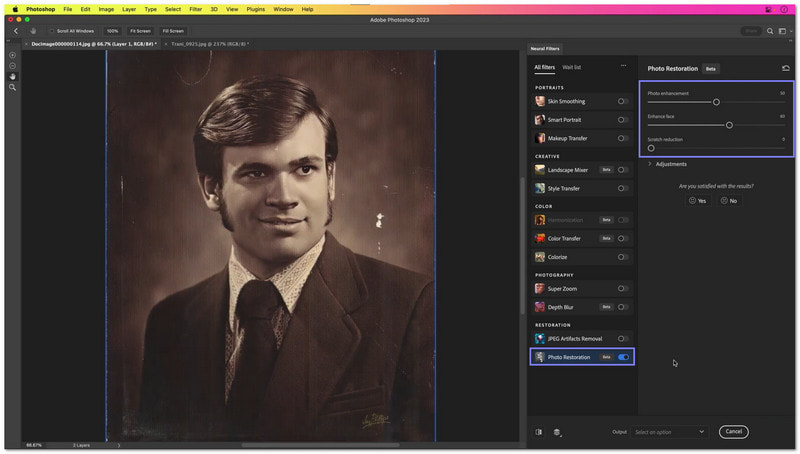
Step 3Go to Filter > Neural Filters > Photo Restoration. Turn the filter on and start with Photo Enhancement to improve the full image. Use Enhance Face if the photo has a person and the face looks soft or faded. Move Scratch Reduction to clean small lines and dust marks. If the image looks grainy, add a little noise reduction.
Step 4For small dirt marks, cracks, or spots, use the Spot Healing Brush Tool. To preserve the healthy areas, only click or drag the damaged areas. Use the Clone Stamp Tool to replicate larger tears from a clean nearby area. When working, zoom in to carefully correct minor details.
Step 5Check the image at full size before saving. If the result looks good, merge the edited layers or keep layers if you may edit again later. Open File > Save As and choose a format like JPEG for sharing or PSD for future editing. Save a new copy so your original scan stays safe.
Part 2. Manual Fine-Tune Old Photos in Photoshop
Master how to restore old pictures in Photoshop by manually refining them. This guide will teach you to fix small details, adjust colors, and enhance every part of the image for a polished, realistic result.
Step 1Choose the Spot Healing Brush Tool and paint over dust, tiny scratches, or marks. It fixes details that automatic filters miss and keeps the photo looking natural.
Step 2For areas that are torn or worn, use the Clone Stamp Tool. Click on a spot that is clean while holding down Alt. Paint over any damaged areas after that. To create seamless fixes, it replicates texture from high-quality areas.
Step 3Add a Levels adjustment layer to fix brightness and contrast. Then, use Hue/Saturation to restore faded colors. Small tweaks here make the photo look lively and balanced.
Step 4Go to Neural Filters > Colorize for quick automatic color. Or paint color manually on a new layer with the Brush Tool and set the layer mode to Color. It gives more control over shades and tones.
Step 5 Zoom in to inspect faces, edges, and backgrounds. Fix any rough spots with the Spot Healing or Clone Stamp tools. Once satisfied, please save your work as a new file so the original scan stays safe.

Part 3. Downsides of Photoshop Old Photo Restoration
Photoshop's old photo restoration is powerful, but it has some important drawbacks. Knowing them helps you avoid mistakes and keep your photos safe.
1. AI Can Be Inaccurate
The Photo Restoration Neural Filter works fast, but it can change faces or details too much. Overuse can make skin look fake or plastic. Images may look oversharpened or unnatural.
2. Manual Fixing Takes Time
Fixing scratches, dust, and cracks by hand is slow. Using the Clone Stamp or Patch Tools takes hours on damaged photos. It is easy to remove real details accidentally.
3. Hard to Learn & Expensive
Photoshop is complex and can take time to master. The subscription is costly for casual users. Auto tools often do a mediocre job compared to careful manual editing.
4. Risk of Losing Authenticity
Too much editing can change the photo's original look. Removing grain or smoothing textures can make the photo look digital. It may cause it to lose its historical charm.
5. Technical Limits
Low-resolution scans limit what you can restore. Without careful layer management, edits can overwrite original details.
Part 4. Easier Alternatives to Restore Old Photos
You have learned how to restore old photos using Photoshop, and we cannot deny the fact that it can be hard for beginners. That is why we look for easier alternatives you can consider to restore your old photos. Explore them today!
1. Remini

Turn blurry or damaged photos into HD images instantly. Remini uses AI to restore faces and details, making old family pictures look fresh and clear. It also helps you retouch a photo easily. It is popular worldwide and simple for anyone to use. With just one tap, old memories become crisp and vibrant, perfect for sharing or saving.
The key things that make it worth using:
- Improve old cameras or vintage photos.
- Increase pixel count for clearer portraits.
- Unblur and sharpen faces automatically.
- Repair scratches, dust, and low-quality images.
2. AVCLabs Photo Enhancer AI
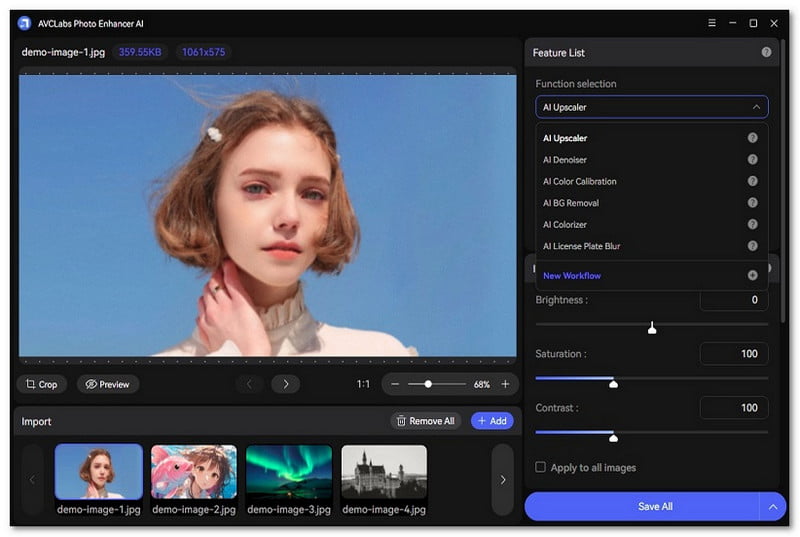
This powerful AI program fixes many photos at once. It enhances, denoises, colorizes, and upscales images with minimal effort. AVCLabs works for old, pixelated, or faded photos and preserves natural textures. You can adjust workflows for batch editing, saving time while keeping results consistent.
The key things that make it worth using:
- Batch processing for many photos.
- Colorize black-and-white photos quickly.
- Enhance image details up to 4K, 8K, or 16K.
- Remove noise while keeping natural textures.
3. Picsart - Photo Restoration
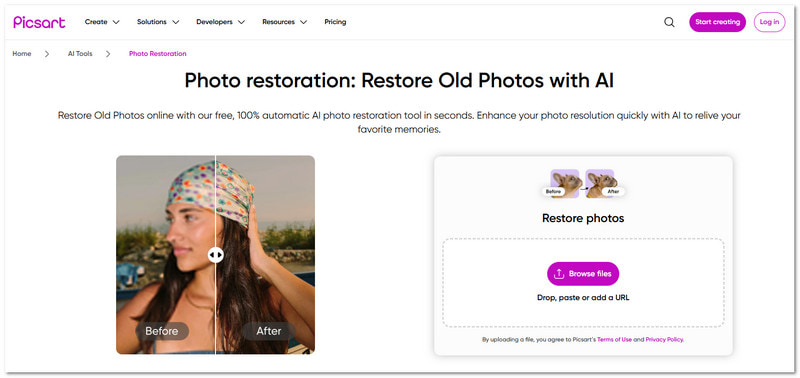
Picsart is known for fast, automatic AI restoration. Upload an old photo and let the AI clean scratches, sharpen faces, and correct color. You can also add color to black-and-white photos or fix low-resolution images instantly. It is simple for beginners and works on mobile or web browsers.
The key things that make it worth using:
- One-click batch restoration.
- Colorize black-and-white photos.
- Fix faded and low-quality images.
- Automatic scratch and blur removal.
Bonus Tool: Upscale Images with AVAide Image Upscaler
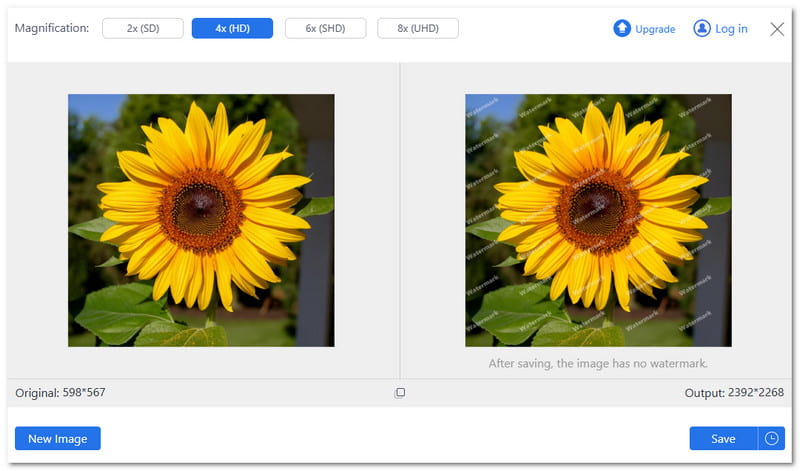
Ever tried printing an old photo or sharing a small image online, only to find it blurry and pixelated? AVAide Image Upscaler makes that problem disappear.
One-click, it can upscale photos up to 8×, giving bigger, sharper results. It also fixes blur and corrects colors while enlarging images, so every detail looks natural and clear. If you like, you can batch upscale many photos at once to save time.
Best of all, it is free online and works without installation. It makes high-quality image enhancement simple and fast for anyone.
The main functions that are worth knowing about:
- Supports many image formats like JPG, PNG, BMP, and more.
- No watermarks added, so your images stay clean and ready to use.
- AI immediately enhances photo quality with no experience needed.
- Preview results before and after upscaling to see the improvements.
- Completely safe and private, your photos and data are protected.
How was your experience restoring old photographs in Photoshop? Do you find it easy or hard? If it feels hard, you can try the easier alternatives we mentioned. Plus, if you need to make your image bigger or clearer, you can trust AVAide Image Upscaler. It can enlarge your picture up to 8× without losing quality!
ABOUT THE AUTHOR


Our AI technology will automatically enhance the quality of your images, remove noise and fix blurry images online.
PROCESS NOW