Most PowerPoint background problems are not tool failures. They come from low image contrast, compressed files, or using the wrong method for the image type. Choosing the right one prevents rough edges and blurred outlines. This guide explains PowerPoint remove the background from an image in a practical presentation design view. It starts with preparation, then walks through each method step by step.
Part 1: Important Preparation Before Removing Background in PowerPoint
Good preparation is the key to clean results. Most mistakes happen before any tool is used. This section supports how to remove picture background in powerpoint by focusing on image readiness rather than editing steps.
1. Choose an Image that PowerPoint Can Process
Not every image is suitable when you want to remove the background from an image in PowerPoint. Clarity and high-resolution pictures are the best. The subject ought to be distinct and separate against the background in terms of color, light, or concentration. The backgrounds in solid color are the easiest to work with. Soft or blurred background photos also do well. Active images, which contain numerous sharp details, tend to yield poor quality with jagged edges.
2. Use the Correct Image File Format
File format affects how to remove the background from an image in PowerPoint successfully. PowerPoint does not support background removal for vector files such as SVG or AI. The safest ones are JPEG and PNG. PNG is also suggested when you require transparency upon editing, as it maintains clean edges and does not create background artifacts.
3. Insert the Image Properly into PowerPoint
Correct insertion improves accuracy when learning how to remove background from a picture in PowerPoint. Always use the Insert tab to add images from your computer. Pasting pictures cannot be done through browsers or emails because they are usually compressed. Replacing the original file maintains the picture quality and enhances the detection of the background.
After these procedures, the picture can be prepared to have the background removed with the PowerPoint application.
Part 2: Remove Background from Image in PowerPoint with Set Transparent Color
This method works best for images with a single, solid background color. It is quick and effective for simple visuals like icons or logos. This section explains powerpoint picture background removal using the Set Transparent Color tool.
Step 1Click on the image you want to edit. Once selected, the Picture Format tab appears in the PowerPoint ribbon. This tab contains the image editing tools needed for background changes.
Step 2In the Picture Format tab, find the Color option. Click it to open the dropdown menu where color and transparency tools are located.
Step 3From the Color dropdown menu, select Set Transparent Color. The cursor will change into a small pen button, showing that PowerPoint is ready to remove a specific color.
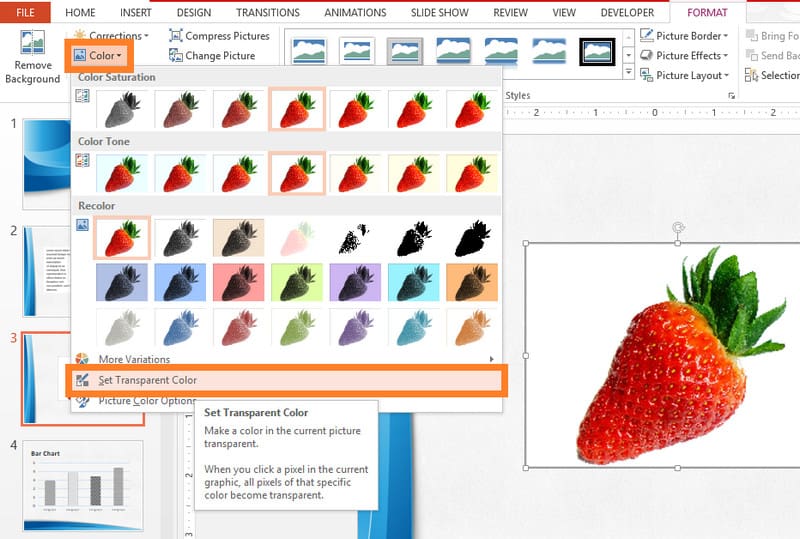
Step 4Move the cursor over the image and click on the background color you want to remove. PowerPoint will make that color transparent and reveal the slide background underneath. For better accuracy, click an area with a flat and even color. You can use these methods to remove the background from a passport photo.
Part 3: Remove Background from Image in PowerPoint with Remove Background
Some images have backgrounds that are too detailed for color transparency. In these cases, PowerPoint uses automatic detection to separate the subject from its surroundings. This method allows manual correction when the first result is not accurate. This section explains how to make a picture background transparent in PowerPoint using the Remove Background tool.
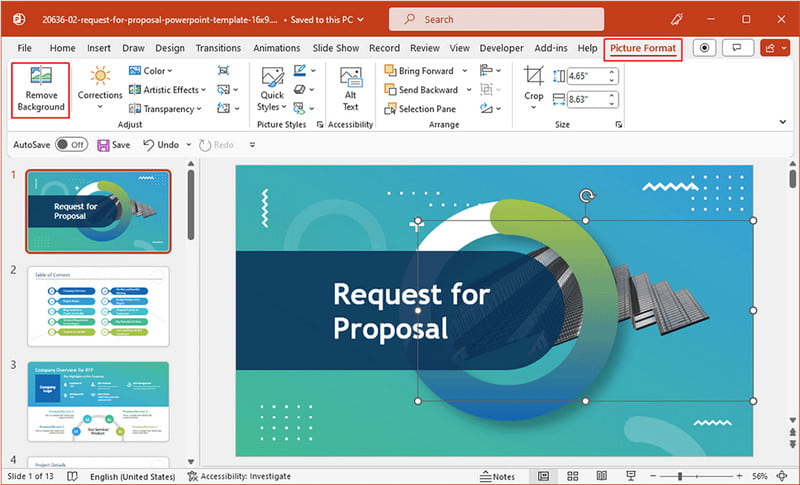
Step 1Click on the picture you want to edit so PowerPoint can activate the image editing options. Go to the Picture Format tab in the PowerPoint ribbon and select Remove Background. PowerPoint will analyze the image and attempt to separate the subject from the background.
Step 2The background area is highlighted in magenta. This initial selection may remove important details or leave unwanted background areas visible. Reviewing this step is important before finalizing the result.
Step 3Use Mark Areas to Keep to protect parts of the subject. Use Mark Areas to Remove to clear unwanted background areas. Click for small corrections or click and drag for larger sections. PowerPoint updates the selection as you adjust it.
Step 4When the selection looks clean and accurate, click Keep Changes. PowerPoint removes the background and leaves only the selected subject, ready to use on any slide.
Part 4: The Fastest Way to Remove Image Background Free Online
How do I make a picture background transparent in PowerPoint? If the tutorial above is not enough, then we suggest that you use a dedicated online background eraser, namely AVAide Background Eraser. It is a no-installation-needed tool that uses AI to detect and remove the background of any images you have in a single click. After removing the background, you can layer it on another picture to use it as a background or set a solid color and blend it naturally. So, if you want to know how to do it, you can copy the steps below.
Step 1You can go to the official webpage of the tool by searching for its name on a browser. Once the result appears, click the AVAide Background Eraser, and tick the Choose a Photo button to import the image you want to edit here.

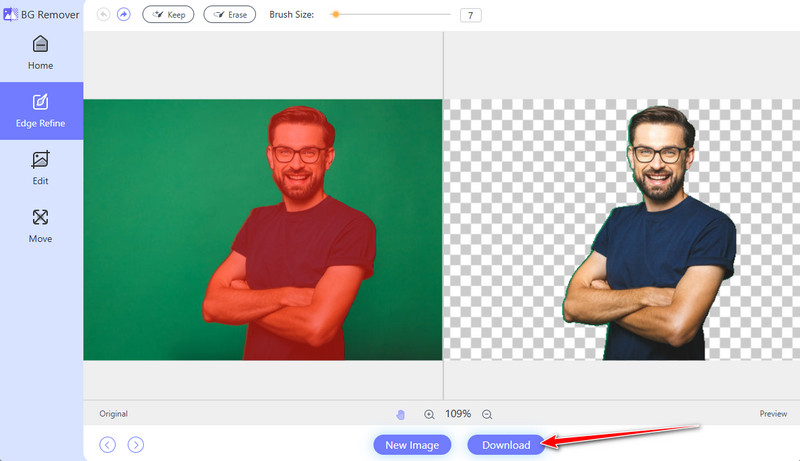
Step 2Wait for several seconds as the AI automatically detects the subject, and after that, you will get the result of what it looks like on the preview side. If you want to do a manual highlighting of the subject, you can click the Keep and adjust its brush to highlight it on the other side.

Step 3Now that you have finished highlighting the subject in the image, you are ready to proceed with exporting. Tick the Download button to get the final result of the image where the background is transparent for free.
Just like what we said earlier, if you want to add a background to a picture, then you need to Edit and click Image or Colors as a background for the image. Not only is it the best in removing the background, but it also offers more features that you can freely use, even if you are a newbie in editing.
Removing backgrounds makes your slides cleaner and more professional. It is possible to achieve accurate results by preparing pictures and selecting the appropriate technique. Color transparency works well with simple backgrounds, whereas the complex image can be enhanced with the help of the Remove Background tool. Using PowerPoint to make image backgrounds transparent helps your images fit seamlessly into any slide, improving clarity and visual appeal without extra effort.
ABOUT THE AUTHOR


Uses AI and automated background removal technology to capture complex backgrounds from JPG, JPEG, PNG, and GIF.
PROCESS NOW