When a photo is blurry and unfocused, it is usually caused by poor lighting or an incorrect focus point. In some cases, the details of the unfocused image can still be fixed. In this guide, we will explain why it happened, the types of blurriness, and how to improve using the best available tools. You can learn how to fix it with a few simple steps to avoid taking unfocused images in the first place.
Part 1. Why Do Images Become Unfocused?
Images became out of focus for many reasons. We have listed the most common reasons below to help you understand why they lose their sharpness.
• Camera Shake
Camera shakes do happen when the camera is moved while taking a photo. Even a small movement can make the image look blurry, which is why professionals use a tripod to hold the camera steady and additional stabilizer arms.
• Incorrect Focus Point
When the camera is out of focus on the wrong part of the image you want to capture, this problem can occur. For example, the background is too clear because the focus is set to it, but the main subject looks blurry. Choosing the correct focus point can help you keep the subject sharp.
• Low-Light Situations
Photos taken in low-light conditions can also be blurry. The camera may need more time to capture enough light, making small movements visible after you take a photo in night mode. Adding more light can produce a sharper image of the main subject.
• Motion Blur
This issue happens when you capture a high-moving subject. This is a common issue when photographing people, pets, or moving objects. Using a faster shutter speed can help you reduce the motion blur.
• Shallow Depth of Field
Most creatives use this to capture a portrait, keeping a small part of the image in focus. While it is useful, some subjects may appear somewhat unfocused if the focus is not placed correctly.
Part 2. What Types of Blur CAN Be Fixed
Not all the blurring is the same as the other. Some of its types can still be improved with image editing tools, while others that are too severe might require more extensive treatment. Knowing the type of blur can help you choose the right way to fix an out-of-focus image.
1. Fixable Blur Types
• Slight Motion Blur:
AI enhancement tools or sharpening can often help reduce motion blur. These tools can help to bring out more clarity and details in edges.
• Out-of-Focus Blur:
Fuzzy images can be improved to some degree. AI tools can help hone the primary subject and help create a clearer image.
• Lens Distortion Blur:
Certain lenses will cause portions of the picture to be soft or distorted. There are lens correction tools available that can help minimize these issues and enhance image clarity.
• Chromatic Aberration:
Chromatic aberration is the presence of minute color halos around objects, particularly at strong contrast. These color fringes can be edited out or minimized.
2. Unfixable or Difficult Blur Types
• Severe Motion Blur:
Excessive motion blur can defocus a picture. It can be enhanced with editing tools, but not always.
• Low-Resolution Blur:
If the image is very small or of very low resolution, it will not be possible to recover anything from it. Upscaling tools may enlarge it and increase its detail, but it can still appear soft.
• Overexposure/Underexposure Blur:
Either the brightest or the darkest images can miss out on important information. These details might not have been recorded in the original photo and could not be fully retrieved using editing tools.
• Intentional Background Blur (Bokeh):
Background blur can be intentional to help the foreground subject pop. Unless the right part of an image is blurred, this is not typically something that has to be corrected.
Part 3. Fix Unfocused Images Online Free with AI Tools
Do you want to fix the unfocused image using AI tools without needing to download software on your device? If so, try using these web tools that are already available and ready to help you.
1st Way. AVAide Image Upscaler
For quick improvements in image quality, blurriness, and low resolution, the AVAide Image Upscaler is the best choice. It is an AI-powered web tool that automatically analyzes what is wrong with the image, sharpens details, and reduces the soft look usually seen in low-resolution images. It is useful for portraits, and the workflow is simple. There is no need to create an account or download it, as it is already available online.
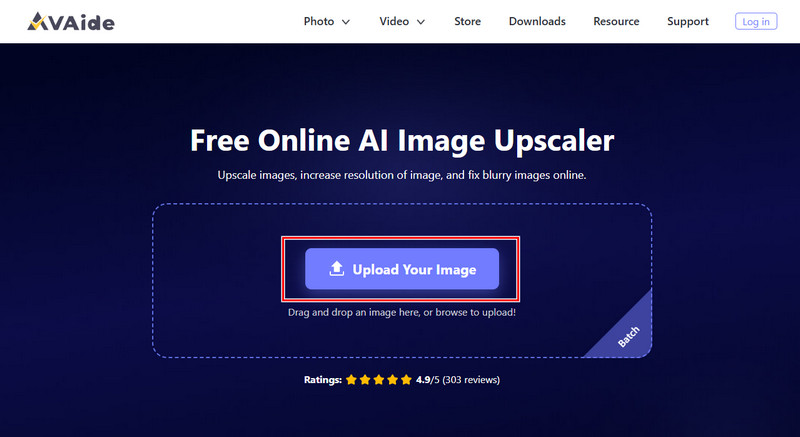
Step 1Go to your browser, search for its official page, and open it. Tick the Upload Your Image button to import the image that looks unfocused.
Step 2After uploading, select the magnification level you want to apply to your image. You can take a quick preview of the upscaled version by clicking 2x, 4x, 6x, or 8x.
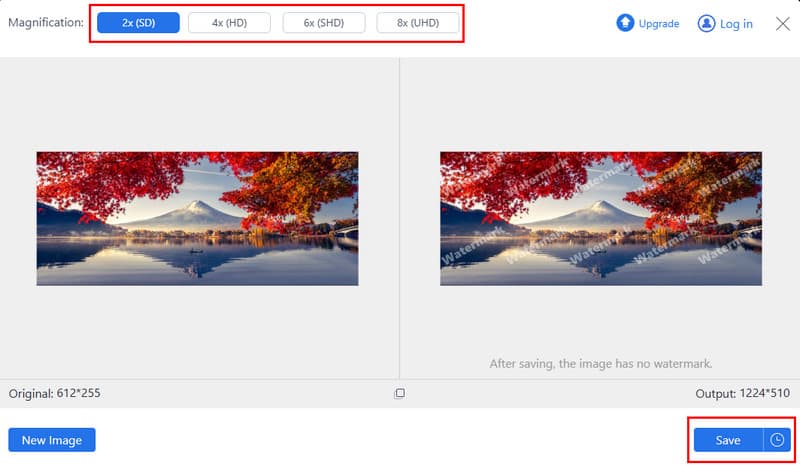
Step 3Finally, click the Save button to download it on your device and get the final result.
2nd Way. TopazLabs Image Upscaler
Topazlab Image Upscaler is a web-based version of Gigapixel, designed to quickly improve and enlarge images directly in the browser. This web tool uses the standard version of Topaz's Upscaler, which increases an image's resolution, sharpens soft details, and makes low-quality images clearer. Overall, this works best for fixing images that look slightly blurry or unfocused. But it does not offer the same level of control as the desktop version, and it requires you to subscribe to a plan before you can export it.
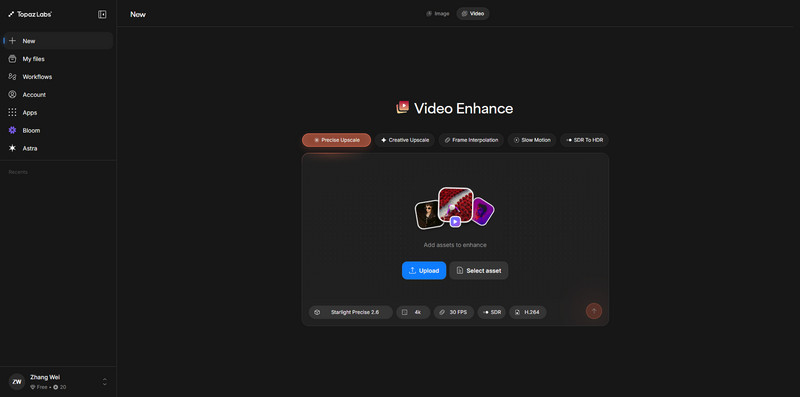
Step 1Open the Topaz Image Upscaler and log in to your account here. Then click the Upload button to import the blurred image you want to upscale here.
Step 2Point your cursor to the scale and select the level you want to apply to your image.
Step 3Finally, click the up button to start the processing.
Part 4. Fix Unfocused Images with Professional Software
When an image is out of focus, you need to fix the problem immediately using the professional software available on Windows and Mac. Here are the two ways you can do it.
1st Way. Affinity Photo
Affinity Photo is a professional photo editor, but it also has a feature you can use to improve soft, slightly blurry images. Its sharpening options give you different ways to make the details and edges appear sharper than before. It is particularly well-suited for controlling an image's sharpness when applied as a non-destructive live filter. However, it cannot fully recreate information that the camera failed to capture.
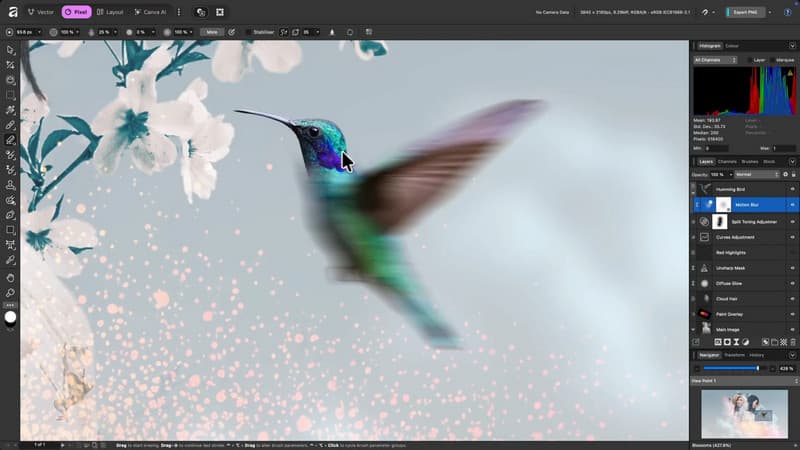
Step 1Import the image into the downloaded Affinity Photo, then click the Layer > New Live Filter Layer > Sharpen > Unsharp Mask.
Step 2Then a new filter layer will show above your image with the Layers Panel, and a slider window will appear.
Step 3Here, adjust the radius, factor, and threshold to fix the unfocused image.
2nd Way. GIMP
GIMP is designed to fix unfocused images that you usually have and need to sharpen. It is a great choice for sharpening soft images because of its Sharpen (Unsharp Mask) filter. With that filter, you can control the Radius, Amount, and Threshold to determine how strongly the image is sharpened and which areas are affected. Dealing with this editor is like a puzzle, especially if you are a beginner. That is why you might experiment with sharpening settings if it is your first time. But with this guide, you can do it successfully.
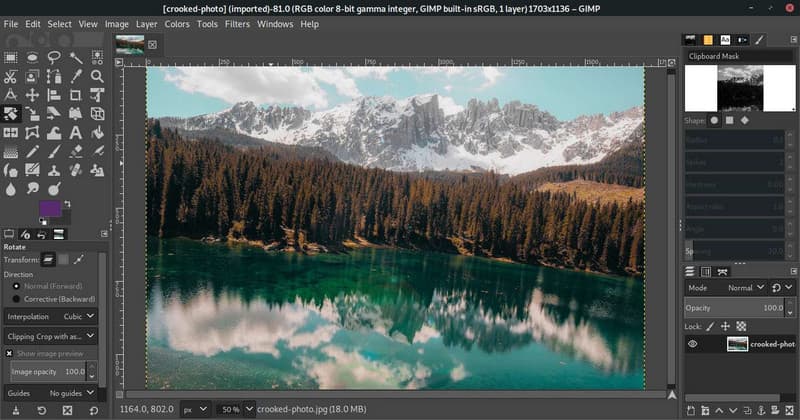
Step 1Launch the software, click Open Image to import the unfocused image, then go to Layer > Duplicate Layer.
Step 2Go to Filters > Enhance > Sharpen to open a dialog box where you can tweak a few settings to make the image look sharper.
Step 3Once you are satisfied with the result, click the File tab and save it.
Part 5. Fix Unfocused Images on Mobile
Having trouble with the unfocused image you captured on your Android or iOS device? Well, try using these available tools to fix the issue.
1st Way. Remini
Remini is known for its photo enhancement feature, which is designed to improve blurry, low-quality, or out-of-focus images you have saved on your phone. With its Unblur & Sharpener feature, you can address focus issues, while the Photo Enhance feature improves an image's overall clarity and detail. Although it uses AI enhancement, the result may still look different from the original you uploaded, especially if the source is extremely blurry.
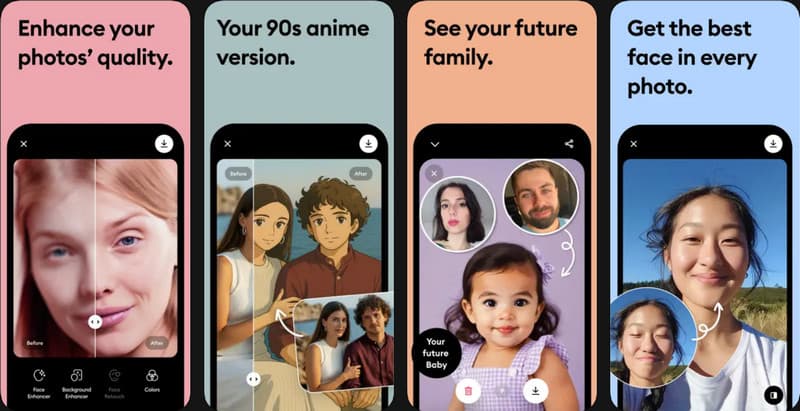
Step 1Open the Remini app on your phone and select the photo that you want to improve from your Photos or Albums.
Step 2Choose the Unblur & Sharpener feature in the app, and the AI will analyze the photo to improve its clarity.
Step 3Compare the enhanced version to the original, and save it.
2nd Way. Snapseed
Snapseed is a free mobile photo editor that lets you beautify an image and control how much sharpening is applied. Its Details tool includes all the necessary tools, such as Sharpening and Structure, to sharpen details and bring out texture without directly affecting the object's edges. After applying the changes, you can inspect the image on its built-in loupe while editing. However, the app does not use an AI feature to help you unblur an image.
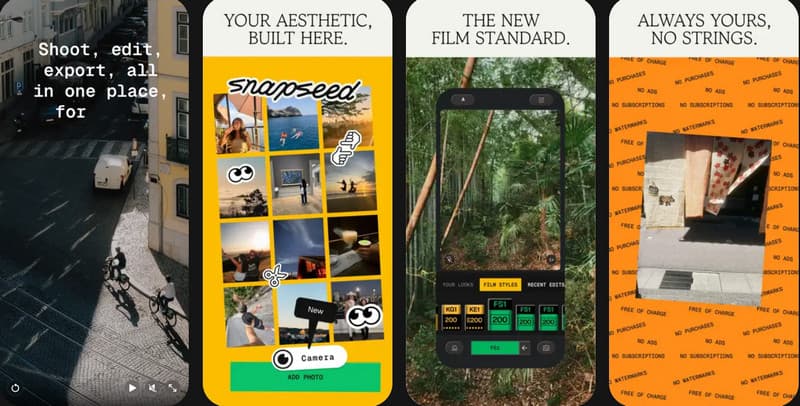
Step 1Open the Snapseed app on your phone and tap the screen to import the image you want to fix. In the Tools section, select Details and choose Sharpening.
Step 2After choosing Sharpening, swipe right to increase the image's sharpness gradually. Then adjust the image's structure if it looks soft by slightly increasing it to bring out more texture and detail.
Step 3Take a quick look at the details using a loupe, then tap the checkmark to apply the edits.
Part 6. How to Avoid Unfocused Images in the First Place
To avoid out-of-focus images, follow the key points highlighted here.
1. Tap the Subject to Focus
With your camera pointed at the subject, you only need to tap the main subject on your screen to focus on it. This helps the camera focus on the area you want to keep sharp.
2. Keep Camera Steady
Most images captured in a blur come from a shaky camera; that is why you need to hold your camera with two hands to stabilize it, or use a tripod and set a timer to capture it.
3. Clean the Lens
Often, fingerprints, dust, and dirt on the lens can make the photo look hazy or soft. To avoid this, you need to wipe the lens gently with a clean microfiber cloth.
4. Do Not Rely Too Much on Digital Zoom
Heavy digital zoom can reduce overall image quality and make details appear too soft. Instead, move closer to the subject or use optical zoom, if your camera supports it, to avoid these things happening.
You can now fix an out-of-focus image using the tips and software we have mentioned here. Although AI upscalers and photo-editing software can improve blurry photos, capturing a sharp image from the start can save you time and effort. With these practices, you can avoid getting unfocused images and get better results every time.
ABOUT THE AUTHOR


Our AI technology will automatically enhance the quality of your images, remove noise and fix blurry images online.
PROCESS NOW