Distorted photos can be frustrating, whether caused by compression issues, a poor scaling method, or an incorrect aspect ratio. The good news here is that we are here to help you fix your distorted images for a better viewing experience. So, if you need the best tutorial, read here and learn all the methods to fix distorted images online and offline.
Part 1. Understanding the Types of Image Distortion
Before learning how to fix distorted images, you must first know what the types of image distortion are. To learn all of them, you can read all the details in this part.
Lens Distortion
There are two types of distortion in Lens Distortion. The first one is Barrel Distortion. You will see straight lines and curves outward, making the photos bloated in the center. The second one is Pincushion Distortion. The lines bend inward, giving a pinched effect in the middle part of an image.
Perspective Distortion
It occurs when the camera is too close to the subject. The objects appear skewed, stretched, and unnaturally large.
Chromatic Aberration
This distortion is caused by lenses failing to focus on all colors at the same point. It is also more noticeable in cheaper lenses or extreme zoom shots.
Pixelation / JPEG Artifacts
It happens when the photos are compressed or enlarged too much. The image also looks blurry, with blurry details, blocky edges, or has a checkered pattern.
Vignetting
The image has dark corners compared with other photos. Lens design, improper settings, and filters can cause it.
Part 2. Fix Distorted Images Online for Free
How to fix distorted photos quickly and easily? Check the methods in this section and learn to fix your images online.
Method 1. Fix Distorted Pictures Using AVAide Image Upscaler
One of the most reliable online-based tools you can use to fix distorted images is AVAide Image Upscaler. This tool is perfect if you want to deal with your blurry images and pixelation and increase the resolution. The good thing here is that its upscaling process is simple and smooth, making it an ideal tool for users. It can even handle batch processing, allowing you to fix multiple images while saving more time. Thus, if you need the best way to fix a distorted photo, consider using this tool.
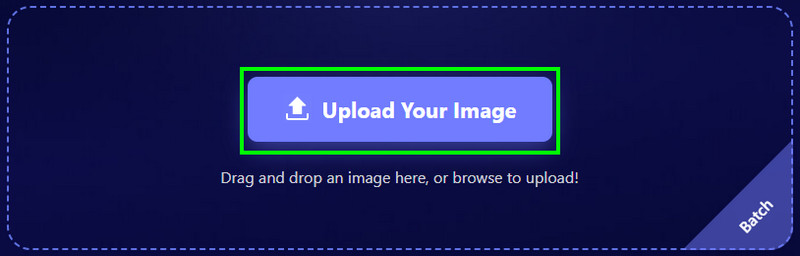
Step 1Access AVAide Image Upscaler on your browser. Then, tap the Upload Your Image button to start uploading the distorted image.
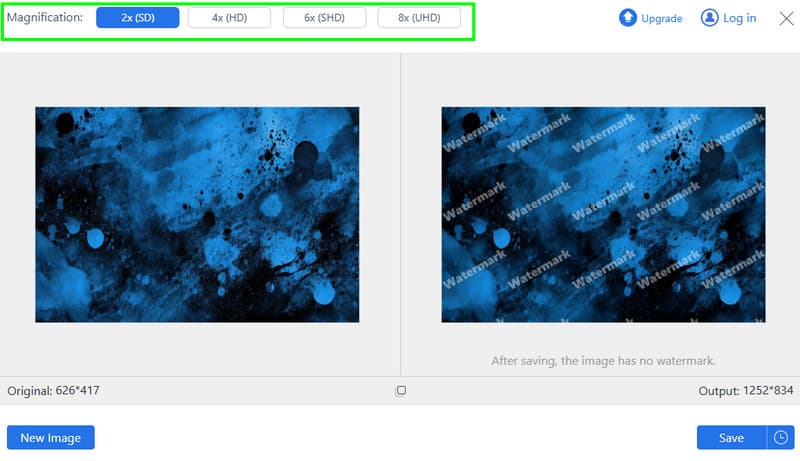
Step 2Proceed to the Magnification section and choose your preferred resolution option. You can upscale your images up to 2×, 4×, 6×, and 8× better.
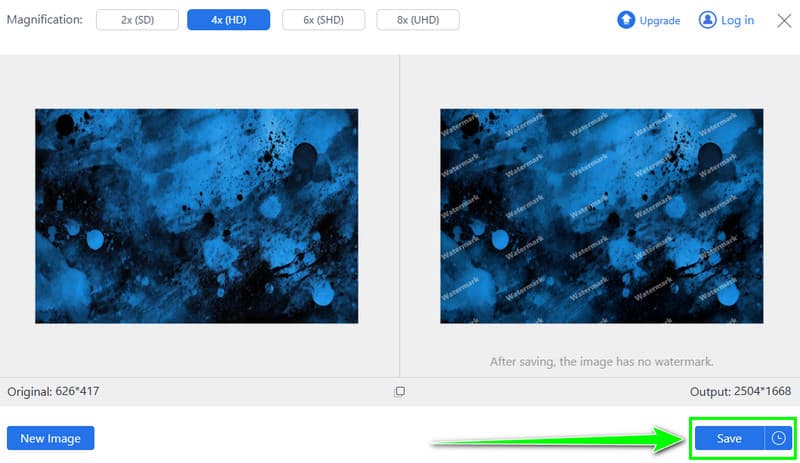
Step 3Finally, click Save to start saving the enhanced image on your drive.
Method 2. Fix Distorted Photo Using LetsEnhance.io
LetsEnhance.io is also perfect if you want to fix a blurry picture online. You can even rely on this tool if you want to deal with any distortion types. It also has a simple layout and a smooth enhancement process, allowing you to get the result you need after the process.
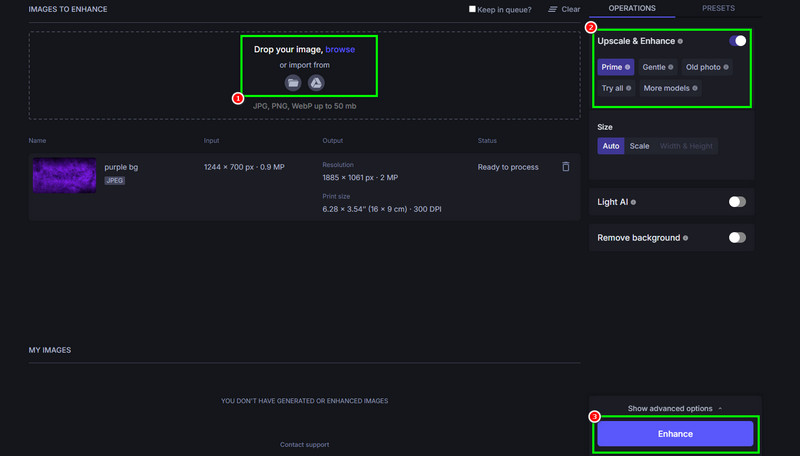
Step 1Go to the website of LetsEnhance and start uploading the image.
Step 2From the right interface, you can start choosing your preferred enhancement model. You can also select the size for the image.
Step 3Start the enhancement process by clicking the Enhance button below.
Method 3. Fix Distorted Pictures Using Pix Fix
Another online tool you can use is Pix Fix. If you want an automatic enhancement process to fix distorted images, then this tool is suggested. What makes it powerful is that it has a fast process and ensures an accurate result. You can even fix the picture quality for a better viewing experience. To fix distorted images online, check the steps below.
Step 1From the main website for Pix Fix, start uploading the distorted image.
Step 2After uploading the photo, the tool will start enhancing and fixing the distorted image.
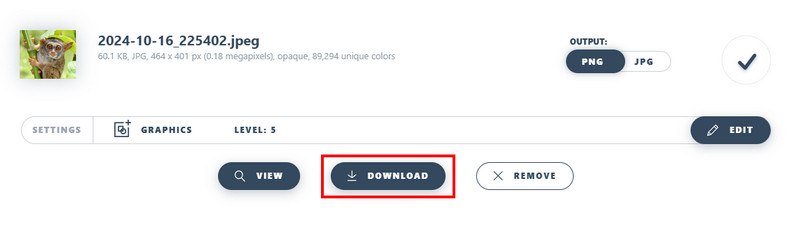
Step 3After the process, you can tap the Download button to start saving the fixed image on your computer.
Part 3. Fix Distorted Images Using Photoshop
If you want to fix distorted images offline, you can access Photoshop. This advanced photo editing software ensures to fix your images and offer the best quality. It can even give you various ways to fix your photos. The only drawback here is that you must get its subscription plan to use it and access its overall features. To fix distortion in Photoshop, use the methods below.
Lens Correction Filter
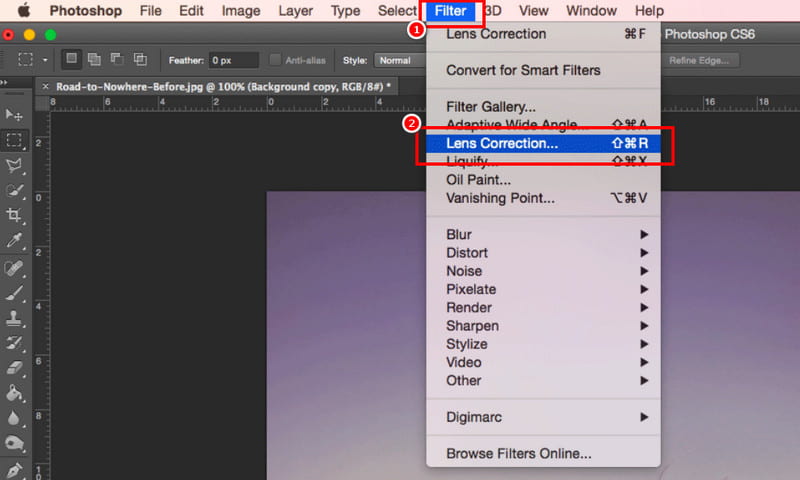
You can use the Lens Correction Filter feature to fix the distorted images. It even lets you adjust the barrel and pincushion distortion. To start the process, start adding the image to the canvas. After that, go to the top interface and go to the Filter section. Then, hit Lens Correction Filter and start fixing the image manually.
Perspective Warp
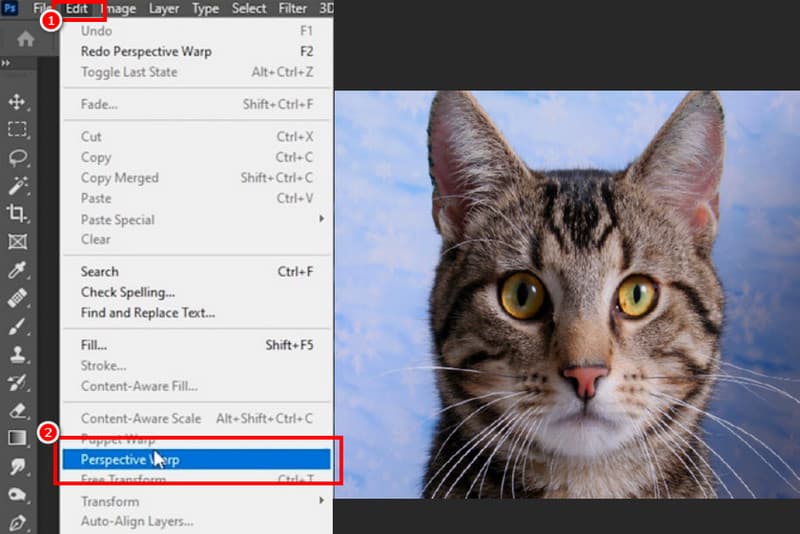
For perspective and architectural distortion, you can use the Perspective Warp feature from Photoshop. It lets you straighten skewed objects, like leaning structures in architectural photos. To start the process, add the image and proceed to the Edit section. Then, select the Perspective Warp function. Then, you can begin to strengthen the skewed objects in the photo.
Adaptive Wide Angle
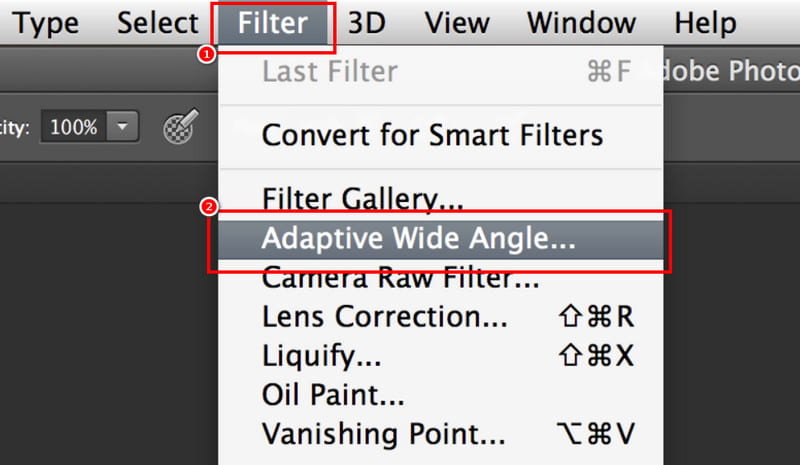
For wide-angle and fisheye images, you can use the Adaptive Wide Angle Filter. It helps users to straighten curved lines. It also lets you draw guides along distorted edges. To begin, insert the photo and click the Filter section. Then, choose the Adaptive Wide Angle option. In the dialog box, you can choose wide-angle, fisheye, and more. You can start drawing guides and adjusting sliders for scale and rotation. Once satisfied, tap OK and save your image.
Liquify + Reconstruct Tool
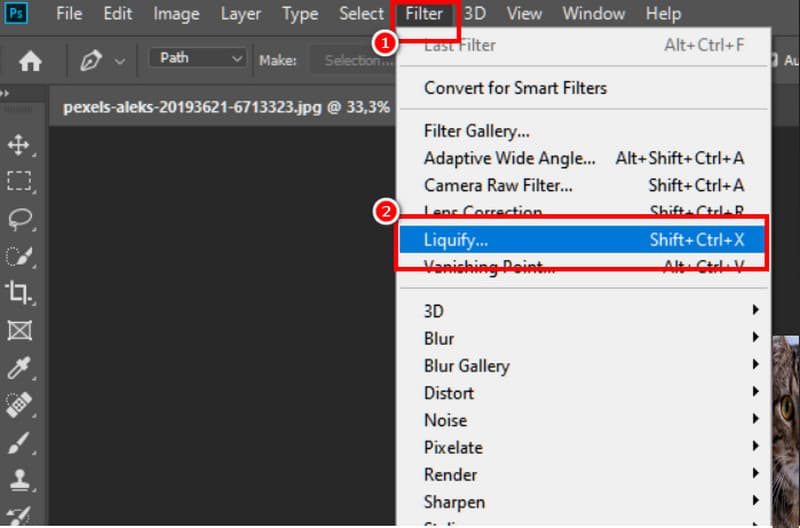
Liquify is an ideal tool from Photoshop since it lets you reshape parts of your images. Plus, the Reconstruction tool also lets you soften distortions without starting over. With these tools, you can ensure that your image is natural. After adding the image, you can go to the Filter > Liquify section. You can rely on the Forward Warp Tool to push and pull areas from the photo. If the distortion looks unnatural, you can switch to the Reconstruction tool to brush over the distorted area. Click OK to get the final photo and begin the saving process.
Camera Raw Filter
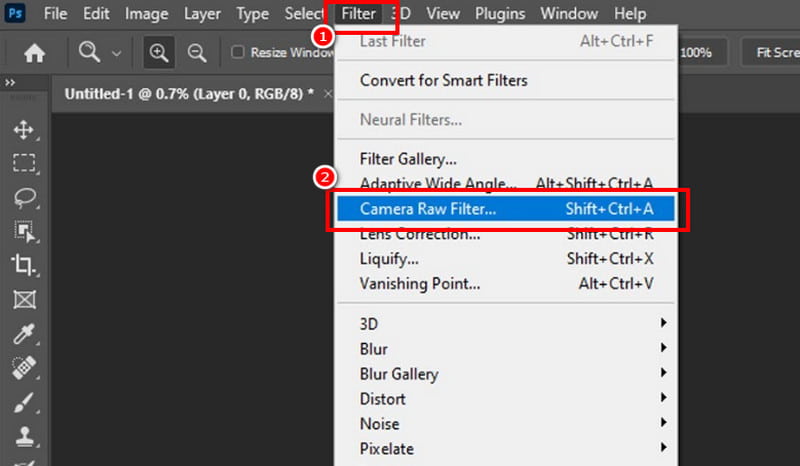
The Camera Raw Filter lets you correct distortion, chromatic aberration, and vignetting. It is a powerful feature from Photoshop since it gives you precise control over image quality. It even lets you adjust various parameters, such as detail, sharpening, mask, contrast, brightness, noise reduction, and more. To begin the process, go to the Filter section, click Camera Raw Filter, and open the Optics tab. Then, start checking the Remove Chromatic Aberration and Enable Profile Correction. To fix wrapping, you can also adjust the Distortion slider. Once done, click OK.
Part 4. Fix Distorted Images on Monitor/Display
Want to fix a distorted image on the monitor/display? In that case, you can proceed to this section and learn all the methods to deal with your distorted images.
Check Cable Connection
Always ensure that cables, such as HDMI, VGA, or DVI, are plugged in appropriately.
Adjust Display Resolution
Go to the Display Settings and choose the monitor's default resolution. Incorrect resolution can only stretch images, resulting in poor image output.
Update Graphics Drivers
Proceed to the Device Manager > Display Settings. Then, from the GPU section, hit the Update Driver. Outdated drivers can cause artifacts or improper scaling.
Check the Refresh Rate
A wrong refresh rate can also lead to distortion. Navigate to the Display Settings > Advanced Display Settings and confirm the refresh rate matches the monitor specs.
Part 5. Which Method to Choose
Wondering which method to choose? If you are a non-professional user, we recommend using AVAide Image Upscaler. This tool is ideal since it ensures that your distorted images are quickly and easily fixed. You can even get the best quality since it can upscale your images up to 8× better. It also handles batch processing so that you can fix multiple images at once. So, if you want a simple tool that lets you achieve the result you need, consider using this tool.
If you want to fix distorted pictures, you can use all the methods from this tutorial. With that, you can deal with your images offline and online. Plus, if you prefer a simple method to fix your distorted images, feel free to access AVAide Image Upscaler. With its simple, smooth, and fast enhancement process, you can ensure that you get the result you need, making it powerful for all users.
ABOUT THE AUTHOR


Our AI technology will automatically enhance the quality of your images, remove noise and fix blurry images online.
PROCESS NOW