Ønsker å fikse skjermbilde fungerer ikke på Mac problemer? Vel, et skjermbilde er et viktig verktøy og en viktig funksjon på Mac. Det kan hjelpe deg med å fange og dele innhold fra Mac-skjermen. Det finnes imidlertid tider når denne funksjonen ikke fungerer bra. Det finnes grunner til at dette problemet oppstår. Sjekk denne veiledningen og lær alle metodene du kan bruke for å fikse problemet med at skjermbildet ikke fungerer på Mac-en din effektivt.
- Rask sjekkliste: Det første du bør prøve
- Del 1. Fikse problemer med hurtigtaster
- Del 2. Fikse problemer med filplassering og tillatelser
- Del 3. Løs problemet med skjermbildeverktøyet
- Del 4. Avanserte løsninger for å håndtere skjermbilde som ikke fungerer på Mac
- Del 5. Bruk et utmerket verktøy for å ta et skjermbilde
Rask sjekkliste: Det første du bør prøve
Se den primære løsningen du kan prøve for å løse problemet med at skjermbildet ikke fungerer på Mac-en din umiddelbart.
- Sjekk tastaturtilkoblingen - Du må sørge for at tastaturet er riktig tilkoblet, spesielt når du bruker et eksternt tastatur.
- Sjekk lagringsplass - Hvis du ikke har nok lagringsplass, kan du ikke ta et skjermbilde. Sørg for at du har nok lagringsplass for en smidigere skjermbildeprosess.
- Start Mac-en på nytt – En enkel omstart kan løse problemet. Start Mac-en på nytt for å fjerne midlertidige feil.
Del 1. Fikse problemer med hurtigtaster
Fungerer ikke Mac-skjermbildet ditt? Da bruker du kanskje feil taster, har endret systeminnstillingene, eller snarveier er deaktivert. Les her og lær hvordan du løser problemet effektivt.
Løsning 1. Bruk høyre snarvei
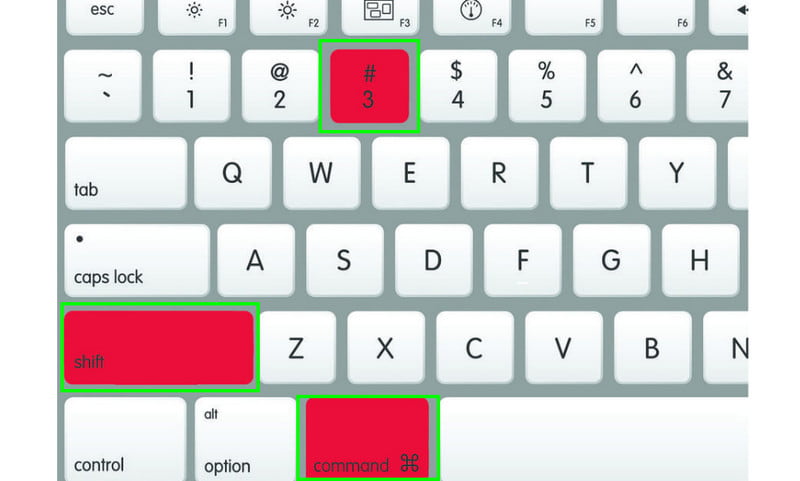
Det første du må gjøre er å sjekke om du bruker riktig snarvei. Hvis du planlegger å ta et skjermbilde av hele skjermen, bruk Kommando + Skift + 3 taster. For å ta et bilde av et bestemt skjermområde, bruk Kommando + Skift + 4Til slutt, hvis du vil ta et skjermbilde av menyen, trykker du på Kommando + Skift + 5 nøkler.
Løsning 2. Bekreft snarveier i systeminnstillingene
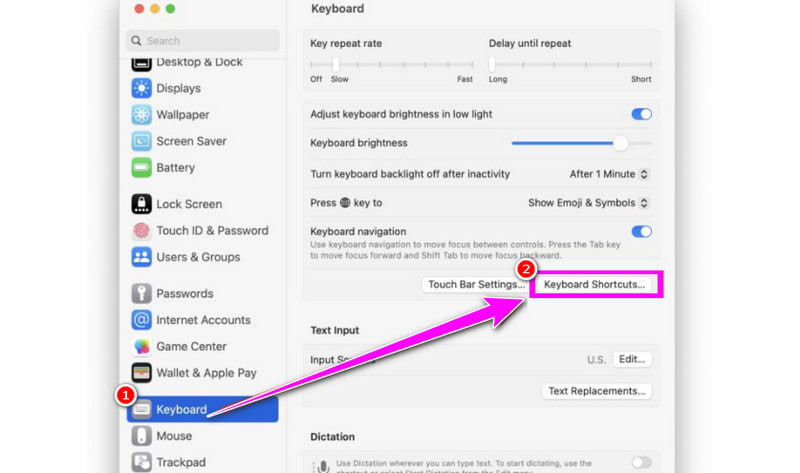
Hvis snarveier for skjermbilder på Mac ikke fungerer, er de kanskje deaktivert eller tilordnet på nytt. Så sjekk dem alltid for å se om de er aktive. For å gjøre det, gå videre til Systeminnstillinger delen og gå til Tastatur > Tastatursnarveier seksjonen for å se SkjermbilderDu må aktivere dem eller tilbakestille standardinnstillingen hvis de har blitt endret.
Løsning 3. Se etter apper som er i konflikt
Hvis du bruker en annen app, kan den overstyre eller blokkere snarveiene for skjermbilder. Det beste du kan gjøre er å lukke annen programvare som kan bruke globale snarveier, som hurtigtastadministratorer og skjermopptakere. Etter at du har fjernet de konfliktskapende appene, er det best å starte Mac-en på nytt. På denne måten vil skjermbildefunksjonen fungere som standard.
Del 2. Fikse problemer med filplassering og tillatelser
Å fikse plasseringen og tillatelsene er også en annen løsning. Det hender at skjermbildene ikke vises fordi de er lagret på et uventet sted. Det hender at systemet ikke har tillatelse til å skrive til den angitte mappen. For å løse problemet, se løsningene nedenfor.
Løsning 1. Sjekk hvor skjermbilder lagres
Skjermbildet kan være lagret i en annen mappe. For å løse problemet, gå til Finner seksjonen og fortsett til Bilder/Skrivebord/DokumenterSe deretter i standardmappene dine. Du kan også bruke Spotlight-søk eller trykke på Kommando + Mellomrom tastene og skriv «Skjermbilde» for å finne de nyeste filene. Bekreft deretter lagringsstedet i Skjermbilde-app > Alternativer seksjon. Med det kan du enkelt finn bildeopptaket på Mac.
Løsning 2. Sjekk disktillatelsene for skjermbildemappen
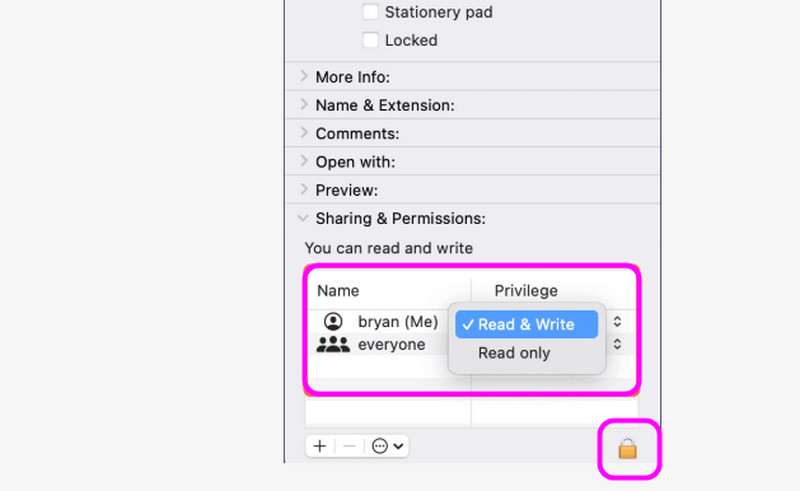
Hvis du ikke kan lagre skjermbildet ditt, kan det hende at det finnes begrensede tillatelser. I så fall trenger du bare å høyreklikke på mappe > Få informasjon > Deling og tillatelser seksjonen. Sørg deretter for at brukerkontoen har Les og skriv tilgang. Hvis ikke, må du trykke på låsikonet og justere tillatelsene. Når du er ferdig, kan du om nødvendig bruke endringene for å omslutte elementene.
Løsning 3. Tilbakestill lagringsplasseringen for skjermbildet

En annen nyttig løsning er å tilbakestille lagringsbanen. Dette er for å sikre at skjermbildene går til standardmappen og den gyldige mappen. For å starte prosessen må du åpne TerminalSkriv deretter inn standardinnstillinger skriver com.apple.screencapture plassering ~/Desktop/zTemp/ og trykk Tast innSkriv deretter inn killall SystemUIServerEtter det kan du starte Mac-en på nytt, og skjermbildet vil bli lagret på enheten din.
Del 3. Løs problemet med skjermbildeverktøyet
Hvis macOS-skjermbildet ikke fungerer, er det kanskje verktøyene som er det virkelige problemet. Det hender at de fryser eller ikke fungerer som de skal. For å løse problemet, se de beste løsningene nedenfor.
Løsning 1. Tving avslutning og start skjermbildeverktøyet på nytt
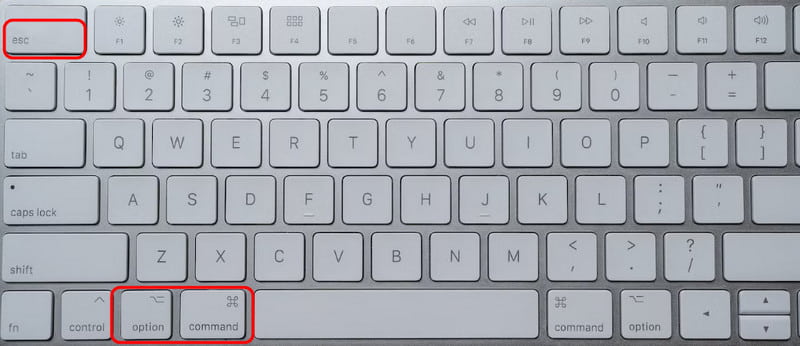
Hvis skjermbildeverktøyet ikke fungerer som det skal, kan det være den beste løsningen å starte det på nytt. For å starte prosessen, trykk på Kommando + Alternativ + Esc knapp. Deretter velger du Skjermdump alternativet og trykk på Tvangsavslutning -knappen. Når du er ferdig, starter du appen for å starte opptaksprosessen.
Løsning 2. Sjekk tillatelsen for skjermopptak
Hvis du bruker et annet skjermbildeverktøy, krever systemet tillatelse. Dette er for å sikre at appen er trygg å bruke på Mac-en din. Gå til på enheten din. Systeminnstillinger og fortsett til Personvern og sikkerhet > Skjermopptak alternativet. Sørg deretter for at Skjermdump alternativet er oppført og aktivert. Hvis det er deaktivert, må du slå det på. Start Mac-en på nytt etter endringene.
Del 4. Avanserte løsninger for å håndtere skjermbilde som ikke fungerer på Mac
Hvis de grunnleggende løsningene ovenfor ikke er nok, se denne delen, da vi tilbyr avanserte løsninger for å løse problemet med at skjermbildet ikke fungerer på Mac.
Løsning 1. Tilbakestill NVRAM/PRAM [Kun Intel Mac-er]
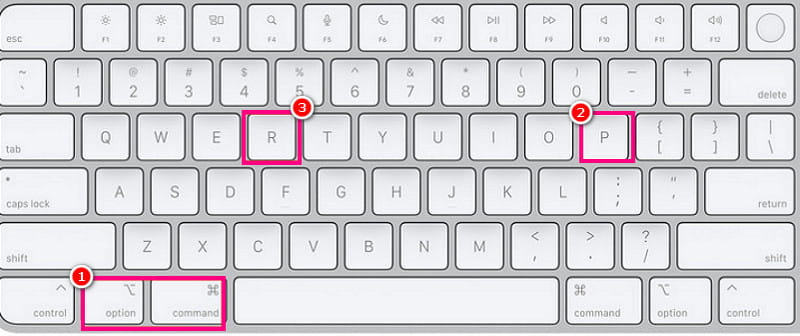
Til skjermbilde på en Mac Uten problemer kan du prøve å tilbakestille NVRAM/PRAM. Du må tilbakestille lavnivåinnstillinger som kan forstyrre snarveier til skjermbilder. Du må slå av Mac-en og slå den på. Trykk på [knappen] under påslåingsprosessen. Alternativ + Kommando + P + R tastene og hold dem inne i 20 sekunder. Når det er gjort, vil Apple-logoen dukke opp på skjermen.
Løsning 2. Tilbakestill SMC
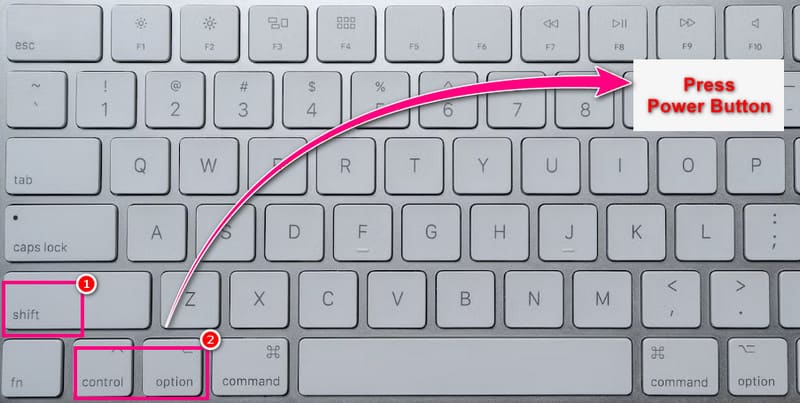
En annen løsning er å tilbakestille systemadministrasjonsfunksjoner som kan påvirke skjermbildenes virkemåte. Etter at du har slått av Mac-en, slår du den på og trykker på Skifte + Styre + Alternativ nøklene og Av/på-knapp samtidig i 10 sekunder. Trykk deretter på Av/på-knapp igjen for å slå på enheten. Når du er ferdig, kan du begynne å ta et skjermbilde.
Løsning 3. Opprett ny brukerkonto
Det er ideelt å opprette en ny brukerkonto hvis din nåværende konto er knyttet til det aktuelle problemet. For å starte opprettelsesprosessen, fortsett til Systeminnstillinger > Bruker og grupper > Legg til konto seksjon. Logg deretter inn med en ny konto. Når du er ferdig, kan du teste skjermbildefunksjonen på Mac-en din.
Del 5. Bruk et utmerket verktøy for å ta et skjermbilde
Hvis du ønsker en smidigere prosess med å ta skjermbilder, er det bedre å bruke et ideelt skjermbildeverktøy, som AVAide skjermopptakerDette programmet har en Snapshot-funksjon som lar deg ta et skjermbilde. Det kan til og med ta et skjermbilde av hele skjermen eller et ønsket område. Du kan til og med ta opp hvilket som helst innhold, for eksempel tekstbasert informasjon, bilder, scener fra en video og mer. Dette verktøyet kan også tilby snarveier, ideelle for en raskere opptaksprosess. For å sjekke funksjonaliteten kan du følge trinnene nedenfor.
Trinn 1nedlasting AVAide skjermopptaker på Windows eller Mac. Deretter installerer du det for å starte prosessen.

GRATIS NEDLASTING For Windows 7 eller nyere
 Sikker nedlasting
GRATIS NEDLASTING For Mac OS X 10.13 eller nyere
Sikker nedlastingSteg 2Etter at du har startet skjermbildeverktøyet, går du til høyre grensesnitt og klikker på rullegardinmenyen -knappen for å velge hvordan du vil ta skjermbildet.
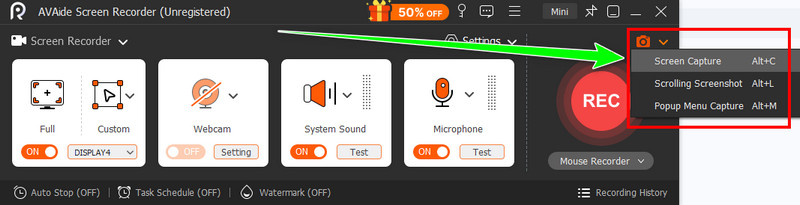
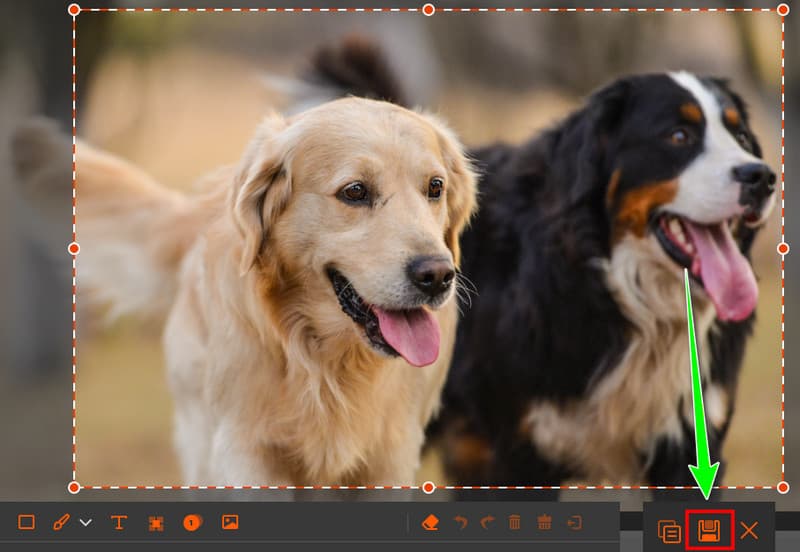
Trinn 3Når forhåndsvisningen vises, kan du begynne å trykke på Lagre funksjonen nedenfor. Etter det kan du sjekke skjermbildet ditt i den tilordnede mappen.
Nå har du lært hvorfor skjermbildet ikke fungerer og hvordan du fikser det ved å følge alle løsningene vi har tilbudt. Så for å fikse problemet med at skjermbildet ikke fungerer på Mac, kan du bruke alle de grunnleggende og avanserte løsningene. I tillegg, hvis du vil bruke et annet skjermbildeverktøy, kan du få tilgang til AVAide skjermopptakerMed Snapshot-funksjonen kan du ta opp hvilket som helst innhold fra Mac-skjermen. Du kan til og med lagre bildet med best mulig kvalitet, noe som gir en tilfredsstillende seeropplevelse.
OM FORFATTEREN

Ta opp skjerm, lyd, webkamera, spilling, nettmøter, samt iPhone/Android-skjerm på datamaskinen din.
Skjermopptak