iMovie lets you edit and share videos easily. If you want to enjoy your iMovie collection on big screens, consider burning them onto DVDs. While iMovie does not directly burn DVDs, you can export your creation as a video file and use DVD creation software. It allows you to turn your iMovie projects into DVDs with menus, making them playable on standard DVD players. So get ready to share your iMovie creation with everyone, anywhere, by popping it into a DVD player. Continue reading to learn how to burn iMovie to DVD!
Part 1. How to Burn iMovie to DVD with iDVD
An authoring program designed exclusively for Mac users, offering a seamless way to burn iMovie projects into DVDs, is iDVD. Its standout features include a diverse range of customizable DVD menu templates. It lets you personalize your DVDs with themes matching your iMovie projects.
With a user-friendly interface, iDVD enables easy importing of iMovie creations. It simplifies the process of arranging and organizing video content effortlessly. This program offers the option to preview projects before burning. It thoroughly checks menu layouts, video quality, and overall navigation. You can modify burning settings for speed and quality, optimizing DVD creation for various project needs.
Here is how to burn iMovie to DVD to play on TV or any player using iDVD:
Step 1Open iMovie and pick the video you want to export from your library.
Click and drag your cursor to choose the part of the video you want on the DVD. You can also press Command + A to choose the whole video.
Step 2Head to the File menu, click Share and select File. Please review the details in the pop-up window that appears. Click the Next and save the file.
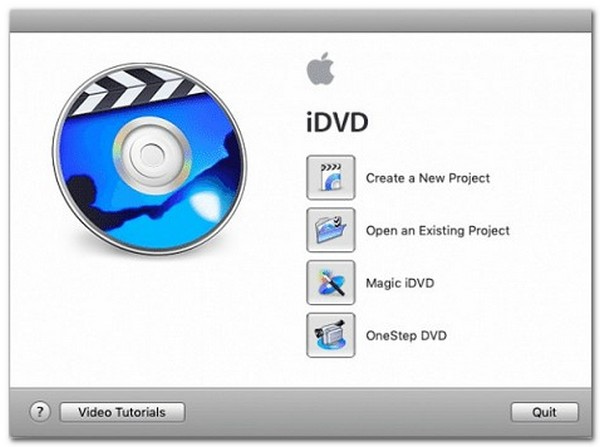
Step 3Open the iDVD platform on your Mac. Click on File in the menu bar. Then, choose OneStep DVD from iMovie to bring your project into iDVD.
Step 4Insert a blank, writable DVD into your Mac's optical drive. Then, click the Burn button within iDVD. The platform will start burning your iMovie project onto the DVD.
Note: iDVD requires ample hard drive space to burn DVDs smoothly. Clear unnecessary files on your Mac to create room. If that does not help, slow down the burning speed to 2×. If issues persist, consider shrinking your iDVD project by editing it in iMovie. To avoid bugs, limit iMovie videos to a maximum of 1 hour in size when burning with iDVD.
Step 5After the burning process is complete, eject the DVD from your Mac. Please insert it into a DVD player to ensure the video plays correctly and everything looks good.
Part 2. How to Burn iMovie to DVD Using Tipard DVD Creator
Can you burn iMovie to DVD without iDVD? Yes! Tipard DVD Creator for Mac steps in! It lets you quickly transform those digital memories into something you can hold and share with friends and family. It allows you to edit and personalize your videos before burning them onto a DVD. It offers editing functionalities that enable trimming, cropping, adding effects, and incorporating subtitles to enhance your videos.
Besides that, it provides a range of customizable DVD menu templates. It allows you to create menus that match the theme of your videos. For a professional touch, you can personalize menu styles, backgrounds, fonts, and buttons. Before initiating the burning process, Tipard DVD Creator lets you preview your DVD project. This feature allows you to check and ensure that your videos and menus appear as you want them to on the DVD.
Step 1Begin by downloading the Tipard DVD Creator, specifically designed for Mac. Follow the installation instructions provided and open the program.

FREE DOWNLOAD For Windows 7 or later
 Secure Download
FREE DOWNLOAD For Mac OS X 10.13 or later
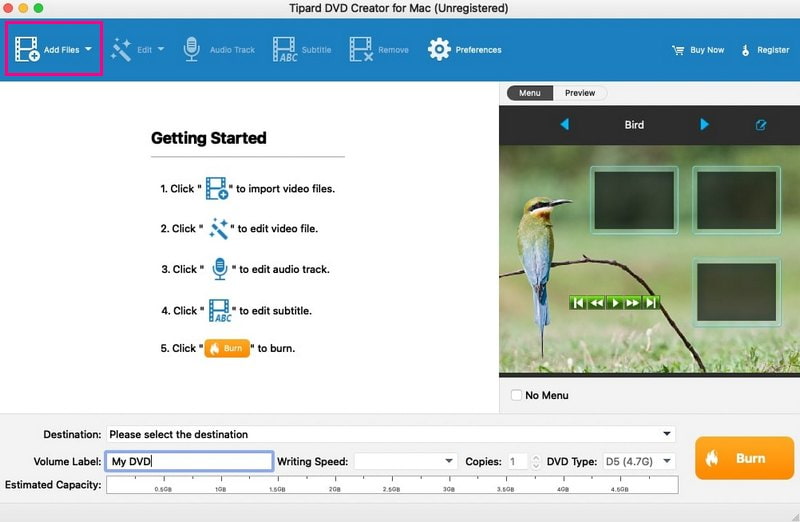
Secure DownloadStep 2Within Tipard DVD Creator, press the Add Files button. Navigate to your iMovie project or video file saved on your Mac and select it. This action imports your iMovie video into the platform.
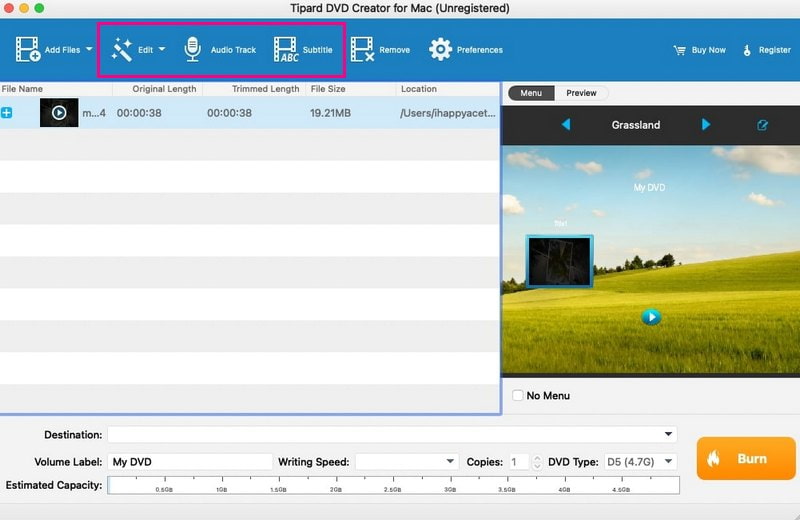
Step 3If you desire to add personalized touches to your video before burning it onto the DVD, you can use the editing tools provided.
Click the Edit tab to change the video settings' brightness, contrast, and volume. Besides that, you can crop the video frame, trim the length, or add a watermark. Afterward, click the OK button to confirm changes.
If you want to add audio and subtitles, click the Audio Track and Subtitles tab. You can also tweak settings like encoder, bitrate, etc. When settled, click the OK button to save changes.
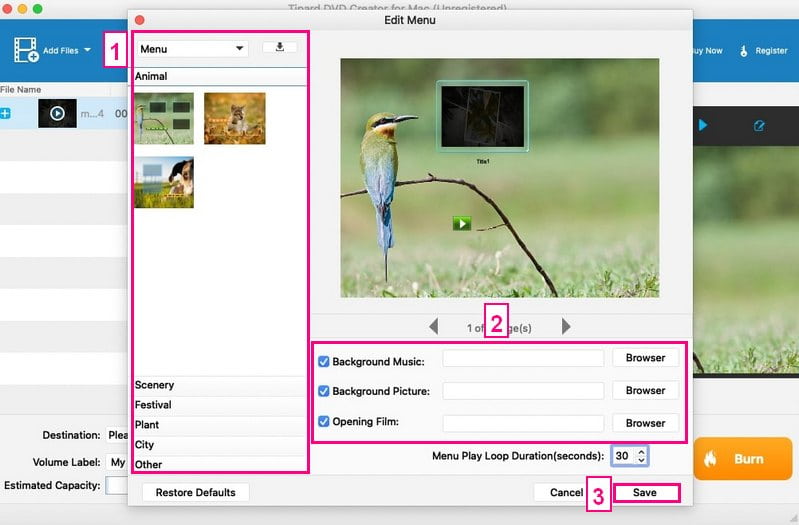
Step 4Navigate to the Menu option, and pick a theme from the list like animals, scenery, festival, plant, etc. You can also add background music, pictures, and an opening film. When done, click the Save button to confirm changes.
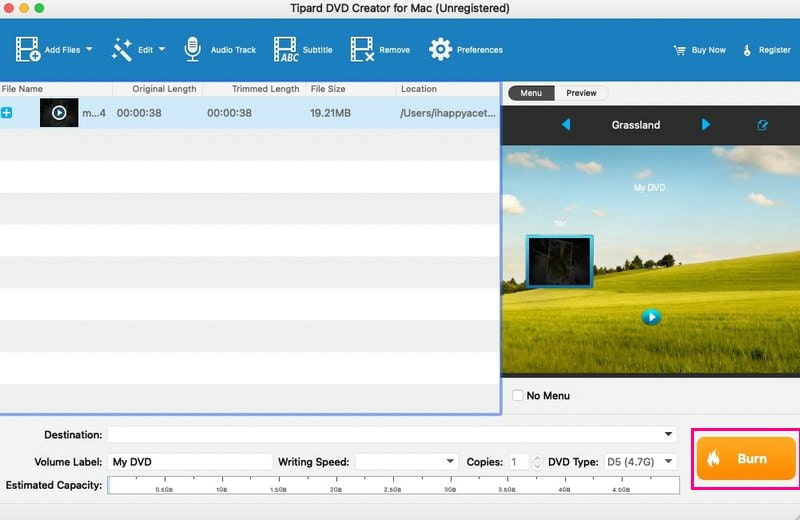
Step 5Insert a blank DVD into your Mac's optical drive. Ensure it is compatible with your drive and has enough storage space for your video. When everything looks good, click the Burn button. Afterward, press the Start button to begin the iMovie video to DVD-burning process.
With Tipard DVD Creator, mastering how to burn iMovie to DVD is a breeze! Enjoy sharing your creations on the big screen with friends and family, all thanks to this user-friendly DVD-burning solution.
Part 3. FAQs about Burning iMovie to DVD
How do you burn an iMovie to DVD with Windows Media Player?
Open Windows Media Player, and click Switch to Library. Select Burn in the Library and go to the Burn tab. Please choose DVD from the drop-down list. Next, insert a blank disc. Then, go to Organize, Manage Libraries, and Videos in the Player Library to import the iMovie file. Make a burn list with the iMovie file and click Start to burn it onto a DVD.
Do I need a specific type of DVD for burning iMovie projects?
It is recommended to use blank DVD-R discs for compatibility and reliability when burning iMovie projects to DVDs.
Can I edit my iMovie project before burning it onto a DVD?
Absolutely! Tipard DVD Creator can edit and customize your iMovie project before burning it onto a DVD. It includes adding effects, trimming, background music, picture subtitles, and more.
Is there a size limit for iMovie projects when burning to DVD?
DVDs have limited storage capacity. It is recommended to keep iMovie projects within the size limits of the DVD. It is typically around 4.7 gigabytes for standard DVD-R discs.
Can you burn an already burned DVD?
DVD-Rs and CD-Rs are not designed for reuse. They have a hardware limit that prevents further changes to specific areas once used. This limitation causes a gradual loss of disk space, making the disk unusable over time.
That is for how to burn iMovie project to DVD journey ends! Burning your cherished iMovie projects onto DVDs preserves your memories in a tangible, shareable format.
For a seamless and hassle-free experience, Tipard DVD Creator for Mac provides an easy solution. Its user-friendly interface and powerful features can transform your digital creations into professionally crafted DVDs. It is ready to be enjoyed on any DVD player! Experience the convenience and creativity of Tipard DVD Creator today!
ABOUT THE AUTHOR

Best tool for ripping and converting DVD Disc/Folder/ISO image file into over various formats.