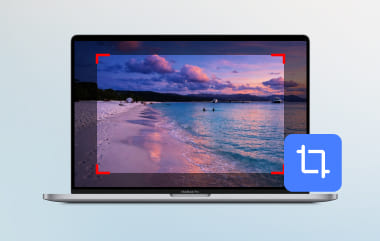
Your computer provides all the essentials for online activities, whether it is for editing, watching, or playing games. One feature that anyone will need is the screenshot option that helps capture an image of your whole screen or just one specific area. Since there are various computers of different brands, this article is dedicated to guiding you on how to take a screenshot on a Windows Acer. To get started, you will discover the different ways of accessing the built-in screenshot features on a laptop or desktop, a Chromebook, and a tablet. Moreover, check out the solutions if you find yourself in a pinch and your Acer is without a PrintScreen button to take a screenshot.
Part 1. How to Screenshot on an Acer Windows Laptop or Desktop
The following is how to screenshot on an Acer laptop with the standard shortcut keys and apps. Clear steps are provided for you to try them on your end. Without further ado, let's begin.
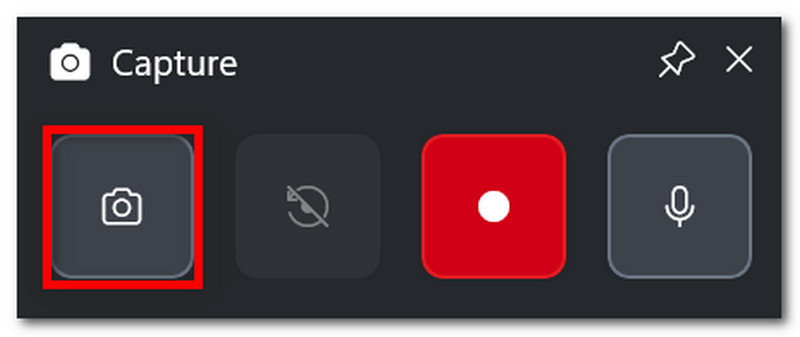
1. The Classic PrintScreen (PrtSc) Button
Bước 1Locate and press the PrtSc button in the upper right part of your keyboard. Your screen will dim, and a small bar menu will pop up at the top middle.

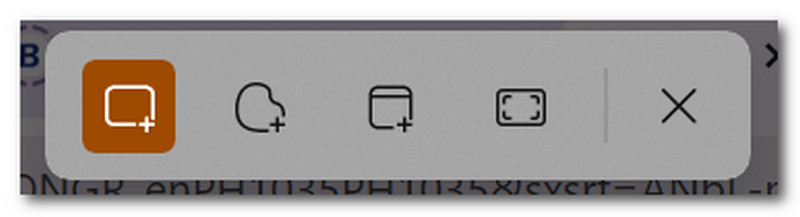
Bước 2Choose between modes: Rectangular, Freeform, Cửa sổ, và Toàn màn hình. Once done, the screenshot is copied to your clipboard automatically, which can be pasted on a blank document, messaging chat, and others.
2. Snipping Tool & Snip & Sketch (Best for Custom Areas)
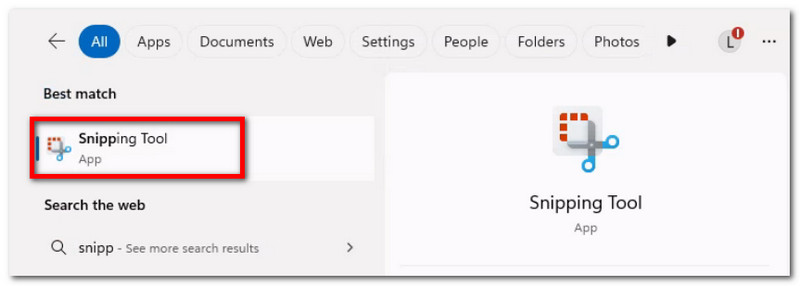
Bước 1Search for the app in your search bar. Note that it can be named as Công cụ cắt hoặc là Snip & Sketch, depending on your device's Windows version.
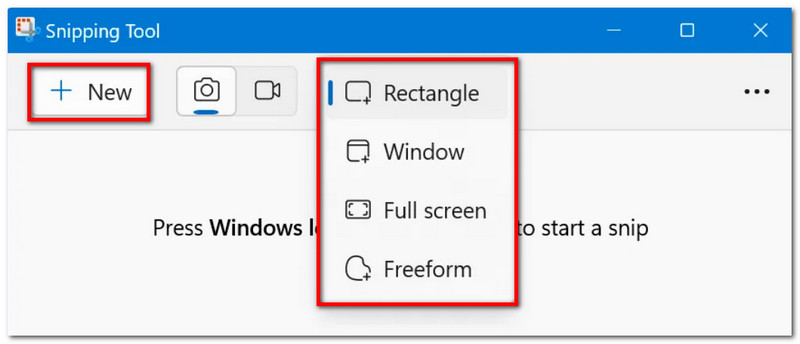
Bước 2Choose a mode from the dropdown menu, then click the Mới button to take a screenshot. Use the drawing tools to edit, then click Cứu to save the screenshot.
3. The Game Bar
Bước 1Nhấn Windows + G on your keyboard. When the screen dims, there will be a few taskbars appearing.
Bước 2Nhấn vào Máy ảnh icon, which is for taking screenshots. You can also press Windows + Alt + PrtSc to access this feature during gameplay.
4. Phần mềm ghi màn hình AVAide
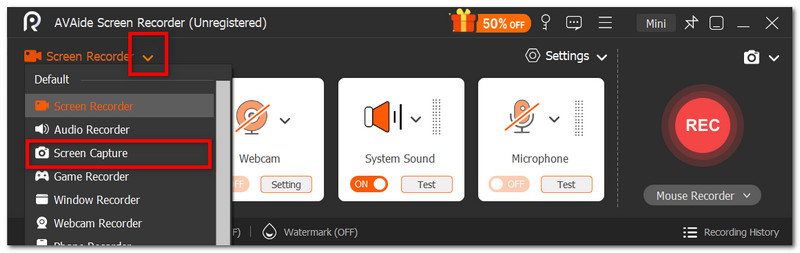
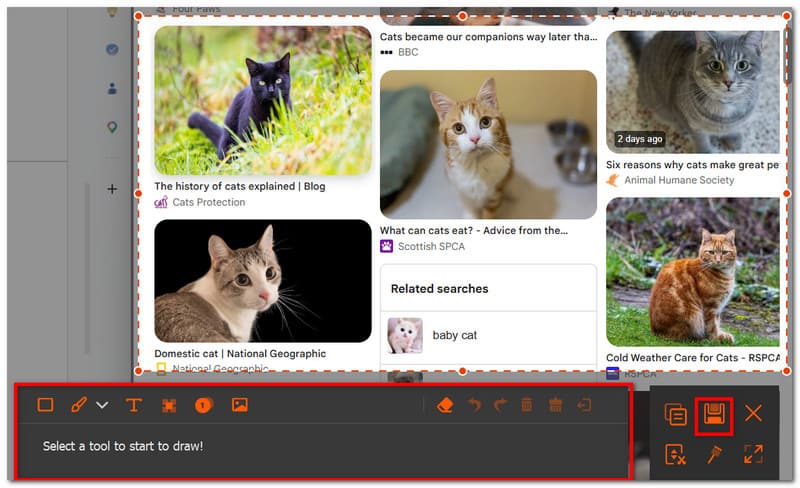
With the default ways to screenshot, you may think that your device can only do so much. But did you know that AVAide Screen Recorder can surpass your experience of taking screenshots? With its sleek design and abundant features, screen capturing has become easy and high-quality. With this, you can take a screenshot of the whole screen, an open window, or just a small area, and save it in popular formats like BMP, JPEG, PNG, GIF, or TIFF. The built-in editing options are also beneficial as you can freely draw, add numbers or text, and blur out important details in the photo before saving it. Finally, AVAide's screen capture is not only limited to an individual tool, but it can be used even when you are recording on your computer, with a webcam, and on any part of the internet. Level up your screenshot experience by getting this wonderful alternative on your Windows or even Mac.
Bước 1Nhấn vào Tải xuống button and install AVAide Screen Recorder on your Acer. Once installed completely, open the software.

TẢI VỀ MIỄN PHÍ Đối với Windows 7 trở lên
 An toàn tải
TẢI VỀ MIỄN PHÍ Dành cho Mac OS X 10.13 trở lên
An toàn tảiBước 2Go to the dropdown menu in the left corner of the UI, and from the list, choose the Chụp màn hình option. Your cursor will change at once, which you can use to select the area of your screen to capture.
Bước 3Once captured, you can edit the picture by using the editing options. After that, export the image by clicking the Cứu button. Repeat as needed.
Part 2: How to Screenshot on Acer Without the PrintScreen Button
You may find yourself in a challenging situation where your keyboard is missing the PrtSc button, and it can pretty much delay your work without it. So, how to screenshot on an Acer computer without PrtSc? This part will provide the best methods without the combination with PrtSc and are native to Acer laptops.
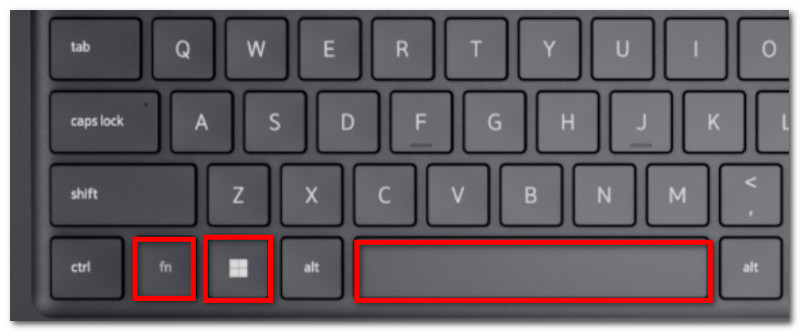
Solution 1: Press Fn + Windows + Spacebar (common Acer shortcut) or Fn + PrtSc
Bước 1On your Acer keyboard, press Fn + Windows + Spacebar buttons. When your screen blinks, it means it took a full-screen screenshot.
Bước 2Go to a blank Word document and press Ctrl + V to paste the image. Then, you can save the document to a folder.
Solution 2: Use Windows + Shift + S (opens Snipping Tool's capture bar)
Bước 1Simultaneously press Windows + Shift + S on your keyboard, and it will open the Snipping Tool.
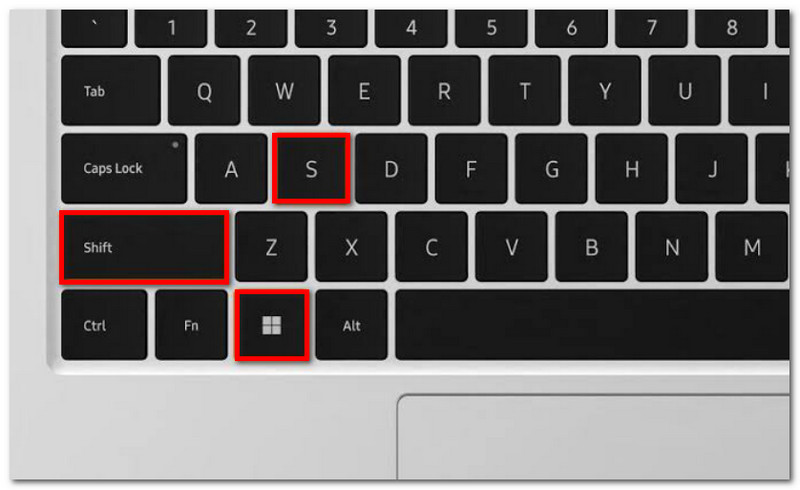
Bước 2Choose the screenshot mode and drag your cursor to select the desired area to capture. Use Ctrl + V to paste the image.
Solution 3: Remap a Different Key
Bước 1Get PowerToys from the Microsoft Store. From the left part of the interface, select the Keyboard Manager.
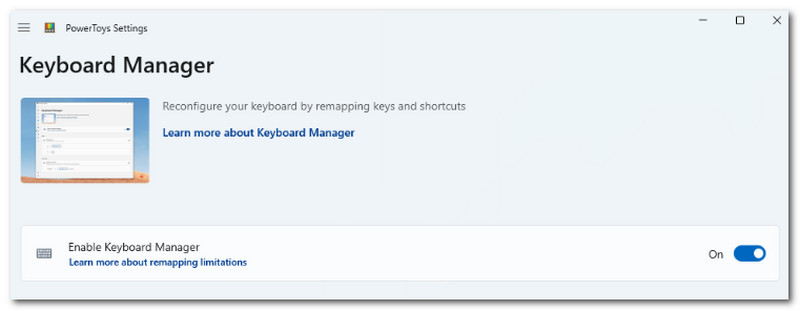
Bước 2Choose any letter on your keyboard to access the Snipping Tool when needed. Click VÂNG để lưu các thay đổi.
Part 3: How to Screenshot on Acer Chromebook
Chromebook has a different way to take screenshots on Acer. While most of the time a computer keyboard has the PrtSc button, Chromebooks do not have it. So, how to screenshot on an Acer Chromebook officially? Use the following steps to take screenshots in full-screen and partial modes easily:
Bước 1For full screen, press Ctrl + Show buttons. The Show button is usually at the middle top part of your keyboard with an icon showing a rectangle with two vertical lines.
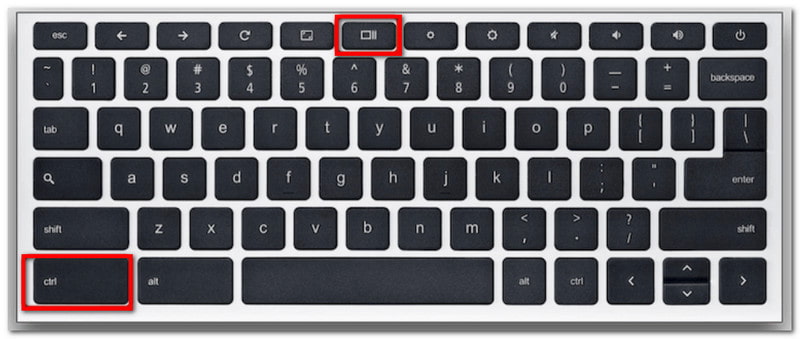
Bước 2The screenshot will be copied to your clipboard, which you need to paste into a blank Word document to be able to save it.
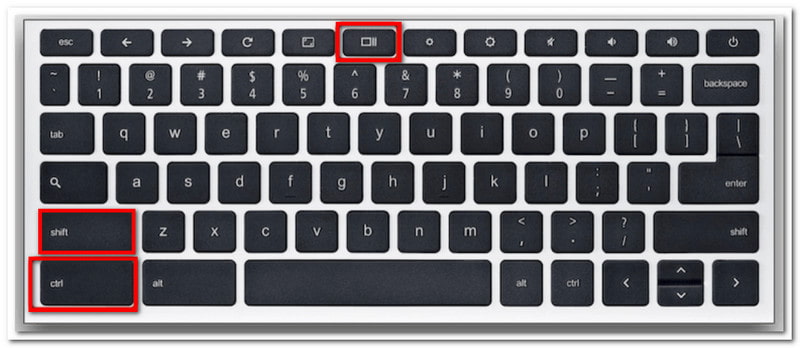
Bước 3For partial mode, press Ctrl + Shift + Show. Use your mouse to select the area you want to screenshot.
Part 4: How to Screenshot on an Acer Tablet
Acer tablets function differently from a laptop. However, taking screenshots on a tablet is plain and simple and only requires a few buttons to do so. Unlike taking screenshots on a laptop, which saves the images depending on the method you use, screenshots on your tablet are stored in the Photos app. Check out the following steps:
Bước 1Prepare the content you want to capture on your Acer tablet. Press and hold the Giảm âm lượng và Quyền lực nút.
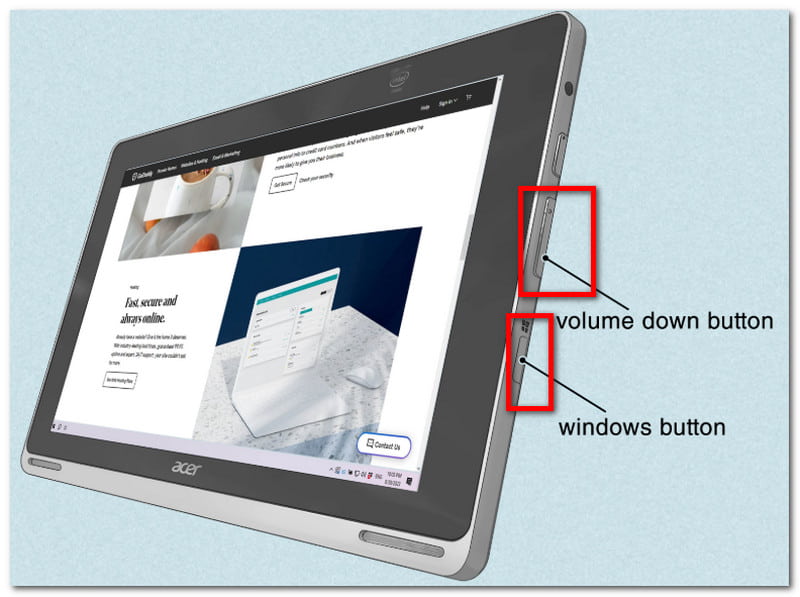
Bước 2Once the screen flashes, it indicates that a screenshot was taken. Visit the Photos app to view the picture or use a chỉnh sửa ảnh to trim the screenshot.
With this article, taking screenshots on Acer has never been easier, as it guides you to use the official ways of screenshotting on your device. Not only that, but you also found out the best method if your desktop has no PrintScreen button. Don't forget that AVAide Screen Recorder will always be a great alternative for screen capturing, whether you want to take a screenshot, record video, or audio. We encourage you to try the best solution for screen recording on Windows and Mac.
GIỚI THIỆU VỀ TÁC GIẢ

Ghi lại màn hình, âm thanh, webcam, trò chơi, cuộc họp trực tuyến, cũng như màn hình iPhone / Android trên máy tính của bạn.