Pictures have thousands or millions of pixels, and Photoshop is known for giving control over them. This third-party tool is commonly used for photo editing and retouching. It allows you to make posters, web elements, and other products that can be used with images.
Photoshop supports various image formats, including JPEG, PNG, GIF, BMP, HEIC, etc. But some wonder why they can't open DDS files in Photoshop. Do you know why? If not, let us guide you about this topic using this article! It will answer most of your queries about the issue and provide beneficial processes. Please continue scrolling below to discover the full information about the topic.
Part 1: Can Photoshop Open the DDS Image Format?
DDS or DirectDraw Surface is thriving in this generation compared to other image formats. This image format is used in game development. This way, users can store countless textures, cube maps, mipmaps, and other components from the image. However, the compatibility of DDS files is limited. It cannot be accessed from mobile devices, web browsers, Mac, or famous photo editing tools, like Photoshop.
Photoshop photo editor can edit your images using its complex editing features. Due to this, it would be the best option for editing the DDS files. However, this third-party tool does not support the mentioned image format.
Part 2: How to Download and Install Photoshop DDS Plugin
You might wonder how to open a DDS file in Photoshop if it does not support the format. Eyes here! This article section will introduce the two best Photoshop DDS plugins. In this case, you can finally edit your DDS files using the built-in Photoshop image resolution increaser, retouching tools, object isolation, and more! Please continue scrolling for more information.
1. NVIDIA DDS Plugin for Photoshop
NVIDIA DDS Plugin Photoshop is also known as Texture Tools Exporter. This plugin permits you to import and export GPU-compressed texture formats. It includes DirectDraw Surface and other image formats that Photoshop does not support. This plugin tool allows you to export and import normal maps, KTX, etc. Moreover, it supports multiple formats, including BC6, BC7, ASTC, and more.
However, downloading the mentioned plugin can be tricky. The reason is that various websites allow you to download it. Please ensure that you download the plugin from its official website for a safe procedure. How to open DDS files in Photoshop with NVIDIA DDS Plugin? The steps below will be your guide.
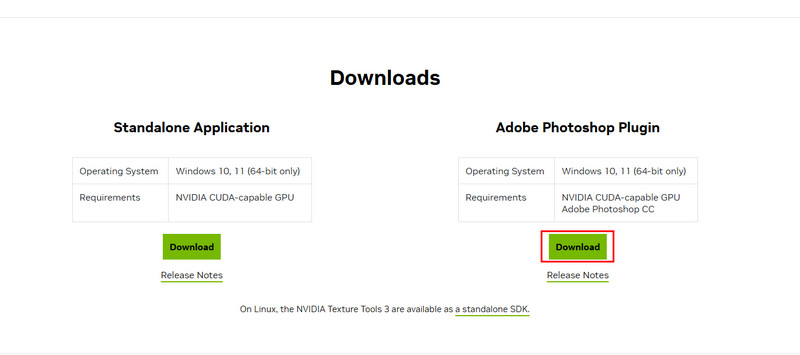
Step 1Go to the website of the NVIDIA DDS Plugin. After that, scroll down and select the Download button under the Adobe Photoshop Plugin button.
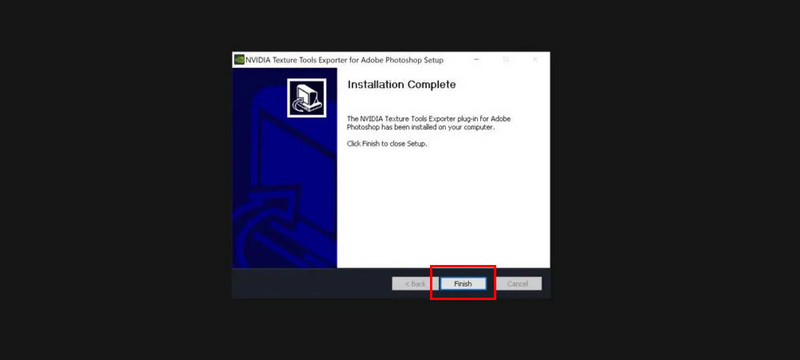
Step 2Quit the Photoshop program and set up the downloaded file on your computer. A small dialog box window will appear on the screen, requiring you to set it up to proceed with the next process. Click the Next button until you see the Finish button at the bottom right. Click it to continue. You can now import the DDS files to Photoshop.
2. Intel® Texture Works Plugin for Photoshop
Intel® Texture Works Plugin is intended for the Photoshop CS2 DDS tool and other versions. The best thing about this plugin is that it is totally free. It supports modern texture compression. This method is commonly used for 3D graphic pipelines and games. It opens and exports DDS images from Photoshop. Besides that, it allows you to generate mipmaps automatically. The installation of this plugin requires professional skills and patience. You are required to open and transfer files from one to another.
Furthermore, this plugin does not support old Photoshop versions. It also does not support macOS devices, including the earlier or latest versions. Do you want to use the Intel® Texture Works Plugin as your Photoshop CS2 DDS plugin? The steps below will be your best guide.
Step 1Click the ZIP button at the top right corner of the Intel® Texture Works Plugin for Photoshop website. Click the Login or Join Now button at the bottom left. This action requires you to sign in to an account. Perform the on-screen steps to proceed with the process.

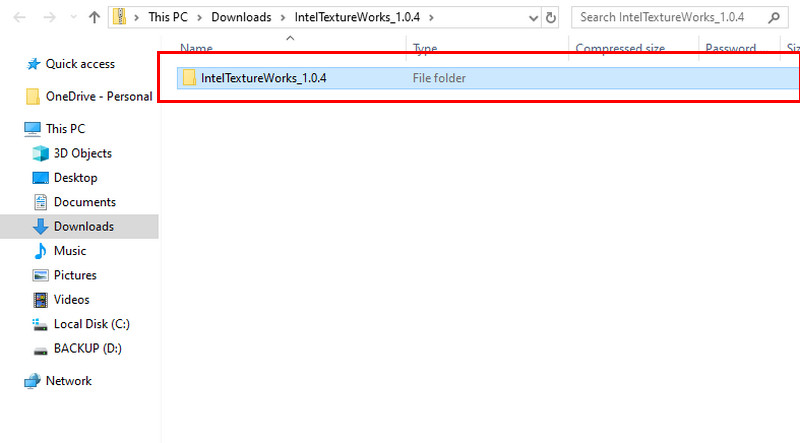
Step 2The ZIP file will be downloaded after a few seconds. Click the IntelTextureWorks folder on the screen and set it up. Select Win32 afterward and follow the on-screen instructions to complete the setup procedure.
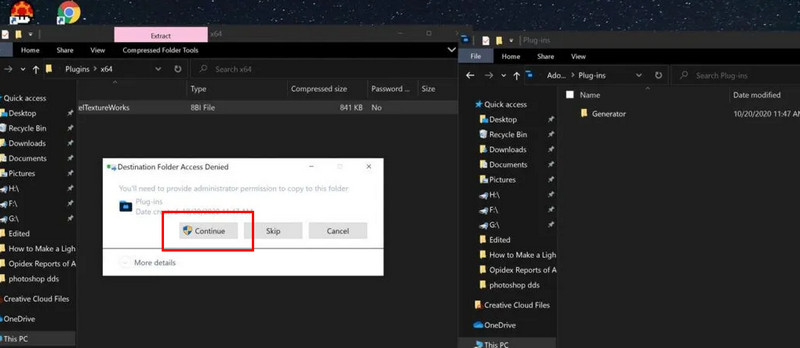
Step 3Open a new File Explorer while Photoshop is opened. Then, search for the Program Files and click the Adobe button from the main screen. Later, click the Photoshop button and select the Plugins button. Finally, click the Continue button.
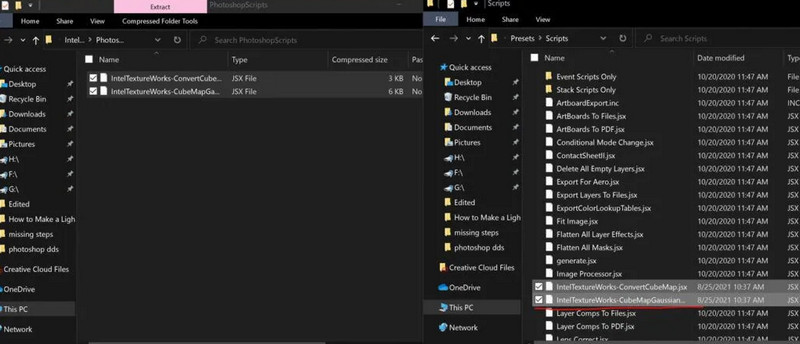
Step 4Go back to the Photoshop folder and click the Presets button. After that, select the Scripts button from the main interface. Two files will appear on the screen. Drag them to the Scripts folder. Finally, you can now access DDS files in Photoshop.
Part 3: Convert DDS to a Format That Photoshop Can Support
Setting up the plugins to open DDS for Photoshop requires patience and intermediate technical skills, right? There is an alternative way to address this issue. Use AVAide Image Converter to convert your DDS files to image formats that Photoshop supports. This online program has a simple interface that novices will find convenient. The best thing about this program is that it allows batch conversion, which will only take a few seconds or minutes to complete. Converting multiple DDS files will no longer consume much of your time.
Additionally, this tool keeps the original quality of your images after the conversion. The instructions you will see below will serve as your guide on how to utilize this online tool to convert DDS files to image formats that Photoshop supports.
Step 1Visit the website of AVAide Image Converter. This way, you will see the interface and full information about the tool. Then, click the plus or Choose Files button in the center.
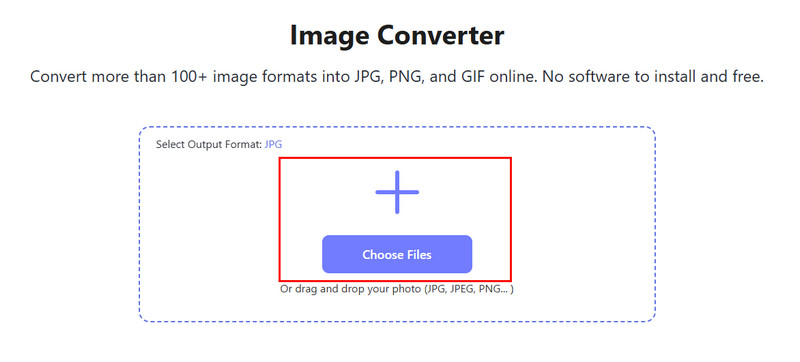
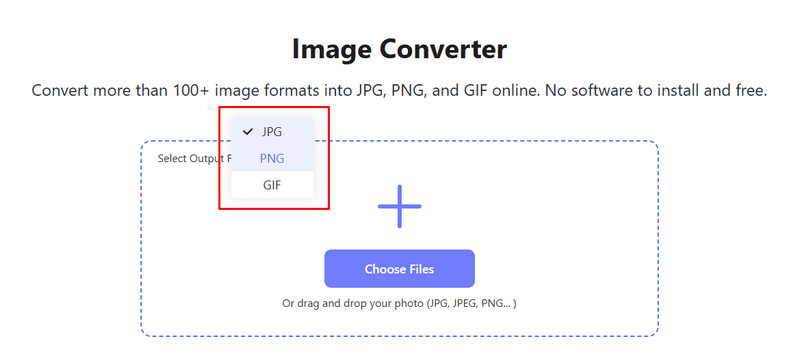
Step 2The computer album will appear. Choose the DDS files you want to convert to import them. Next, go to the Select Output Format section at the top left. Three image formats will appear, and you can choose between JPG, PNG, and GIF.
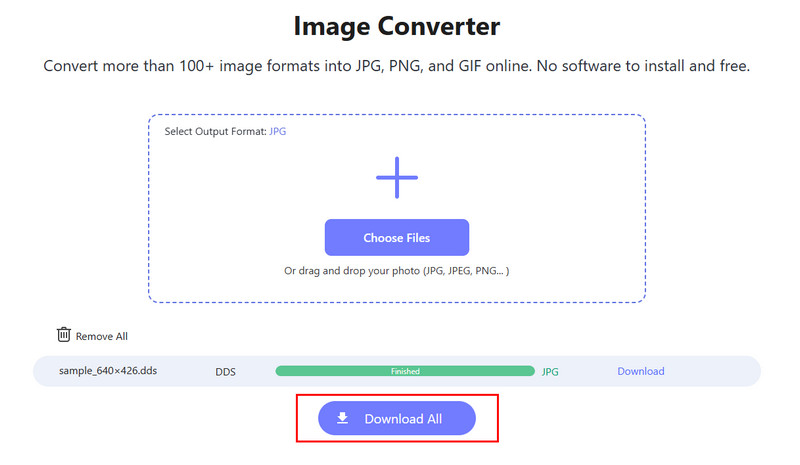
Step 3The online tool will convert the DDS files to your chosen image format automatically. Wait for the conversion to be completed and click the Download All option at the bottom center of the main interface.
In conclusion, there are countless Photoshop .dds plugins you could use to access the files on your computer. You only need to choose the best one and meet all your needs. Their download, set up, and install processes are almost similar. They require time, patience, and skills to be completed. Fortunately, this post has introduced AVAide Image Converter to convert DDS files to image formats that Photoshop supports.

You can easily convert your photo from any image format to a popular JPG, PNG, or GIF with no quality loss.
PROCESS NOW