How to screen record on a Lenovo laptop depends on the tool you choose, from built-in Windows features to advanced software. This guide shows simple, clear, and efficient methods for capturing your screen on Lenovo devices, whether for tutorials, meetings, gameplay, or everyday recording.
Method 1. Using Xbox Game Bar
The built-in recording feature of the Xbox Game Bar is Microsoft's, seamlessly integrates with Windows, and is the most convenient recording solution for Lenovo users. It was created for playing games while also serving as a standard application recorder, tutorial creator, and browser recorder. The top advantage is that it requires no setup; it is ready for use right away.
But there are definite downsides. Does not record the desktop or File Explorer, and customization is restricted to professional tools. However, it is still one of the most convenient built-in options for casual sessions where quality and effort are not as important.
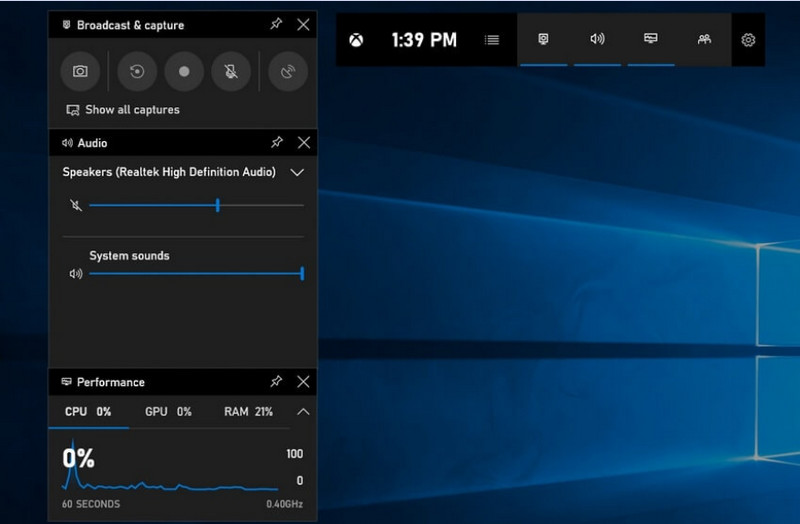
Step 1To open the Xbox Game Bar, press Windows + G on your keyboard.
Step 2Find the Capture panel or click on it from the Widgets menu.
Step 3Click the Record (●) button or press Windows + Alt + R.
Step 4If you wish to record voice, enable the Microphone.
Step 5Press Windows + Alt + R again or click Stop (■) to complete.
Step 6You will find your recording in Videos > Captures.
Method 2. Using Lenovo Vantage
Lenovo Vantage is not a screen recorder; it is a system management and optimization suite. It is more of an indirect role in recording, with very few features that assist the recording process in some form, depending on the recording device model, or even with some devices offering shortcuts or camera/display tools that can help with the recording process.
This is a wide variation in performance and availability. Basic recording functions may be supported on some Lenovo devices, but others may not have these at all. It is limited and somewhat inconsistent in what it can do for full-screen recorders, but it might be valuable to users who want to remain within the Lenovo ecosystem or record podcast content with basic tools.
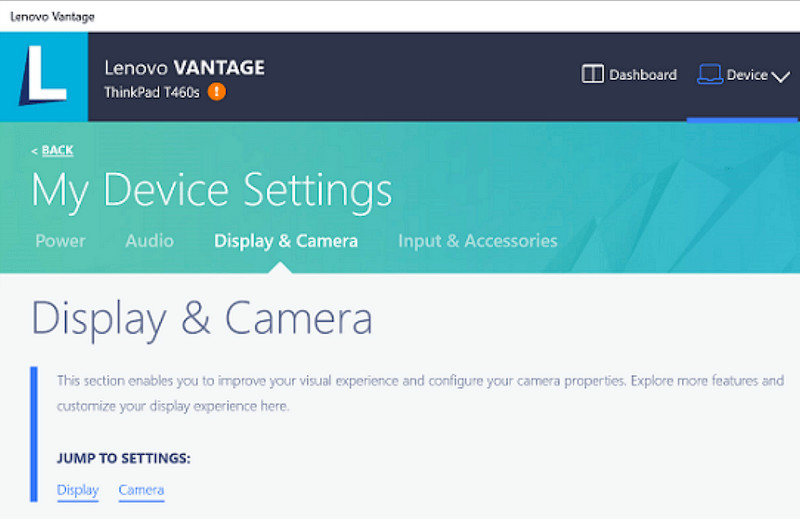
Step 1Go to the Start menu and click on Lenovo Vantage.
Step 2Tap My Device Settings > Display & Camera.
Step 3Check for recordings or other available functions.
Step 4Make any necessary options or shortcuts available.
Step 5Record the music using the function provided (if possible).
Step 6Find recordings you've saved in your Videos folder.
Method 3. Using Legion Zone / Lenovo Nerve Center
Lenovo Nerve Center (or Legion Nerve Center - newer tools from Legion have replaced Nerve Sense) is optimized for Lenovo devices, specifically Lenovo Legion laptops, aimed at gamers. It is also tightly integrated with gaming performance tools, so users can take screenshots of their games while monitoring and optimizing system resources.
It is, however, a rather basic recorder. It is more about convenience than customization, and only offers basic recording options with limited control over resolution, bitrate, and advanced settings. Also, it is only available on some newer systems, and others have replaced or taken it away from their systems, so it is not as reliable as it once was.
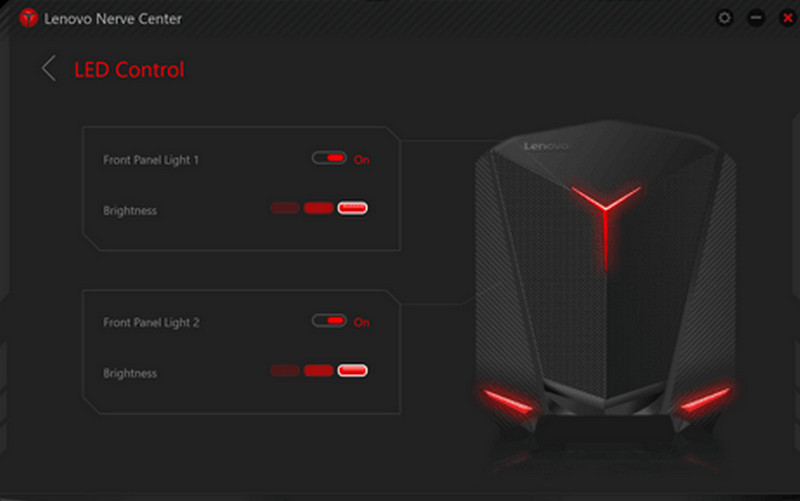
Step 1Access the Lenovo Nerve Center or Legion Zone from the device.
Step 2Navigate to the recording and/or gaming tools.
Step 3If there is a choice, change the recording settings, such as resolution or audio quality.
Step 4Start up the game or application.
Step 5Record with the default shortcut or button.
Step 6Stop recording and look in your Videos folder to see if the file has been recorded.
Method 4. Using AVAide Screen Recorder
AVAide Screen Recorder is a more sophisticated and versatile screen recorder for Lenovo than the built-in screen recorder. It is built for those who want video quality, smoother operation, and greater recording control. It's the perfect tool for creating tutorials, recording meetings, or capturing gameplay, with no complicated setup required, all at a professional level.
While it can capture system sound, microphone input, webcam, and screen areas, it also supports full HD and even 4K recording with minimal lag compared to basic recorders. This makes it an all-in-one screen-capture application for work and leisure.
- Capture videos in 1080p or 4K with smooth, lag-free performance.
- Record in FULL or CUSTOM screen modes depending on your needs.
- Record both internal sound and voice simultaneously with clear output.
- Add Facecam recording for tutorials, presentations, or gameplay videos.
- Trim, compress, and enhance recordings after capturing.

 Secure Download
Step 1Download and Install the Software
Visit the official website of AVAide Screen Recorder. Download Windows Installer, install it on your Lenovo laptop, and run it.
Step 2Choose Recording Mode
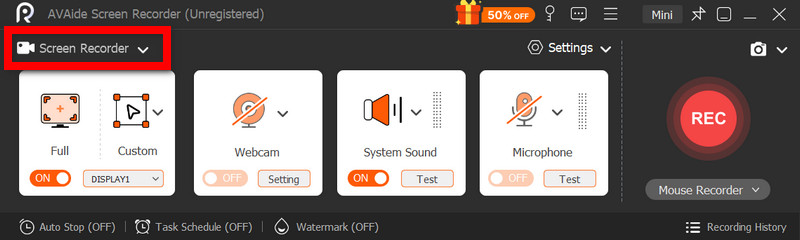
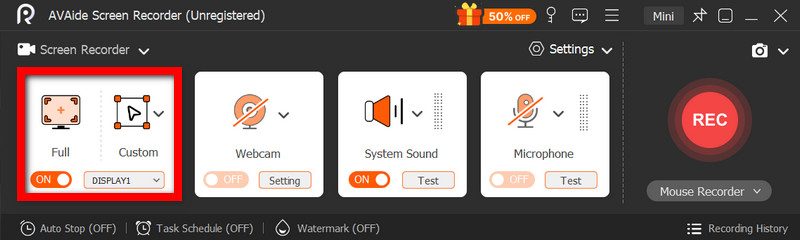
Open the software, then click Screen Recorder. Record the whole screen with Full or a part of the screen with Custom.
Step 3Configure Audio Settings
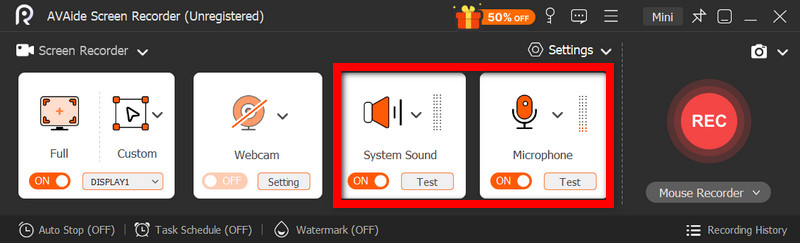
To record any sounds made by the computer, activate System Sound. To include your own voice, activate the Microphone. The webcam can also be switched on as appropriate.
Step 4Adjust Recording Settings
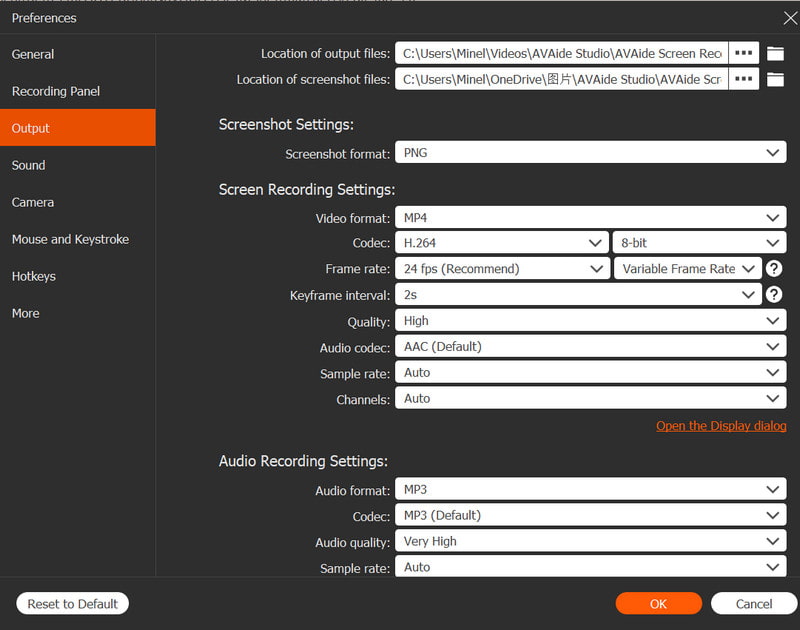
Use the Settings button to configure video quality, resolution, frame rate, and output format to achieve optimal recording performance.
Step 5Start Recording
Press the REC button to start recording. Google Meet recordings, tutorials, gameplay, or any on-screen activity can be recorded smoothly.
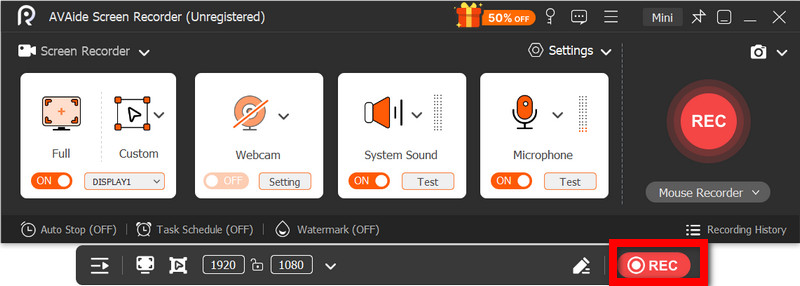
Step 6Stop and Save the Recording
When you have finished, click the Stop button. Preview your recording, edit it quickly if necessary, and save it to your computer instantly.
Method 5. Using Quick Settings
On Lenovo Android tablets, there is an in-built screen recording option in quick settings. The best way to record tutorials, gameplay, or app activity on your tablet is without downloading third-party apps. Easy, quick, and optimized for mobile use, it is ideal for quick recordings on the go.
It lacks the advanced editing and customization features found in other screen capture tools, but it is sufficient for simple screen captures with sound.
Step 1Swipe up from the bottom of the screen to open the Quick Settings.
Step 2Look for the Screen Record or Screen Recorder button. If it is not there, click the Edit button and add it to your panel.
Step 3Click Screen Recorder, then select your desired settings.
Step 4Tap Start to start recording. There will be a countdown before the recording begins.
Step 5Tap the floating toolbar or notification bar, then press Stop to end the recording.
Troubleshooting Common Screen Recording Problems on Lenovo
You can read tips on resolving common issues when recording the screen on a Lenovo device.
While there are generally no major complications with screen recording on Lenovo devices, there is always a possibility of issues depending on the screen recording tool or device used. Below are the most common problems and how to fix them.
- Screen Recorder Not Working: Restart your device and try again. For built-in tools like Xbox Game Bar, ensure it is enabled in Windows Settings under Gaming.
- No Audio in Recording: Check whether System Sound or Microphone is turned on before recording. Also, verify that your system volume is not muted.
- Laggy or Low-Quality Video: Reduce the video quality or close down applications in the background. Upgrading your graphics drivers can also enhance performance.
- Cannot record Desktop or File Explorer: This is one of the common limitations of the Xbox Game Bar. If you want to record your screen and capture everything, use an advanced program such as AVAide Screen Recorder, one of the best screen recorders for Mac and Windows.
- Recording Not Saving: Ensure that your storage is not full, and verify the default save location. In settings, change the output folder, and try it.
Lenovo screen recording button options vary depending on your device and the tool you use. Overall, built-in features and third-party apps make recording simple, giving you flexible ways to capture, save, and manage screen activity efficiently on Lenovo devices.
ABOUT THE AUTHOR

Capture screen activities with audio, online meetings, gameplay videos, music, webcam, etc.