Since promoting products is done online, having a high-quality product photo is essential. That way, your business will catch the eye of your target customers or consumers. If you think that your product photos look unappealing or unprofessional, do not worry. There are still workarounds you can try to improve them. Not only that, you don't need to be a professional photographer to make desired product images. This post will guide you on how to edit your product picture to make it stand out. Plus, you'll learn how to take professional product photos yourself.
Part 1. How to Edit Product Photo
If you already have a captured or available product photo, you need a reliable tool to edit it. Having that said, consider using AVAide Background Remover. It is a web-based photo editing tool that lets you instantly remove the picture background. It uses AI technology to detect and erase a photo's backdrop automatically. Hence, it gives you a transparent background output for your photo. Apart from that, it also lets you refine your selection through the brush tools provided. It means you can choose what to keep or erase from your photo. This online tool lets you edit people, animals, and even product photos. Using it, you can change the product photo background. It offers solid colors like black, white, blue, red, and more. It also enables you to change the background to another image. All these functions can be done for free! Now, this is how you can change the backdrop of your product photo.
Step 1Access AVAide Background Remover
Visit the official AVAide Background Remover website on your browser. Then, click the Choose a Photo to select and import the desired product photo.
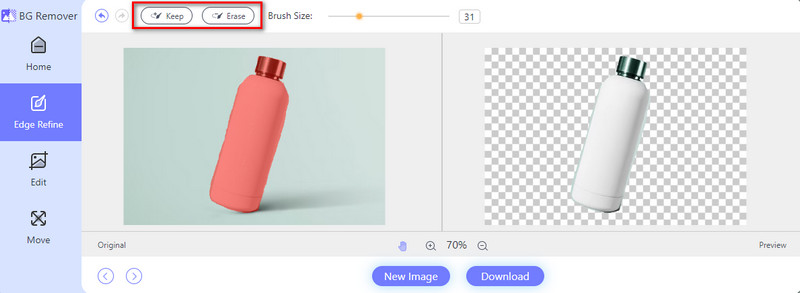
Step 2Remove Background and Refine Selection
Then, the online tool will make your product photo transparent immediately. If unsatisfied, use the Keep or Erase brush tools to refine the selection.
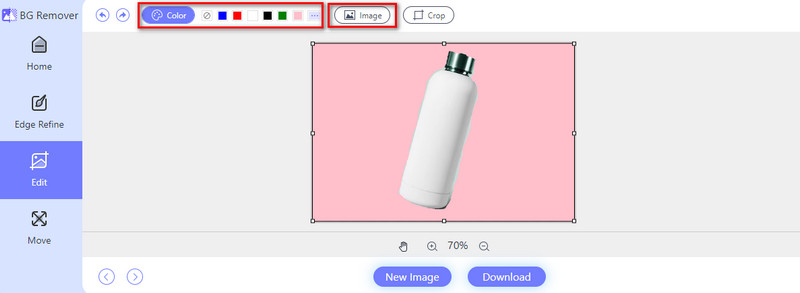
Step 3Change Photo Background
Next, go to the Edit section. Click Color and select a solid color from there to change your photo backdrop. Also, you can adjust the color palette if you want to. Optionally, select Image to select another picture to set as a background.
Step 4Save the Final Output
Once satisfied with the background, click the Download button to save it on your device.
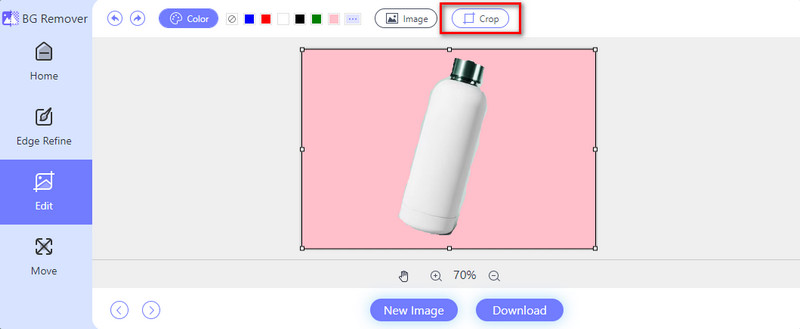
Aside from making a white background for product photos or other colors, it also offers basic editing tools. It lets you crop, rotate, or flip the photo before you save it. To learn how to crop your photo with it, follow this guide.
Step 1From the Edit section still, click the Crop option from the menu.
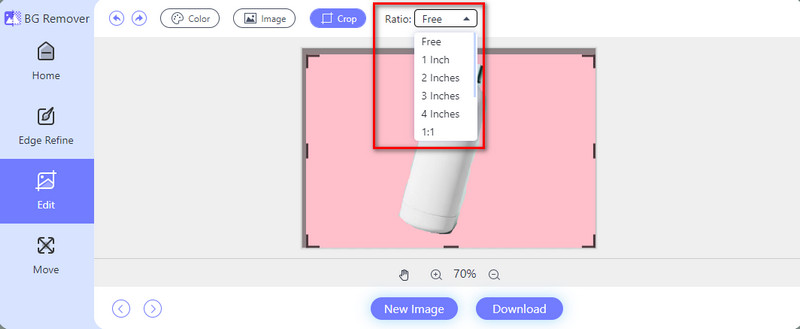
Step 2Then, you can choose your desired Ratio from 1 inch, 2 inches, 1:1, and so on. You can also do it using the option Free to adjust it yourself.
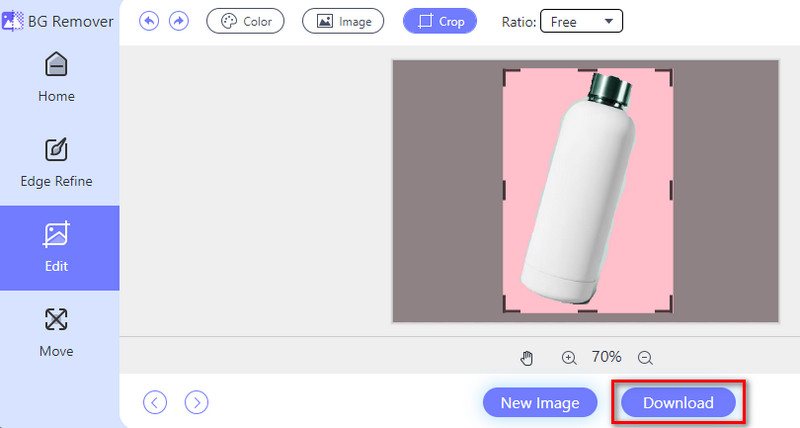
Step 3After that, choose the Download button at the bottom of the tool's interface to save the final output.
Part 2. How to Take Product Photos by Yourself
Taking product photos yourself can be a rewarding and cost-effective way to showcase your products. In this part, we'll provide helpful tips to take product photos yourself. You'll also learn how to take product photos with an iPhone.
1. Prepare your Device/Camera
It is good to have a DSLR camera to capture high-quality product photos. But these days, even smartphone cameras can serve as a DSLR alternative. One of the best devices that has a great camera is the iPhone. Hence, you can use it for your product photography. Yet, you can use any smartphone with a higher megapixel count to ensure better results.
2. Set up Your Shooting Area
Find and select a well-lit area with ample natural light, or set up your artificial lighting. In fact, the closer you are to the window, the softer the light and darker the shadows in your product photos. Now, if you're wondering how to take product images on a white background, you can simply find a white background or clothing. Set it up and ensure it's large enough to cover the area where your product will be placed.
3. Prepare the Product
Next up, clean your product thoroughly to remove any dust, fingerprints, or smudges. Arrange the product in an appealing way. Ensure that you consider its best angles and features. Use props sparingly if they help to enhance the product's appearance or show its size or usage.
4. Compose Your Shot and Take Test Shots
Then, experiment with different compositions and angles. That way, you can find the most engaging perspective for your product. Leave space around the product in the frame to avoid a cramped look. Take a few test shots to review your lighting, composition, and exposure settings. Make adjustments as needed to achieve the desired output.
5. Capture Final Product Photos
Once you're satisfied with the setup and settings, start taking the final photos. Capture multiple shots from different angles and perspectives to provide variety. Finally, pay attention to details and make any necessary adjustments between shots.
Part 3. FAQs About How to Edit Product Photo
How to create product photos with AI?
Many AI tools can help you create product photos you need or want. One such AI tool that can assist you is AVAide Background Remover. You just need to click a few buttons to create your product photos. Do it by accessing its main website. Then, hit the Choose a Photo button. Wait for the tool to process it and make your product photo background transparent. Finally, head to the Edit section to choose the desired image background color. Also, you can select another photo to set as a background for your product.
Is there an app for product photography?
Yes, there are several apps available for product photography, such as Snapseed, VSCO, and Adobe Lightroom Mobile. These apps provide various editing tools and filters. You can use them to enhance your product photos directly on your smartphone or tablet.
What is the best setup for product photos?
The best setup for product photos typically includes a clean, well-lit environment with minimal distractions. Choose a background or surface that goes well with your product. Use natural light or lamps to ensure everything is evenly lit up. It's also helpful to have a tripod to stabilize your camera.
To sum everything up, that's all you need to learn about how to take product photos and edit them. As shown above, there are things you need to prepare to capture product photos yourself. That way, you can acquire the best and desired results to boost your products. At the same time, enhancing taken product photos is also important. If you need a tool to edit and improve your captured photos, consider AVAide Background Remover. With it, you can edit your images easily and for free.

Uses AI and automated background removal technology to capture complex backgrounds from JPG, JPEG, PNG, and GIF.
TRY NOW