Próbuję to rozgryźć jak nagrywać dźwięk na komputerze Mac Często zdarza się to, gdy trzeba nagrać wykład, zapisać rozmowę wideo, nagrać podcast lub szybko utworzyć materiał głosowy. Na szczęście macOS zawiera wbudowane narzędzia do nagrywania, a kilka zewnętrznych opcji ułatwia nagrywanie wysokiej jakości dźwięku z mikrofonu i wewnętrznego.
Metoda 1: Korzystanie z programu QuickTime Player
Wygląda na to, że wszyscy mają QuickTime na swoim macOS. QuickTime oferuje intuicyjny interfejs, niezawodne nagrywanie z mikrofonu i szybki eksport, który nie wymaga żadnej innej aplikacji. Ta technika jest przydatna do nagrywania głosu, wykładów, spotkań online, a nawet prostych nagrań podcastów.
Krok 1Uruchom QuickTime Player z folderu Aplikacje lub za pomocą wyszukiwania Spotlight.
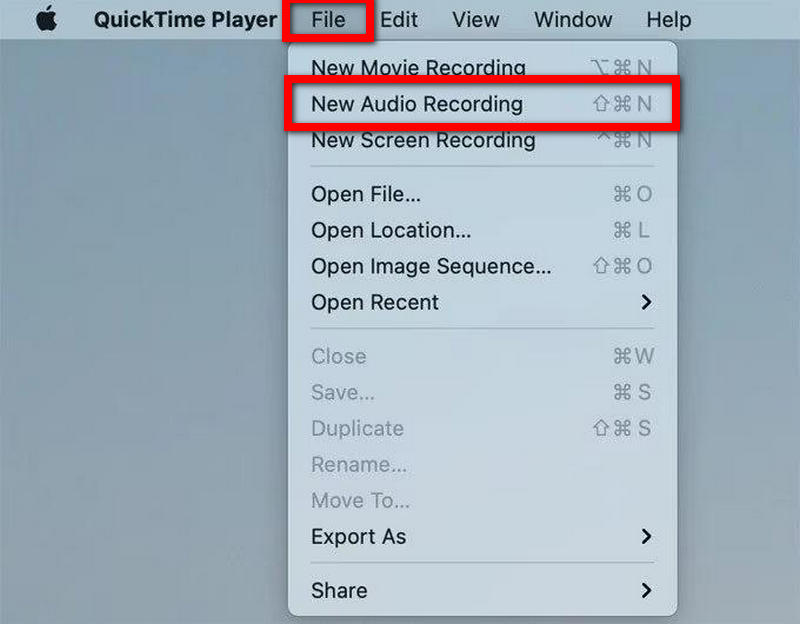
Krok 2Przejdź do Plik menu z górnego paska menu.
Krok 3Kliknij Nowe nagranie audio.
Krok 4Naciśnij małą strzałkę obok Nagrywać przycisk, aby określić mikrofon, którego chcesz użyć.
Krok 5W razie potrzeby dostosuj głośność wejściową.
Krok 6Aby rozpocząć nagrywanie, naciśnij Nagrywać przycisk.
Krok 7 Mów do mikrofonu.
Krok 8wciśnij Zatrzymać przycisk, aby zakończyć nagrywanie.
Krok 9Aby zapisać nagranie na komputerze Mac, przejdź do Plik i wybierz Zapisać.
Metoda 2: Korzystanie z notatek głosowych
Aplikacja Notatki głosowe służy do szybkiego nagrywania głosu. Świetnie nadaje się do tworzenia osobistych przypomnień, burzy mózgów, krótkich wykładów i krótkich nagrań audio. Nagrane notatki głosowe są automatycznie synchronizowane przez iCloud, dzięki czemu są dostępne na wszystkich urządzeniach Apple.
Krok 1Uruchom aplikację Notatki głosowe na komputerze Mac.
Krok 2wciśnij Nagrywać przycisk.
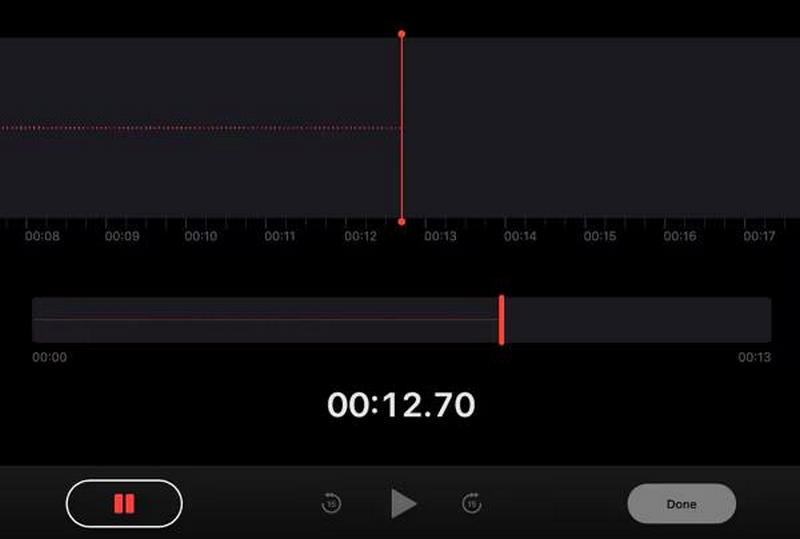
Krok 3Mów przez mikrofon.
Krok 4Jeśli chcesz na chwilę zatrzymać nagrywanie, wybierz Pauza.
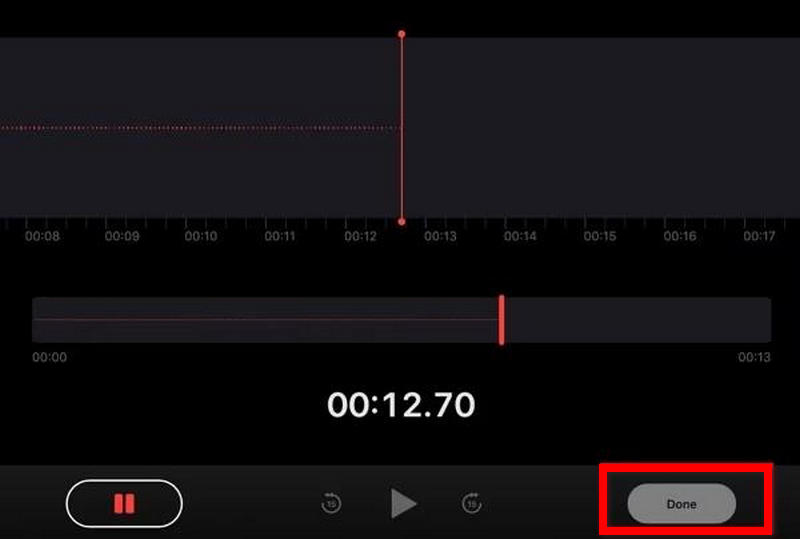
Krok 5Naciskać Gotowe aby zakończyć nagrywanie.
Krok 6Aby łatwiej znaleźć nagranie, wybierz Przemianować opcja.
Krok 7Aby udostępnić, powielić lub wyeksportować nagranie, kliknij plik prawym przyciskiem myszy.
Dlaczego macOS nie obsługuje natywnie wewnętrznego nagrywania dźwięku
System macOS domyślnie umożliwia korzystanie z mikrofonu. Nie ma jednak możliwości nagrywania dźwięku wewnętrznego za pomocą wbudowanej funkcji. Dotyczy to odtwarzania multimediów w aplikacjach, muzyki i dźwięków z przeglądarki. Prywatność, ochrona praw autorskich i bezpieczeństwo systemu to powody, dla których macOS ma te ograniczenia.
W przeciwieństwie do dźwięku z mikrofonu, dźwięk wewnętrzny może zawierać chronione multimedia lub prywatną komunikację z aplikacji. Z tego powodu Apple ogranicza dostęp do wewnętrznych kanałów audio, chyba że użytkownicy zainstalują dodatkowe oprogramowanie.
Z powodu tych problemów narzędzia takie jak QuickTime nie mogą nagrywać wewnętrznego dźwięku, ale dźwięk zewnętrzny za pośrednictwem mikrofonu tak.
Przykłady takich problemów:
- Nagrywaj rozgrywkę wideo z dźwiękiem.
- Nagrywaj zajęcia online.
- Nagrywaj dźwięk i obraz online.
- Nagrywaj dźwięk z filmów online w sieci.
- Nagrywaj filmy instruktażowe z wykorzystaniem wewnętrznego dźwięku komputera.
Metoda 3: Korzystanie z BlackHole + QuickTime Player
BlackHole to darmowy wirtualny sterownik audio, który umożliwia wewnętrzne kierowanie dźwięku systemowego do oprogramowania nagrywającego. Jeśli ten sterownik jest używany wraz z QuickTime, użytkownicy komputerów Mac mogą nagrywać dźwięk wewnętrzny i dźwięk z mikrofonu zewnętrznego. Ten sterownik umożliwia użytkownikom nagrywanie spotkań online, samouczków, gier wideo, webinariów, podcastów i dźwięku z przeglądarki – wszystko z wysoką jakością i czystością dźwięku.
Krok 1Pobierz aplikację BlackHole z oficjalnej strony internetowej i zainstaluj ją na swoim komputerze Mac, a następnie otwórz program Audio MIDI Setup.
Krok 2Utwórz urządzenie wielowyjściowe i włącz głośniki lub słuchawki Maca oraz aplikację BlackHole.
Krok 3 Ustaw urządzenie wielofunkcyjne jako domyślne wyjście audio w ustawieniach dźwięku.
Krok 4Otwórz QuickTime Player, wybierz Plik > Nowe nagranie audio, następnie wybierz Czarna dziura jako mikrofon lub źródło dźwięku.
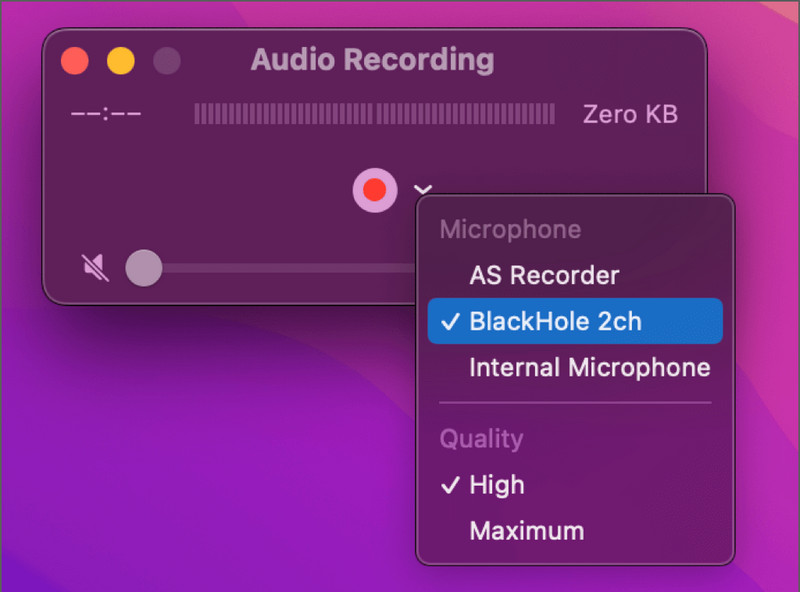
Krok 5Kliknij Nagrywać naciśnij przycisk, odtwórz dźwięk, który chcesz nagrać, a po zakończeniu zatrzymaj i zapisz nagranie.
Metoda 4: Korzystanie z dedykowanego oprogramowania firm trzecich
1. Rejestrator ekranu AVAide
Rejestrator ekranu AVAide Jest idealny dla użytkowników komputerów Mac, którzy poszukują prostego, a zarazem wydajnego narzędzia do nagrywania głosu i dźwięku. Oprócz nagrywania ekranu, AVAide może rejestrować dźwięk z mikrofonu, głośników systemowych i kamery internetowej, a także z ekranu telefonu. Jedną z największych zalet AVAide jest to, że jest przeznaczony zarówno dla początkujących, jak i zaawansowanych użytkowników, co czyni go doskonałym wyborem dla każdego, kto potrzebuje nagrywać głos na komputerze Mac.
- Nagrywa jednocześnie dźwięk z mikrofonu i systemowy.
- Obsługuje nagrywanie dźwięku wysokiej jakości z minimalnym opóźnieniem.
- Umożliwia nagrywanie w pełnym ekranie, w oknie lub w wybranym obszarze.
- Zawiera nagrywanie kamerą internetową na potrzeby samouczków i podcastów.
- Obsługuje wiele formatów eksportu, takich jak MP3, AAC, FLAC, M4A i inne.

 Bezpieczne pobieranie
Krok 1Pobierz i zainstaluj oprogramowanie
Przejdź na stronę internetową AVAide, aby pobrać oprogramowanie. Postępuj zgodnie z instrukcjami wyświetlanymi na ekranie, aby pomyślnie zainstalować oprogramowanie.
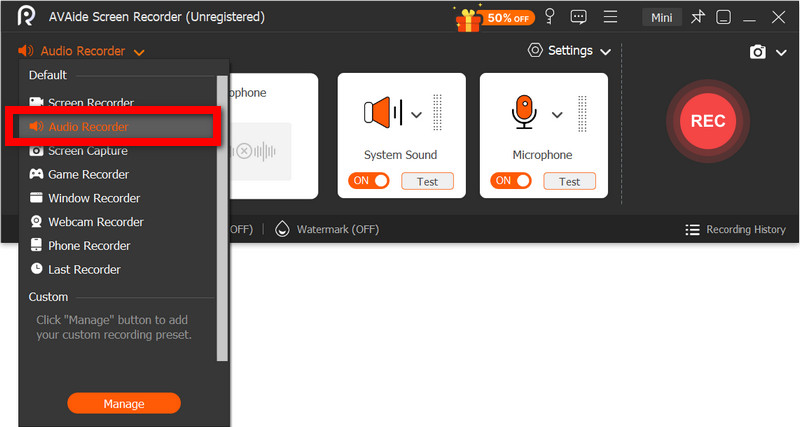
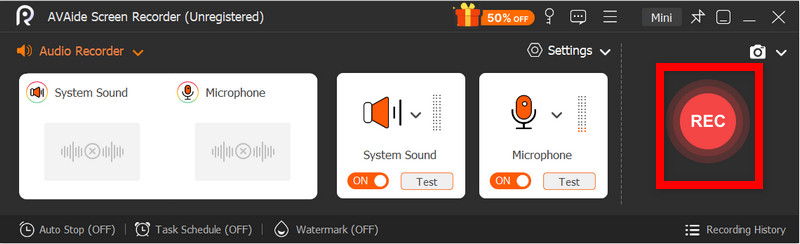
Krok 2Wybierz rejestrator dźwięku
Otwórz oprogramowanie i na stronie głównej wybierz Rejestrator dźwięku nagrywać tylko głos.
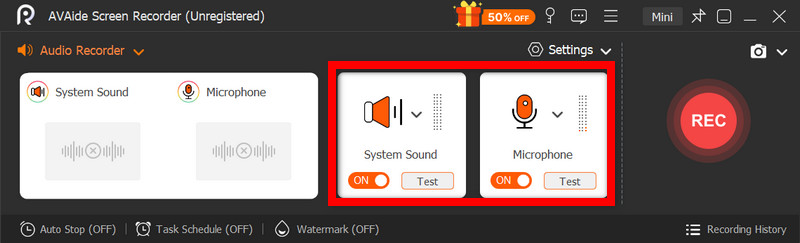
Krok 3Aktywuj mikrofon i dźwięk systemowy
Aktywuj Mikrofon opcja wyraźnego nagrywania głosu. Aktywuj Dźwięk systemowy aby przechwycić wewnętrzny dźwięk z komputera Mac.
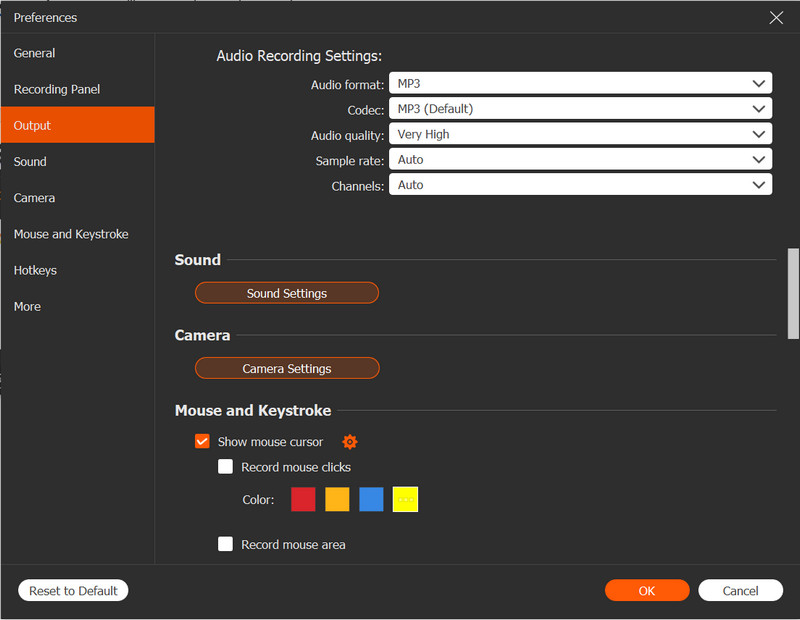
Krok 4Dostosuj ustawienia nagrywania
Od Ustawienia W menu wybierz preferowany format audio i jakość wyjściową. Określ lokalizację zapisu i dostosuj poziom głośności mikrofonu i dźwięku systemowego.
Krok 5Rozpocznij nagrywanie
Wybierz REC Opcja rozpoczęcia nagrywania głosu. Podczas sesji nagrywania możesz ją wstrzymać, wznowić lub dodać notatki.
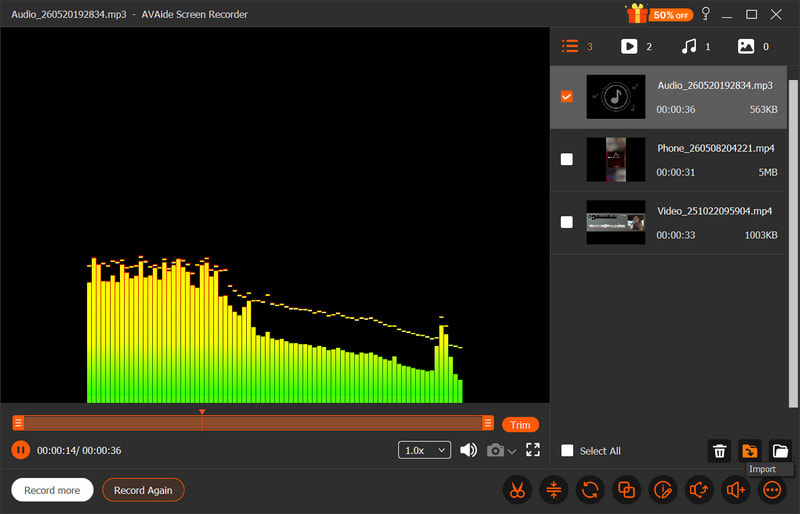
Krok 6Zapisz i wyświetl podgląd
Wybierz Zatrzymać opcja zakończenia nagrywania dźwięku. Następnie możesz przyciąć dźwięk i zapisać nagrany dźwięk na swoim Macu.
2. Korzystanie z Audacity
Audacity to łatwy w użyciu, wydajny i darmowy rejestrator i edytor dźwięku dla komputerów Mac. Jest często wybierany spośród innych programów do podcastów i projektów muzycznych ze względu na prosty proces pracy i profesjonalne funkcje, takie jak redukcja szumów, przycinanie i wzbogacanie dźwięku. Pomimo tych wszystkich funkcji, Audacity oferuje prosty interfejs użytkownika, co czyni go doskonałym wyborem dla początkujących.
Krok 1Pobierz Audacity i zainstaluj na swoim Macu. Otwórz aplikację po zakończeniu instalacji.
Krok 2Wybierz wejście audio. Ustaw wejście na urządzenie audio i dostosuj poziom przechwytywania.
Krok 3Gdy będziesz gotowy do nagrywania, naciśnij Nagrywać naciśnij przycisk i zacznij mówić do mikrofonu.
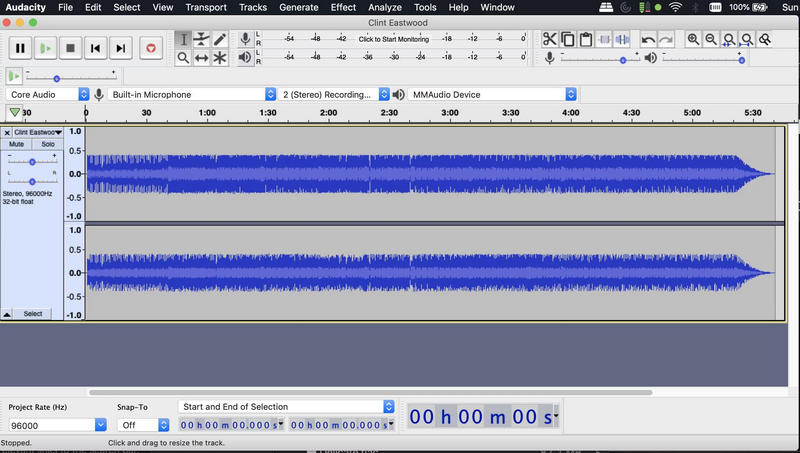
Krok 4Po zakończeniu nagrywania naciśnij przycisk Zatrzymać przycisk.
Krok 5Gdy będziesz zadowolony z nagrania, wybierz projekt, który chcesz wyeksportować, przechodząc do Plik > Eksport. Wybierać MP3, WAVlub inną opcję eksportu audio.
3. Korzystanie z GarageBand
Świetną alternatywą dla Audacity jest GarageBand, autorska aplikacja Apple, preinstalowana na wszystkich komputerach Mac. GarageBand oferuje wszystkie te same funkcje co Audacity, a nawet więcej, takie jak narzędzia muzyczne i efekty audio. GarageBand sprawdza się jeszcze lepiej w produkcjach muzycznych i jest szeroko wykorzystywany do… nagrywać podcast sesje, nagrania lektorskie i wysokiej jakości projekty audio z profesjonalną kontrolą dźwięku.
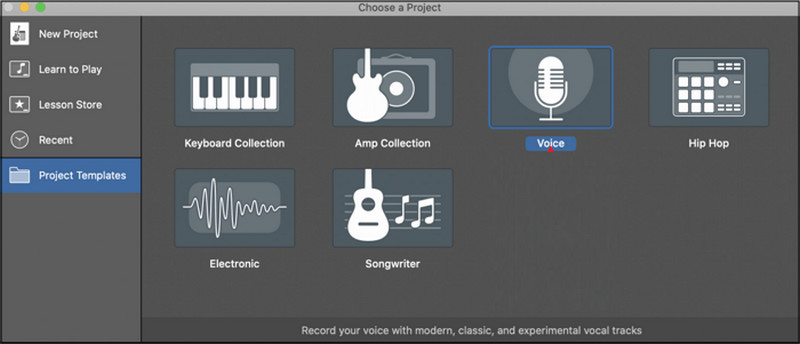
Krok 1Uruchom GarageBand i wybierz Nowy projekt, wybierając opcję Głos.
Krok 2Wybierz wejście, z którego chcesz nagrywać. Jeśli chcesz, włącz monitorowanie dźwięku, aby słyszeć swój głos podczas nagrywania.
Krok 3Uderzyć Nagrywać i rozpocznij sesję.
Krok 4Po zakończeniu nagrywania naciśnij przycisk Zatrzymać przycisk. Skorzystaj z funkcji edycji i regulacji dźwięku w GarageBand, aby udoskonalić swoje nagranie.
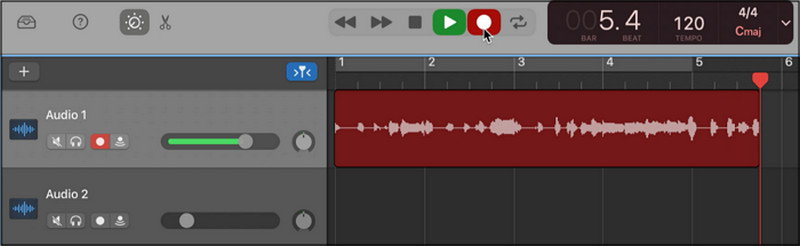
Krok 5Eksportuj ukończony projekt audio w żądanej jakości i formacie na swój komputer Mac.
Dodatkowe wskazówki
1. Jak nagrywać dźwięk z YouTube na komputerze Mac
Aby nagrywać dźwięk z YouTube, kursów online, webinarów oraz odtwarzać podcasty i muzykę na komputerze Mac, możesz użyć OBS Studio – darmowego oprogramowania do nagrywania ekranu i transmisji na żywo. Ponieważ OBS Studio oferuje wysokiej jakości nagrania dźwięków systemowych, jest to doskonałe rozwiązanie.
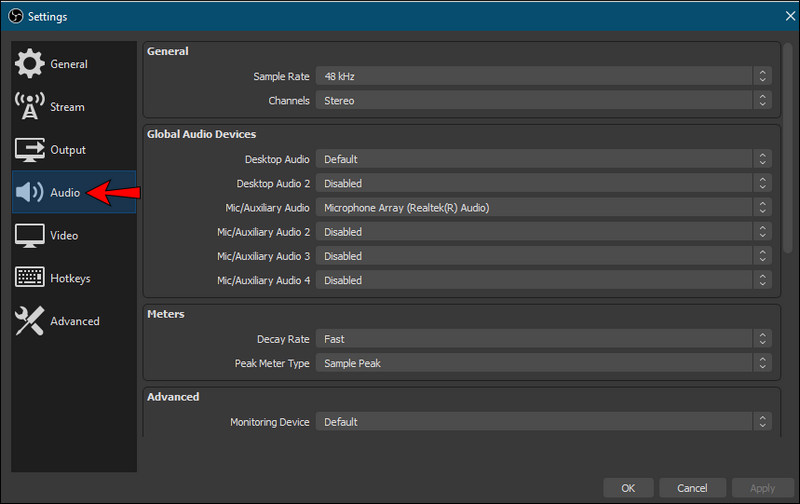
Krok 1Pobierz i zainstaluj OBS Studio na komputerze Mac, a następnie uruchom oprogramowanie po zainstalowaniu.
Krok 2Utwórz nowe źródło w Audio opcję i wybierz urządzenie audio systemu lub wirtualny sterownik audio.
Krok 3Otwórz YouTube w przeglądarce i załaduj wideo/audio, które chcesz nagrać.
Krok 4Uderz w Rozpocznij nagrywanie przycisk, a następnie odtwórz normalnie film/audio z YouTube.
Krok 5Poczekaj, aż dźwięk, który chcesz nagrać, zostanie ukończony, a następnie naciśnij przycisk Zatrzymać kliknij przycisk i znajdź plik audio, który jest teraz zapisany na Twoim komputerze Mac.
2. Jak nagrywać dźwięk na komputerze Mac za pomocą zewnętrznego mikrofonu
Dźwięk z zewnętrznych mikrofonów w większości przypadków charakteryzuje się wyższą jakością dźwięku w porównaniu z wewnętrznym mikrofonem w komputerze Mac. Mikrofony USB mają bezpośrednie połączenie z komputerem Mac. Jednak mikrofony XLR mogą wymagać interfejsu audio dla lepszej jakości dźwięku i niższego poziomu szumów. Korzystanie z najlepszy rejestrator ekranu dla komputerów Mac może również pomóc w uzyskaniu wyraźniejszych nagrań podczas łączenia zadań audio i wideo.
Krok 1Podłącz wybrany mikrofon do komputera Mac i otwórz Ustawienia systemowe, przejdź do Dźwięki ustaw podłączony mikrofon jako urządzenie wejściowe.
Krok 2Dostosuj poziom sygnału wejściowego mikrofonu i przetestuj dźwięk, aby upewnić się, że Twój głos jest wyraźnie słyszalny.
Krok 3Otwórz preferowany program do nagrywania, np. AVAide Screen Recorder.
Krok 4Wybierz mikrofon zewnętrzny w ustawieniach oprogramowania i rozpocznij nagrywanie głosu lub dźwięku.
Krok 5Zatrzymaj nagrywanie, sprawdź jakość dźwięku i zapisz lub wyeksportuj końcowy plik audio na swój komputer Mac.
Nagraj głos Maca Z łatwością korzystaj z wbudowanych narzędzi, takich jak QuickTime i Notatki głosowe, lub zaawansowanego oprogramowania do nagrywania w jakości profesjonalnej. Niezależnie od tego, czy potrzebujesz wewnętrznego dźwięku, narracji do podcastu, czy nagrań wykładów online, te metody zapewniają niezawodne i wydajne nagrywanie czystego dźwięku na komputerze Mac.
O AUTORZE

Przechwytuj działania na ekranie z dźwiękiem, spotkaniami online, filmami z gry, muzyką, kamerą internetową itp.