A designer once sent a client a project, only to find the images looked pixelated in print. Frustration mounted, but a simple fix existed: increasing DPI. When one learns how to enhance the DPI of an image, one can avoid a blurred image and retain detail, ensuring the visuals are of professional standard. This guide takes you through five practical techniques, compares their benefits, and helps you make informed, proper decisions. These steps will make even complex images printable and crisp, with sharp, clear photos.
Part 1: What Is Image DPI?
DPI, or dots per inch, measures an images resolution. It shows how many tiny dots of color appear per inch in the image. In this case, a 300 DPI image has 300 dots per inch, producing sharp, detailed images suitable for printing photos, posters, or other professional graphics. Imagine it as a mosaic: the more tiles you place in the same area, the more precise and more detailed the picture becomes. Even when a screen displays them as fine images, low-DPI images may appear blurred or even pixelated. This is what you need to understand before you enlarge the DPI of the image since this is the reason why higher DPI is essential to the clarity and quality of the image.
Part 2: Top 5 Ways to Increase the DPI of an Image
1. AVAide Image Upscaler
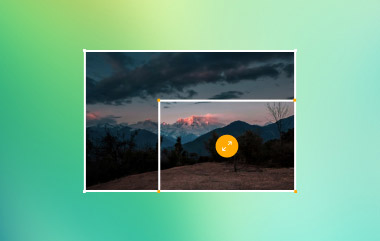
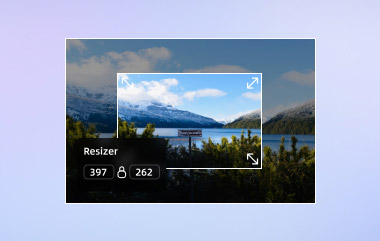
If you have ever asked, "How do I increase the DPI of an image?" AVAide Image Upscaler is a fast and reliable solution. It is an AI-powered image magnifier that does not blur images when magnified, retaining sharpness and minute details; it is entirely web-based and also exports files without watermarks. It has easy uploading; Click, and drop your picture into the browser. In addition to the images, AVAide allows one to upsample the videos up to 200 percent, 400 percent, and even 800 percent. AVAide can produce high-quality videos, digital projects, and print work in a professional, high-resolution format, at a low cost and without hassle.
Key Features:
- AI-powered upscaling to increase the DPI accurately for images
- Enhances clarity and detail during enlargement like a pro tool
- Free online tool with no installation or sign-up required
- No watermark added when exporting images
- Drag-and-drop support for easy uploads
- Video upscaling from 200%, 400%, up to 800%
- Supports upscaling images simultaneously
Step 1Open a new tab on your device and search for the official AVAide Image Upscaler website.
Step 2After that, click Upload Your Image to import the picture and increase its DPI.

Step 3Next, choose the magnification level you want to apply to the uploaded image. If you want a higher DPI, we suggest setting the magnification to 8x.
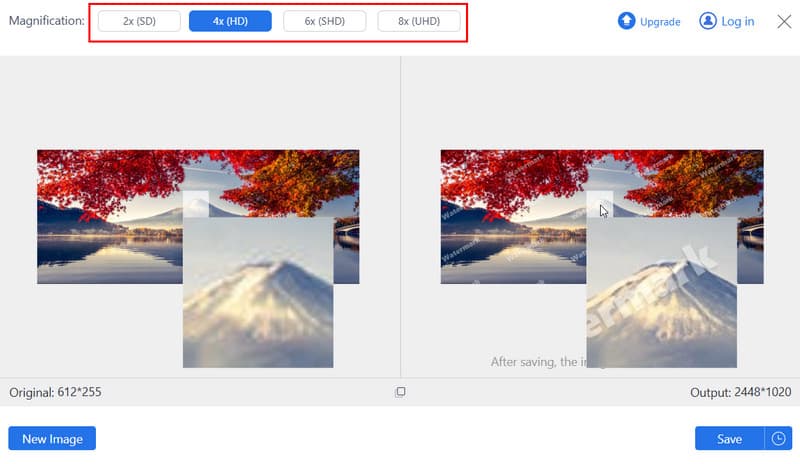
Step 4Finally, click the Save button to save the increased image DPI on your device.

2. Adobe Photoshop
Adobe Photoshop is the industry-standard software for increasing image DPI with precision. It allows users to adjust resolution while maintaining image quality, making it ideal for print or professional design projects. If the image quality is low, use Photoshop Super Resolution to fix the problem.
Key Features:
- Adjustable DPI in Image Size settings
- High-quality resampling options to prevent blurriness
- Supports multiple file formats for export
Step 1Open Photoshop and import your image.
Step 2Go to Image > Image Size, check Resample, and set the new DPI value.
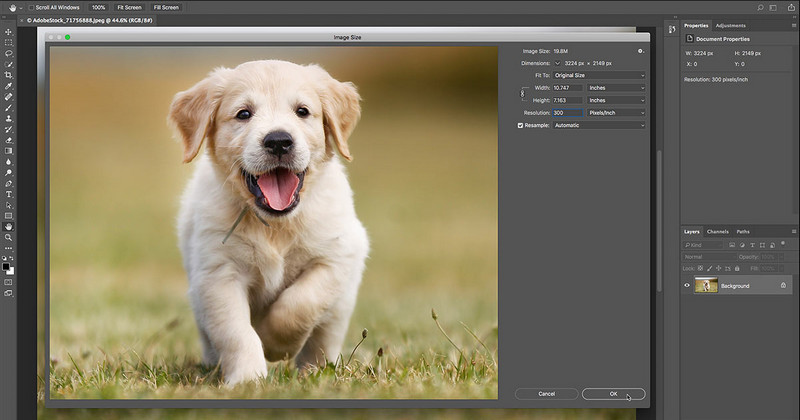
Step 3Click OK and save the image to apply the changes.
3. Preview on Mac
Preview, the built-in Mac application, can quickly help you how to increase the DPI of a picture without installing extra software. It is lightweight and ideal for simple DPI adjustments for printing or digital use.
Key Features:
- Built into macOS with no installation required
- Basic DPI adjustment options for quick results
- Lightweight and easy to use
Step 1Open your image in Preview.
Step 2Click Tools > Adjust Size, then enter the desired DPI in the Resolution field.
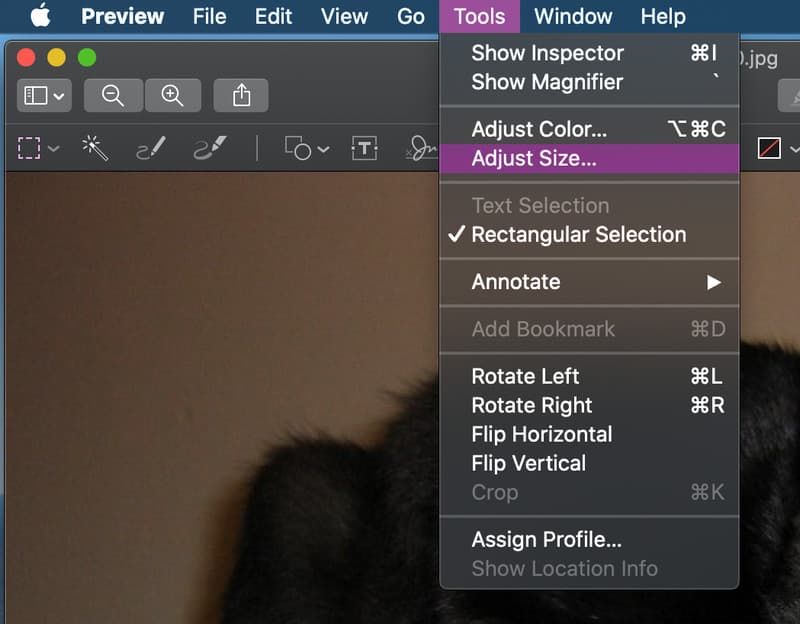
Step 3Save the image to apply the new DPI.
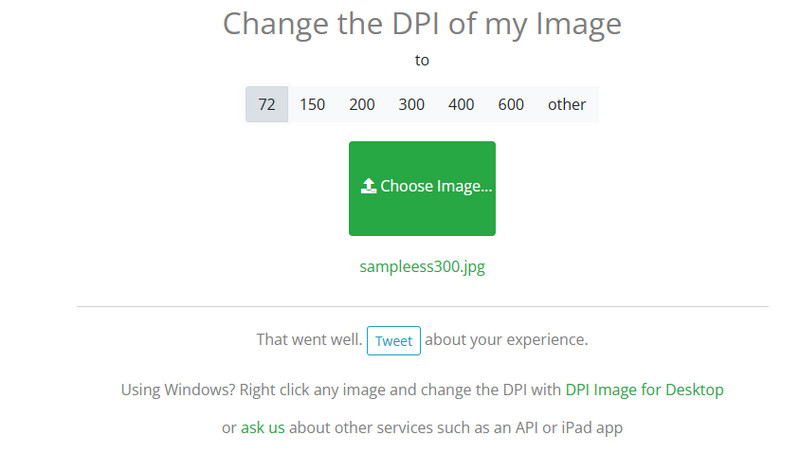
4. ConvertTown
ConvertTown is a convenient, free tool that allows you to learn how to increase photo DPI from any browser. It is perfect for users who need a quick solution without installing software. However, the app does not support previewing before exporting, which leaves you guessing if it truly increases the DPI of the uploaded image.
Key Features:
- Free and browser-based, no installation required
- Adjustable DPI settings for various image formats
- Works on Windows, Mac, and mobile devices
Step 1Open Online-Convert.com in your browser.
Step 2Pick the desired DPI value from the list above.
Step 3Upload your image using the Choose Image button, and it automatically increases the DPI of your image.
5. GIMP
GIMP is a free, open-source alternative for users who want to increase photo DPI while retaining control over improved image quality. It works on Windows, Mac, and Linux. For increasing the DPI, it can be a bit stiff to use, as you may see when comparing it to the other tools here. Especially if you are a beginner who needs to do a simple upscaling.
Key Features:
- Free and open-source, fully customizable
- Precise DPI adjustment and resampling options
- Suitable for advanced editing and print preparation
Step 1Open your image in GIMP.
Step 2Go to Image > Print Size and enter the new DPI value.
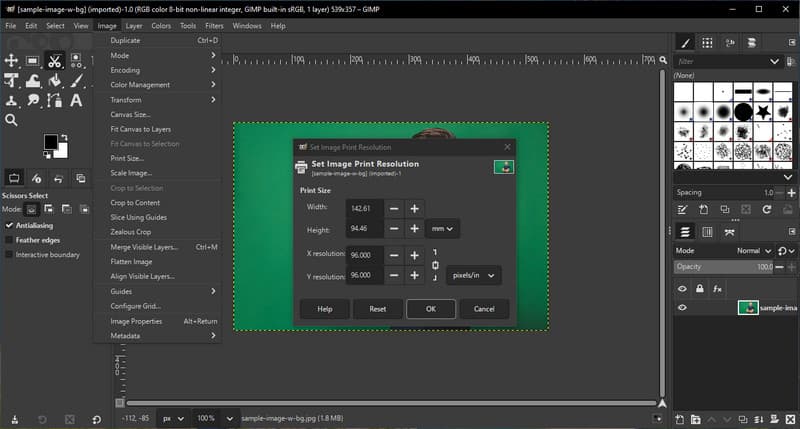
Step 3Export the image to save it with the updated DPI.
Part 3: Comparison of the 5 DPI Increasers
If you have ever asked, "How do I increase the DPI of an image?" Choosing the right tool can make a big difference in quality, speed, and ease of use. The following chart compares the five most popular options, highlighting key features, pros, cons, and ideal use cases.
- Platform
- Free to Use
- Ease of Use
- AI Technology Supported
- Best For
| AVAide Image Upscaler | Adobe Photoshop | Preview on Mac | ConvertTown | GIMP |
| Online | Windows and Mac | Mac | Online | Windows, Mac, and Linux |
| Free | Paid | Free | Free | Free |
| Very Easy | Advanced | Easy | Easy | Average |
| Yes | Yes | No | No | Yes |
| Fast DPI increase for images without installation | Professional designers and print-ready projects | Quick, simple DPI adjustments for print | Fast browser-based DPI fixes | Advanced users who want detailed control without cost |
Using the right tool ensures your images stay sharp and clear. Understanding DPI for high-resolution photos helps you prevent blurry or pixelated results, whether for printing, digital use, or presentations. AVAide or traditional tools can all work; it just depends on how much control or speed you need.
Part 4: FAQs on How to Increase Image DPI
How to ensure an image is 300 DPI?
On Windows, right-click the image, select Properties > Details, and check the Resolution. On a Mac, open the image in Preview, then go to Tools > Show Inspector to see the DPI. If it is below 300, you can use tools like AVAide Image Upscaler to increase it while keeping the image sharp.
Can PNG have 300 DPI?
Yes. PNG files can have any DPI. DPI is a resolution setting, not a file format. You can change it in Photoshop, GIMP, or online converters. Increasing the DPI tells programs or printers how sharp to display the image.
How to convert a normal image to high resolution?
Use software or online tools to increase DPI. Photoshop and Gimp allow you to resample images to preserve details. AVAide and other online applications that use AI to enlarge images while maintaining clarity, producing high-resolution images that can be printed or used digitally.
Knowing how to increase DPI makes your images sharper and more precise. Whether you use Photoshop, Preview, or AVAide Image Upscaler, understanding how to improve the DPI on a photo helps you create high-resolution images for print, digital projects, or presentations quickly and easily.
ABOUT THE AUTHOR


Our AI technology will automatically enhance the quality of your images, remove noise and fix blurry images online.
PROCESS NOW