A Bluebeam watermark helps mark documents with important labels like confidential, draft, or company logos. It makes files look professional and keeps them secure. With Bluebeam watermark tools, you can place a watermark on a single page or all pages in a few steps.
In this tutorial, we will walk you through the basic steps of adding and removing watermarks in Bluebeam. Furthermore, in case that Bluebeam is not available, we will offer an online watermark remover that can be useful. Stay tuned for the easiest way to deal with watermarks!
Part 1: How Do I Add a Watermark in Bluebeam
Watermarks help protect files and make them look more professional. Bluebeam lets you easily add watermarks to a single page or multiple pages. So, in this part, we will teach you how Bluebeam watermark all pages or a single page. You will quickly learn how to insert, customize, and apply watermarks. Follow along, and you can add watermarks in just a few clicks!
1. How to Add a Watermark in Bluebeam to a Single Page
Step 1First, launch Bluebeam Revu and open the PDF file where you want to add a watermark.
Step 2Click on the Tools menu at the top. Then, choose the Stamps option to access watermark options.
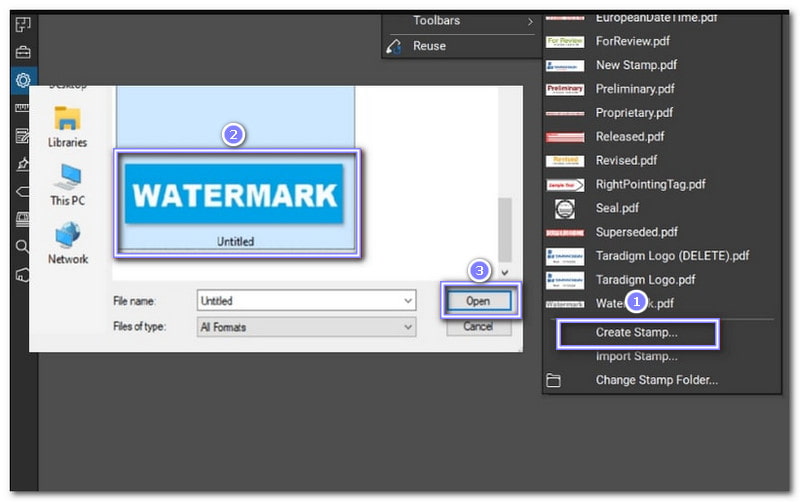
Step 3You can pick a ready-made stamp or make your own. To create a custom one, click the Stamp button and then Create. A display will open where you can adjust text, font, size, color, opacity, and rotation.
Step 4Type your watermark text or upload an image. Place it on the document by clicking and dragging. You can resize and rotate it if needed. Make sure it is visible but does not block important content.
Step 5When happy with the watermark, go to File at the top and select Save As. Please pick a name and save your file.
2. How to Add a Watermark in Bluebeam to Multiple Pages
Step 1Click on Batch at the top. Then, choose the Apply Stamp option. A window will pop up.
Step 2Click Load to use a saved batch. If you want to add new files, click the Add button. You can pick single files, folders, or subfolders.
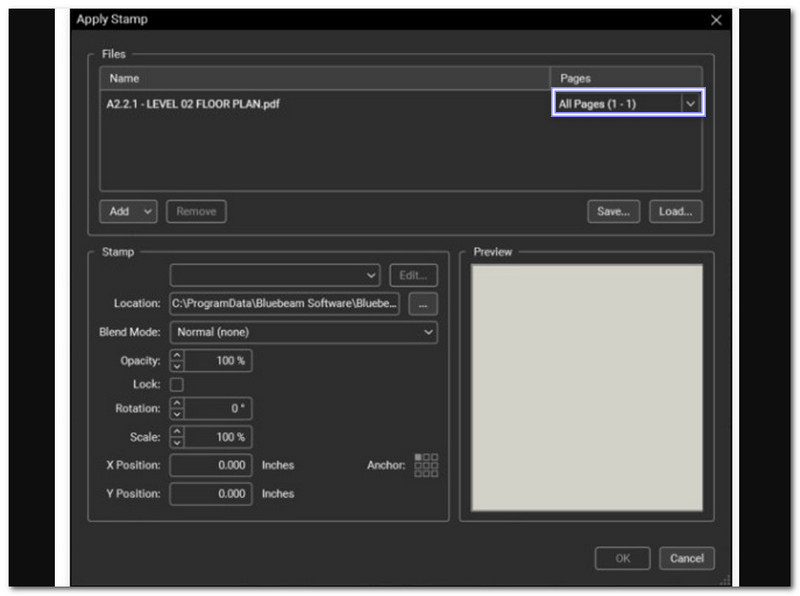
Step 3In the Pages column, use the drop-down menu to set which pages get the watermark in each file.
Step 4Pick a watermark from the Stamp drop-down or upload one from your computer. Change opacity, rotation, and position to fit your needs.
Step 5Click Save to keep your settings. Then, click the OK button to apply the watermark. If the files are open in Revu, you must save them manually. If they are not open, Revu will save them automatically.
Part 2: How Do You Remove Watermarks in Bluebeam
What if you want to remove the watermark? Can you do that in Bluebeam, too? Yes, you can! Bluebeam has built-in tools that simplify removing logos, text, or any type of watermark. You can remove them from a single page or multiple pages at once. Follow the steps and discover how Bluebeam watermark removal works to eliminate unwanted watermarks hassle-free!
1. How to Remove a Watermark in Bluebeam to a Single Page
Step 1Launch Bluebeam Revu and open the PDF file with the watermark you want to remove.
Step 2Click on Edit at the top. Then, choose Edit Content from the menu. You can also press Alt + 6 as a shortcut.
Step 3Find the watermark on your page. It may be text or an image. Click on it. You should see a box or handles around it.
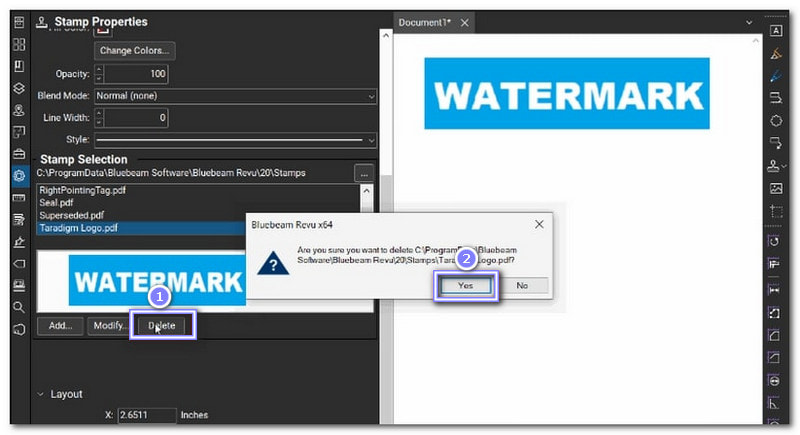
Step 4Right-click on the watermark and choose the Delete button. You can also press the Del key on your keyboard.
Step 5Go to File and click Save. Now, your PDF is watermark-free!
2. How to Remove a Watermark in Bluebeam to Multiple Pages
Step 1Click View at the top. Choose Thumbnails from the menu. It will open a panel on the left showing all the pages.
Step 2Click the first page. Then, hold Shift and click the last page to select everything in between. If you want to pick specific pages, hold Ctrl on Windows or Cmd on Mac and click each one.
Step 3Click Edit at the top. Then, choose the Edit Content button. You can also press Alt + 6 as a shortcut.
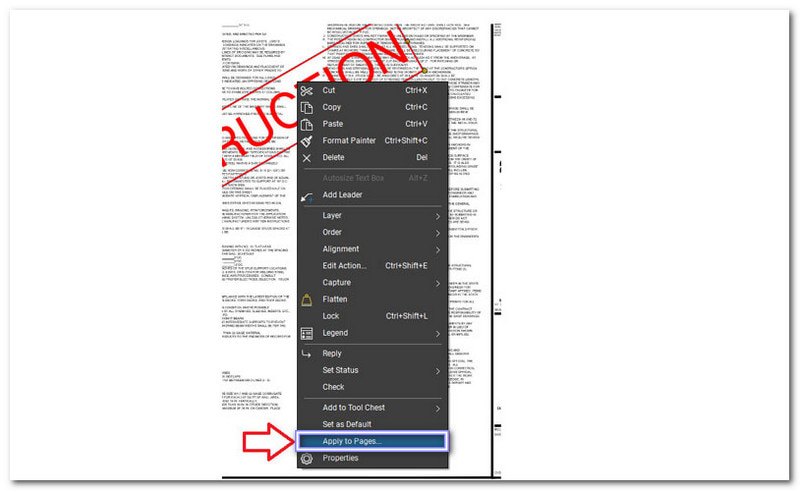
Step 4Find the watermark on one of the pages. Click on it. Press Del or right-click and choose Delete.
Step 5The watermark will be removed from all selected pages. Click the File menu and pick Save to keep the changes.
Part 3. More Tips: The Best Watermark Remover Online
Removing watermarks from images has never been easier. AVAide Watermark Remover is the best online tool to remove texts, unwanted logos, or objects from images without leaving any traces. It works fast and delivers clean results without harming the background.
This tool is online, free, and powered by AI, making watermark removal simple and effective. With just one click, you can eliminate watermarks and restore your photos to perfection. No extra skills are needed; let the AI do the rest.
Step 1Visit AVAide Watermark Remover's official website to access it. Then, press the Choose a Photo button in the center to add the image you want to remove the watermark. It can be JPG, JPEG, PNG, or GIF. You can also drag and drop the photo for a faster upload process.

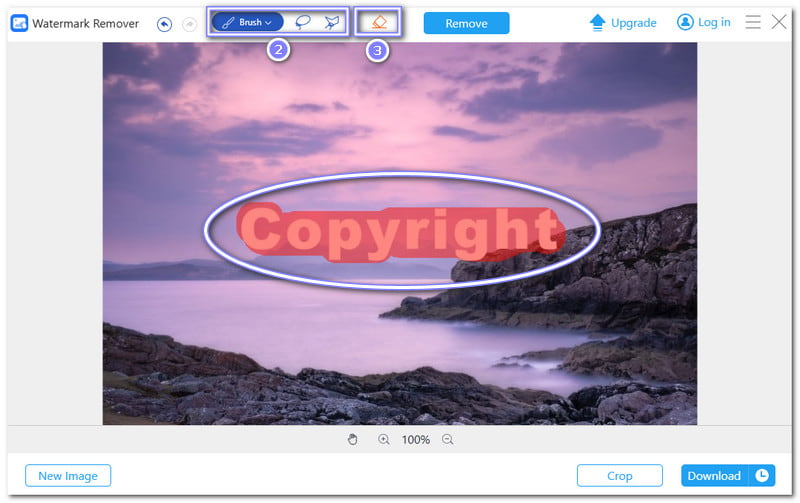
Step 2Once your image loads, highlight the watermark using the Brush, Lasso, or Polygon tool. It will turn red. If you highlight the wrong area, click Undo to fix it.
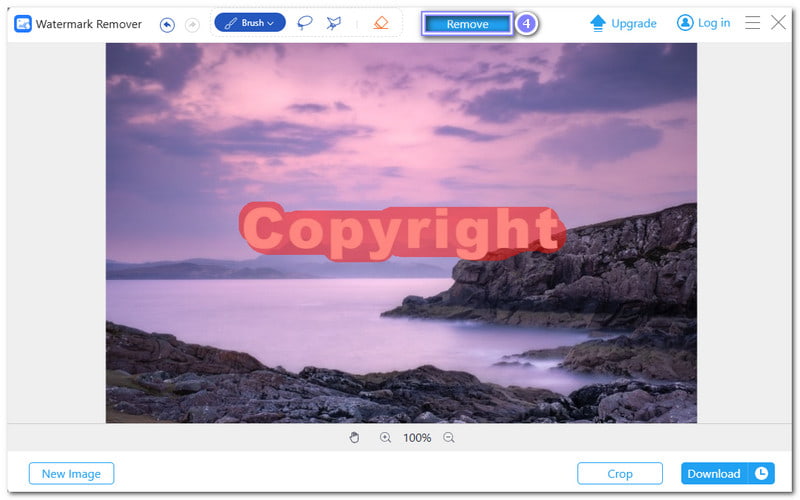
Step 3Click Remove to erase the watermark. Depending on your internet speed and the watermark's size, the process may take a few seconds.
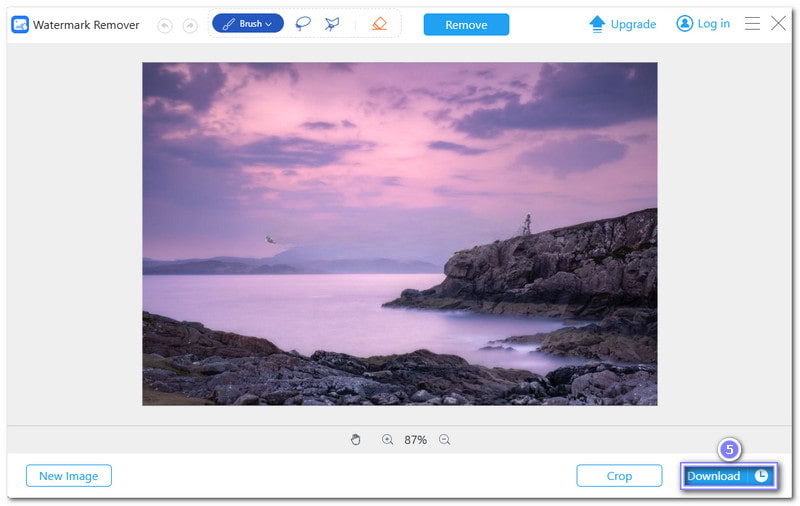
Step 4If the result looks good, click Download to save the clean image. If needed, use the Brush tool to touch up minor details before saving.
That is a wrap on adding or removing watermarks in Bluebeam. Luckily, Bluebeam watermark all pages can be done if you want to incorporate a watermark to numerous pages, not just one. But we need to remember that some files need a watermark for security, while others require a clean, professional look without one.
Bluebeam is an offline watermark remover, and if you are looking for the best online tool to erase watermarks fast, AVAide Watermark Remover is a great choice. It is free, easy to use, and powered by AI to ensure flawless results. Try it now!

Easily get rid of annoying watermarks and unwanted objects from your photos without quality loss.
PROCESS NOW