logiciel d'enregistrement de podcasts Ce guide devient indispensable lorsque vous décidez enfin de lancer votre premier podcast, mais que vous rencontrez des difficultés avec un son de mauvaise qualité, des bruits de fond ou des outils d'enregistrement complexes. Que vous envisagiez d'enregistrer des épisodes en solo, des interviews à distance ou des podcasts sur iPhone, ce guide couvre le matériel, les méthodes d'enregistrement et les outils pratiques nécessaires à la création d'épisodes de podcast de qualité professionnelle.
Partie 1. Équipement essentiel pour l'enregistrement de podcasts
Microphones : l’investissement le plus important
La qualité audio de votre podcast dépend directement de la qualité du microphone que vous utilisez. Un son équilibré et clair capte l'attention des auditeurs et permet de réaliser des podcasts de qualité professionnelle.
1. Microphones USB
Extrêmement simples d'utilisation, les microphones USB offrent une connexion directe à votre appareil et facilitent la création de podcasts simples. C'est pourquoi ils sont parfaits pour les débutants, car ils conviennent parfaitement aux interviews en ligne et aux studios d'enregistrement à domicile.
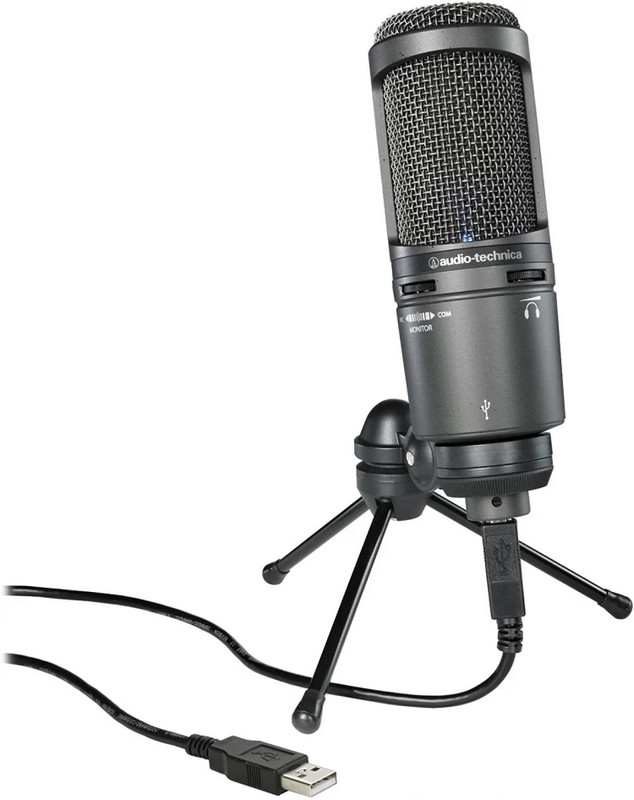
Voici quelques microphones USB courants :
- Yéti bleu
- Audio-Technica AT2020USB+
- Rode NT-USB
2. Microphones XLR
Les microphones XLR sont tout à fait différents. Ils offrent une excellente qualité d'entrée audio et un contrôle précis du rendu sonore. Ce sont d'excellents investissements pour les configurations de podcasting avancées. Ils se distinguent des microphones USB par le fait qu'ils nécessitent une interface audio ou une table de mixage.

Voici quelques microphones XLR courants :
- Shure SM7B
- PodMic Rode
- Electro-Voice RE20
Interface audio (pour micros XLR)
Une interface audio est le partenaire idéal de votre microphone XLR, car elle améliore la qualité de vos enregistrements et convertit l'audio en un format numérique compatible avec votre ordinateur. Ce processus réduit également considérablement le bruit de fond de vos enregistrements et vous permet même de… Jouer de la musique pendant l'enregistrement.
Voici quelques bonnes interfaces audio :
- Focusrite Scarlett 2i2
- PreSonus AudioBox USB 96
- Universal Audio Volt 2
Casque audio
Pouvoir contrôler son audio pendant l'enregistrement et limiter les fuites d'écho dans le microphone sont quelques-uns des avantages d'un casque fermé de bonne qualité.
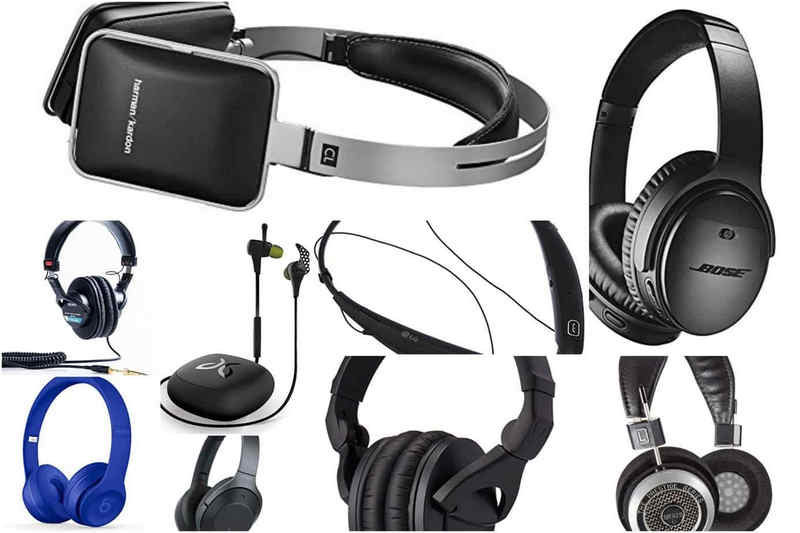
Quelques excellents casques pour podcast :
- Audio-Technica ATH-M50x
- Sony MDR-7506
- Beyerdynamic DT 770 Pro
Accessoires
L'un des achats essentiels pour améliorer le confort et la qualité audio lors de l'enregistrement est constitué par les accessoires supplémentaires.

- Filtre anti-pop : Ces dispositifs servent à atténuer le claquement sec que produisent des lettres comme le P et le B.
- Bras de flèche : Ces supports permettent de stabiliser votre microphone tout en libérant de l'espace sur votre bureau.
- Panneaux en mousse acoustique : Ces dispositifs sont parfaits pour améliorer l'acoustique de votre espace tout en contrôlant l'écho.
- Support anti-chocs : Un support antichoc minimise les vibrations et le bruit du bureau pendant l'enregistrement.
Partie 2. Les meilleures méthodes d'enregistrement de podcasts
Méthode 1 : Enregistrer un podcast avec AVAide Screen Recorder
Enregistrement de podcasts à l'aide de AVAide Enregistreur d'écran Ce logiciel est simple et fiable. Il fait partie des meilleurs programmes permettant de capturer simultanément l'écran, la webcam et l'audio, y compris l'écran de votre téléphone. Sans latence, il est idéal pour les interviews à distance, les sessions de podcast, les vidéos de réaction, les podcasts éducatifs et les podcasts vidéo.
- Enregistre simultanément le son du microphone et du système.
- Capture simultanément la webcam et l'écran pour les podcasts vidéo.
- Prend en charge le mode plein écran, le mode fenêtré ou une zone d'enregistrement personnalisée.
- Offre des outils d'annotation pendant l'enregistrement.
- Exporte les enregistrements dans des formats tels que MP4, MP3, AAC, FLAC, et bien d'autres.

 Téléchargement sécurisé
Étape 1Téléchargez et installez le logiciel
Rendez-vous sur le site officiel d'AVAide pour télécharger le logiciel sur votre ordinateur Windows ou Mac. Installez-le en suivant les instructions à l'écran.
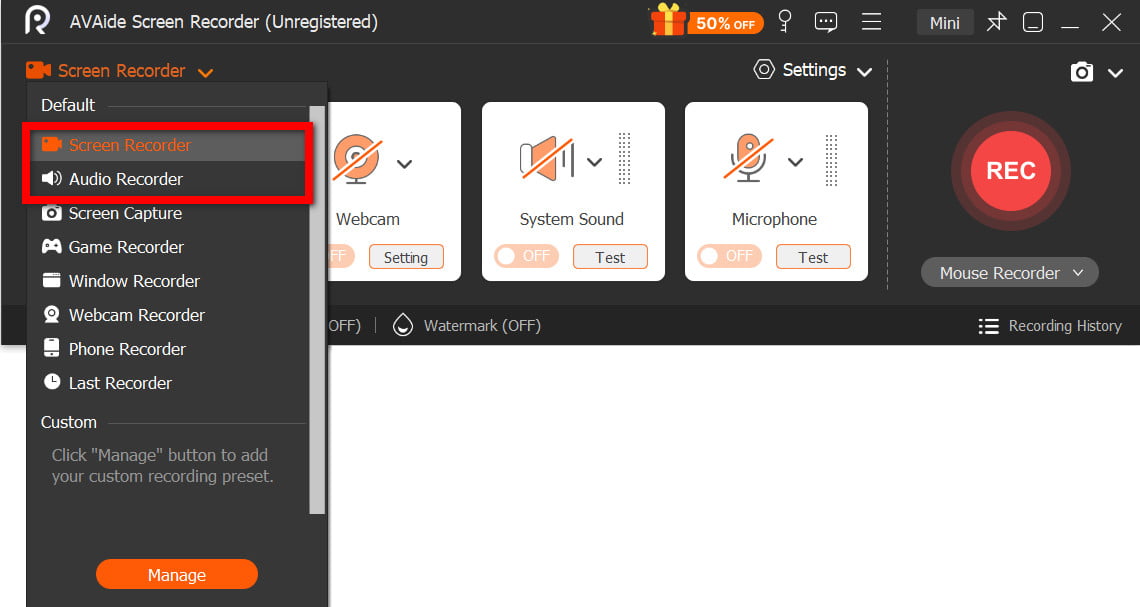
Étape 2Choisissez un enregistreur audio ou vidéo
Ouvrez le logiciel et cliquez sur l'un ou l'autre des boutons suivants : Enregistreur audio ou Enregistreur d'écran, selon que vous souhaitiez créer un podcast audio uniquement ou un podcast vidéo.
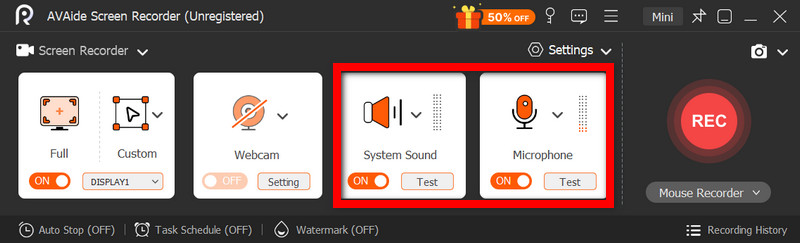
Étape 3Activer le microphone et le son du système
Activer le Microphone pour enregistrer votre voix. Son du système devrait permettre l'enregistrement d'interviews en ligne, de musique et de contenus audio d'invités.
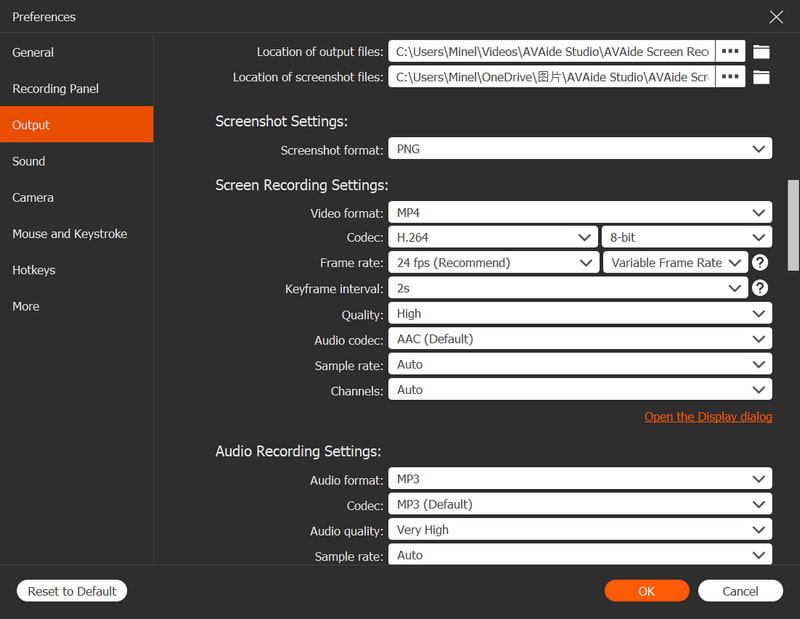
Étape 4Définir les préférences d'enregistrement
Sélectionnez votre format audio et votre qualité préférés dans la section Réglages Menu. Pour les podcasts vidéo, définissez votre zone d'enregistrement et l'incrustation de votre webcam.
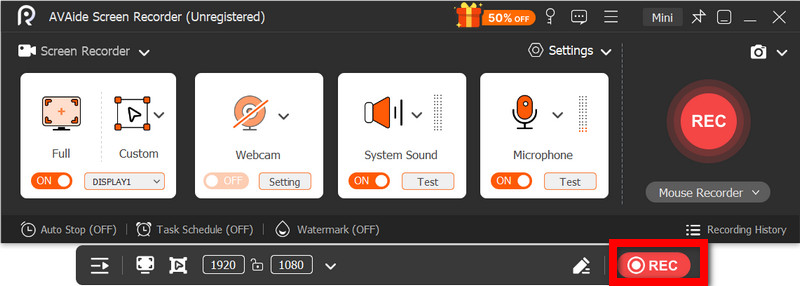
Étape 5Disque
Après avoir atteint le REC En cliquant sur le bouton, vous lancez l'enregistrement de votre podcast. Vous pouvez ajouter des notes ou des passages importants à tout moment.
Étape 6Enregistrer et prévisualiser
Après avoir frappé le Arrêter En cliquant sur le bouton, vous pouvez enregistrer votre podcast après avoir supprimé les passages indésirables. Vous pouvez également prévisualiser votre travail.
Méthode 2 : Enregistrer un podcast avec Audacity
Audacity est l'un des logiciels les plus populaires pour l'enregistrement et le montage audio destinés aux podcasts. Ce logiciel gratuit et open source permet d'enregistrer et de monter des fichiers audio grâce à des fonctionnalités pratiques telles que la réduction du bruit, les effets audio et la prise en charge multipiste. Ces fonctionnalités permettent de créer rapidement et facilement des enregistrements de podcasts de qualité professionnelle avec Audacity.
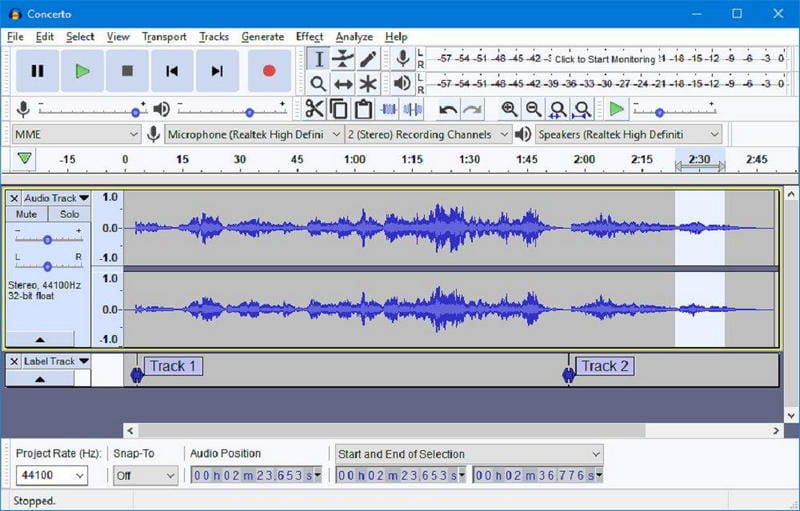
Étape 1Téléchargez Audacity depuis le site officiel d'Audacity et installez-le sur votre ordinateur personnel.
Étape 2Utilisez un microphone USB ou XLR et configurez-le comme périphérique d'enregistrement dans Audacity.
Étape 3Configurez les canaux d'enregistrement et la qualité audio en fonction des besoins de votre podcast.
Étape 4Clique le Disque Appuyez sur le bouton et énoncez votre contenu dans le microphone.
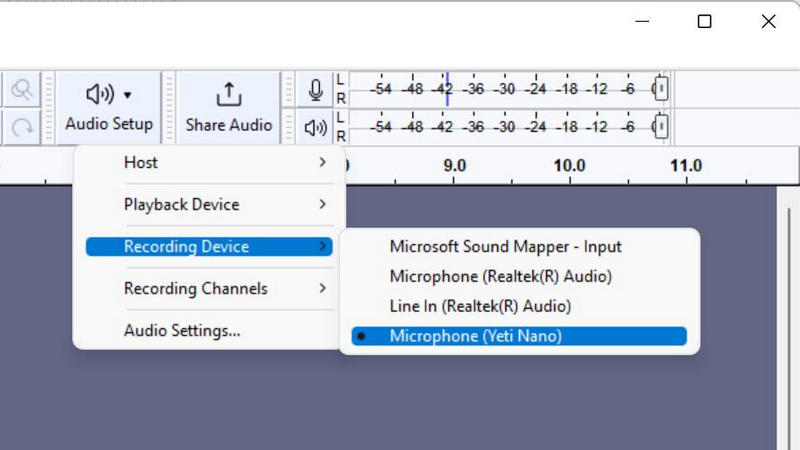
Étape 5 Modifiez votre podcast pour supprimer les erreurs, ajouter une musique d'introduction ou des effets sonores à l'aide du logiciel de montage Audacity.
Étape 6Sauvegardez votre podcast en exportant l'audio au format MP3 ou WAV.
Méthode 3 : Enregistrer un podcast avec Adobe Audition
Avec Adobe Audition, obtenez un son de qualité professionnelle pour vos podcasts. Adobe Audition propose des fonctionnalités performantes pour le montage audio, comme la réduction du bruit et la restauration audio. C'est également un excellent logiciel de montage multipiste.
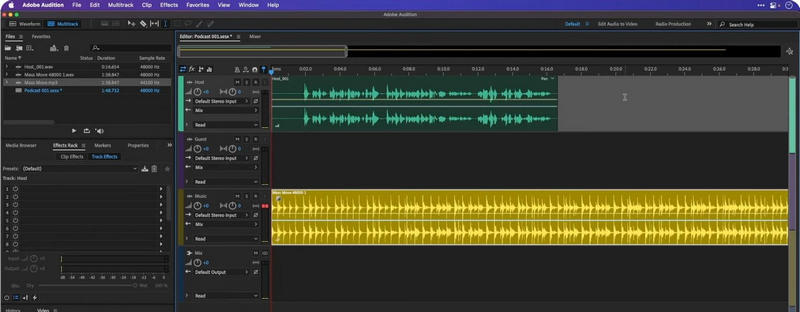
Étape 1 Téléchargez Adobe Audition depuis le site officiel d'Adobe et installez-le sur votre appareil.
Étape 2 Ouvrez le programme et créez et configurez une nouvelle session de podcast multipiste.
Étape 3Utilisez le Matériel audio paramètres pour sélectionner votre microphone et vos écouteurs.
Étape 4Sélectionnez la piste audio sur laquelle vous souhaitez enregistrer.
Étape 5Démarrez votre session de podcast en cliquant sur Disque bouton.
Étape 6Modifiez votre session de podcast à l'aide des outils de montage d'Adobe Audition, et c'est terminé.
Partie 3. Comment enregistrer un podcast à distance
Riverside.fm est l'un des meilleurs sites, et des plus fiables, pour l'enregistrement de podcasts à distance. Au lieu d'enregistrer l'audio et la vidéo via Internet, il effectue des enregistrements locaux de haute qualité sur chaque appareil. Riverside.fm est un outil idéal pour les podcasts vidéo, les webinaires, les émissions de discussion en ligne et les interviews, car il offre des enregistrements clairs, même en cas de connexion Internet instable, et fonctionne parfaitement avec des outils comme… meilleur enregistreur d'écran pour Mac pour la sauvegarde ou l'enregistrement.
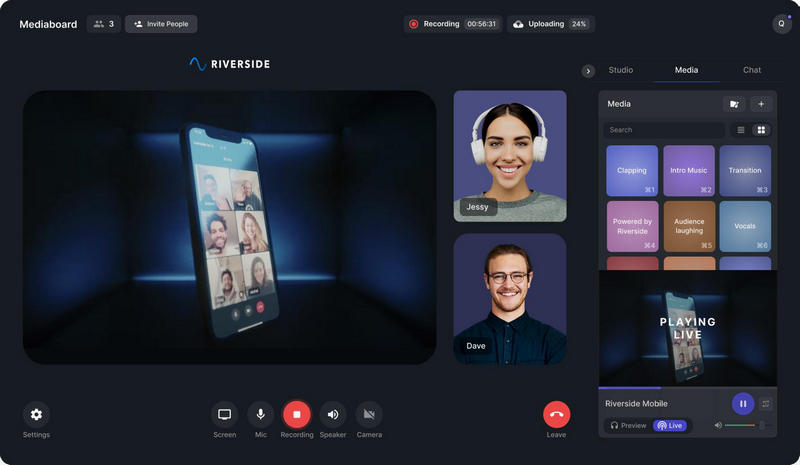
Étape 1Rendez-vous sur le site Riverside.fm et créez un compte. Une fois inscrit, connectez-vous au studio.
Étape 2Clique le Créer Studio Cliquez sur le bouton et choisissez les paramètres de votre podcast. Déterminez si vous souhaitez enregistrer un podcast audio uniquement ou un podcast vidéo.
Étape 3Envoyez le lien d'invitation à vos invités. Ils pourront se connecter via un navigateur web sans avoir à télécharger de logiciel.
Étape 4Choisissez le microphone, le casque et la webcam de votre choix avant d'entrer dans le studio, et assurez-vous de tester votre audio avant de quitter le studio afin de vérifier qu'il n'y a pas de problèmes techniques.
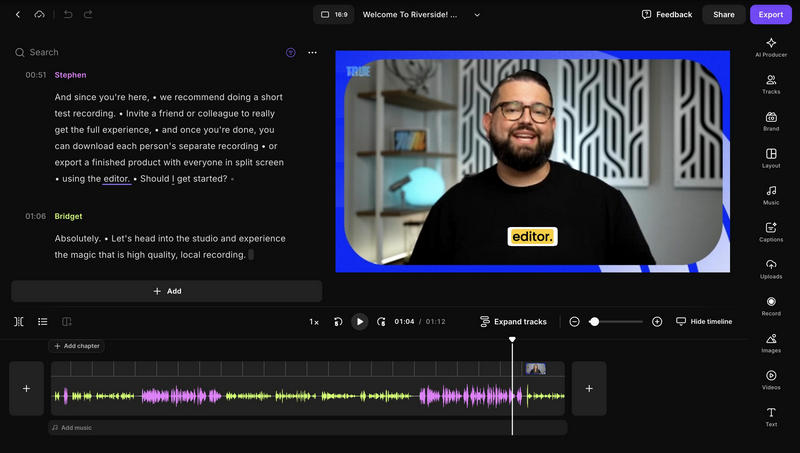
Étape 5Une fois que vous êtes prêt, cliquez sur le Disque bouton. Riverside.fm capture chaque enregistrement audio et vidéo localement en haute qualité.
Partie 4. Comment enregistrer un podcast sur iPhone
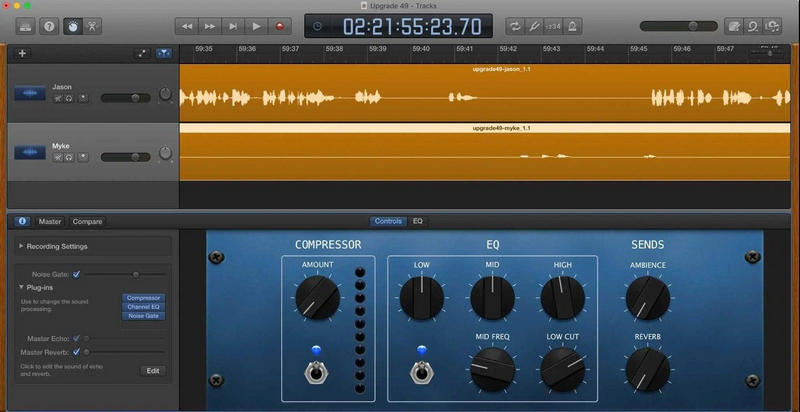
GarageBand est l'application d'enregistrement de podcasts de prédilection pour de nombreux utilisateurs d'iPhone qui recherchent une alternative à l'application Dictaphone intégrée. Elle permet l'enregistrement multipiste, l'ajout d'effets sonores et de musique de fond, et offre en plus une impressionnante sélection d'outils de montage.
Étape 1Pour télécharger GarageBand, rendez-vous sur l'App Store et vérifiez s'il est déjà installé sur votre iPhone. Si ce n'est pas le cas, installez-le.
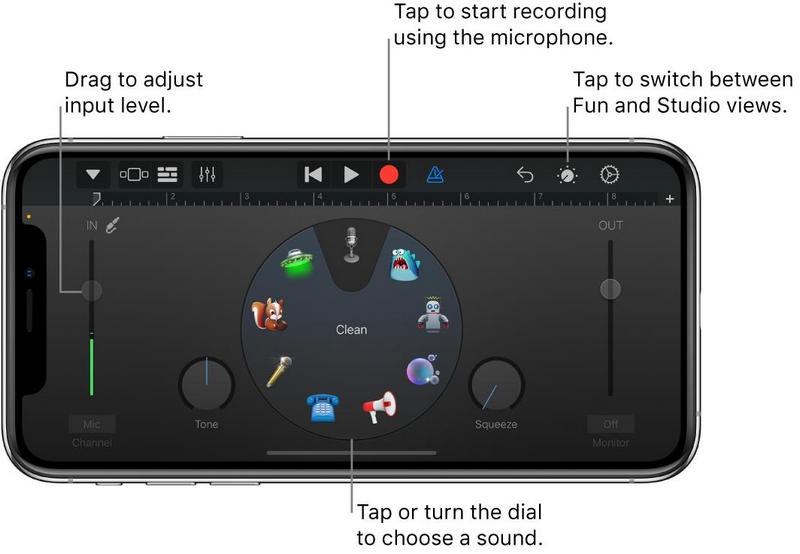
Étape 2À l'ouverture de GarageBand, choisissez le Enregistreur audio à partir des outils d'enregistrement disponibles.
Étape 3Vos podcasts auront un son beaucoup plus professionnel si vous utilisez un microphone externe. Le son sera également plus clair et vous entendrez moins d'interférences.
Étape 4Le monitoring est utile pour vérifier le niveau sonore capté par votre microphone et pour s'assurer qu'il est clair et non compressé.
Étape 5Vous pouvez démarrer instantanément l'enregistrement de votre podcast en appuyant sur Disque bouton. L'enregistrement peut être interrompu en le mettant en pause et repris après la reprise.
Étape 6Dans GarageBand, vous pouvez corriger les erreurs et ajuster le volume sonore grâce à la fonction de découpage. Vous pouvez également ajouter de la musique.
Étape 7Le podcast que vous avez mis tant de temps à préparer, enregistrer et monter peut être exporté et sauvegardé sur votre iPhone. Vous pouvez également le partager.
Préparation de enregistrer un podcast C'est pratique, avec le matériel et les logiciels adéquats. Vous pouvez enregistrer des podcasts depuis votre ordinateur, à distance avec des invités, ou directement depuis votre iPhone équipé de matériel performant. Vous produirez ainsi des podcasts de haute qualité à chaque fois.
À PROPOS DE L'AUTEUR

Capturez les activités de l'écran avec de l'audio, des réunions en ligne, des vidéos de jeu, de la musique, une webcam, etc.
Enregistrement audio
- Enregistrer l'audio depuis l'ordinateur
- Meilleur logiciel d'enregistrement audio
- Enregistrer les appels iPhone
- Studio d'enregistrement FL
- Comment enregistrer un podcast
- Télécharger Soundgasm
- Télécharger les chansons d'Audiomack
- Enregistrer de la musique depuis Deezer
- SoundCloud en MP3
- Télécharger X Space Audio
- Téléchargement de musique gratuit