You took lots of photos on your trip. Now you are back home and want to see them. You take out your SD card but do not know where to begin. Do not worry! There are easy ways to view photos on an SD card. Whether you are using a card reader, checking from your phone, or viewing them inside your camera, we will show you the best options. Let us go through the simple steps so you can enjoy your photos with no trouble!
Part 1: How to View Photos on an SD Card with a Card Reader
Sometimes, your computer does not come with a slot for an SD card. That is okay! You can use a card reader. It is a small tool you plug into your computer. It helps you see your pictures fast. You pop your SD card into it, and boom, your photos show up on your screen.
For Windows
Step 1Plug your SD card into the card reader.
Step 2Connect the card reader to your desktop using a USB port.
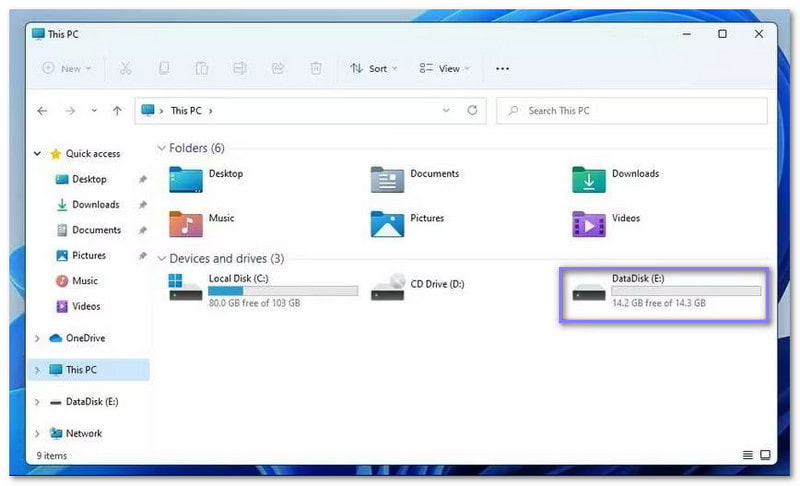
Step 3If a message pops up (AutoPlay), click Open folder to view files. If not, open File Explorer and select This PC.
Step 4Find your SD card under Devices and Drives. After that, open it, and your photos should be there.
For macOS
Step 1To learn how to view photos from an SD card on a Mac with a card reader, first, you must put your SD card into the card reader.
Step 2Connect it to your Mac's USB port. If your Mac asks, click Allow to approve the card.
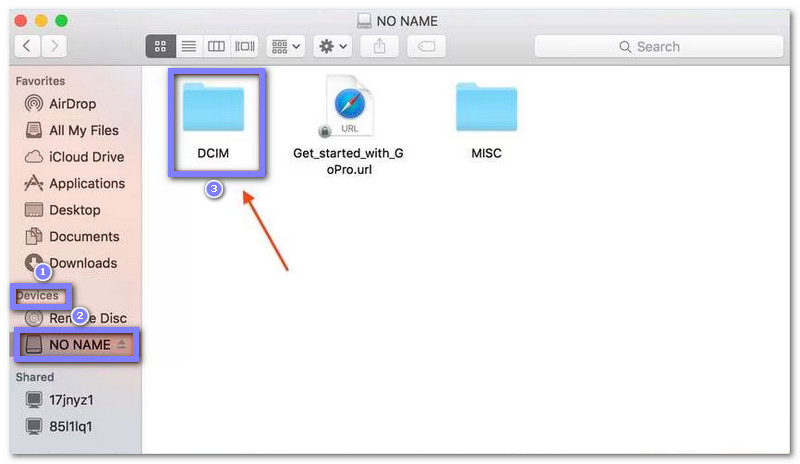
Step 3Open Finder, then go to Preferences. In the General tab, check all the boxes so you can see the SD card on your desktop.
Step 4Go back to Finder, click your SD card, and then open the DCIM folder to see your pictures.
Part 2: How to View Photos on an SD Card in a Camera
Do you not want to take the SD card out of your camera? No problem! You might be asking yourself, "How do I view photos on an SD card in a camera?" You can connect your camera straight to your computer with a USB cable. It works great if you do not have a card reader. Your camera acts like a storage box, and your computer peeks inside.
For Windows
Step 1Turn on your camera.
Step 2Use a USB cable to connect the camera to your computer. If it is your first time, Windows will set it up for you.
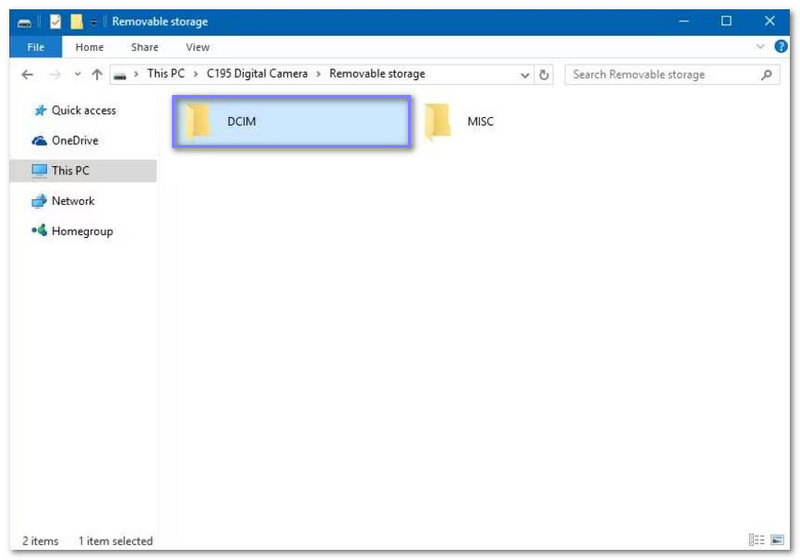
Step 3Once done, open File Explorer. Next, select This PC, then find your camera under Removable Storage.
Step 4Open the DCIM folder. Your photos will be there!
For macOS
Step 1Turn on your camera.
Step 2Connect it to your Mac with a USB cable. If a message shows up, click Allow to connect the camera.
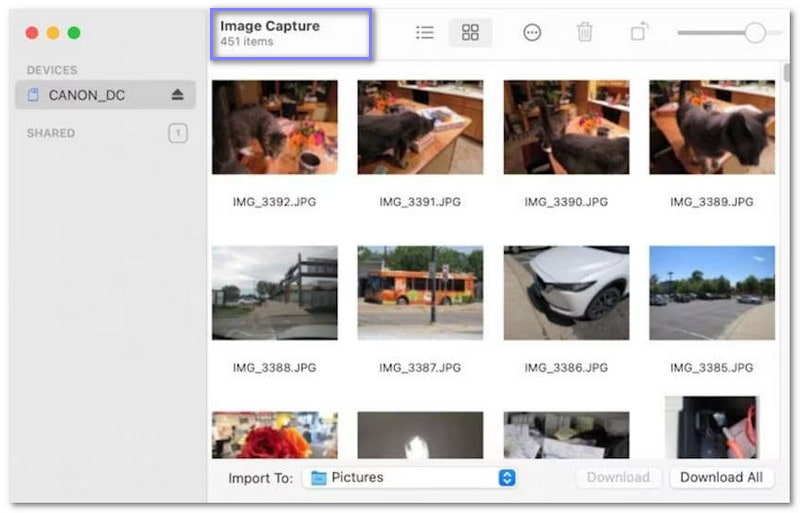
Step 3Open Image Capture from your Launchpad or Applications folder.
Step 4Choose your camera from the left side, and you will see your SD card photos. You can also use the Photos app if you like.
Part 3: How to View Photos on an SD Card on a Phone
Want to see your SD card photos on your phone or tablet? It depends on what kind of device you have. Android phones are easy because most of them let you add a microSD card. iPhones are different, but you can still use a card reader made for Apple.
For Android
Step 1Place your SD card into a card reader with the correct USB plug.
Step 2Plug the card reader into your Android phone or tablet.
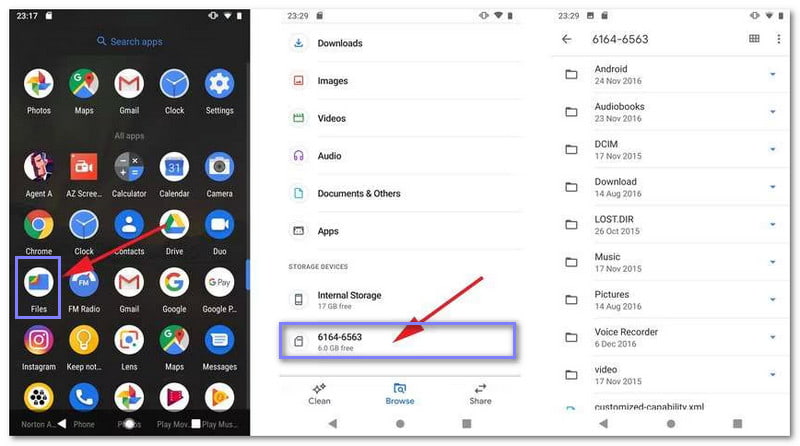
Step 3Go to Settings > Storage > SD Card to see your photos.
Step 4You can also open the Files app. Tap Storage Devices, then your SD card. Your pictures should show up!
For iOS (iPhone, iPad, iPod Touch)
Step 1So, how to view photos from an SD card on an iPad or iPhone? Just put your SD card into an Apple-friendly card reader.
Step 2Plug the reader into your iPhone or iPad using the Lightning or USB-C port.
Step 3Open the Files app.
Step 4Tap Browse, then find and open your SD card. Look for your pictures inside!

Part 4: Troubleshooting SD Card Not Recognized
Your SD card might not show up when you plug it in. That can be a big problem, especially if you need your photos or files. But do not panic. It does not always mean your card is broken. Sometimes, the fix is super simple. Just try these steps one at a time to see what works!
Method 1: Try Another USB Port or Reader
Sometimes, the problem is not the SD card at all. It could be that the USB port or the card reader is not working correctly.
• Unplug the reader.
• Move it to a different USB port on your computer.
• If that does not help, use another card reader if you have one.
This quick switch can help your device find the card.
Method 2: Look for the Card in File Explorer or Finder
Your card might be there. It just did not pop up.
On Windows:
• Open File Explorer.
• Click This PC.
• See if your SD card shows under Devices and Drives.
On Mac:
• Open Finder.
• Check the left sidebar for the SD card name.
Sometimes, the card is there, hiding in plain sight.
Method 3: Check Disk Management (Windows Only)
Windows might see your card but not give it a letter.
• Right-click This PC and pick Manage.
• Click Disk Management.
• Look for your SD card in the list.
If it is there but has no letter:
• Right-click it.
• Click Change Drive Letter and Paths.
• Add a letter and press OK.
Now, your card should show up.
Method 4: Use Disk Utility (macOS only)
Your Mac might see the SD card but not mount it.
• Go to Applications > Utilities > Disk Utility.
• Find your card on the left side.
If it is greyed out:
• Click Mount to open it.
Still not working?
• Hit First Aid to scan and repair the card.
This tool helps your Mac talk to the card again.
Method 5: Restart Your Device
Yes, turning it off and on really works.
• Shut down your computer.
• Unplug your card reader and wait a few seconds to start the computer again.
• Plug the reader back in.
This resets things and helps your system refresh.
Bonus: Convert Photos on SD Card to a Widely Recognized Format
What do you think are the most supported image formats today? You are right if you guessed JPG and PNG. These formats are accepted on almost all devices and platforms. They are also easy to upload, edit, or send online.
Good thing; AVAide Image Converter supports JPG, PNG, and GIF, and it can help you turn your SD card photos into those formats quickly. It does not stop there. The tool works with many image input formats, such as BMP, TIFF, GIF, and WebP.
AVAide Image Converter does not lower image quality either. It keeps your original photo's clarity, color, and detail during the conversion. Plus, it works online, so there is no need to install anything. It is free, fast, and safe to use from any browser.
Step 1First, place your SD card into your computer using a card reader. Next, open the DCIM folder, then copy the pictures you want to convert to your desktop or any folder you like.
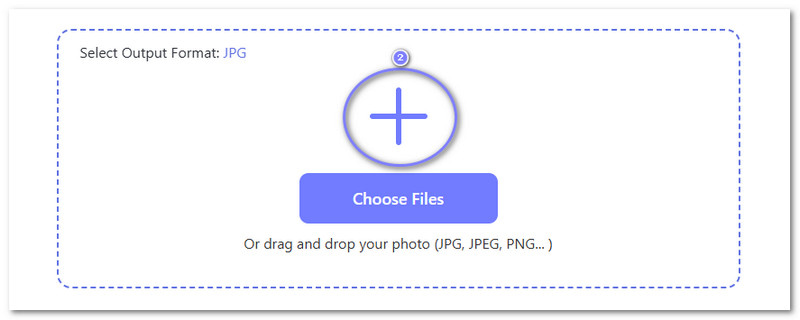
Step 2Search AVAide Image Converter in your browser and select the official site to access it. Once you are in, pick JPG under the Select Output Format option. It is an excellent choice because almost every device can open it.
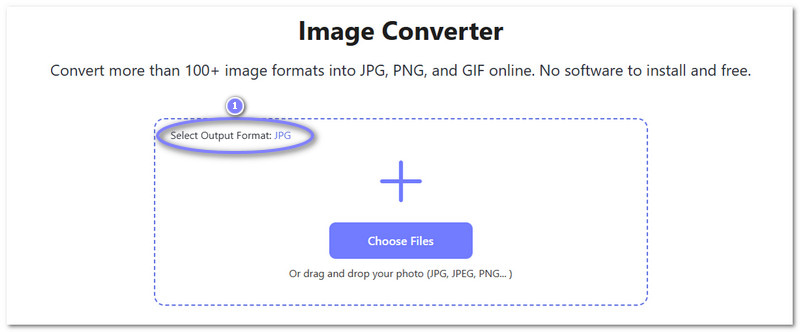
Step 3Click + Choose Files and select the pictures you moved from the SD card. You can even import a bunch of photos at once. Batch converting is super handy!
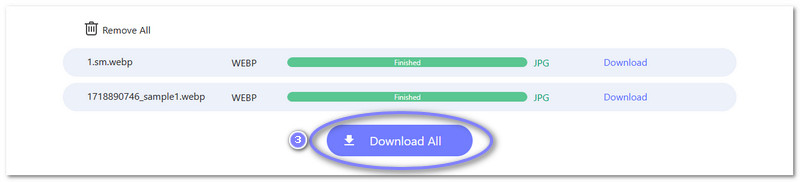
Step 4The conversion will begin the moment you add your pictures. Once it is done, press Download All to save your new JPG files. Now, your photos are in a format that works almost anywhere!
As mentioned above, AVAide Image Converter does not lower image quality, but if you want to improve image quality online, you can rely on AVAide Image Upscaler. Try it, and see how it can elevate your photos!
There are many ways how to view photos on your SD card. But what if the photo file is not opening correctly? Or is the format not the one that most devices can read? That is when you can convert it. AVAide Image Converter can help. It supports many image types and can turn your photo into something more known, like JPG or PNG.

You can easily convert your photo from any image format to a popular JPG, PNG, or GIF with no quality loss.
PROCESS NOW