EXR or Open EXR is a container format that contains a High Dynamic Range (HDR) image. This format offers a wide color gamut and superior details for CGI, VFX, and photography. However, unlike the widely compatible image formats, EXR is special, and so is its viewing tool. You read it right. It's safe to say that it lacks compatibility across different devices and platforms. In this situation, the JPG format shines. The JPG format is often referred to for its broad compatibility and smaller file size. If you wish to maintain visual quality while optimizing images for social media, everyday viewing, and social media, you need the right EXR to JPG converter. This guide will help you, so read the rest of the post.
Part 1: What Is EXR Format?
The EXR format is a raster image file format developed and maintained by Industrial Light & Magic for professional digital imaging and visual effects. It supports multiple image layers and deep data, which is intended for volumetric effects. Moreover, it comes with multiple compression methods, including lossy and lossless. For lossy, it supports B44, DWAA/DWAV, and ZIP, and PIZ for lossless. This format allows you to balance quality and file size efficiently. Since it is capable of preserving deep shadows, brightness levels, and fine details, artists use it for VFX workflows, animation, and CGI. Besides, EXR is designed to store high dynamic range (HDR) data, supporting 32-bit and 16-bit floating-point pixel depths - no wonder it is wanted for its superior color accuracy and luminance.
If you wish to open your EXR files, you will need to install various software that supports EXR extensions. As we know, not all image viewers can open EXR files. There are only a few tools that can open it. Nevertheless, we've looked for a workaround to resolve this kind of need. You may convert EXR files to JPG in an instant. To find out how it is done, check out the following sections of this article.
Part 2: How to Convert EXR to JPG with Photoshop
If you are into an industry-leading raster graphics editor, look no further than Adobe Photoshop. This program is trusted by artists, designers, and photographers for advanced image manipulation. Moreover, it is known for seamless handling of high-bit-depth formats like EXR and its powerful HDR support. Also, users can have precise control over exposure, compression, and color grading using Photoshop. Regardless of whether you are working on photography, digital art, or visual effects, you can convert EXR to JPG without sacrificing critical details in your image files. Hence, it is ideal for projects where file size and compatibility are priorities. For the step-by-step conversion guide, follow the walkthrough below.
Step 1First, download and install Photoshop on your computer. Next, launch it and go to File > Open. After that, select the EXR file you want to edit. Alternatively, you can drag and drop the EXR file directly into the app.
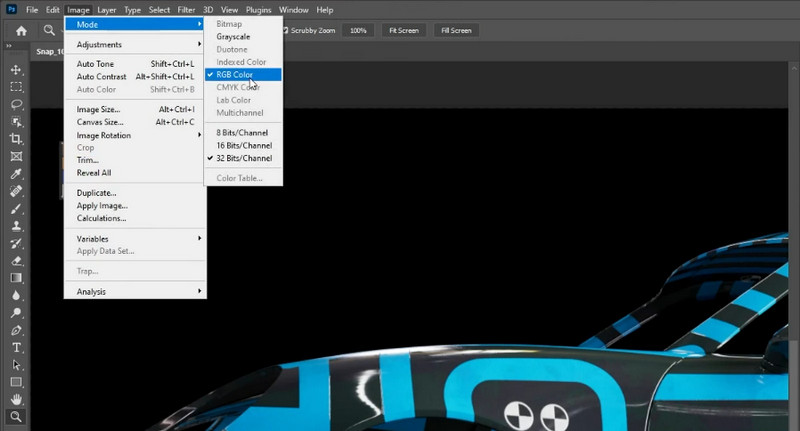
Step 2If you wish, you can make adjustments to your EXR file before exporting. Use Image > Adjustments to fine-tune dynamic range.
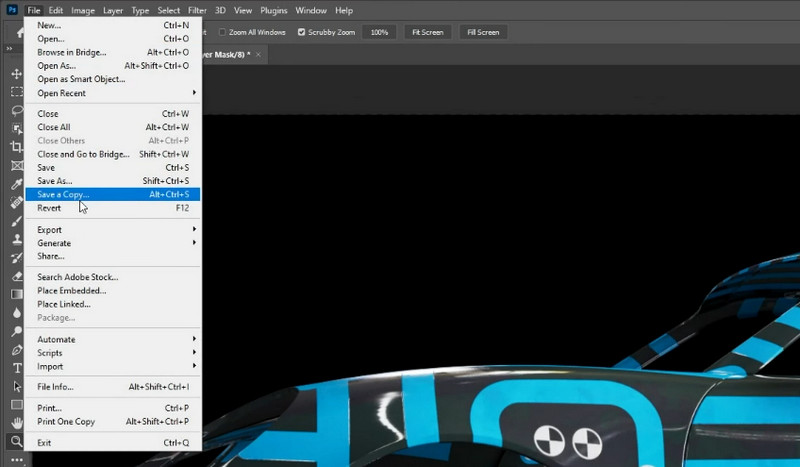
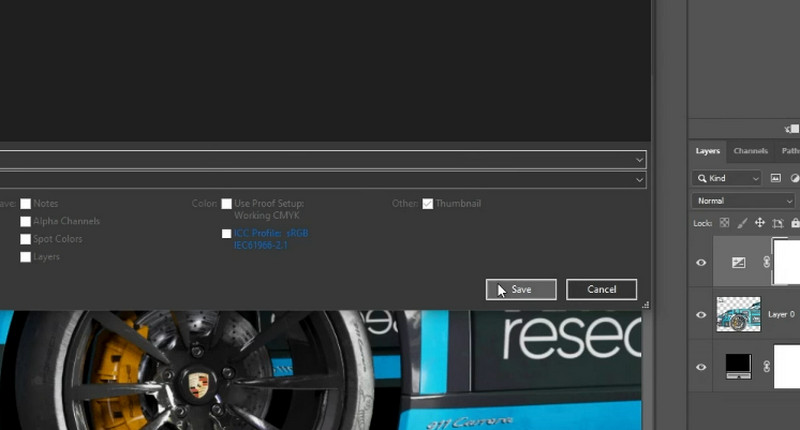
Step 3When you are ready to convert the file, navigate to File > Save a Copy and choose JPEG from the list of formats in the dropdown. You may modify the quality between 1 and 100. The higher the quality, the bigger the file size.
Step 4Once finalized, click the Save button to proceed with the conversion. Later, you can increase the JPG resolution when you are not satisfied with the results.
Part 3: How to Convert EXR to JPG with GIMP
For a free and open-source alternative to Photoshop, the GNU Image Manipulation Program is for you. Similarly, this app offers powerful tools for format conversion and image editing. It fully supports EXR files and is capable of converting them to JPG image files in a reliable way. While it does not have the advanced HDR features of the premium software, this tool is perfect for users who need a no-cost program for presentations, web, or everyday use. Follow the tutorial below to learn how to change EXR to JPG.
Step 1Install and launch GIMP on your device. Then, open the EXR file using the program by going to File > Open. The program will prompt you to adjust the HDR Import Settings if the uploaded file is 32-bit. You may choose Perceptual gamma or Linear light, depending on your needs.
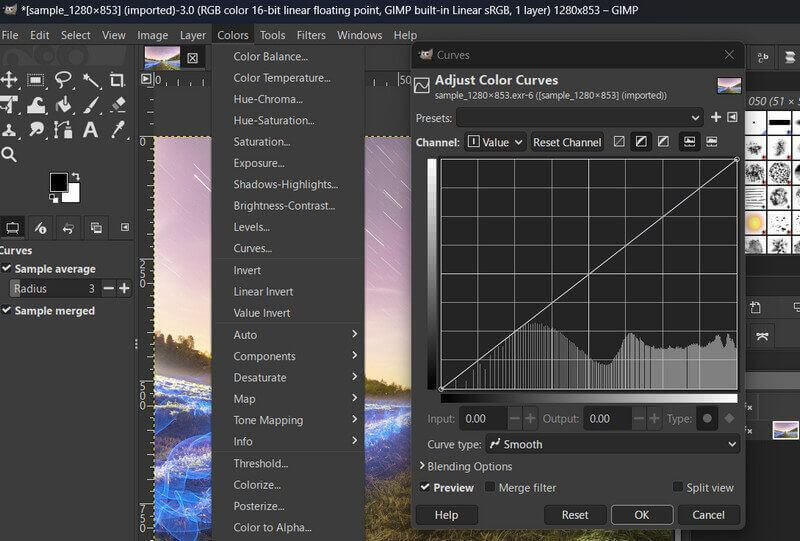
Step 2To fine-tune exposure and contrast before converting, use Colors > Levels or Colors > Curves. Also, you can correct the color if the image looks dark/light by going to Colors > Exposure.
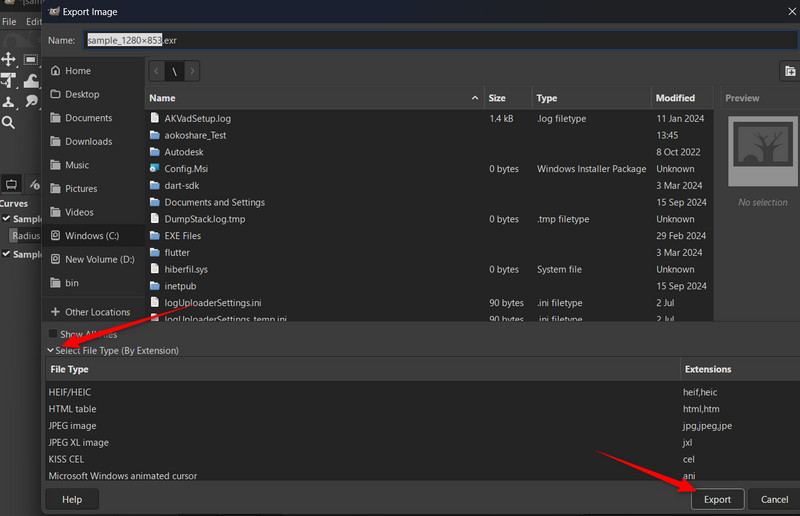
Step 3This time, navigate to File > Export As and expect a dialog box that appears. In the dialog box, enter a name for your file and select JPG as the output format. Likewise, you can adjust the quality slider to retain more detail.
Step 4Finally, hit Export when you are satisfied with the settings. Then, confirm in the next window that will appear.
Part 4: How to Convert EXR to JPG with XnConverter
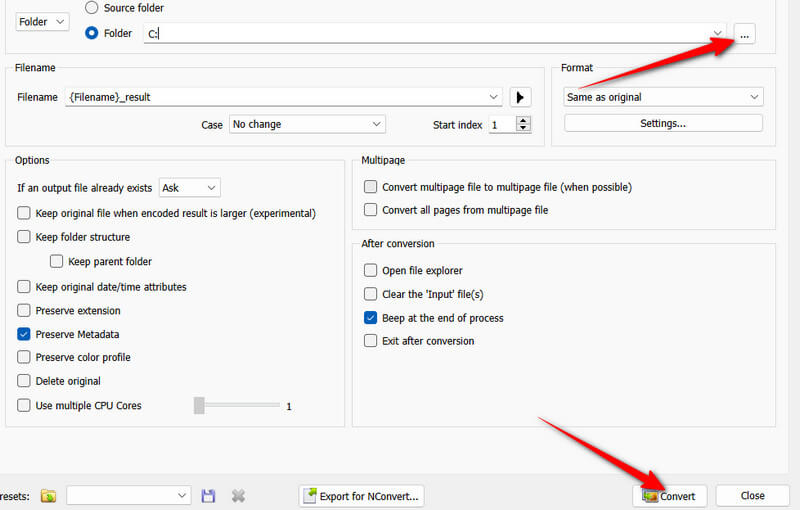
You can also rely on XConvert if you want a lightweight yet powerful batch image processor. What sets this program apart is its incredible EXR to JPG conversion while maintaining quality. Besides everything, it can do one thing exceptionally well. That is converting and lightly processing images in bulk in a less complicated interface. On top of that, it can also handle EXR's high dynamic range data, meaning it can retain full 32-bit floating point support during conversion.
Step 1Get XnConvert from its official website and launch it. Next, add the EXR files you want to convert. Hit Add Files or drag and drop your target files.
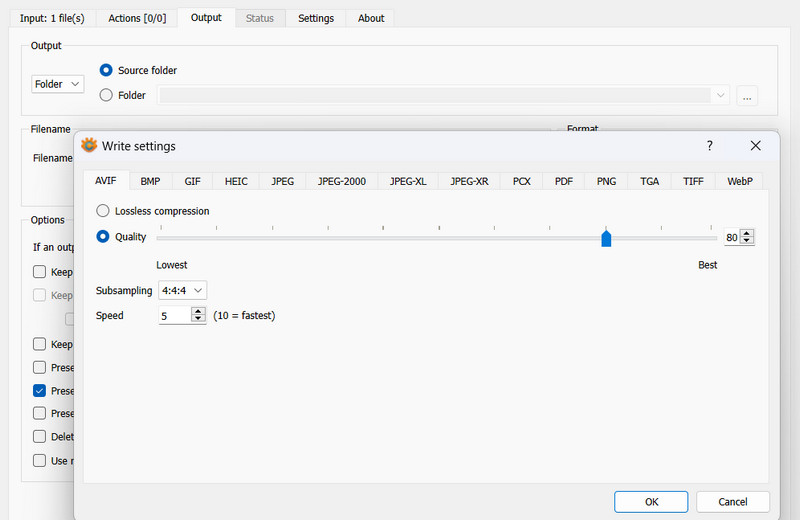
Step 2At this point, go to the Output tab and set the output format to JPG. You may also adjust the quality by 90% is advisable. On one hand, you can also enlarge JPG/JPEG and PNG using this tool.
Step 3Then, hit the ellipsis button to select the location where to save the converted files. All the converted JPGs will be saved to this location.
Step 4Finally, click the Convert button and wait for it to finish.
Part 5: The Best Way by Batch for Free Online
If you are looking for a free, online solution to convert images without sacrificing quality, AVAide Image Converter is the perfect choice. This tool comes with a user-friendly interface that runs directly from the web. It also allows you to process multiple images at once with no installation required and within just a few clicks. AVAide uses smart algorithms to maintain clarity, making it ideal for casual users and designers alike. For PNG photos, it will retain transparency. It is best paired with other tools to help you work seamlessly. Find out how this tool works by following the guide below.
Step 1Open a browser on your computer and visit the official page of the program.
Step 2Once you land on the page, head straight to the Select Output Format and click its dropdown list. Then, select your desired format, like JPG, GIF, and PNG.
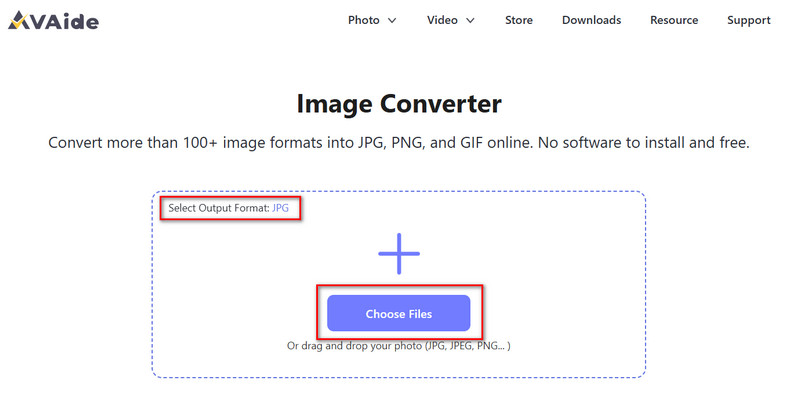
Step 3After selecting a format, click the Choose Files button and choose your photos to convert. After adding the files, they will be converted automatically.
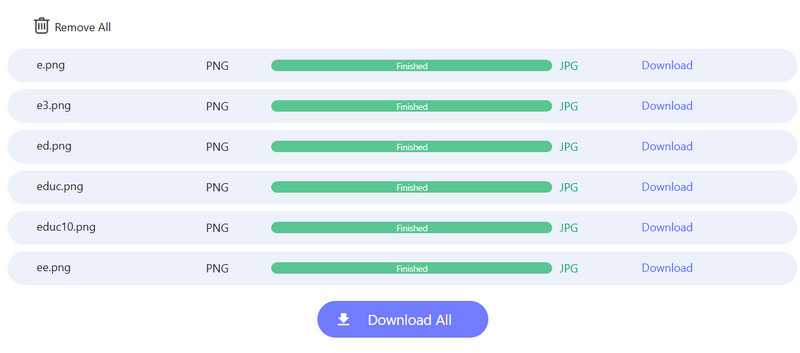
Step 4Once the conversion is done, click the Download All button to save them.
Now you will not struggle with opening your EXR files because you have just mastered the solution. You now know how to convert EXR files to JPG and easily access your files using any standard image viewer. You may choose among powerful software and free alternatives for a reliable way to transform your EXR files. For no-fuss conversions, pair these tools with a free online converter to see instant results without installation and registration being necessary.

You can easily convert your photo from any image format to a popular JPG, PNG, or GIF with no quality loss.
PROCESS NOW