Need to show and record steps, report a bug, or make a quick tutorial on your PC? I have created hundreds, if not thousands, of Windows recordings for everyday users and focus on simple tools built into its operating system. This guide shows you exactly 如何在 Windows 上錄製螢幕 using the default tools available and third-party tools that offer extensive features for your recording needs. With clear steps, you can produce clear and shareable videos.
- Top Screen Recording Methods at a Glance
- Method 1: Xbox Game Bar (The Quick & Easy Choice)
- Method 2: Snipping Tool (Windows 11)
- Method 3: AVAide Screen Recorder
- Method 4: Bandicam
- Method 5: OBS Studio
- Method 6: ScreenRec
- Method 7: Loom
- Method 8: ShareX
- Method 9: Awesome Screenshot
- Keyboard Shortcuts Sheet
- Troubleshooting: Common Screen Recording Problems
Top Screen Recording Methods at a Glance
Best Choice for Newbies: Xbox Game Bar (Built-in Windows, fast capture with a single click record) and The Snipping Tools (Record selected area with simple audio toggles)
Best Free to Use for Professionals: OBS Studio (unlimited recording, multi-source scenes, live streaming, open source), and ShareX (free, region capture, customizable workflow).
Best Free Recorder with Watermark: Bandicam (lightweight, high-quality recording, audio, and region)
Best Paid All-in-One for Overall Recording: AVAide Screen Recorder (simple screen interface, recording schedule, webcam overlay, lock-in feature, built-in editor, and annotation while recording)
Best for Recording Videos Online: Loom (cloud-based recording, link sharing, comments and reactions, Windows compatible, web) and Awesome Screenshot (browser-based application, capture with markup and quick edits)
Method 1: Xbox Game Bar (The Quick & Easy Choice)
Looking for an application or game capture solution without any installation that works with Windows? Xbox Game Bar is a built-in feature of Windows 10 and 11 that comes preloaded with the ability to capture audio and mic from the Xbox, as well as save an MP4 file with just a click. Get to know how to record your screen: Open your app, press Win + G, and press record. The following process outlines setup, audio toggles, and recording location.
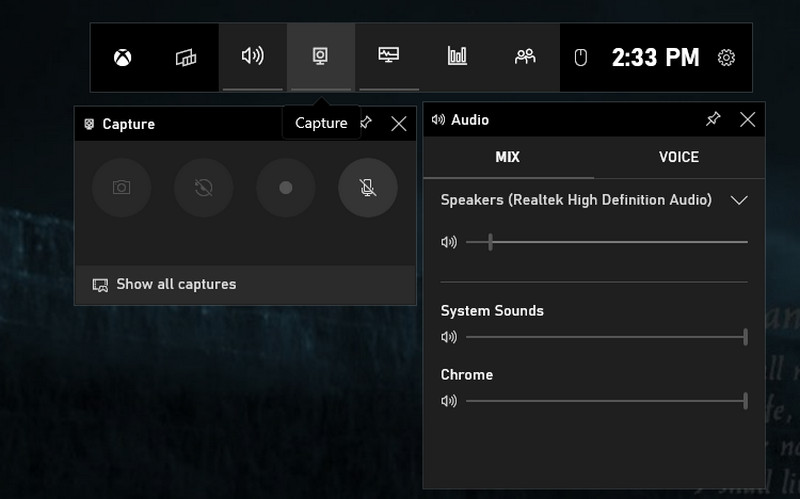
步驟1打 視窗 button and the G key to open the Xbox Game Bar.
第2步Next, tick the box to confirm and progress. Adjust the recording based on your needs with the options available here. Now that you are ready to start recording, click the red dot button to start, or you can press Windows + Alt + R.
第 3 步There will be a recording capture status that appears on your screen. If you are done, then click the 方塊 按鈕。
Method 2: Snipping Tool (Windows 11)
On Windows 11, the 截圖工具 is a simple, built-in way to capture any area of your screen. It records system audio and mic, lets you select a region or full screen, and saves directly as MP4. If you are wondering how to screen record without installing new software, this tool is the fastest native option. The steps below show how to open it, start recording, and save your clip.
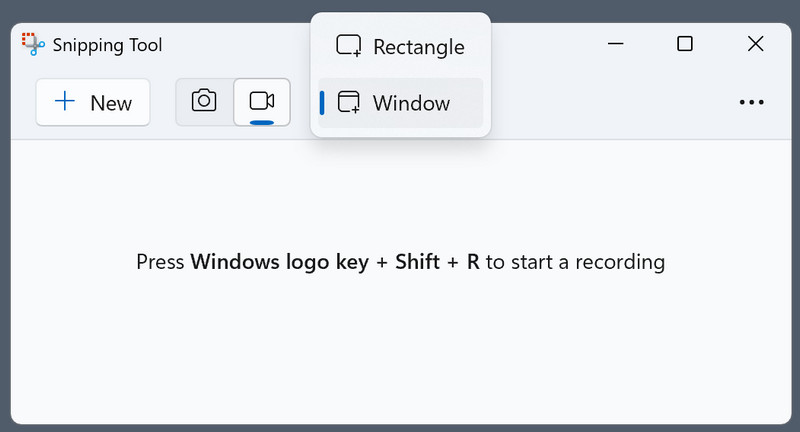
步驟1To open it, click the Windows button on your keyboard and type in the Snipping Tool available on Windows.
第2步On its floating interface, click the 相機 button since you want to use its screen recording feature. Next, adjust the area where you want to be captured by drawing a rectangle.
第 3 步然後,點擊 開始. After recording, click the 停止 按鈕來保存它。
Method 3: AVAide Screen Recorder
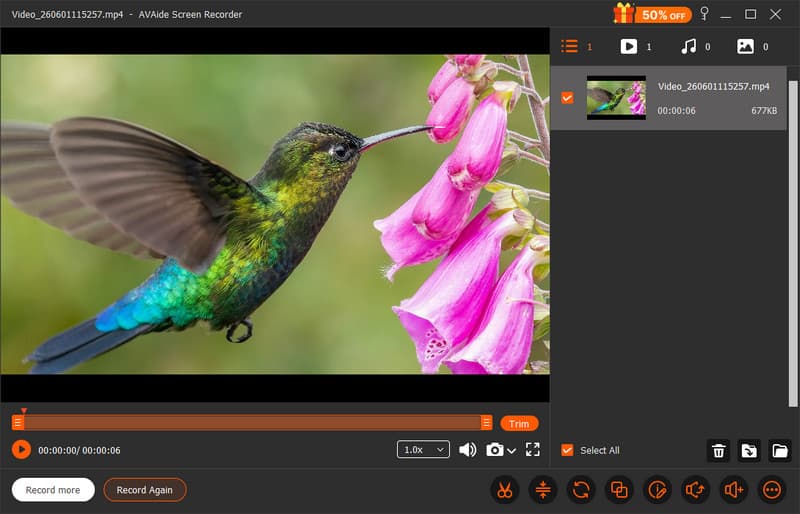
AVAide 屏幕錄像 is a paid Windows application designed for those who wish to have a neat application, scheduled recording, webcam overlay, annotation, and an integrated editor. Records the audio and mic of your system, records in region or full screen, and exports in common formats without a watermark. If you are looking for how to do on-screen recording with professional features and a simple workflow, this app delivers consistent quality for tutorials and training content. The following steps illustrate installation, audio setup, recording settings, and export options.
步驟1First of all, you need to download and install the screen recorder on your Windows 10/11 by clicking the appropriate button here. Then, proceed to the next steps.

 安全下載
安全下載
第2步On the main interface, select 屏幕錄像. Here, you need to properly set up the recording area, add your face via webcam, audio from your external mic, and system sound generated on your PC. After that, click the 錄音 按鈕開始錄音。

第 3 步Once you are satisfied and the app has done its job on recording, click the 停止 button. Now, you can share the recorded video with everyone as easily as AVAide has to offer.
Method 4: Bandicam
班迪卡姆 is a light but efficient screen capture recorder on Windows capable of creating high-quality recordings for extended periods. It has both region capture and full-screen and specific-window recording features, and allows it to record mic and system audio, set up recordings, and draw while recording. Bandicam is a Windows screen capture recorder that is stable and produces smaller-sized files for tutorials and demos, or even for games. The following steps demonstrate installing, selecting the capture mode, setting up the audio input, and setting up the export options.
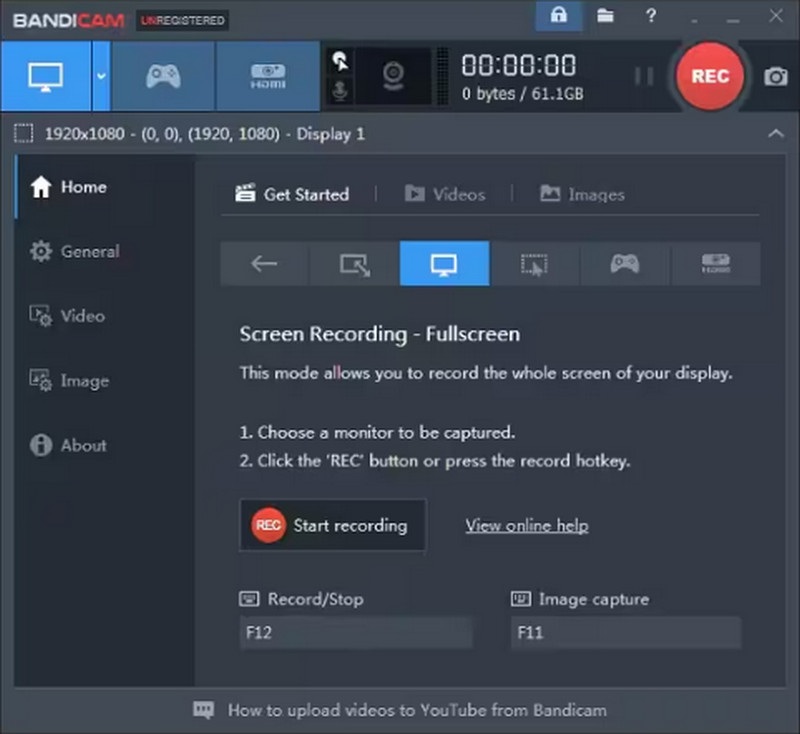
步驟1Open the Bandicam on your computer, choose the recording mode you want to use that is available in here, and adjust its presets.
第2步接下來,單擊 錄音 button to start recording, then wait for a few seconds until the countdown is done.
第 3 步Once recording is done, click the 停止 button, and you can replay the recorded video.
Method 5: OBS Studio
OBS工作室 is an open-source, free Windows recorder and streamer, with unlimited recording, no watermarks, and the ability to have a high level of control over its scenes, sources, audio mixers, and encoders. Best for multi-source configurations, customized transitions, and producing high-quality output, it is the preferred option for professionals who value flexibility. For Windows, if you are looking to record from the screen on Windows for audio tracks, resolution, and bitrate options, you can get broadcast quality with OBS Studio.
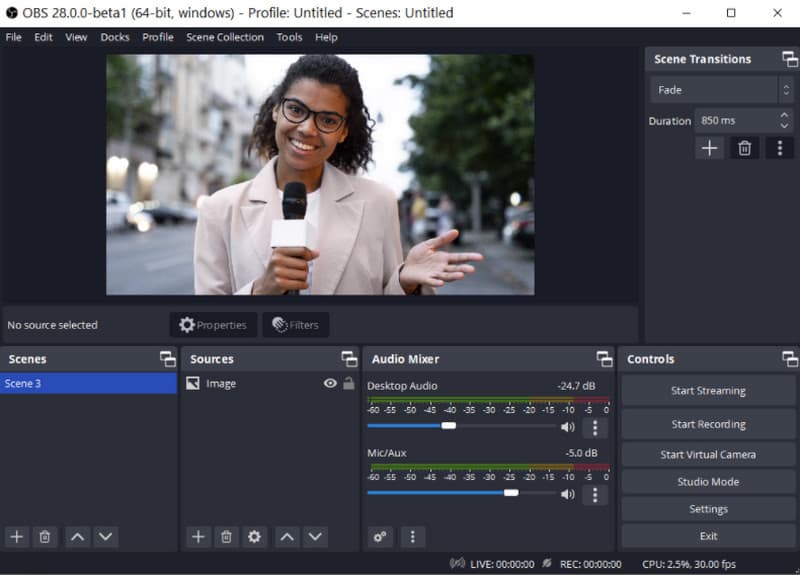
步驟1Download and open the latest version of OBS Studio. Rename or create a 場景 from the bottom left box of it.
第2步Add the source of what to record, click the + button to add the right scenes, and select 顯示捕捉。勾選 設置 > 輸出 > 錄影路徑 > 瀏覽 to select where you want to save the recorded video.
第 3 步Now that you are ready, click the 開始錄製 button, and when you want to stop it, click the 停止錄製 按鈕。
Method 6: ScreenRec
屏幕錄製 is a trusted screen recorder trusted by more than 14 million people worldwide, offering free screen, mic, system, and webcam recording with instant sharing to the cloud and no watermark to stop screenshots. It provides a quick setup, easy-to-use control, and 2 GB of free Cloud storage for quick sharing after each recording. ScreenRec is a simple and fast screen recorder for users, support technicians, and trainers who don't need to download large software. The following steps demonstrate how to record a screen on Windows with this tool, as well as how to share your clip using a link.
步驟1Get the official app on the ScreenRec website, and follow the installation process. Then, press 替代 + 秒 to select the area you want to capture.
第2步To record your screen, click the Video Camera button and activate the computer audio and microphone if you want to record audio to it.
第 3 步勾選 方塊 button to stop recording, and you will be given a unique URL wherein you can share the recorded video with anyone you have sent the link to.
Method 7: Loom
織機 is a cloud-based screen recorder that makes it easy to capture your screen, webcam, and mic, then share immediately via a link with comments and reactions. It works on Windows and offers a clean interface, quick editing, and team collaboration features built in. If you are wondering how to screen record on PC for fast async communication, Loom is ideal for teachers, support, and teams who need instant sharing without managing files. The steps below show installation, recording mode selection, and how to share your video link.
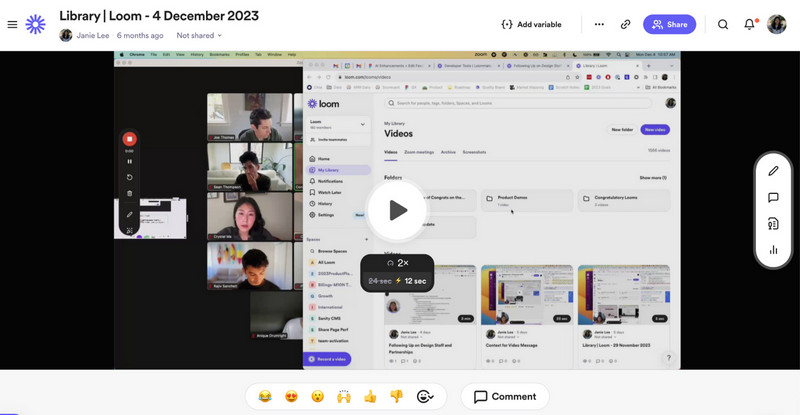
步驟1Download the Loom on your computer and follow the installation prompt, then open it.
第2步選擇 Recording Mode you want to use from the available options in its menu. Toggle on the mic and camera if you need them for your recording. Then, click 開始錄製.
第 3 步When you are finished, click the 停止 button, and it will automatically be opened in a new browser. Click the 複製連結 if you want to share it with others online.
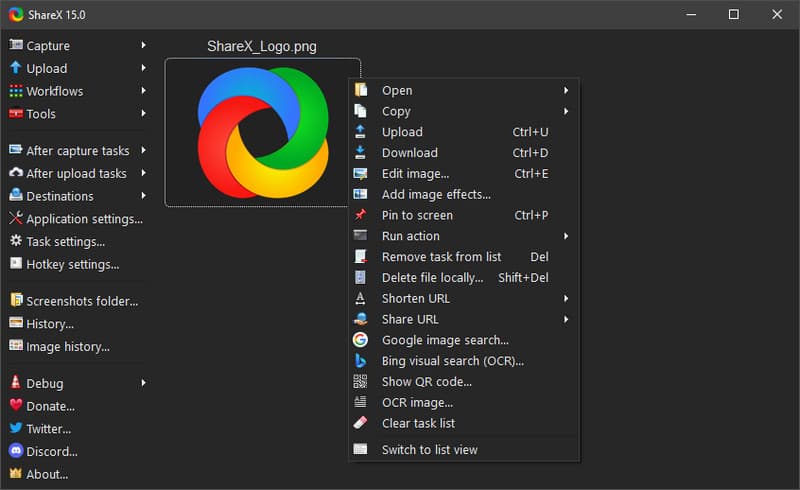
Method 8: ShareX
分享X is a free, open-source Windows application that records regions and the entire screen, automates workflows, and instantly uploads without watermarks. Offers the ability to support mic and system audio, custom hotkeys, and post-capture actions such as annotation and sharing. ShareX is the best screen recorder for Windows 11 for power users who want to record screens on Windows 11 with high-quality free options and automated workflows.
步驟1Open ShareX and press the Shift + Print Screen as these are its hotkeys for recording.
第2步A cursor will appear, click and drag to the selected area you want to record, or you can simply click activate Window or Full-screen recording. After that, the recording will begin with a small time of your recording limitation.
第 3 步To finish the recording, click the same hotkeys we mentioned or the 停止 點擊此處。
Method 9: Awesome Screenshot
Awesome Screenshot is a browser-based application that can take and annotate screenshots and also allows you to record certain regions and web tabs. Works on Windows using Chrome or Edge, supports mic audio, quick editing, and sharing. For web-based screenshots, Awesome Screenshot is a handy extension if you are looking to quickly capture your screens for quick editing and annotation. So, if you want to try this screen recorder extension or its downloadable app, follow the steps below.
步驟1Download the app on your desktop, or you can use its browser extension. Choose the recording mode you want, such as entire screen, certain tab, specific area, or camera only.
第2步If needed, activate the microphone, system audio, and camera before you click the 開始錄製.
第 3 步完成後,按一下 Stop Sharing to end the recording.
Keyboard Shortcuts Sheet
Sometimes, you want to do a Windows screen record with a shortcut because it is faster and hassle-free. Learn what hotkeys are available on the screen recorder you want to use.
| Tool Name | 開始錄製 | Pause/Resume Recording | 滾動截圖 | Popup Menu Capture | Switch Recording Panel Style | Open/Close Webcam | 屏幕截圖 |
| Xbox 遊戲欄 | Win + Alt + R | Not Available | Not Available | Not Available | Win + G | Win + Alt + W | Win + Alt + Print Screen |
| Snipping Tool (Windows 11) | Win + Shift + R | Not Available | Not Available | Not Available | Not Available | Not Available | Win + Shift + S |
| AVAide 屏幕錄像 | 阿爾特+小號 | Alt + R | Alt + L | Alt + M | Alt + I | Alt + W | Alt + C |
| 班迪卡姆 | Ctrl + F12 | Not Available | Not Available | F11 | Not Available | Tab key | F11 |
| OBS工作室 | Set custom Hotkeys | Set custom Hotkeys | Not Available | Not Available | Not Available | Not Available | F7 |
| 屏幕錄製 | 阿爾特+小號 | Not Available | Not Available | Not Available | Not Available | Not Available | 阿爾特+小號 |
| 織機 | Ctrl + Shift + L | Alt + Shift + L | Not Available | Not Available | Not Available | Not Available | Ctrl + Shift + 1/2 |
| 分享X | Shift + Print Screen | Not Available | Not Available | Not Available | Not Available | Not Available | Print Screen |
| Awesome Screenshot | Alt + Shift + R | Not Available | Alt + Shift + F for full-page | Not Available | Not Available | Not Available | Alt + SHift + V/S/F |
Troubleshooting: Common Screen Recording Problems
| Problem | What to Do? |
| Recording won’t start. | Go to Settings, then Privacy, to check if the screen recording and microphone access are enabled. |
| Black screen in recording | Try a different type of capture mode or close the protected video apps |
| No sound in the recording | Turn on the microphone and system audio in your settings or by clicking the hotkeys available, depending on the tool. |
| Recording stop earlier | Free up disk space and restart your computer. |
| The webcam is not showing | Activate the webcam before pre-recording, or check its settings. Try to check the camera permission as well. |
You now know how to screen record on PC using built-in tools such as Xbox Game Bar and Snipping Tool, as well as powerful third-party applications such as AVAide 屏幕錄像, OBS Studio, Bandicam, and Loom. Find someone who needs quick gameplay clips, training videos, or fast bug reports; this is what there is for everyone. Use basic built-in features for simplicity, or opt for more advanced features when you require greater control. For quicker workflow, refer to the keyboard shortcut sheet, and if you encounter problems, look in the troubleshooting section. These tips and tools will help you to achieve great-looking screen recording footage with Windows, every time.
關於作者