Visit the official AVAide Screen Recorder website and free download the software. Or acquire it directly from the download buttons above. Then install AVAide Screen Recorder on your computer following the instructions.
Method 1. Each time when you launch AVAide Screen Recorder, a comparison window will pop up. You can register by clicking the Register button in the bottom-right corner.
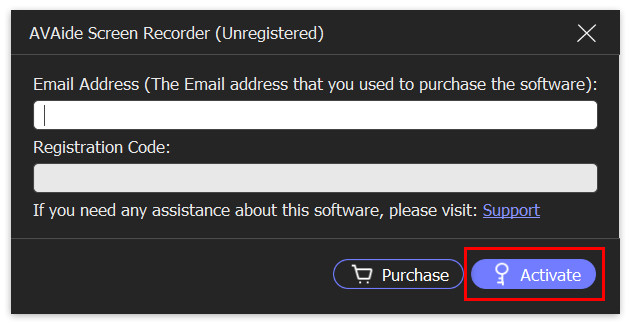
Method 2. If you close the popped-up window accidentally, don’t worry. You can click Register this product (a key icon) and you’ll enter the registration window.

Then enter the Email Address you used to purchase this software and the registration code you received. Click Activate to enjoy the full features!
Method 1. Click Menu in the top-right corner of the main interface. Then choose Check Update… from the drop-down list. Install the latest version is there is one. If not, click OK and exit the update checking.

Method 2. Select Preferences from the drop-down list of Menu. Choose More from the left panel and check the box in front of Automatically check for updates. Then click OK. You don’t need to check it yourself from time to time.

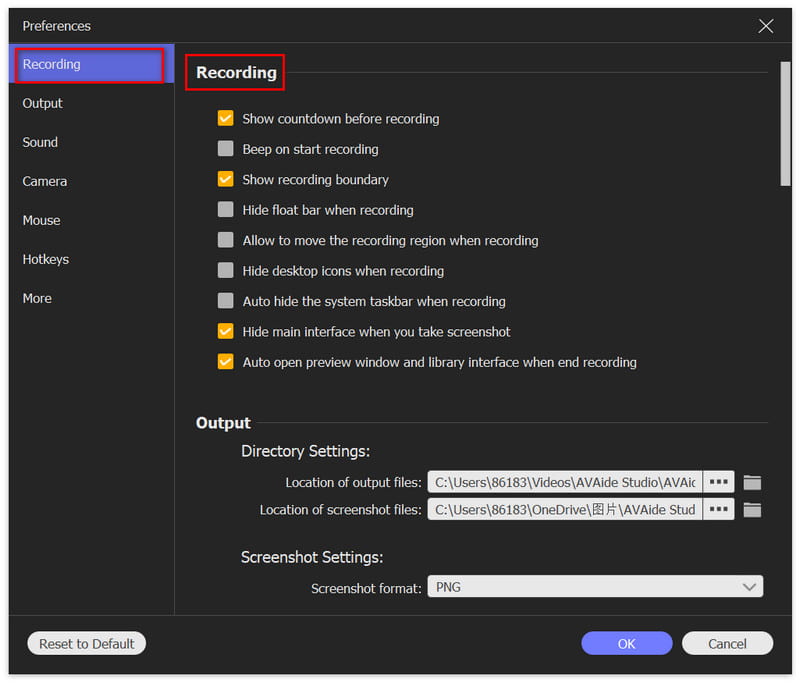
Find Preferences from the Menu. Then let’s set your preferences for convenient use.
General
In the General settings, you can adjust the operations before or during recording. Likewise, you can decide on whether to show the countdown before recording or hide float bar when recording. Just check the box in front of them as you want.
Recording Panel
In this section, you can select a desired work panel.

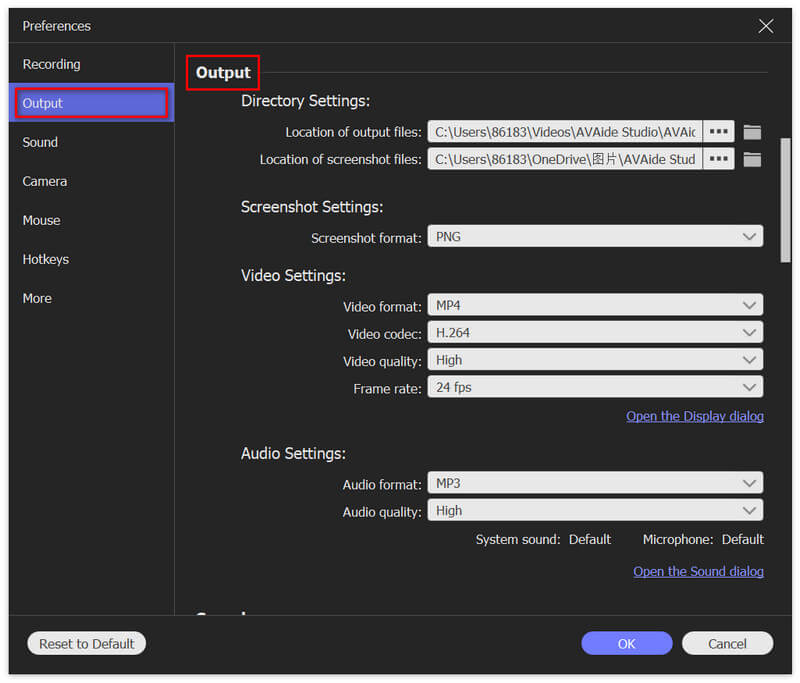
Output
Output settings are mainly about stored folders and formats. You can change the storage path by clicking the Folder button. Then set the format of screenshot, video, and audio. You can even adjust the codec, quality, and more for the video and audio.
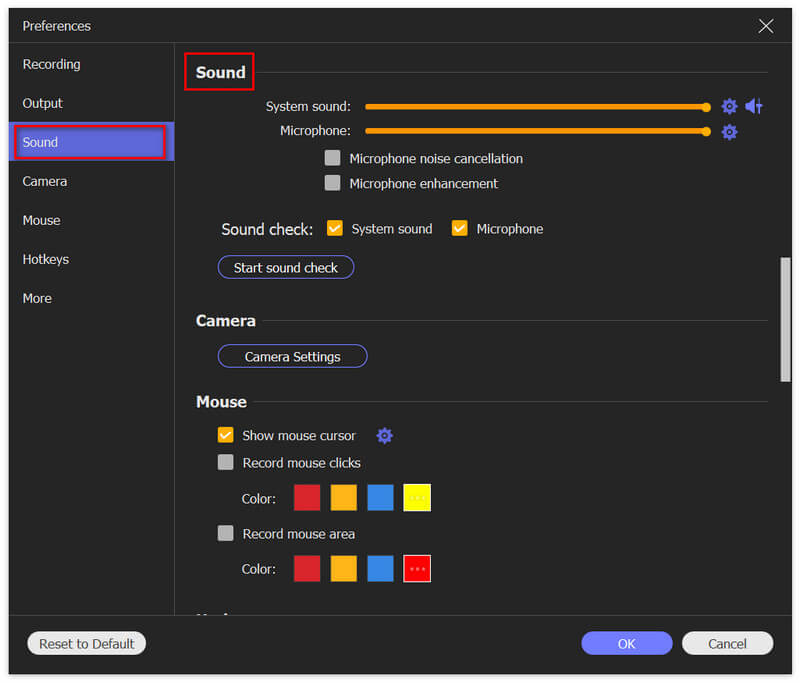
Sound
In Sound settings, adjust the System sound and Microphone by dragging the progress bar. AVAide Screen Recorder also provides advanced Microphone settings like noise cancellation and enhancement. Check the box as you want. Sound check is also available if you need.
Mouse and Keystroke
This section lets you adjust the mouse cursor in the recording area. you can also add a click effect or audio effect when you click.

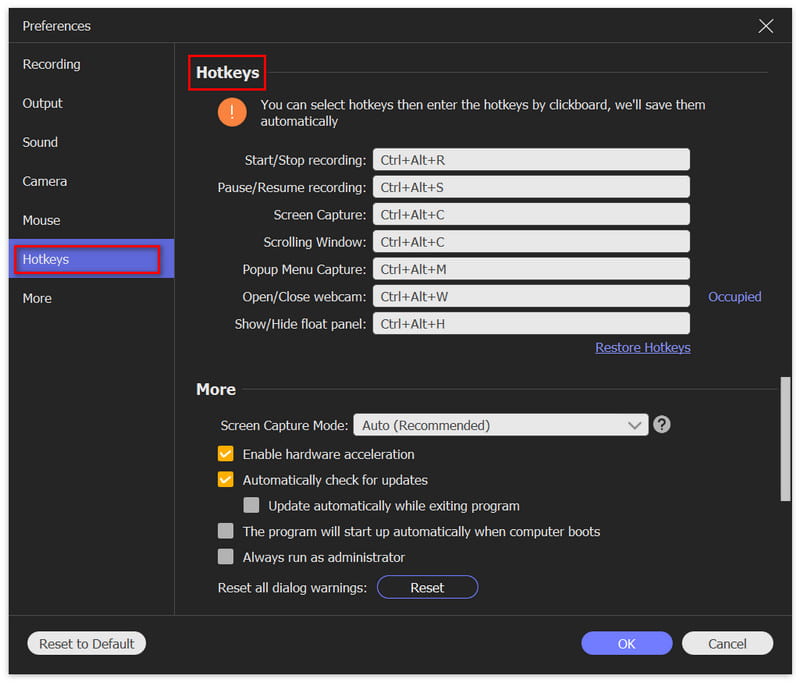
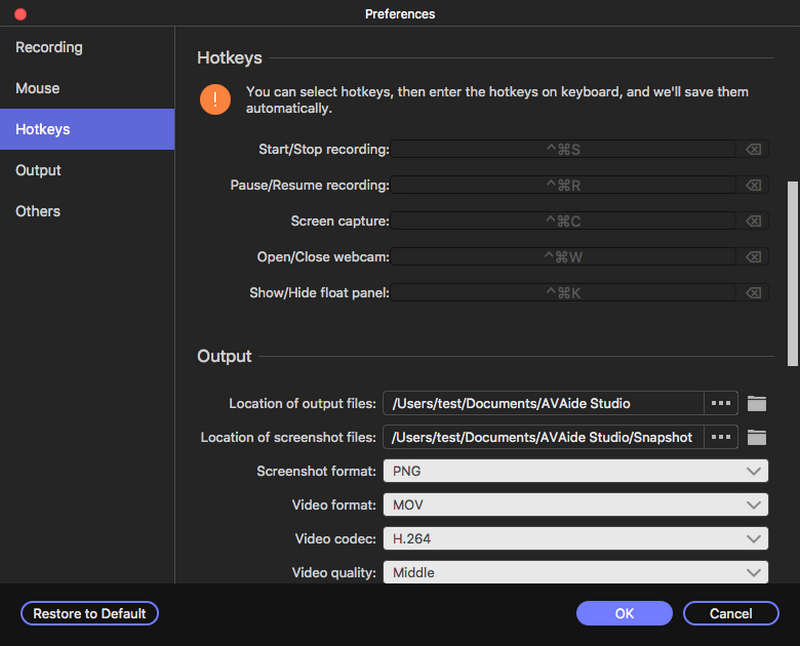
Hotkeys
Hotkey settings are based on your usage habits. You can use the hotkeys to control how to Start/Stop/Pause/Resume recording, capture screen, Open/Close webcam, and Show/Hide float panel.
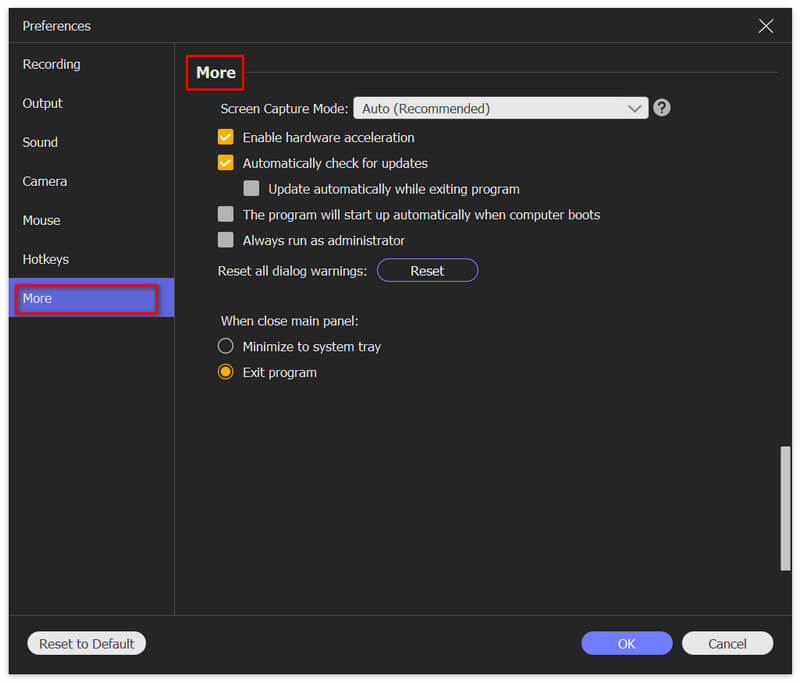
More
Additional settings are listed in More preferences. You can choose to check update automatically as mentioned above. In addition, hardware acceleration, administrator run, and more are available to set as you like.
When all settings are done, don’t forget to click OK to save them.
| Product Version | Supported OS | CPU/Processor | RAM |
| Windows | Windows 11/10/8.1/8/7 | 1GHz Intel/AMD CPU or above | 1GB RAM or more |
| Mac | Mac OS X 10.13 or above | 1GHz Intel® processor and Apple chip | 512 MB or more |
| Supported Formats | |
| Video | MP4, MKV, AVI, MPG, MPEG, RMVB, WMV, MPEG, VOB, DAT, DivX, XviD, M4V, TS, MTS, M2TS, RM, ASF, 3GP, 3G2, F4V, FLV, SWF, MPV, MOD, TOD, QT, MOV, DV, DIF, MJPG, MJPEG, TP, TRP, WebM |
| Audio | MP3, MP2, AAC, AC3, WAV, WMA, M4A, RA, RAM, OGG, AU, AIF, AIFF, APE, FLAC, CUE |
| Supported Formats | |
| Video | MP4, MOV, WMV, AVI, F4V, M4V, TS, GIF |
| Audio | MP3, M4A, AAC, WMA, CAF |
| Image | PNG, JPG/JPEG, BMP, GIF, TIFF |
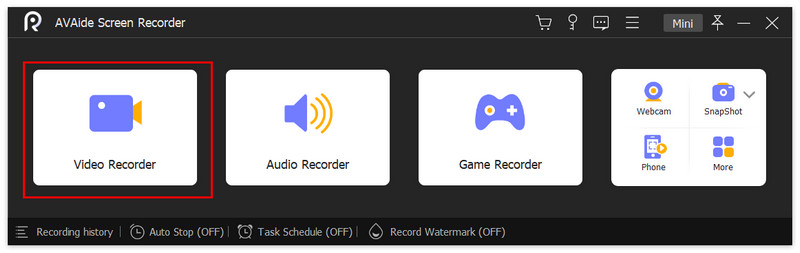
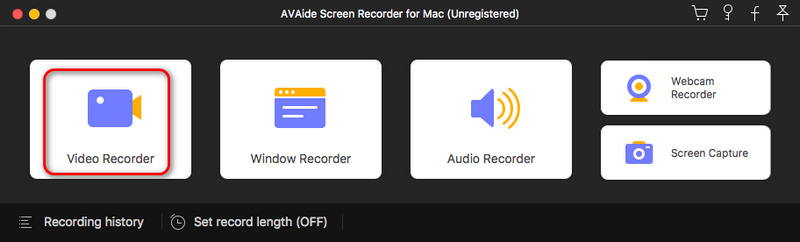
Step 1Choose Video Recorder
Select Video Recorder from the main interface.
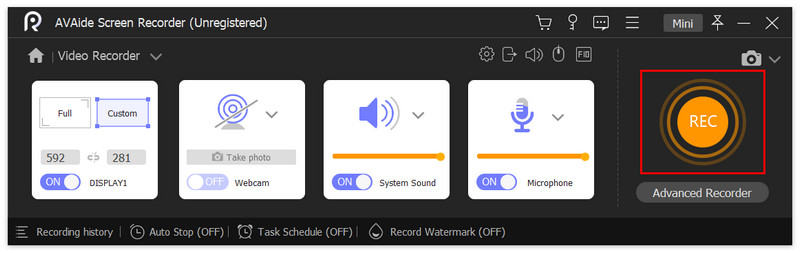
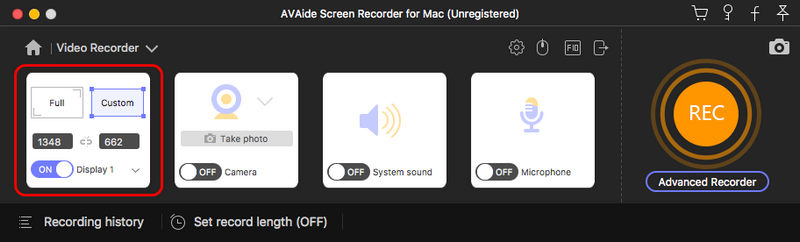
Step 2Select Captured Area
Firstly, select the Full screen or the Custom area according to your need. You can also set the width and length of the captured area yourself by changing the number of them. The aspect ratio can be both changed or locked.

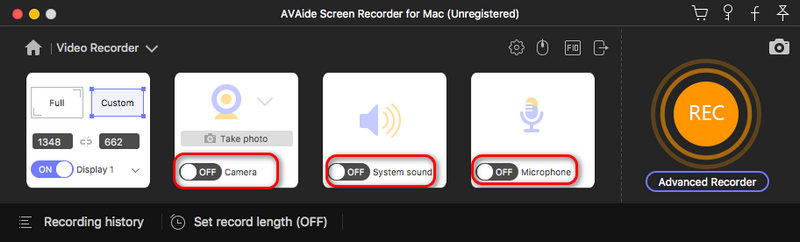
Step 3Adjust Video Recording Settings
Turn on/off the Webcam as you like. For the System Sound, you can Change sound source, Volume Mixer, or Sound check.

You can also adjust Microphone by choosing noise cancellation, enhancement, microphone source, or sound check.

Step 4Start Recording
Click the red REC and start the recording process.
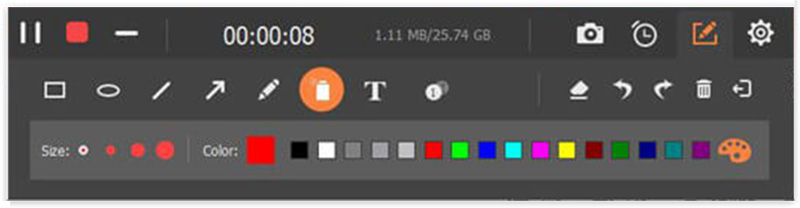
During the recording process, there are many editing features for your choice. Click the Camera button to take snapshots.

Click the Toolbox button and you can make versatile edits.
Select a tool such as border, line, arrow or any shape you want. You can also change the size and color of them.

Choose the Air brush and brush your recording as you like. It really adds flavor to your video.

Click the Text button to add text to the video.

Click the Callout button and you can add order to your video, which is helpful to a tutorial video.

In case that you make wrong edits, look to the right and you can select to erase or cancel your operations.

Step 5Stop Recording Video
Click the Red Square in the top-left corner to end the recording.

Step 6Save Recorded Video
You can see that your recorded video is saved. you can click the Open Folder button to reveal it in file explorer.

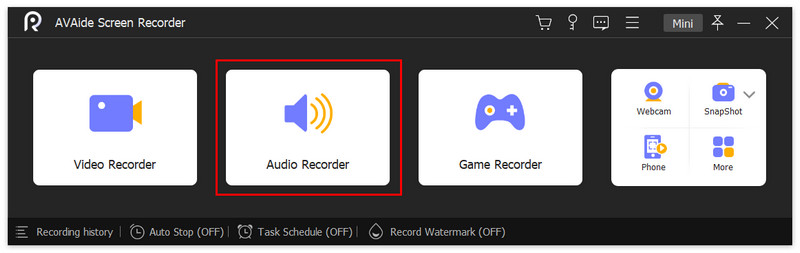
Step 1Choose Audio Recorder
Select Audio Recorder from the main interface.
Step 2Adjust Audio Recording Settings
Turn on/off the System Sound and Microphone as you like. To get better sound experience, you can Change sound source, use Volume Mixer, or Sound check.

You can also adjust Microphone by choosing noise cancellation, enhancement, microphone source, or sound check.

Step 3Start Recording
Click the red REC button and start recording audio.
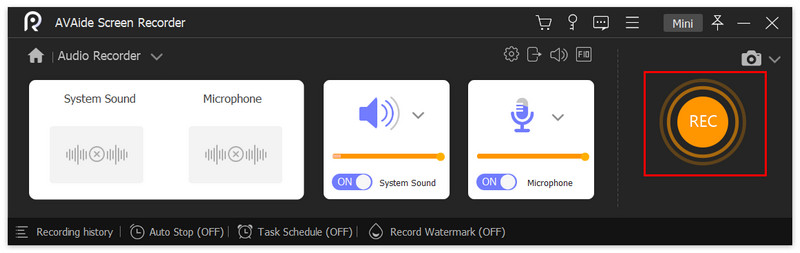
Click the Clock button to Set record length as you need.

Step 4Stop Recording Audio
Click the Red Square to end recording audio.
Step 5Save Recorded Audio
You will see your recorded audio file in the recording list. You can click the Open Folder button to check it in the File Explorer.

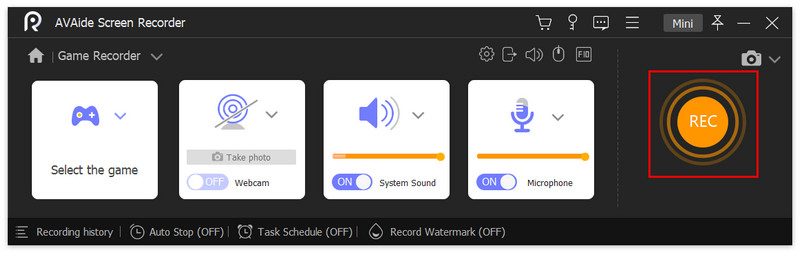
Step 1Choose Game Recorder
Select Game Recorder from the main interface. A window will pop up to remind you run AVAide Screen Recorder as administrator. Please check the box in front of Always run as administrator and you won’t see this notice again.
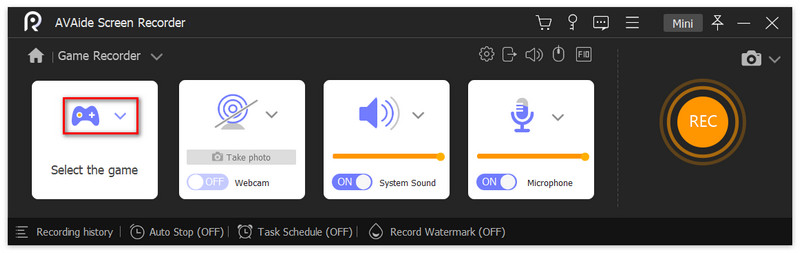
Step 2Select the Game
There will be a notice each time when you launch the Game Recorder. You can read it carefully and close it. Click the drop-down list of Select the game. Select the Game Window you want to record and click OK.

Step 3Adjust Game Recording Settings
Turn on/off the Webcam as you need and you can Take photo during the process.

There are System Sound and Microphone for you to adjust. For the System Sound, you can Change sound source, use Volume Mixer, or Sound check.

For Microphone settings, you can choose the noise cancellation, enhancement, microphone source, or sound check.

Step 4Start Recording
Click the REC button to start recording the selected game window.
Step 5Edit Game Recording
You can click the Camera icon and take photos during the process.

Click the Setting icon and you can also adjust the sound settings here.

Step 6Stop Recording Game
Click the red square if you want to end the game recording.

Step 7Save Recorded Game
You can see your recorded game video in the recording history list. Click the Open Folder button to reveal it in the File Explorer.
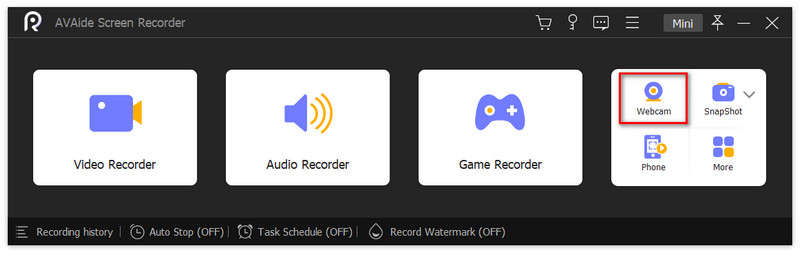
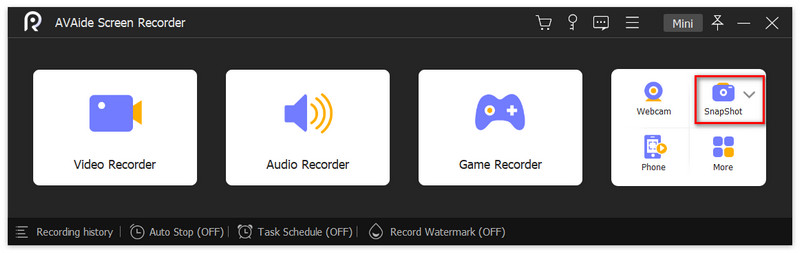
Step 1Select Webcam Recorder
Choose Webcam from the main interface.
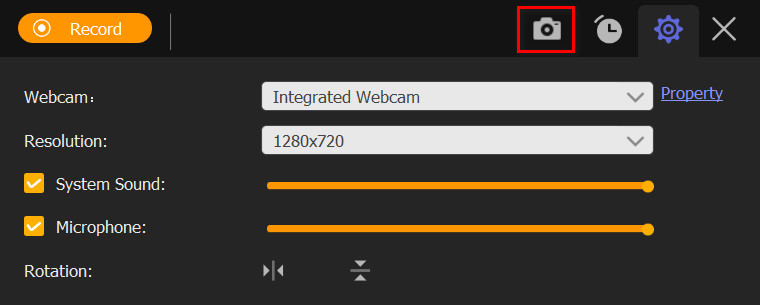
Step 2Set Webcam Recording Settings
During the process, you can change the Resolution, Microphone settings, and the Rotation.
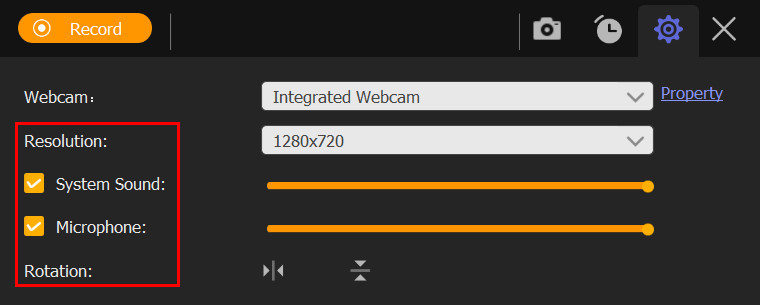
Take snapshots of the webcam by clicking Camera button.
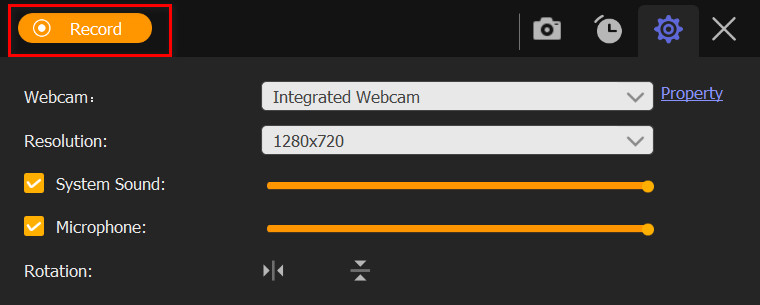
Step 3Start Recording Webcam
Click the Record button in the top-left corner.
Step 4Stop Recording Webcam
Click the red square to stop the recording process.

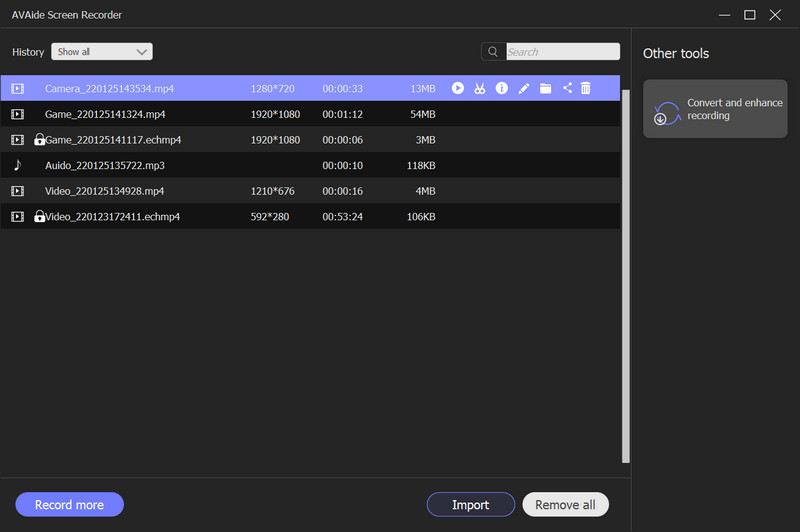
Step 5Check Recorded Webcam
Then you can see the recording list in the window coming up. You can preview the webcam video by clicking the Play button or change the stored folder by clicking the Folder button.
Step 1Select Screen Capture
Click Screen Capture from the main interface.
Step 2Capture Computer Screen
Select the area you want to capture by dragging your mouse. You’ll see a tool bar beneath the captured area. Use the tools to edit your screenshot.
1. You can draw the rectangle, oval, line, arrows, and free graffiti as you like. They are usually used to emphasize the important content.

2. Click the Airbrush button to add powder effect to your captured screenshot. You can change the size and color of it.

3. Click the Text button and you can add the text to the picture.

4. Blur. If you want to hide the personal content on the photo, click the Blur button and apply it to the target area.

5. Callout. Select the Number button and left click the part where you want to add the serial number. They will be added by order.

In case that you make wrong editing, we provide you with the erasing features on the right. You can erase, undo, redo, and delete the editing.

On the very right, you can choose to copy, save, or close the screenshot. Full screen and pinning features are also available.

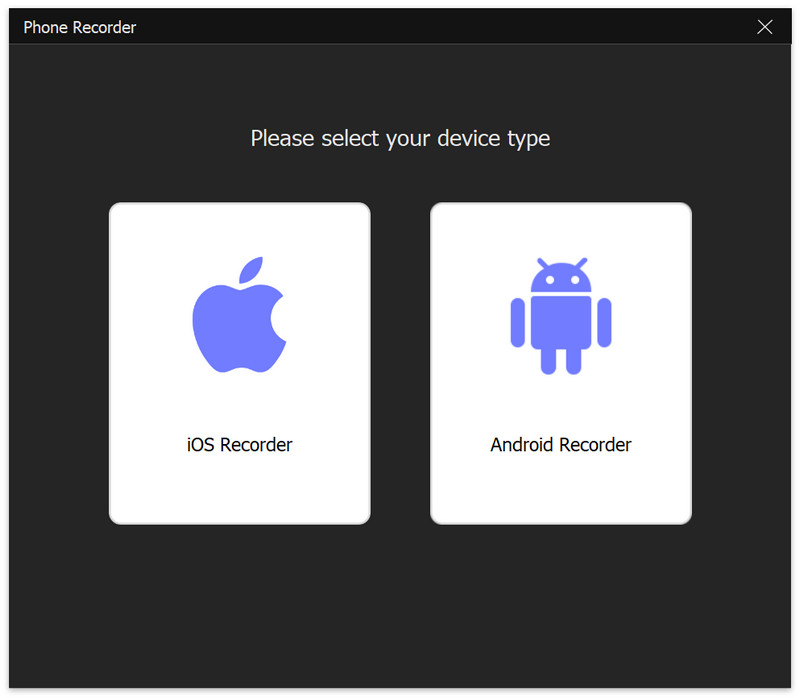
Step 1Select Phone Recorder
Click Phone from the main interface and select iOS Recorder.
Step 2Connect Screen Mirroring
Please make sure that your iPhone and computer are connected to the same WLAN.
Open Control Center on your iPhone and click Screen Mirroring. In the list, please tap AVAide Screen Recorder.
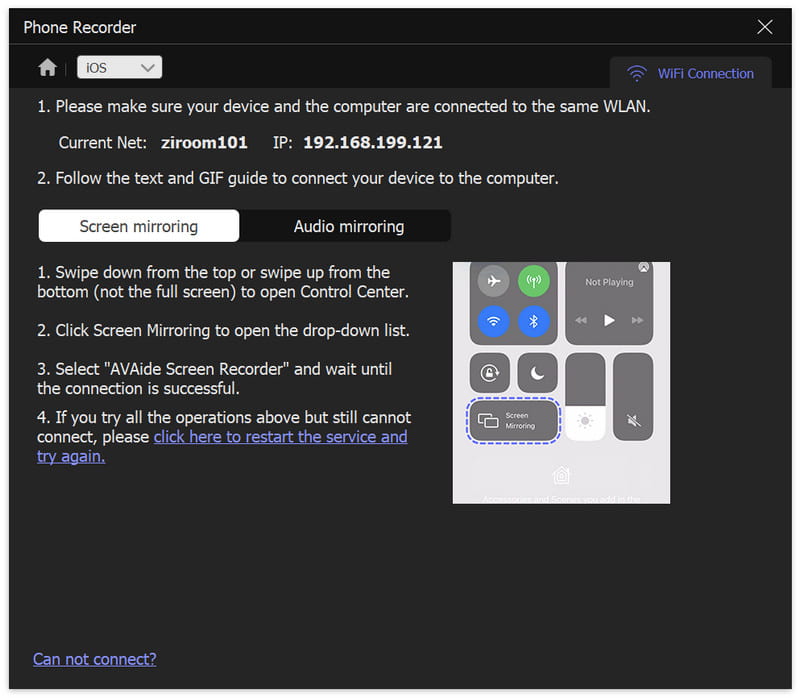
Note: You can select Screen Mirroring and Audio Mirroring as you like.
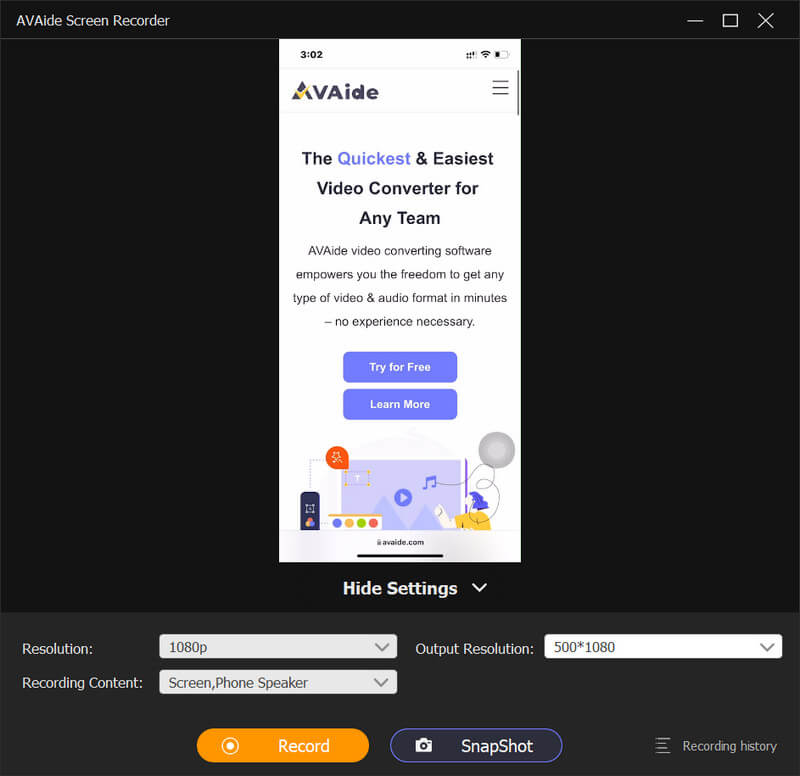
Step 3Screen Mirroring Settings
During the recording, you can adjust the mirrored video as you like. Under the mirrored screen, you can change the Resolution (display), Output Resolution, and Recording Content. Choose to rotate or flip the recorded video to adjust it to the perfect angle.

Step 4Start Recording
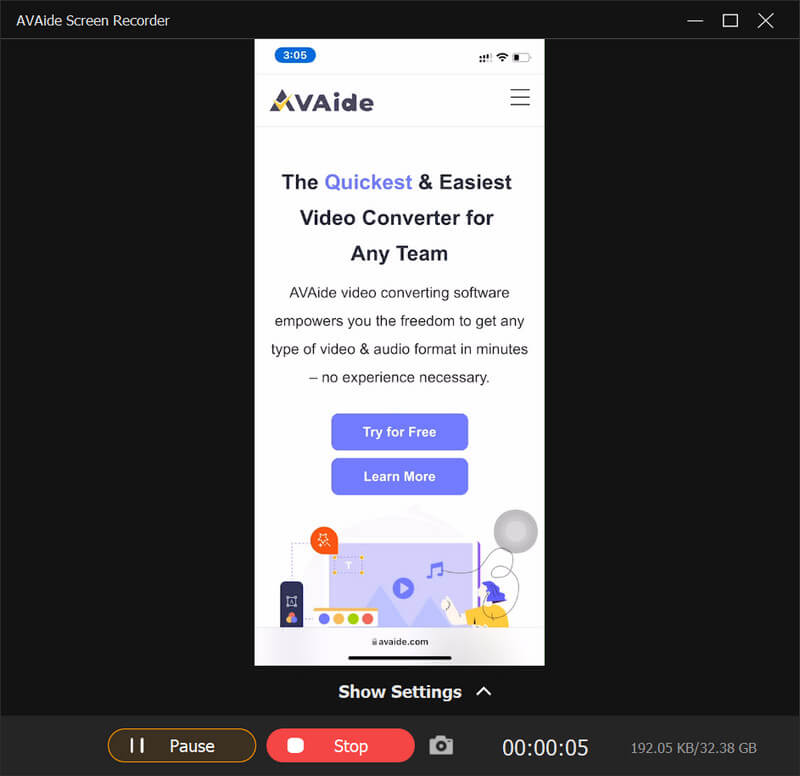
Click Record to start the recording and you can take snapshots during the recording.
Step 5Stop Recording
Click Stop or Pause to implement the corresponding operation.
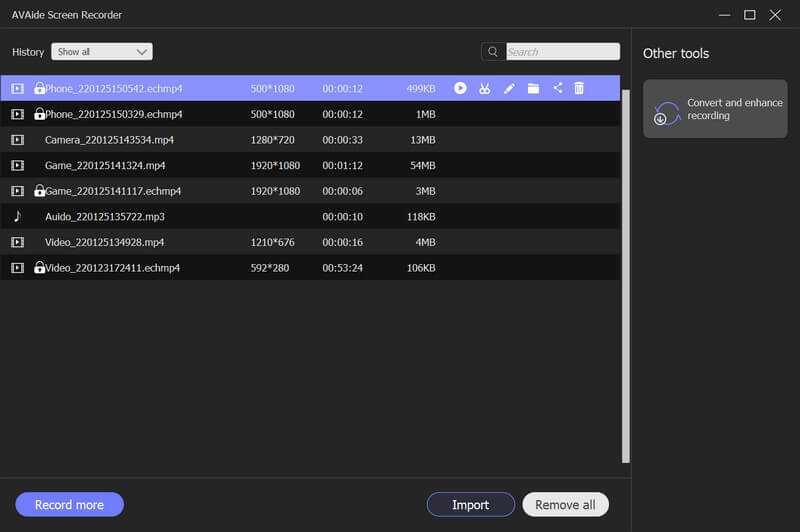
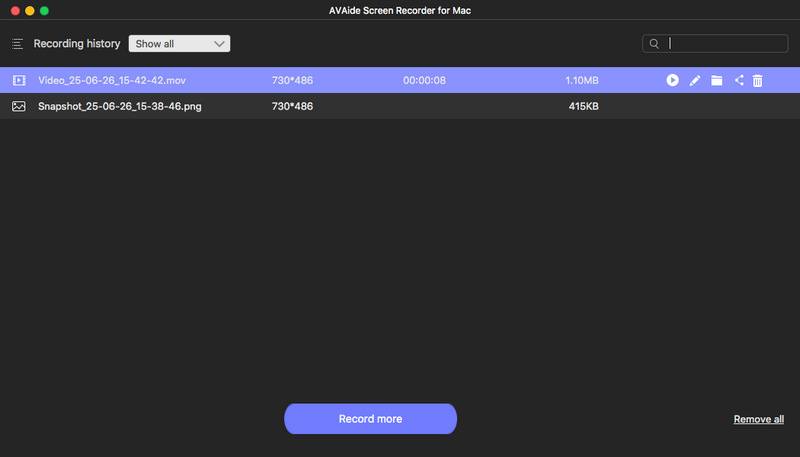
Click Recording history in the bottom-left corner of the main interface.
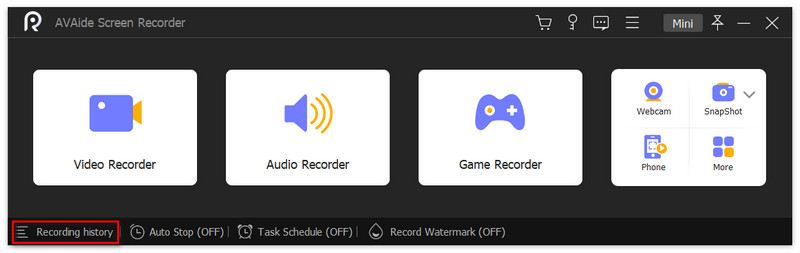
Here you can see all the history files and you can preview them in the folder. You can also choose to Record more or Remove all.
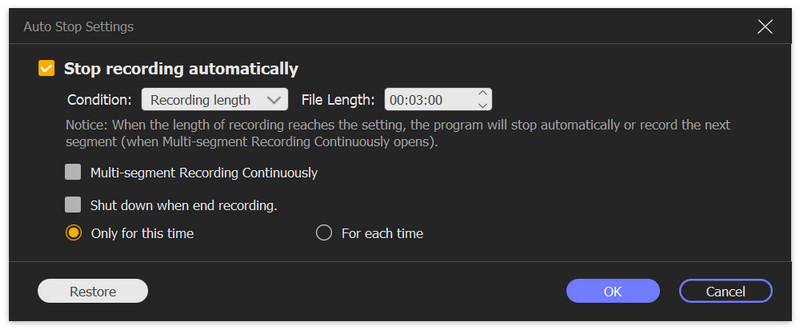
Click Set record length from the main interface.
Check the box in front of Record Length. You can control it by changing the number behind it or click the arrows. Choose to shut down when the recording ends for each time or only for one time.
Visit the official AVAide Screen Recorder website and free download the software. Or acquire it directly from the download buttons above. Then install AVAide Screen Recorder on your computer following the instructions.
Method 1. Each time you launch AVAide Screen Recorder, a comparison window will appear. You can register by clicking the Register button in the bottom-right corner.
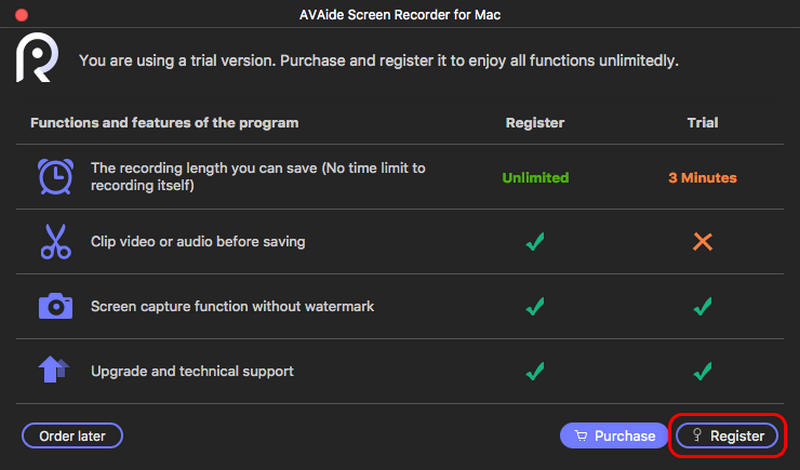
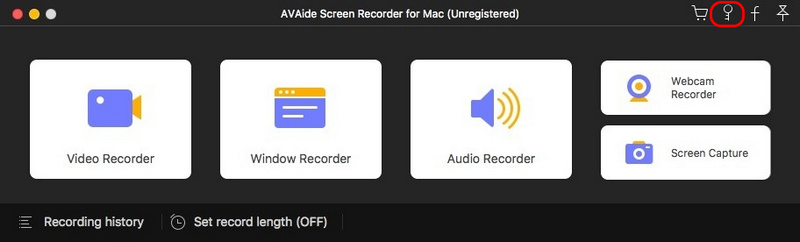
Method 2. If you close the popped-up window accidentally, don’t worry. You can click the Help button on the top ribbon and select Register.
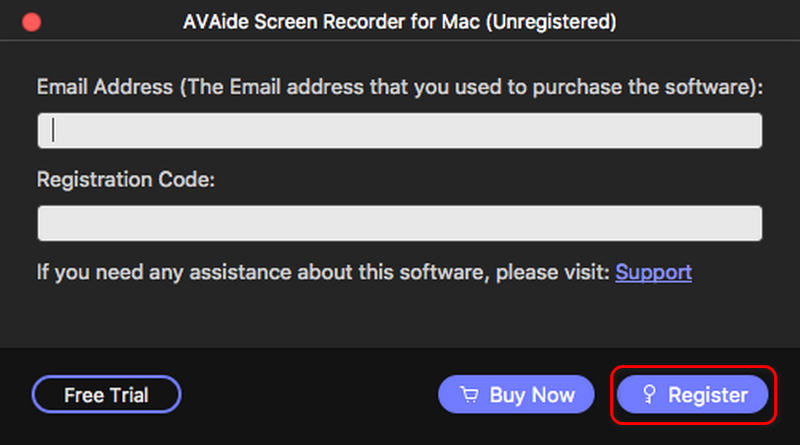
Then enter the Email Address you used to purchase this software and the registration code you received. Click Register to enjoy the full features!
Method 1. Click the Help button on the top ribbon. Then choose Check Update… from the drop-down list. If your current version is not the latest, you should update it immediately.

Method 2. Click the product name on the top ribbon and select Preferences.
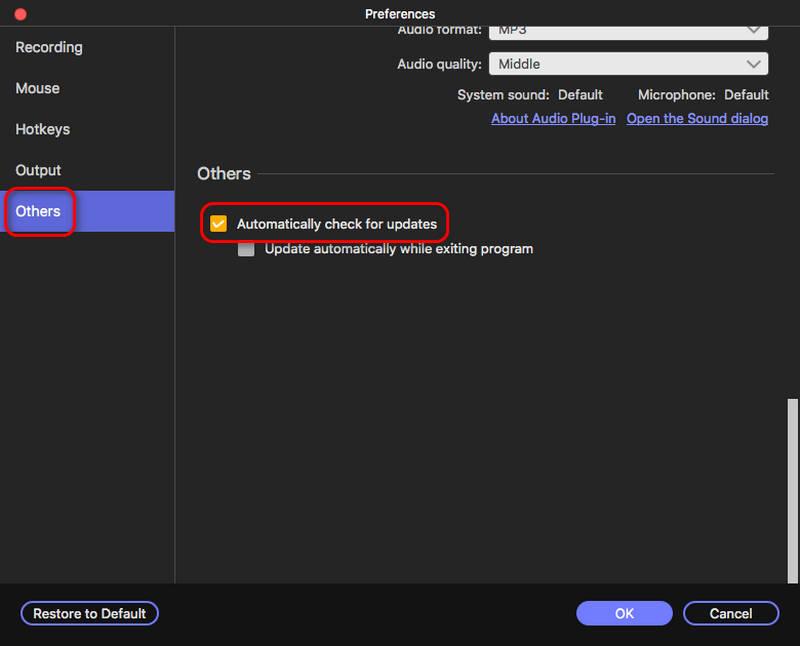
Choose Others from the left panel and turn on Automatically check for updates. Then click OK. You don’t need to check it yourself from time to time.
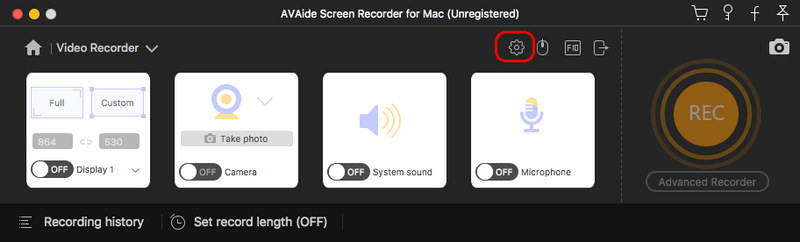
Click the product name on the top ribbon and open Preferences. Then let’s set your preferences for convenient use.
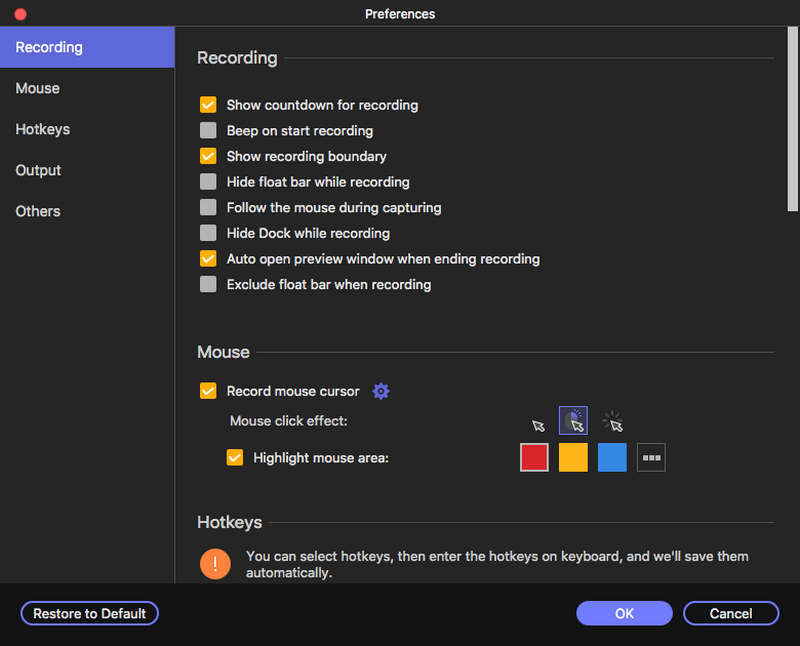
Recording
In the Recording settings, you can adjust the operations before or during recording. Likewise, you can decide on whether to show a countdown for recording or hide float bar while recording. Just select what you want or deselect what you don’t like.
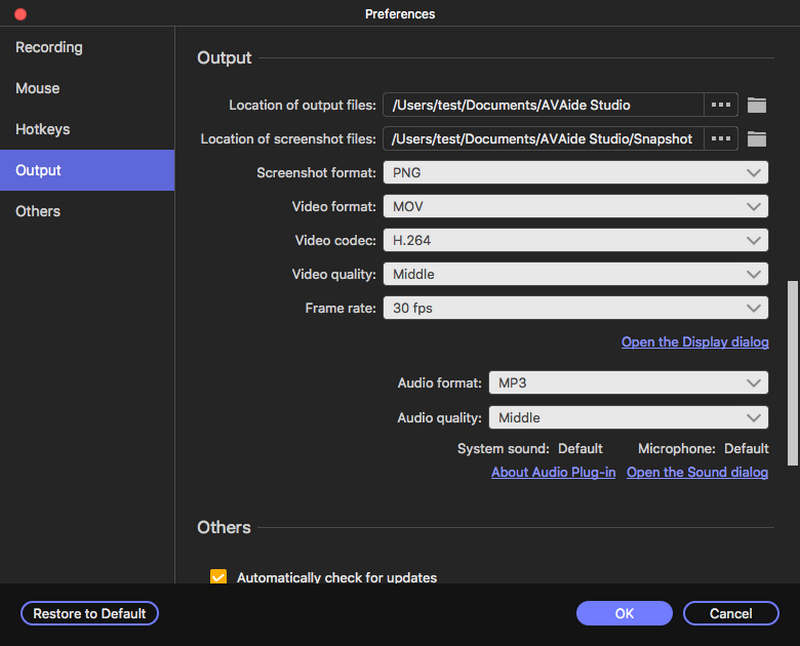
Output
Output settings are mainly about stored folders and formats. You can change the output path by clicking the Browse button. Then set the format of screenshot, video, and audio. You can even adjust the codec, quality, and more for the video and audio.
Mouse
Adjust the Mouse-related settings here. Choose to Record Mouse cursor as you need. You can also add Mouse click effects and mouse area and the color for them.
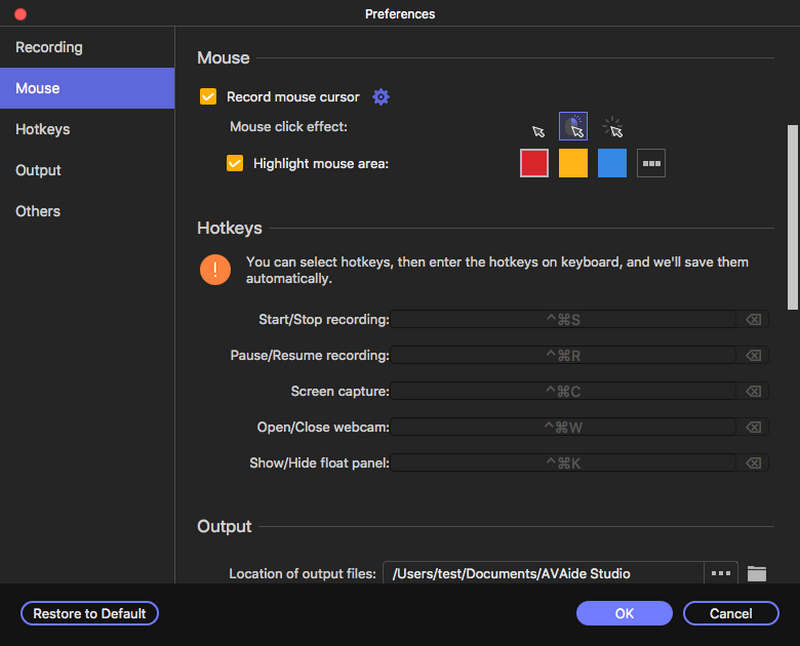
Hotkeys
Hotkey settings are based on your usage habits. You can use the hotkeys to control how to Start/Stop/Pause/Resume recording, capture screen, Open/Close webcam, and Show/Hide float panel.
| Product Version | Supported OS | CPU/Processor | RAM |
| Windows | Windows 11/10/8.1/8/7 | 1GHz Intel/AMD CPU or above | 1GB RAM or more |
| Mac | Mac OS X 10.13 or above | 1GHz Intel® processor and Apple chip | 512 MB or more |
Supported Output Formats
| Supported Formats | |
| Video | MP4, MOV, WMV, AVI, F4V, M4V, TS, GIF |
| Audio | MP3, M4A, AAC, WMA, CAF |
| Image | PNG, JPG/JPEG, BMP, GIF, TIFF |
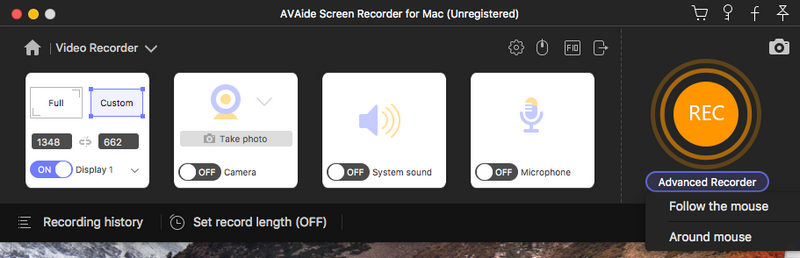
Step 1Choose Video Recorder
Select Video Recorder from the main interface.
Step 2Select Captured Area
Firstly, select the Full screen or the Custom area according to your needs. You can also set the width and length of the captured area yourself by changing the numbers. The aspect ratio can be both changed and locked.
Step 3Adjust Video Recording Settings
Turn on/off the Webcam as you like. For the System Sound, you can change the sound source, Volume Mixer, or Sound check.
You can also adjust the Microphone by choosing noise cancellation, enhancement, microphone source, or sound check.
Step 4Set Advanced Recorder
Surprisingly, there are more settings for you to explore. Click Advanced Recorder and choose the operations. You can choose Around mouse, Follow the mouse, Lock and record window, Exclude window, and record.
Step 5Start Recording
Click the REC button and start the recording process.

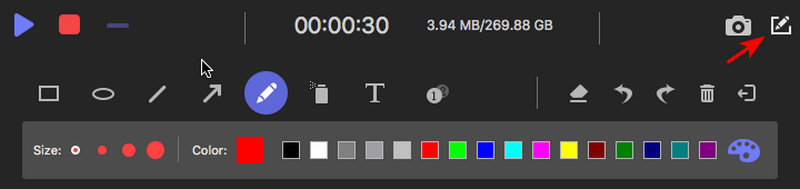
During the recording process, there are many editing features for your choice. Click the Camera icon to take snapshots.

Click the Edit button, and you can make versatile edits. Click the Text button to add text to the video. Click the Callout button, and you can add an order to your video, which is helpful for a tutorial video. In case you make wrong edits, look to the right and you can select to erase or cancel your operations.
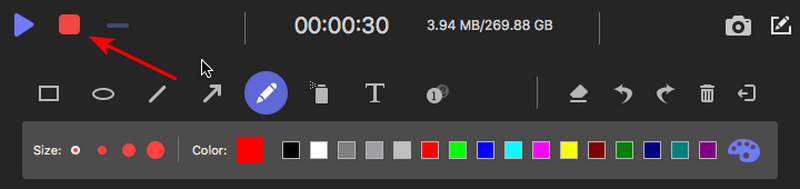
Step 6Stop Recording Video
Click the red Stop button in the top-left corner to end the recording.
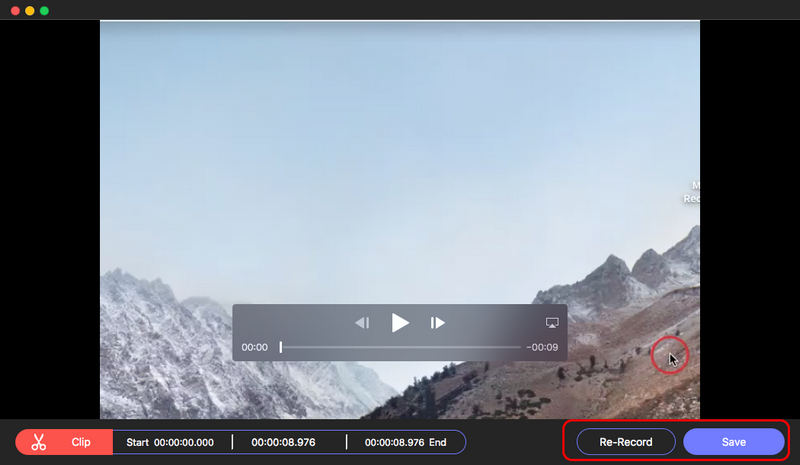
Step 7Preview Recorded Video
In the preview window, you can clip the recorded video to change the start time and end time of the recorded video. Play the video and then decide to Re-Record or Save it.
Step 8Save Recorded Video
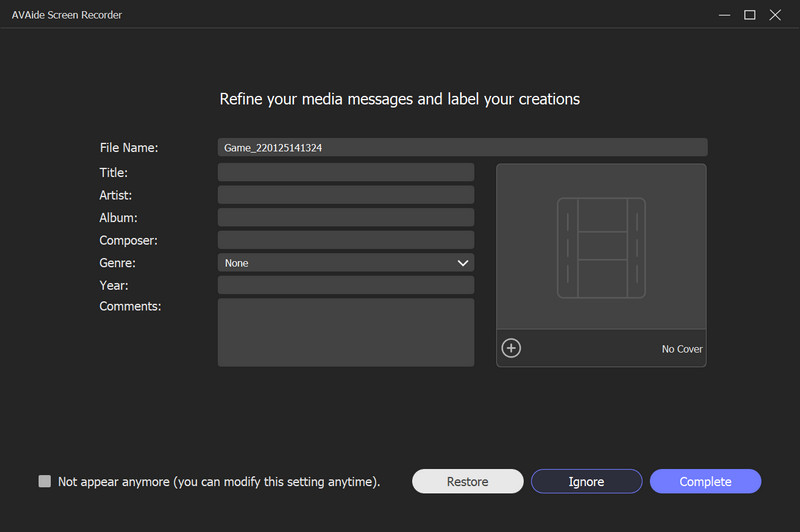
Click Save, and you’ll enter the custom window. Here you can change the Name and the Output Path of the recorded video. Then click Next.
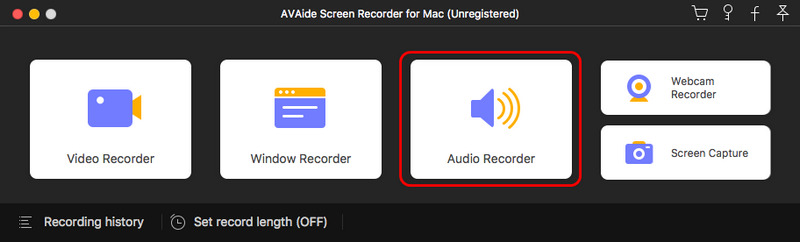
Step 1Choose Audio Recorder
Select Audio Recorder from the main interface.
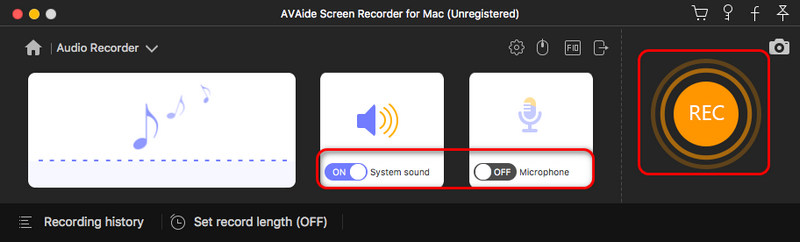
Step 2Adjust Audio Recording Settings
Turn on/off the System Sound and Microphone as you like. Then, click the REC button to start recording audio.
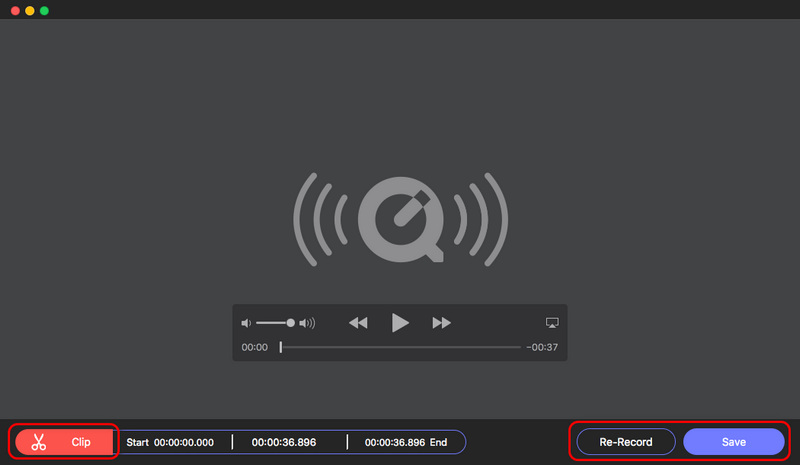
Step 3Stop Audio Recording
When you want to stop audio recording, just click the red Stop button.

Step 4Save the Recorded Audio File
You can click the Clip button to clip the recorded audio file. Click the Save button to save the recording on your Mac. If the recording is not satisfying, you can click the Re-Record button to record audio again.
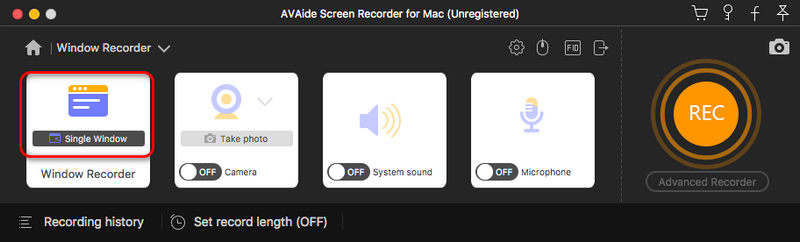
Step 1Select Window Recorder from the main interface. Click the Single Window button to choose a window on your Mac.
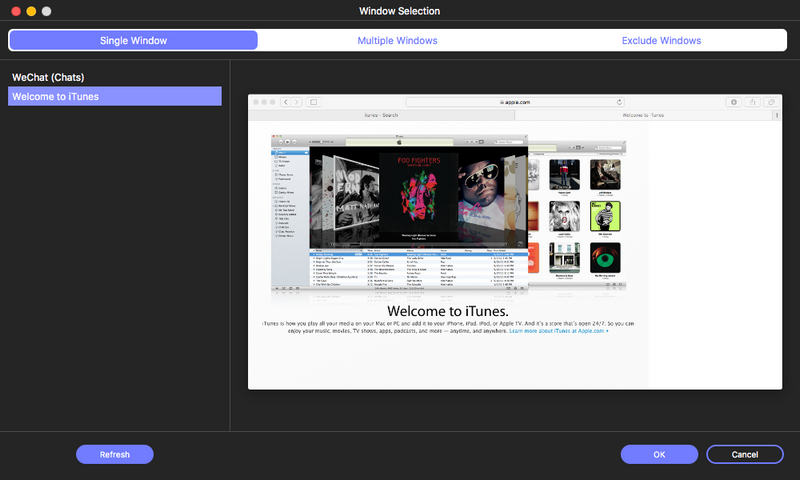
Step 2Here, you should choose a window, such as a browser window, an app, a game, or a folder. Then, click the OK button.
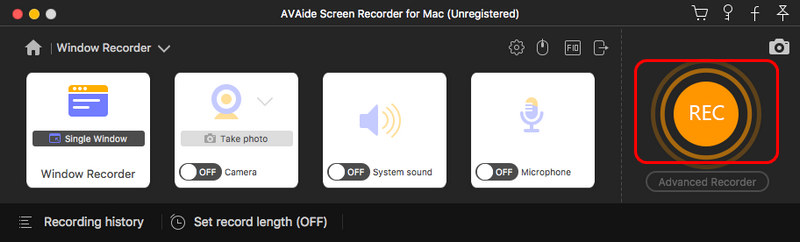
Step 3Now, click the Record button to record the selected window.
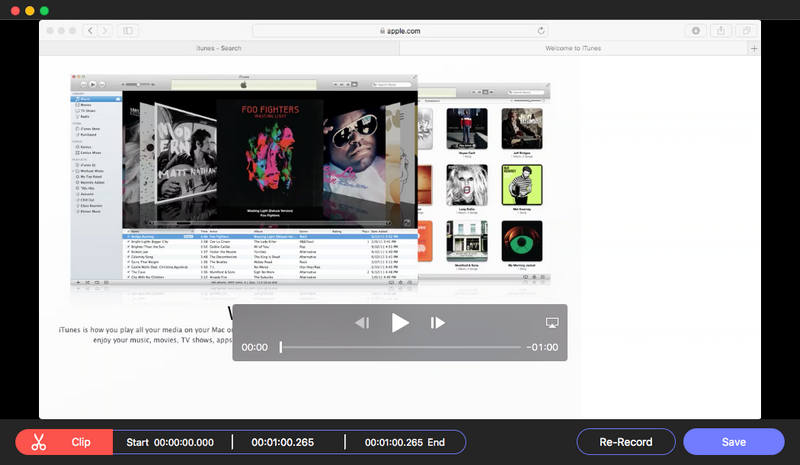
Step 4Click the Stop button to stop recording. You can preview and edit the recorded video and save it. If you consider this recording not satisfactory, just click the Re-Record button.
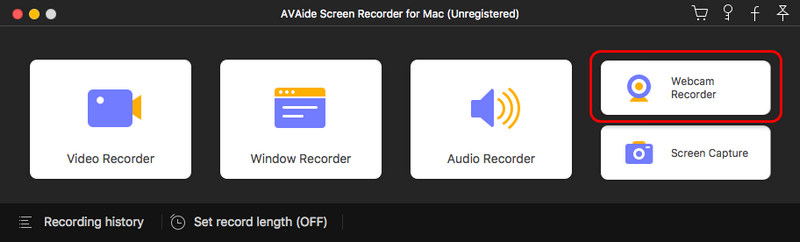
Step 1Choose Webcam Recorder from the main interface.
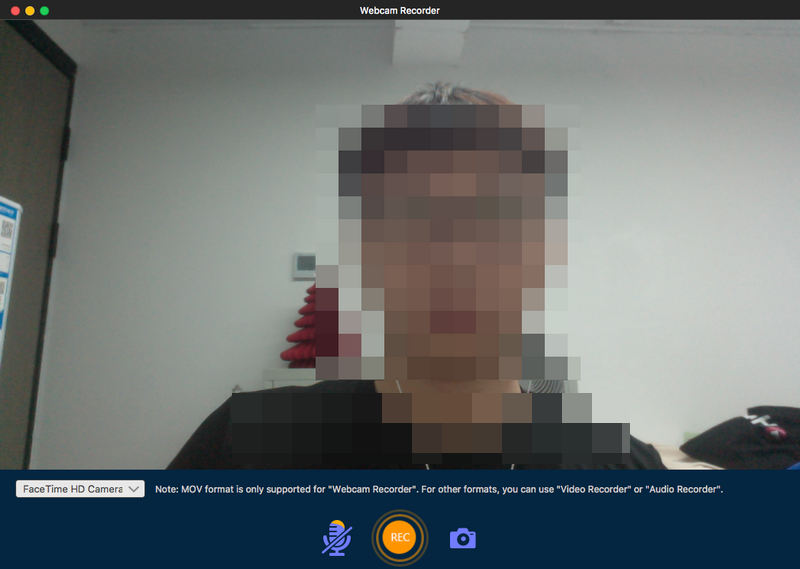
Step 2Click the REC button to start recording your webcam. When it’s over, click the REC or Stop button to stop recording.
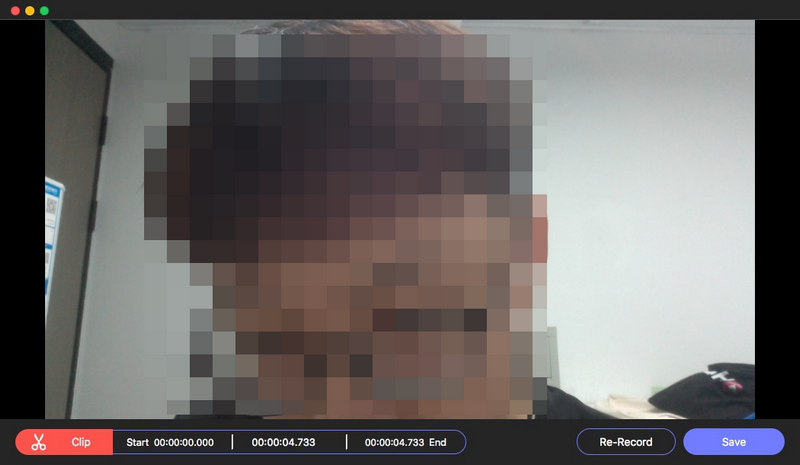
Step 3You can preview the recorded webcam video and edit it. Click the Save button to save this video to your Mac. If you consider this recording not satisfactory, click the Re-Record button to record your webcam again.
Copyright © 2026 AVAide. All rights reserved.