Probabil sunteți familiarizați cu OBS Screen Recorder, mai ales dacă redați în flux sau înregistrați videoclipuri. Dar știți cu adevărat ce poate face dincolo de funcțiile de bază? Știți cum setările sale pot îmbunătăți calitatea înregistrării?
Dacă nu, acest articol este pentru tine. Vom acoperi totul despre el, de la istoric, caracteristici cheie, avantaje și dezavantaje, performanță și setări corecte. Până la final, vei ști cum să îl folosești mai bine și să profiți la maximum de el.
- Verdict rapid: Pentru cine este OBS Studio
- Avantaje și dezavantaje dintr-o privire
- Ce este OBS Studio: O prezentare generală completă
- Defalcarea caracteristicilor cheie
- Performanță și calitate a înregistrării
- Disponibilitatea platformei: Poți folosi OBS pe mobil?
- OBS Studio vs. Concurența
- Probleme comune ale OBS și cum să le remediați
- Fișă de informații despre setările OBS
Verdict rapid: Pentru cine este OBS Studio
OBS Studio vă oferă instrumente puternice pentru streaming și înregistrare. Funcționează cel mai bine pentru utilizatorii care doresc mai mult control asupra conținutului lor.
- Cel mai bun pentru
- Transmisiuni live pe Twitch, YouTube și Facebook Live.
- Creatori de conținut care utilizează mai multe surse video și audio.
- Utilizatori care au nevoie de efecte de ecran verde și controale audio avansate.
- Persoane care își doresc un instrument gratuit cu funcții profesionale.
- Utilizatori avansați cărora le place să personalizeze setările de înregistrare și streaming.
- Nu este ideal pentru
- Începători care doresc o configurare rapidă și simplă.
- Utilizatori ocazionali care au nevoie doar de instrumente de înregistrare de bază.
- Creatori care axează pe dispozitive mobile, deoarece OBS este conceput în principal pentru utilizare pe desktop.
- Utilizatorii caută un editor video complet pentru post-producție.
Avantaje și dezavantaje dintr-o privire
Aici, poți vedea imediat principalele puncte forte și limite ale OBS Screen Recorder, astfel încât să știi la ce să te aștepți înainte de a-l utiliza.
- Pro
- Complet gratuit și open-source.
- Fără abonamente, paywall-uri sau filigrane.
- Foarte personalizabil pentru diferite configurații de streaming și înregistrare.
- Acceptă camere web, imagini, text, surse de browser și multe altele.
- Instrumentele audio avansate ajută la îmbunătățirea clarității sunetului.
- Funcționează pe Windows, Mac și Linux.
- Transmiteți direct pe YouTube, Twitch, Facebook și alte platforme.
- Contra
- Poate fi dificil pentru începători să învețe.
- Configurarea necesită timp și poate părea confuză la început.
- Fără instrumente de editare video încorporate.
- Necesită un program separat pentru decuparea și editarea videoclipurilor.
- Poate rula lent pe computere mai vechi sau low-end.
- Necesită suficientă memorie RAM și putere grafică pentru o performanță fluidă.
- Sprijinul vine în principal din forumurile și ghidurile comunității
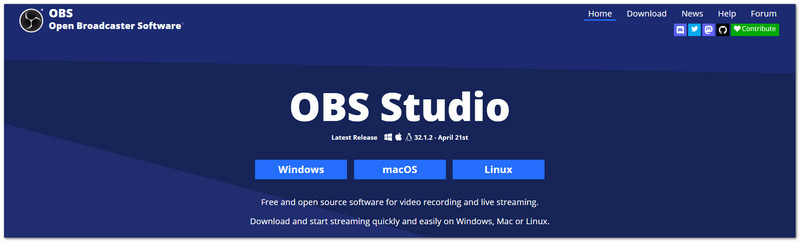
Ce este OBS Studio: O prezentare generală completă
OBS Studio Screen Recorder este unul dintre cele mai populare instrumente pentru înregistrarea ecranului și streaming live. Oferă utilizatorilor funcții puternice, fără costuri suplimentare. Este folosit de începători, creatori, profesori, companii și streameri profesioniști din întreaga lume.
Istorie și reputație
OBS Studio este considerat acum standardul industriei pentru înregistrare și streaming live. Este renumit pentru instrumentele sale puternice, rezultatele excelente și accesul nerestricționat. Atât pentru proiecte personale, cât și pentru cele profesionale, mulți utilizatori au încredere în el.
Caracteristici esențiale
Poți utiliza diverse surse pentru a crea scene unice cu OBS Studio. Camerele web, ecranele, ferestrele de joc, suprapunerile browserului, imaginile și textul pot fi integrate într-un singur layout. De asemenea, are un mixer audio integrat. Cu ajutorul filtrelor, poți îmbunătăți claritatea audio, reduce zgomotul de fundal și modifica nivelurile sunetului.
Pentru streaming și înregistrare, OBS Studio folosește accelerarea hardware pentru a oferi performanțe fluide și videoclipuri de înaltă claritate. Modul Studio vă permite să previzualizați modificările înainte de a fi lansate, ceea ce ajută la crearea unei transmisiuni mai profesionale.
Ce îl face diferit
Cel mai mare avantaj al OBS Studio este că este complet gratuit și open-source. Toate funcțiile sunt disponibile fără abonamente, paywall-uri sau watermark-uri.
Funcționează pe Windows, Mac și Linux, ceea ce îl face accesibil pentru mulți utilizatori. De asemenea, acceptă o colecție mare de plugin-uri și instrumente create de comunitate care adaugă noi funcții.
O altă caracteristică remarcabilă este interfața sa personalizabilă. Puteți muta, ascunde sau rearanja panourile pentru a se potrivi fluxului de lucru și configurației ecranului.
Defalcarea caracteristicilor cheie
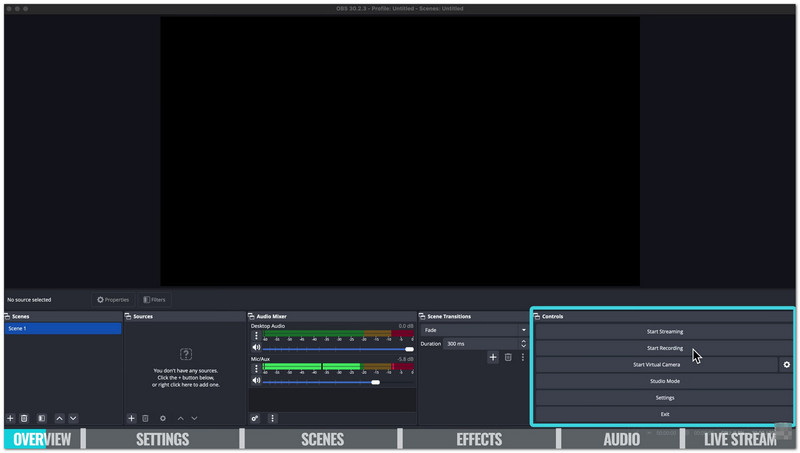
OBS Studio oferă un control puternic asupra videoclipurilor, audio și transmisiilor live. Puteți verifica fiecare funcție mai jos!
1. Managementul scenei și sursei
OBS Studio vă permite să creați un număr nelimitat de scene pentru diferite configurații de înregistrare sau streaming. Puteți combina capturi de ecran, camere web, imagini, ferestre de browser și multe altele într-un singur layout. De asemenea, include instrumente pentru efecte, ajustări de culori și designuri personalizate.
2. Mixaj audio și înregistrare multi-track
Puteți gestiona toate sursele de sunet datorită mixerului audio integrat. Filtrele audio vă permit să reduceți zgomotul de fundal și să modificați nivelurile de volum. Pentru o editare mai simplă, înregistrarea multi-track vă permite să stocați independent microfonul, sunetul sistemului și alte surse de sunet.
3. Înregistrare superioară
OBS Studio acceptă înregistrarea de înaltă rezoluție și la o rată mare de cadre pe secundă. Acesta folosește accelerarea hardware pentru a oferi videoclipuri fluide, reducând în același timp încărcarea sistemului. De asemenea, acceptă formate populare precum MP4 și MKV.
4. Transmisiune în direct
Poți transmite direct pe Facebook, Twitch, YouTube și alte site-uri web. Pentru ca transmisiunea ta să funcționeze fără probleme, OBS Studio oferă previzualizări live, o conexiune fiabilă și reconectare automată.
5. Taste rapide și scurtături
Tastele rapide personalizate accelerează streamingul și înregistrarea. Poți seta o tastă rapidă pentru a începe înregistrarea în OBS și a o opri oricând cu o simplă apăsare de tastă. În plus, poți controla cu ușurință alte acțiuni cu ajutorul tastaturii, poți dezactiva sunetul și poți schimba scenele.
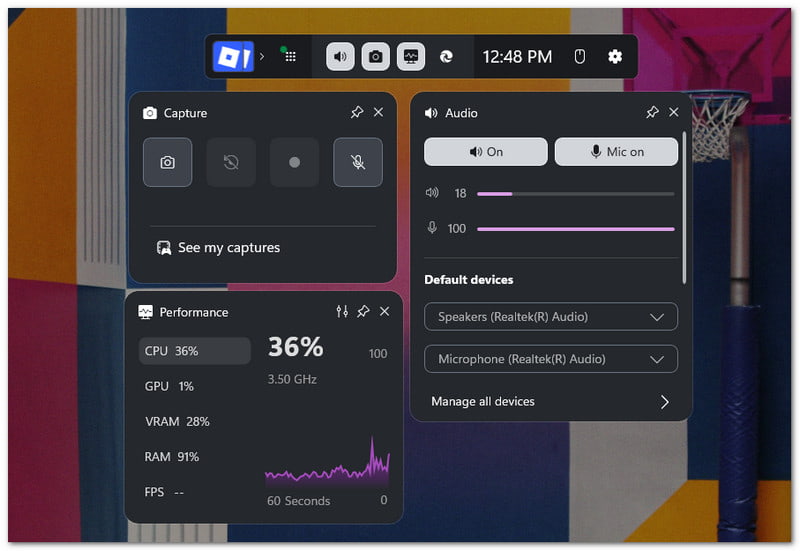
Performanță și calitate a înregistrării
OBS Studio poate produce înregistrări clare și fluide atunci când este configurat corect. Setările corecte ajută la îmbunătățirea calității video și la reducerea neclarității, a întârzierii și a pierderii cadrelor.
1. Cum să obțineți înregistrări de înaltă calitate
Pentru cele mai bune rezultate, utilizați un encoder hardware precum NVENC, AMD AMF sau Intel Quick Sync. Păstrați aceleași valori pentru Baza Canvas și Rezoluția de Ieșire pentru a evita pierderea clarității. Este important să știți cum să creșteți calitatea înregistrării OBS fără a provoca latențe în sistemul dvs. sau a pierde detalii.
A. Setări optime pentru video 1080p 60fps:
- Rezoluție bază (pânză): 1920×1080
- Rezoluție de ieșire: 1920 × 1080
- FPS: 60
- Mod de ieșire: Avansat
- Format de înregistrare: MKV sau MP4 fragmentat
- Encoder: Encoder hardware
- Controlul ratei: CQP
- Nivel CQ: 16
- Interval cadre cheie: 2
Aceste setări oferă videoclipuri clare și mișcare fluidă, menținând în același timp dimensiunile fișierelor rezonabile.
B. Pentru setările de înregistrare 4K:
- Rezoluție: 3840×2160
- FPS: 60
- Encoder: Encoder hardware dedicat GPU
- Controlul ratei: CQP
- Nivel CQ: 18-20
Salvați înregistrările pe un SSD. Acest lucru ajută la prevenirea pierderii de cadre și a problemelor de înregistrare.
2. De ce înregistrarea mea OBS pare neclară
De ce apare înregistrarea mea OBS neclară? Este o problemă frecventă. Înregistrările neclară apar adesea din cauza setărilor incorecte sau a limitărilor sistemului.
Cauze frecvente:
- Setările pentru rata de biți sau calitate sunt prea mici.
- Rezoluțiile de bază și de ieșire nu corespund.
- Setări slabe ale filtrului de reducere a scalei.
- Suprasolicitarea codificatorului din cauza utilizării intense a sistemului.
- Folosirea aplicației Window Capture în loc de Game Capture pentru jocuri.
Corecții:
- Folosește CQP în loc de setări de înregistrare cu rată de biți redusă.
- Setați nivelul CQ la aproximativ 16 pentru o calitate mai bună.
- Aliniați rezoluțiile de bază și de ieșire.
- Folosește filtrul de reducere a dimensiunii Lanczos atunci când redimensionezi videoclipul.
- Înregistrați jocurile cu Game Capture atunci când este posibil.
- Rulați OBS ca administrator pentru a îmbunătăți performanța.
- Pentru a elibera resurse de sistem, închideți toate programele care nu sunt necesare.
Câteva mici modificări ale setărilor pot face o mare diferență. Cu configurarea corectă, OBS Studio poate oferi înregistrări clare, fluide și cu aspect profesional.
Disponibilitatea platformei: Poți folosi OBS pe mobil?
Adevărul este simplu. Nu există o aplicație oficială OBS Studio pentru dispozitive mobile precum iPhone sau dispozitive Android, deoarece este construită doar pentru Windows, Mac și Linux. Dar nu ești limitat. Există totuși modalități de a-ți utiliza telefonul cu instrumentele OBS.
Ce POȚI face:
- Folosește-ți telefonul ca cameră sau microfon.
Îți poți transforma telefonul într-o cameră web wireless. Aplicații precum DroidCam, OBS sau NDI te pot ajuta. - Transmite jocuri mobile pe OBS pe PC.
Poți oglindi ecranul telefonului pe computer folosind instrumente precum AirPlay sau LetsView. - Controlează OBS de pe telefon.
Poți folosi OBS WebSockets cu aplicații precum Touch Portal sau Deckboard. Îți permite să pornești sau să oprești fluxuri și să schimbi scenele. - Folosește aplicații de streaming mobil de la terți.
Aplicații precum Streamlabs Mobile sau Prism Live Studio îți permit să transmiți conținut direct de pe telefon. Acestea nu sunt aplicații oficiale OBS, dar funcționează într-un mod similar.
OBS Studio vs. Concurența
OBS Studio este un instrument puternic pentru înregistrare și streaming live, dar poate fi dificil pentru începători. De aceea, există diferite instrumente cu care îl poți compara, oferind o utilizare mai simplă, o configurare mai rapidă și funcții de înregistrare mai simple.
1. AVaide Screen Recorder
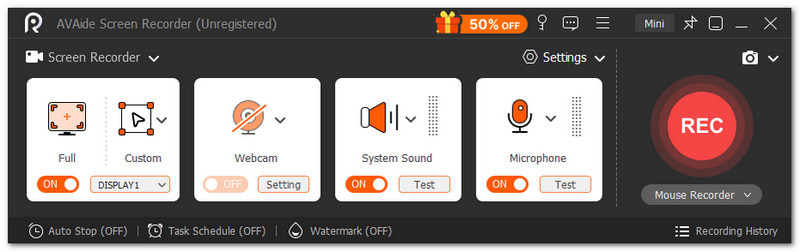
Cel mai bun pentru: Înregistrare simplă, all-in-one, pentru începători.
Comparație OBS: OBS Screen Recorder este puternic, dar nu este ușor de utilizat pentru începători. Necesită timp pentru învățare. Configurarea poate părea complexă. AVaide Screen Recorder este mult mai simplu și mai ușor de utilizat pentru începători.

DESCĂRCARE GRATUITĂ Pentru Windows 7 sau o versiune ulterioară
 Descărcare sigură
DESCĂRCARE GRATUITĂ Pentru Mac OS X 10.13 sau o versiune ulterioară
Descărcare sigurăÎți permite să înregistrezi simultan sunetul ecranului, al camerei web, al microfonului și al sistemului. De asemenea, oferă funcții de desenare în timp real, programare, adnotări și instrumente simple de editare. Jocurile, seminariile și întâlnirile pot fi înregistrate rapid. Este într-adevăr conceput pentru o utilizare rapidă, cu mai puține configurări și un control mai fluid.
2. Bandicam
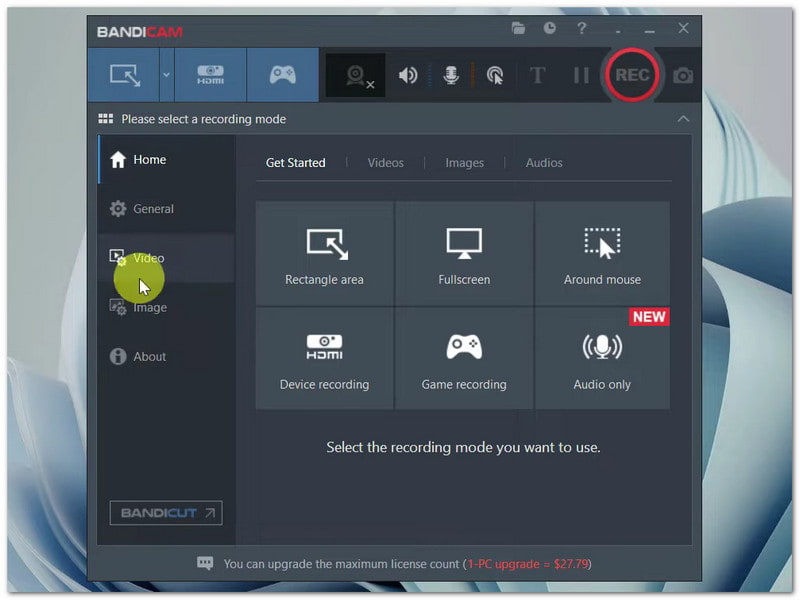
Cel mai bun pentru: FPS stabil și înregistrare ușoară a jocurilor Windows.
Comparație OBS: Bandicam este conceput pentru înregistrarea fluidă a jocurilor, cu un impact redus asupra performanței. Este un program plătit, cu limite la versiunea gratuită. Înregistrarea ecranului cu OBS este gratuită, open-source și nu are filigran, dar utilizează mai multă putere de sistem.
3. ShareX
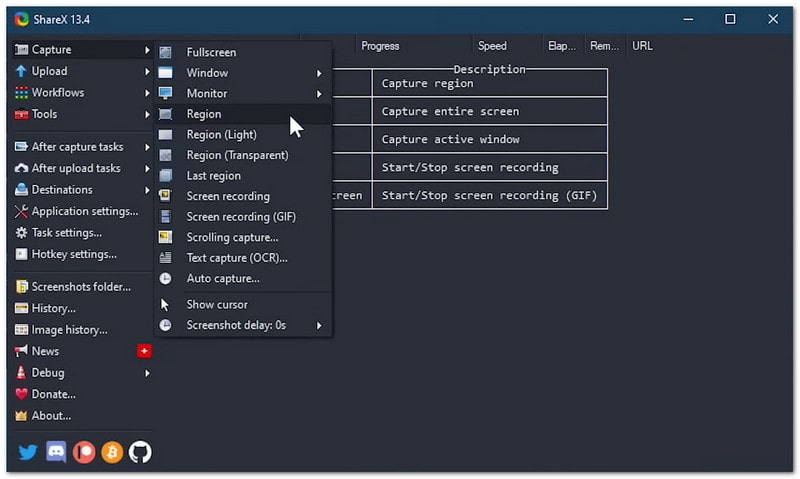
Cel mai bun pentru: Capturi de ecran și procese rapide de captură de ecran.
Comparație OBS: ShareX este un program ușor, specializat în înregistrări scurte, GIF-uri și capturi de ecran. Acceptă încărcări în cloud și include funcții de automatizare. Înregistrarea ecranului prin OBS include streaming complet, gestionarea scenelor și funcții audio sofisticate, dar este mai complexă.
4. Bara de jocuri Windows
Cel mai bun pentru: Înregistrare rapidă fără a fi nevoie să instalați software suplimentar.
Comparație OBS: Bara de jocuri este încorporată în Windows și este foarte ușor de utilizat. Funcționează pentru simplul recorder de joc Înregistrarea OBS oferă o calitate superioară, mai multe setări și control complet asupra streamingului, dar necesită configurare manuală.
5. ScreenPal
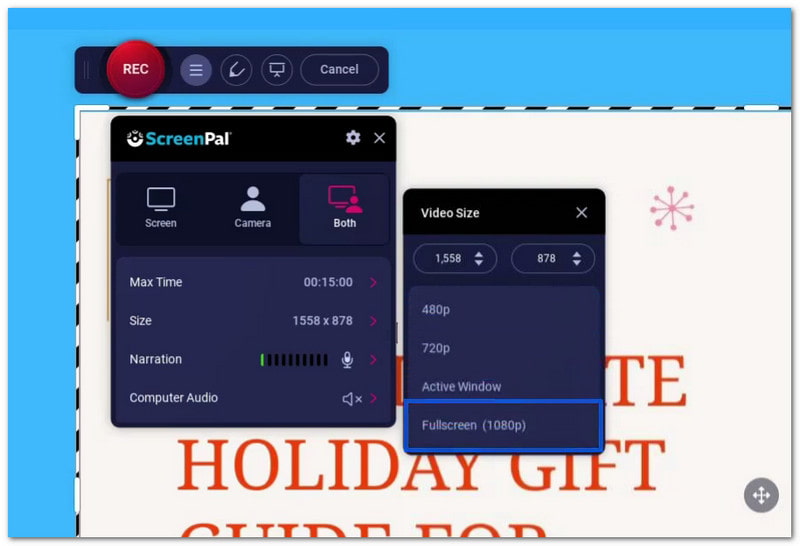
Cel mai bun pentru: Instrumente de editare ușor de utilizat pentru începători în flăcări.
Comparație OBS: ScreenPal este ușor de utilizat și include editare încorporată, înregistrare webcamși adnotări. OBS este mai puternic și mai flexibil pentru streaming profesional, dar necesită mai mult timp de învățare.
Probleme comune ale OBS și cum să le remediați
Nu putem nega că OBS Studio este un program bogat în funcții pentru înregistrare și streaming, însă pot apărea probleme în timpul utilizării. Dar nu vă faceți griji; majoritatea acestor probleme pot fi rezolvate prin modificări simple ale setărilor.
Problema 1: OBS are întârzieri la înregistrare (dar jocul funcționează bine)
Când OBS are întârzieri la înregistrare sau la streaming, dar jocul funcționează bine, încearcă asta:
- Rulați OBS ca administrator.
- Limitează rata de cadre pe secundă a jocului tău.
- Setări grafice mai mici pentru joc.
- Dezactivați Ajustarea Psiho-Vizuală.
Problema 2: OBS nu înregistrează audio
- Verificați dacă există pictograme de dezactivare a sunetului în Mixerul audio atunci când OBS nu înregistrează audio.
- Dați volumul audio și microfonul pe desktop la maxim.
- Setați dispozitivele corecte în Setări > Audio.
- Verificați Proprietăți audio avansate și activați pistele corecte.
Problema 3: OBS nu oprește înregistrarea (se blochează pe „Oprire”)
- Când OBS nu oprește înregistrarea, comutați formatul de înregistrare la MKV.
- Setări mai mici ale codificatorului sau rată de biți.
- Reporniți OBS dacă este necesar.
Problema 4: „A apărut o eroare la encoder în timpul înregistrării”
Când a apărut o eroare de codificare în timpul înregistrării OBS, încercați acest lucru:
- Actualizați driverele GPU.
- Comutați codificatorul la ×264 (software).
- Verificați antivirusul și permiteți accesul OBS.
Problema 5: Eroare „Setări de codare neacceptate”
- Potrivește rezoluția cu cea a monitorului tău.
- Folosește doar 30 sau 60 FPS.
- Resetați setările video dacă este necesar.
- Dezactivați limitele stricte de streaming. Acest lucru este valabil mai ales atunci când este nevoie să remediați înregistrările din OBS care utilizează setări de codificare neacceptate.
Problema 6: Înregistrările sunt prea mari
- În loc să utilizați metoda fără pierderi, utilizați CQP sau CRF.
- Setați nivelul CQ în jurul valorii de 20-23.
- Evitați formatele necomprimate.
- Dacă sunt necesare fișiere mai mici, reduceți ușor calitatea.
Fișă de informații despre setările OBS
Mai jos este o listă simplă de setări OBS. Aceasta oferă cele mai bune setări OBS pentru înregistrare și streaming.
| Zonă | Setare | Cea mai bună valoare |
| Ieșire | Modul | Avansat |
| Ieșire | Codificator | NVENC (NVIDIA) / AMF sau HEVC (AMD) |
| Ieșire | Controlul ratei | CBR |
| Ieșire | Rată de biți (1080p 60fps) | 6000 kbps |
| Ieșire | Rată de biți (720p 30fps) | 3500 kbps |
| Ieșire | Intervalul cadrelor cheie | 2 |
| Ieșire | Presetare CPU (×264) | Foarte rapid sau mai rapid |
| Ieșire | Profil | Înalt |
| Video | Rezoluție de bază | Monitor de meci (de exemplu, 1920×1080) |
| Video | Rezoluție de ieșire | Potrivire țintă (1080p sau 720p) |
| Video | Filtru de reducere a scalei | Lanczos |
| Video | FPS | 60 sau 30 |
| Video | Rata simpla | 48 kHz |
Unde salvează OBS înregistrările

Deci, unde salvează OBS înregistrările?
OBS salvează înregistrările în folderul implicit al computerului. Pe Windows, este Videoclipuri folder. Pe Mac, este folderul Filme. De asemenea, le puteți deschide rapid în OBS făcând clic pe Fişier > Afișați înregistrăriDeschide locația exactă de salvare. Dacă ați modificat calea de salvare în setări, OBS va folosi în schimb folderul personalizat respectiv.
Atât de multe detalii despre Înregistrare ecran OBS, corect? Toți aceștia sunt factori importanți de luat în considerare dacă intenționați să îl utilizați. Poate fi puternic, dar necesită și timp și efort pentru a-l învăța. Dacă doriți o opțiune mai simplă, puteți încerca AVaide Screen RecorderEste mai ușor de utilizat și mai prietenos pentru începători.
DESPRE AUTOR

Capturați activități pe ecran cu sunet, întâlniri online, videoclipuri de joc, muzică, cameră web etc.
Înregistrare ecran
- Înregistrare ecran pe Windows
- Înregistrați live pe Instagram
- Extrage videoclipuri din Tubi
- Convertește videoclipuri YouTube în MP3
- Descarcă videoclipuri de la Fansly
- Descărcarea videoclipurilor JW Player
- Descărcați videoclipuri Bilibili
- Descarcă videoclipuri Patreon
- Descarcă videoclipuri SpankBang
- Descarcă videoclipuri Discord
- Descărcați videoclipul DoodSream