Usuários de Android que desejam aprender Como gravar áudio no Android Você está no lugar certo, pois este artigo abordará todos os métodos simples de que você precisa.
Vamos abordar como gravar áudio externo, como voz e sons do ambiente, bem como capturar áudio interno do seu sistema telefônico. Também incluiremos um guia básico de solução de problemas para ajudá-lo a resolver problemas comuns de gravação.
Parte 1. Gravação de áudio externo (voz e sons do ambiente)
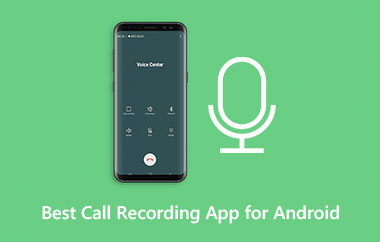
1. Usando o aplicativo Gravador de Voz Integrado
Este método oferece uma maneira fácil de aprender a gravar áudio em um telefone Android, usando um recurso básico já presente na maioria dos telefones Android para capturar voz e som.
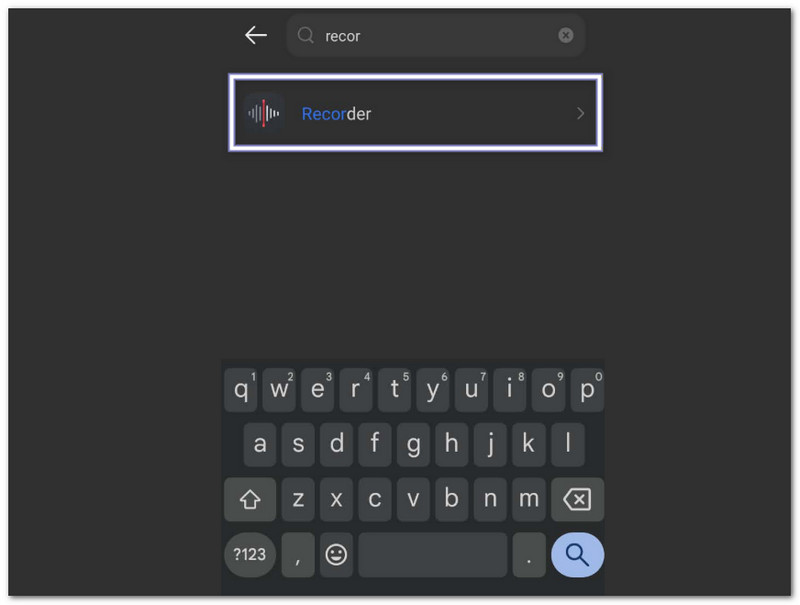
Passo 1Abra a gaveta de aplicativos e procure por Gravador de voz.
Passo 2Toque no vermelho Registro Botão para iniciar a gravação da sua voz ou de sons próximos.
etapa 3Toque Pausa Se precisar de uma pequena pausa, toque. Retomar continuar.
Passo 4Toque Salve Assim que terminar, seu arquivo de áudio será armazenado no aplicativo Arquivos ou Meus Arquivos. A maioria das gravações é salva como arquivos MP3 ou M4A.
2. Gravação de áudio externo sem nenhum aplicativo
Essa abordagem permite a gravação de voz no Android para captura de áudio imediata usando recursos integrados do telefone, sem a necessidade de abrir qualquer aplicativo de gravação instalado.
A. Widget de gravação do Google
Passo 1Pressione e segure uma área vazia na sua tela inicial.
Passo 2Toque Widgets e encontre o Gravador do Google widget.
etapa 3Arraste-o para a sua tela inicial.
Passo 4Toque no widget a qualquer momento para iniciar a gravação com um único toque.
B. Assistente do Google
Passo 1Dizer "Ei, Google"ou segure o Poder botão.
Passo 2Dizer "Grave minha voz" ou "Inicie uma gravação de áudio."
etapa 3O Google Assistente abrirá o gravador e começará a capturar o som.

C. Bloco de Configurações Rápidas
Passo 1Deslize o dedo de cima para baixo na tela.
Passo 2Procurar Gravador de áudio ou Gravador de ecrã Nas Configurações Rápidas.
etapa 3Toque para iniciar a gravação instantaneamente.
Passo 4Ao terminar a gravação, pare e salve o arquivo.
3. Gravação com aplicativo de terceiros (para melhor qualidade e recursos)
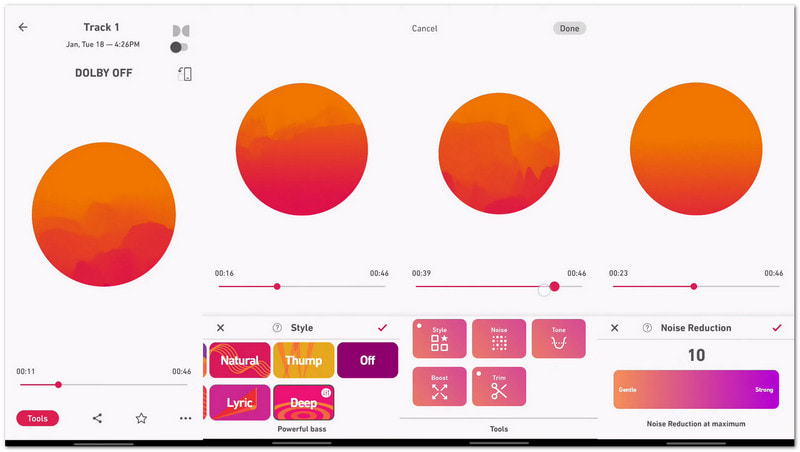
Gravar com um aplicativo de terceiros, como o Dolby On, proporciona maior clareza de som e mais controle para todos os tipos de necessidades de áudio. Ele transforma seu celular em um estúdio de gravação simples para voz, música e vídeos.
Ele aprimora o som com redução de ruído, equalizador e efeitos de estúdio para um áudio mais limpo e profissional. É muito útil se você precisa aprender a gravar áudio em dispositivos Samsung e outras marcas Android.
Passo 1Instalar Dolby On da Google Play Store.
Passo 2Abra o aplicativo e pressione o Registro botão.
etapa 3Grave sua voz, música ou sons de fundo. O aplicativo reduz automaticamente o ruído e melhora a clareza do som.
Passo 4Salve ou compartilhe a gravação após a edição com as ferramentas de áudio integradas.
Parte 2. Gravação de áudio interno (do sistema do seu telefone)
1. Usando o gravador de tela integrado
É o recurso oficial do Android para aprender. Como gravar áudio interno no AndroidE grava o som do sistema juntamente com a atividade da tela de forma estável.
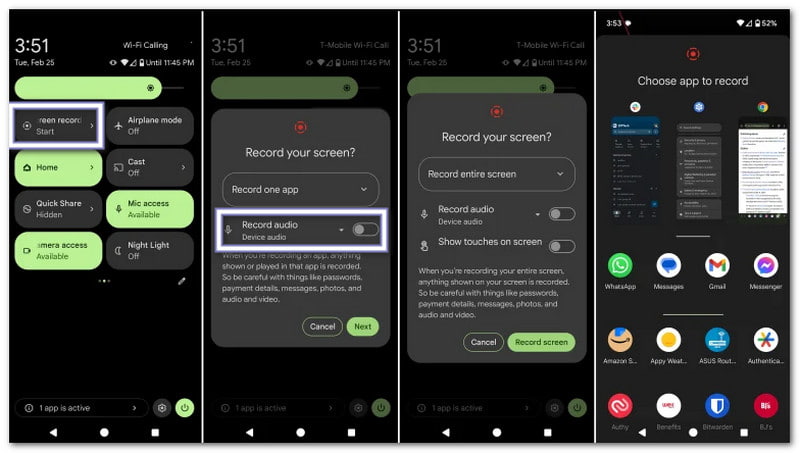
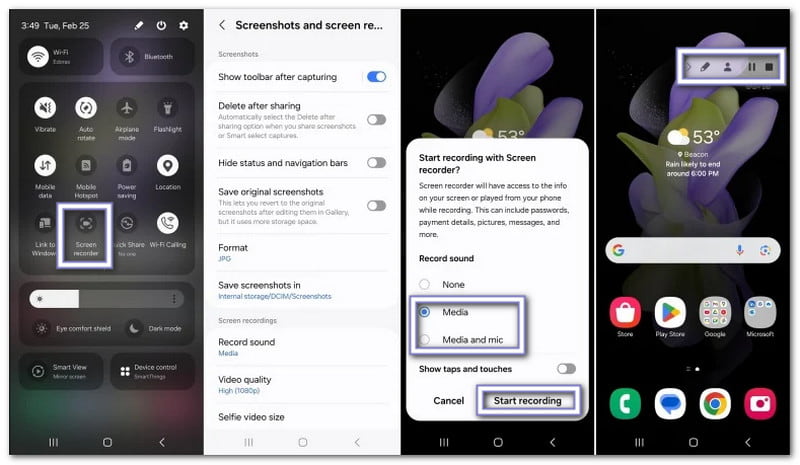
Passo 1Deslize o dedo de cima para baixo na tela duas vezes para abrir. Configurações rápidas.
Passo 2Encontrar Gravador de ecrãSe estiver faltando, pressione o Lápis ou Editar botão e adicione-o primeiro.
etapa 3Toque Gravador de ecrã e escolha Áudio do dispositivo ou meios de comunicação e Microfone como fonte sonora.
Passo 4Inicie a gravação e abra o aplicativo, jogo ou vídeo que deseja capturar. Pare a gravação quando terminar.
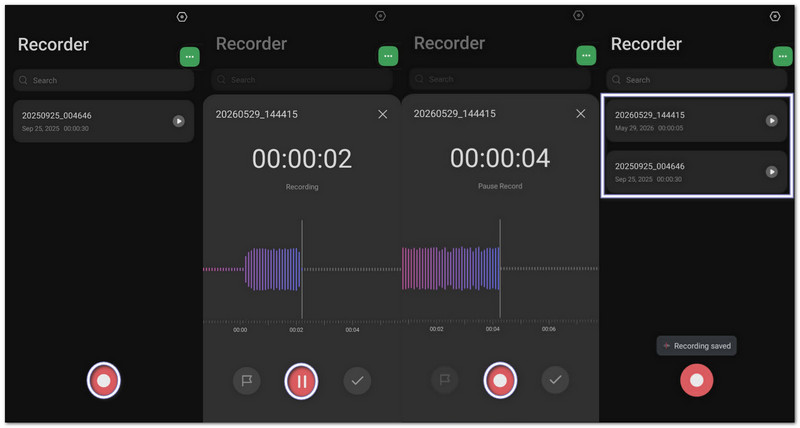
2. Gravação de áudio interno puro (sem vídeo) usando aplicativo de terceiros
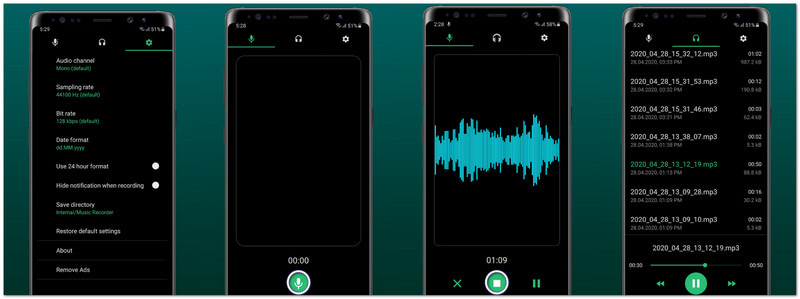
Se você está procurando uma maneira de gravar apenas áudio no Android, o Music Recorder - Song Recorder, desenvolvido pela Jaya Zone Tech, é uma solução simples.
este aplicativo de gravador de voz Captura áudio de alta qualidade de aplicativos, jogos e reprodutores de música. Você também pode configurar a taxa de bits, a taxa de amostragem e escolher mono ou estéreo para uma melhor saída. Suporta pausa, retomada, edição, compartilhamento e até mesmo um modo de gravação oculto para uso flexível.
Passo 1Instalar Gravador de Música - Gravador de Canções Baixe o aplicativo da Google Play Store e abra-o.
Passo 2Conceda as permissões necessárias para Microfone e Acesso ao armazenamento.
etapa 3Aberto Configurações e mudar o Fonte de gravação a partir de Microfone para Áudio internoVocê também pode escolher MP3 ou WAV formato.
Passo 4Toque Registro e reproduza o áudio, jogo ou vídeo que deseja capturar. O aplicativo grava apenas o som interno.
Parte 3. Caso precise usar microfones externos com o Android
O microfone do seu celular funciona bem para gravações simples. Mas se você quiser um som mais nítido, com menos ruído ou uma captação de voz mais alta, um microfone externo pode ajudar bastante.
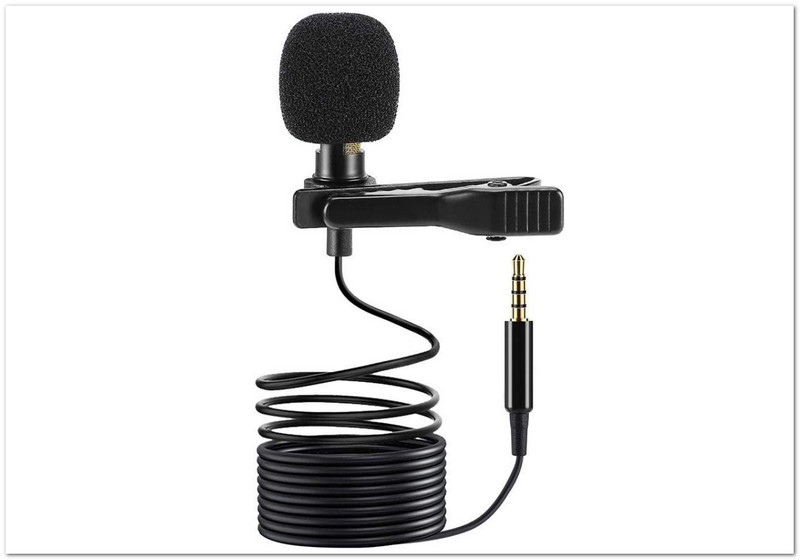
Opção A: Microfones USB-C
Os microfones USB-C são simples e rápidos de usar. Basta conectá-los à porta USB-C do seu celular e começar a gravar. A maioria dos celulares Android os detecta automaticamente. Eles costumam oferecer um som mais limpo e com melhor clareza de voz do que o microfone embutido do aparelho. São ótimos para criadores de conteúdo, estudantes e gravações de vídeo em dispositivos móveis.
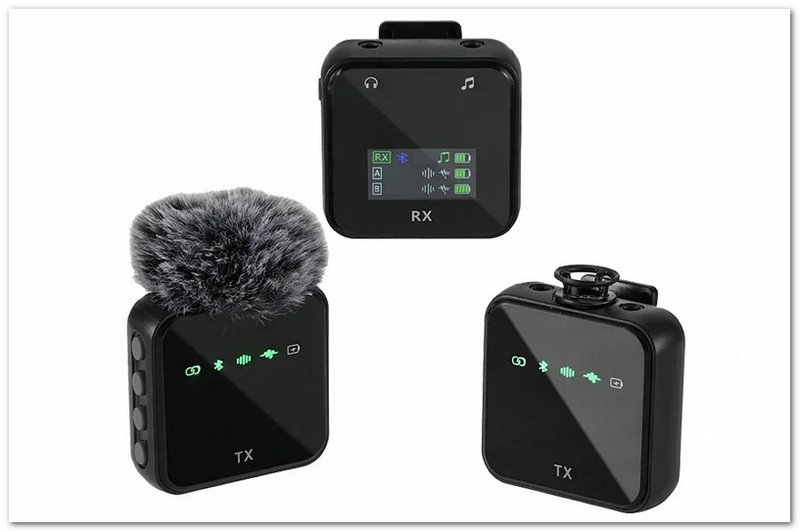
Opção B: Microfones Bluetooth sem fio
Os microfones Bluetooth permitem gravar sem fios. Basta conectá-los através das configurações de Bluetooth do seu celular e começar a gravar normalmente. São úteis para quem se movimenta enquanto grava ou fala. Muitas pessoas os utilizam para vlogs, apresentações, vídeos ao ar livre e entrevistas, pois são portáteis e fáceis de transportar.
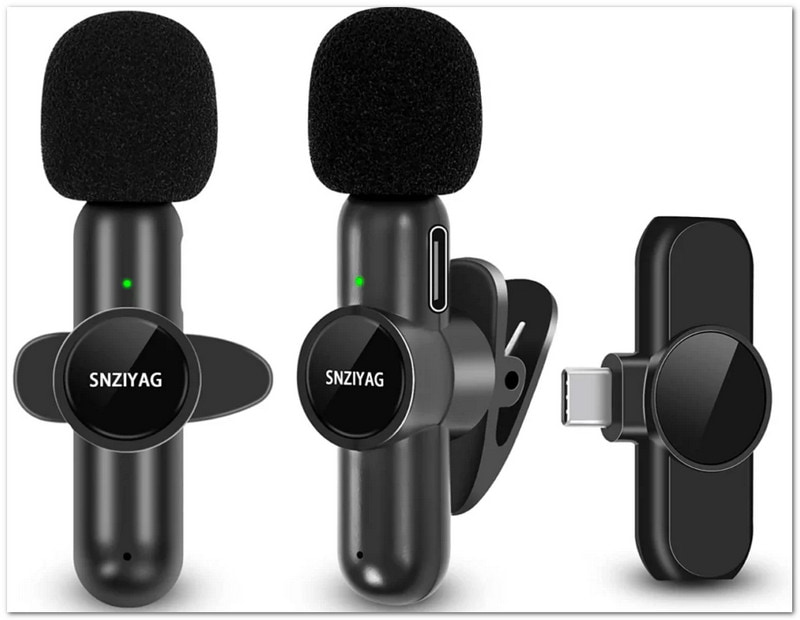
Opção C: Microfones de 3,5 mm
Microfones de 3,5 mm se conectam à entrada de fone de ouvido do seu celular Android. Se o seu dispositivo não tiver entrada para fone de ouvido, você pode usar um adaptador USB-C para 3,5 mm. Esses microfones são acessíveis e fáceis de usar para anotações de voz, trabalhos escolares, chamadas e gravações simples. Eles também são uma boa opção para iniciantes que desejam um áudio melhor sem gastar muito.
Parte 4. Solução de problemas comuns
Você concluiu o aprendizado sobre gravação de áudio no Android. Mas e se você se deparar com problemas inesperados? Sabe o que fazer?
Pode parecer difícil, especialmente se você for iniciante. Mas não se preocupe. Não vamos te deixar na mão. Também daremos soluções simples e confiáveis caso você enfrente problemas como os abaixo.
1. Opção de áudio interno desativada (em cinza)
O Android bloqueia o áudio interno em alguns aplicativos. Ele também pode ser restringido por leis de direitos autorais. Use o recurso integrado. Gravador de ecrã a partir de Configurações rápidasFunciona melhor para o som do sistema. Se possível, defina o áudio para Áudio do dispositivo ou meios de comunicação e Microfone.
2. Microfone externo não reconhecido
Isso acontece quando o telefone não consegue detectar o microfone. Ligue-o. OTG dentro Configurações para Microfones USB-C. Verificar Cabos e Adaptadores para apoio e um chip DACConecte o microfone antes de abrir o aplicativo. Tente. Abrir câmera se necessário.
3. O gravador de voz não está aparecendo.
O aplicativo pode estar oculto ou desativado. Abrir Gaveta de aplicativos e pesquisar Gravador. Vamos para Configurações > aplicativos e habilite-o se estiver desativado.
4. A gravação em segundo plano é interrompida.
O Android pode fechar aplicativos para economizar bateria. Configure Otimização de bateria para Sem restriçõesBloqueie o aplicativo em Aplicativos recentes para que permaneça aberto.
5. Gravações não estão sendo salvas
Geralmente é um problema de armazenamento ou de permissões. Permitir Armazenar ou Permissão de arquivosVerifique se o armazenamento está cheio. Limpe o cache e tente novamente.
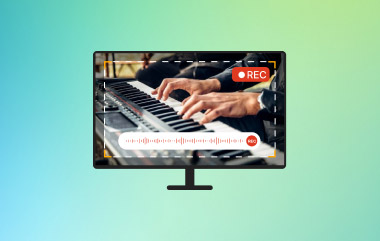
Bônus: Melhor gravador de tela para Android com melhor qualidade de saída.
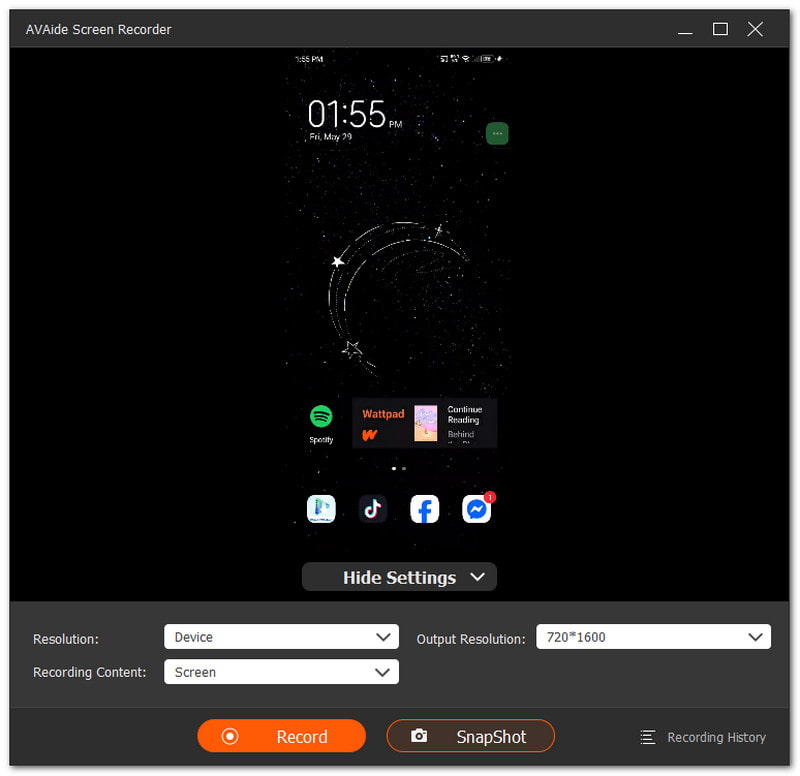
Gravador de tela AVAide Oferece um recurso de gravação de áudio para celular compatível com dispositivos Android. Suporta resolução de até 4K para vídeos nítidos e claros. Permite também capturar o áudio do microfone do celular, do alto-falante do computador ou ambos simultaneamente. Além disso, é possível tirar uma foto durante a gravação para registrar o conteúdo imediatamente. É ideal para jogos em aplicativos para celular, tutoriais e videochamadas.
- Grava áudio no iPhone, Android, Windows e Mac.
- Captura a tela do celular em alta resolução.
- Permite edições como cortar, mesclar, converter e aumentar o volume do áudio.
- Suporta formatos como MP4, WMV, AVI, GIF e MP3.

 Download seguro
Agora você sabe Como gravar som no Android e o que fazer quando você tiver problemas. Se ocorrerem problemas, basta verificar suas configurações, permissões e ferramentas de gravação.
Para obter melhores resultados, você também pode usar uma ferramenta poderosa como Gravador de tela AVAideProporciona gravação fluida e saída de alta nitidez para usuários de Android e até mesmo para usuários de Windows e Mac.
SOBRE O AUTOR

Capture atividades na tela com áudio, reuniões online, vídeos de jogos, música, webcam, etc.