PowerPoint, a versatile and widely used presentation software, empowers users to create engaging slideshows. While it offers many features to enhance your presentations, you may encounter watermarks when working with specific files. Fortunately, PowerPoint watermark removal features can help you remove those.
This write-up will provide a step-by-step process you can follow to achieve that. Moreover, it will present various methods of removing watermarks from pictures and videos before uploading them into your PowerPoint. Let us explore these methods!
Remove a Watermark in PPT with PPT Design Tab
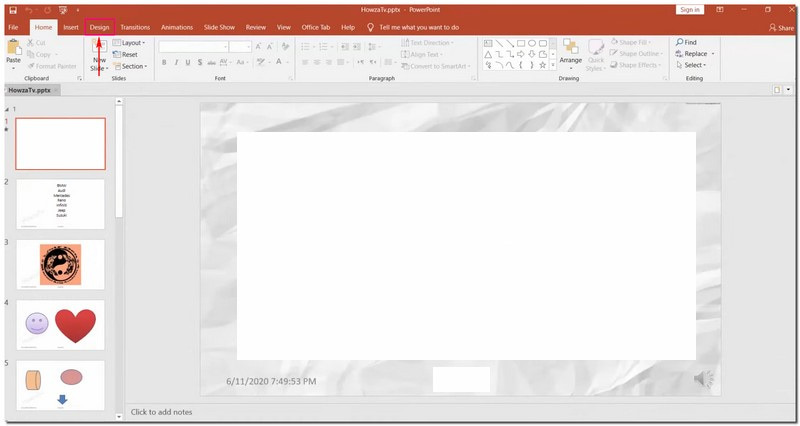
Step 1Start by opening your PowerPoint file containing the watermark.
Step 2Choose the slide with the watermark or any slide if the watermark appears on many slides.
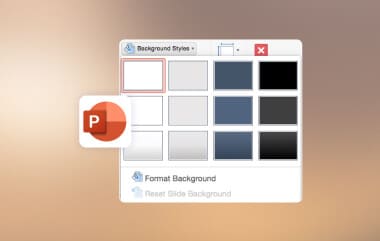
Head to the Design tab. It is where you control the look of your slides. In the Design tab, find Format Background in the Customize section and click on it.
Step 3Go to the Fill tab once the Format Background sidebar appears. Then, select Solid Fill in the Fill tab. It ensures you are working with a simple, single-color background.
Use the color palette to choose a background color, replacing the area where the watermark is. Optionally, you can change the transparency if you desire to.

Step 4Hit Apply to All if you want the new background without the watermark on all slides.
Step 5Return to your slides to confirm the watermark has been removed from the selected slide or all slides.
Use Slide Master to Remove Watermarks Effectively
Step 1Open the PowerPoint file where the watermark is located.
Step 2Head to the View tab. Look for the Slide Master in the Master Views group.
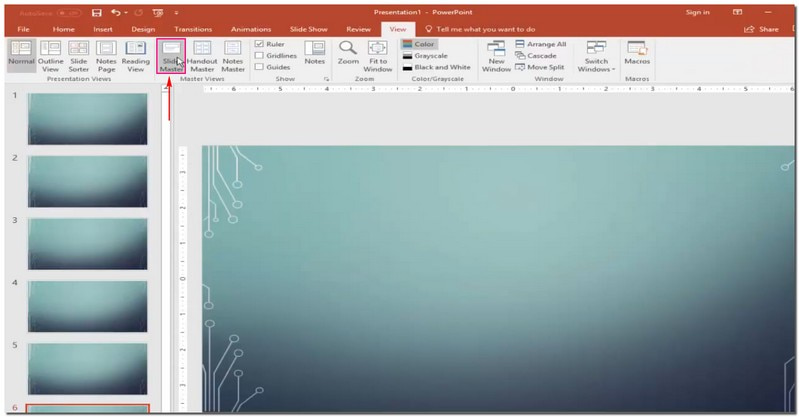
Step 3In Slide Master view, you will notice a panel with thumbnail images. Locate the specific slide layout containing the watermark you wish to remove and click on it.

Note: If there are many layouts, hold down the Ctrl key and click on each.
Step 4Find the watermark image or text on the chosen slide layout. Once found, click on it and press the Delete key on your keyboard.
Step 5To make these changes effective throughout your presentation, return to the View tab and select Normal in the Presentation Views group. Confirm that the watermark has disappeared from your slides.
How to Remove Watermark Before Uploading to PPT
1. Remove Photo Watermark
Have you ever had an excellent picture for your PowerPoint but got bothered by a watermark? AVAide Watermark Remover is a helpful friend in such situations. It is a platform that erases watermarks, keeping your picture background clean. It offers various options to remove the watermark: brush, lasso, and polygonal. Impressive, right?
This online platform uses AI to understand and fill colors around the watermark. It does not remove the mark; it fixes details and makes your picture look perfect. Are you worried about safety? This platform ensures it is safe with a strong 256-bit SSL certificate, so there are no viruses, ads, or risks. Enjoy a hassle-free way to remove watermarks and make your PowerPoint look great!
Step 1Head to the official AVAide Watermark Remover website.
Step 2Press the Choose a Photo button. Then, import the image containing the watermark you want to remove.

Step 3A new window will appear on your screen, where you can see your imported image. You have three options to remove the watermark on your image: Brush, Lasso, and Polygonal.
Use the Brush for marking and removing the watermark. Use the Lasso to draw around the watermark for removal. Use Polygonal for precise selections with straight lines. If there are unwanted highlights, you can use the Eraser to remove them.
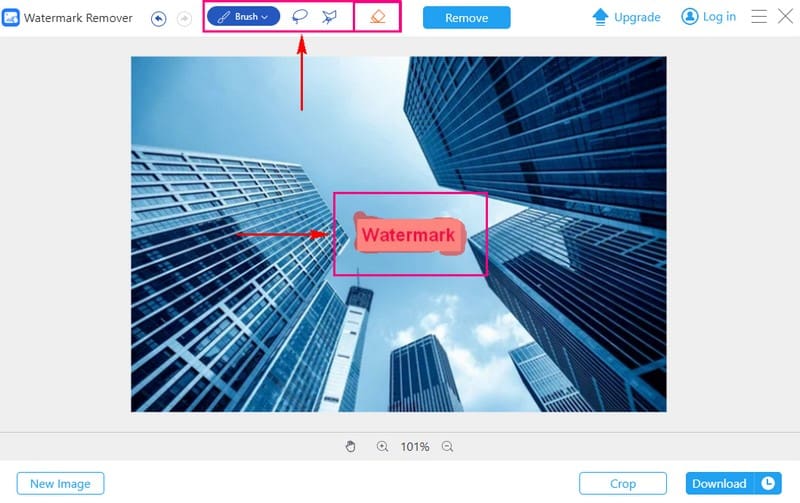
Step 4Once the watermark is covered, click the Remove button. AVAide Watermark Remover will kickstart the process, leaving you with a watermark-free picture.
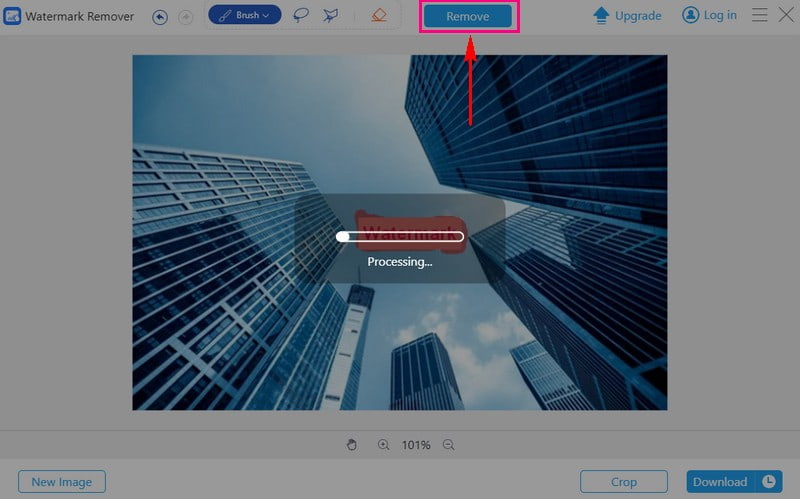
Step 5Press the Download button to save the watermark-free image to your local folder.

2. Remove Video Watermark
If you have videos with watermarks, making you hesitate to upload them on PowerPoint, AVAide Video Converter can be your solution.
It has a built-in Video Watermark Remover. It can help you achieve a professional and clean presentation. It simplifies the process of removing watermarks manually using a selection box. Therefore, you can remove the watermark without unwanted elements or residues. Moreover, it enables you to remove many watermarks in a single video. It makes your task efficient and hassle-free. Upgrade your presentation game with AVAide Video Converter!
Here is a guide on how to remove watermarks from your video using AVAide Video Converter:
Step 1Visit the AVAide Video Converter official website to download and install the program.

FREE DOWNLOAD For Windows 7 or later
 Secure Download
FREE DOWNLOAD For Mac OS X 10.13 or later
Secure DownloadStep 2Open the program and navigate to the Toolbox tab. Select the Video Watermark Remover from the provided tools.

Step 3Import the video with the watermark by clicking the (+) button.

Step 4A new window will appear for watermark removal. Click the + Add watermark removing area button to activate the selection box on the preview screen.
Move the selection box to the watermark in the video frame. Then, resize it using the circles on each side to cover the watermark.

Step 5Once satisfied, click the Export button to start the watermark removal process. After completion, find your watermark-free video in your local folder.
How to Add Watermarks in PPT with Built-in Tool
Regarding watermarks in PowerPoint, it also supports adding custom watermarks to existing content. The process is straightforward—simply follow the steps below to accomplish this.
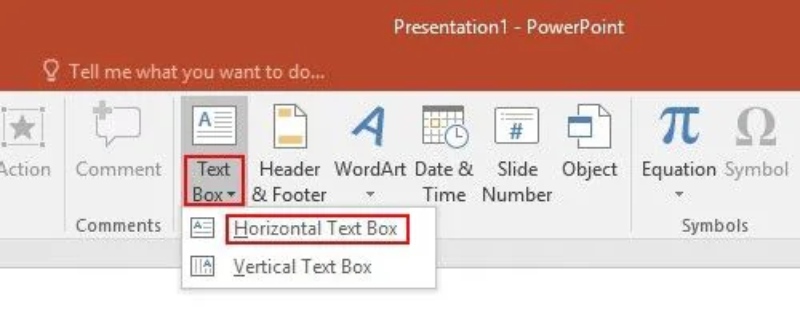
Step 1Click the View menu and select Slide Master; in later versions of PowerPoint, you can also click Master Slide at the top of the thumbnail pane.
Step 2Click Insert to choose between normal text and rich text. Rich text allows you to add artistic fonts. Then enter the text you want to use as a watermark.
Step 3After positioning it correctly, send it to the back of the slide content. Right-click or select Format and Picture Tools, then choose Send to Back.
FAQs about Removing Watermark in PowerPoint
Can I remove watermarks from PowerPoint slides on my mobile device?
It might be more challenging on mobile devices due to limited editing features. A computer with a dedicated editing program, like AVAide Video Converter, is often more effective.
What are the benefits of removing a watermark from my PowerPoint slides?
Removing watermarks can give your presentation a more polished and professional appearance. It ensures that your audience focuses on your content without distractions. It makes the information more accessible and appealing.
Will removing a watermark change the file size of my presentation?
It does not change the file size of your presentation. Using high-resolution images to replace the watermarked ones could increase the file size.
Is there a way to recover the original file without a watermark if it's accidentally deleted?
If you delete or replace a file, returning the original without the watermark is hard. To avoid this, save a copy of your files in another place.
You have learned two straightforward methods to remove watermarks in PowerPoint. In addition, you have gained insights into eliminating watermarks from images and videos using AVAide's user-friendly tools. Simplify your workflow, enhance your presentations, and make your content truly yours with AVAide. Do you have something to say? Feel free to share it in the comment section!
ABOUT THE AUTHOR


Easily get rid of annoying watermarks and unwanted objects from your photos without quality loss.
PROCESS NOW