GIMP is a free and open-source editor software. It helps with photo editing, creating images, and combining different pictures. One of its valuable features is image upscaling. It lets users make small images bigger while keeping as much clarity as possible.
Upscaling is excellent for printing or using pictures on high-resolution screens. It helps make images look clear and sharp even when enlarged. This guide will show how GIMP upscale image using its built-in tools and AI-powered plugins. Also, we will provide alternatives capable of doing the same job.
Part 1: How GIMP Upscales Image with Enhance Feature
Usually, when you make an image bigger, it loses clarity, but through GIMP's enhanced feature, it helps fix this problem. GIMP upscale images without making them look blurry or pixelated. It improves the clarity of photos and graphics. It lets you fine-tune brightness, contrast, and colors. You can also sharpen images, reduce noise, and highlight small details. These tools help make your pictures look clearer and more professional, even if you are not an expert.
Step 1Open the program, click File, Open, and then pick the image file you want to upscale.
Step 2Go to Image and Scale Image in the top menu. A window will pop up where you can change the image size. Look for a Small Chain Link button between the width and height boxes. Make sure it is connected. It keeps the shape of the image the same.
Step 3In the Scale Image display, find the Interpolation option. It controls how the program smooths the image when making it bigger. After that, pick LoHalo or NoHalo for better clarity. These options help reduce blur and jagged edges.
Step 4Enter the new width or height to resize an image in GIMP. If the chain link is on, the other side will adjust automatically. What you need to do next is to click the Scale button to resize the picture. The program will process it and apply the changes.
Step 5After scaling, you might see some loss in sharpness. Fix this by going to Filters, Enhance, and using Unsharp Mask or High Pass to bring back details. Please fine-tune the settings carefully until the image looks good.

Part 2: How to Upscale an Image in GIMP with AI Upscale Plugin
AI upscaling makes images bigger without making them blurry. Normal upscaling stretches pixels, but AI fills in missing details to keep the picture sharp. GIMP can do this with plugins like Stable Boy, which uses innovative technology to enhance images. This method, the GIMP upscale image AI plugin, helps when working with old photos, low-quality pictures, or small images that need to be larger. Instead of just making an image larger, AI adds missing details, making it look more professional.
Step 1Get the Stable Boy plugin from its official site or a trusted source. Follow the instructions to install it. Usually, you need to place the file in GIMP's plugin folder. Then, restart GIMP to activate it.
Step 2Run GIMP and load the image you want to upscale. Go to File, Open, then choose your file.
Step 3Navigate to Filters, Enhance, and Stable Boy at the top menu. It will open the plugin's settings.
Step 4Stable Boy lets you pick how much you want to increase the size. It also has settings to improve sharpness and details. Play around with these options to get the best result. If you are unsure, start with the default settings.
Step 5Hit the OK button to begin. The AI will process the image and make it bigger while maintaining clarity. It may take a few seconds, depending on the image size.

Part 3: 2 Alternatives to GIMP to Upscale Images
You can upscale images in GIMP manually. But do you also consider upscaling images without extra work, as everything works automatically? If so, we have something for you. We will present two outstanding GIMP alternatives that can upscale pictures efficiently. These tools are free, easy to use, and do not require advanced skills. Check them out!
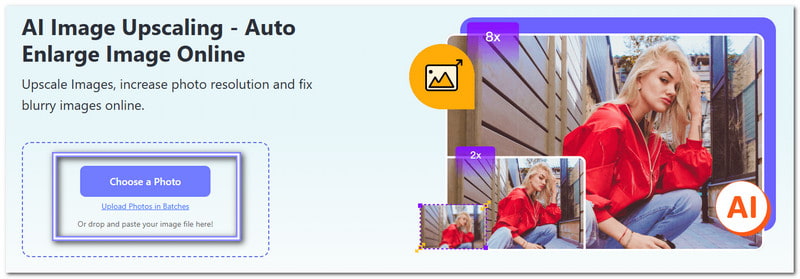
1. AVAide Image Upscaler
As you know, GIMP works only offline and using your computer, and in case you prefer to do upscaling tasks straight online, we highly recommend AVAide Image Upscaler. It is the best online alternative for making your images bigger without losing clarity. You can use it on a computer and mobile, making it accessible anywhere.
With AI technology, it can upscale your image by 2×, 4×, 6×, or 8×. It sharpens details, reduces blur, and improves textures. It also enhances colors and removes noise, making images look clearer and more professional. The simple interface makes it easy, even for beginners. It is free and does not add watermarks to your upscaled pictures.
You already know how to upscale an image in GIMP; now it is the time to discover how to upscale an image using AVAide Image Upscaler:
Step 1Open your computer or mobile device web browser and look for the AVAide Image Upscaler main website.
Step 2Press the Choose a Photo button and choose the image you want to upscale from your device. The Upload Photos in Batches option can help if you upscale many pictures simultaneously.
Step 3Once your image is loaded, let us proceed with upscaling it. As you can see, your image is automatically upscaled to 2×. If you want to upscale your image more, select 4×, 6×, or 8×. Choosing a higher upscale level makes your photos bigger while keeping details sharp.
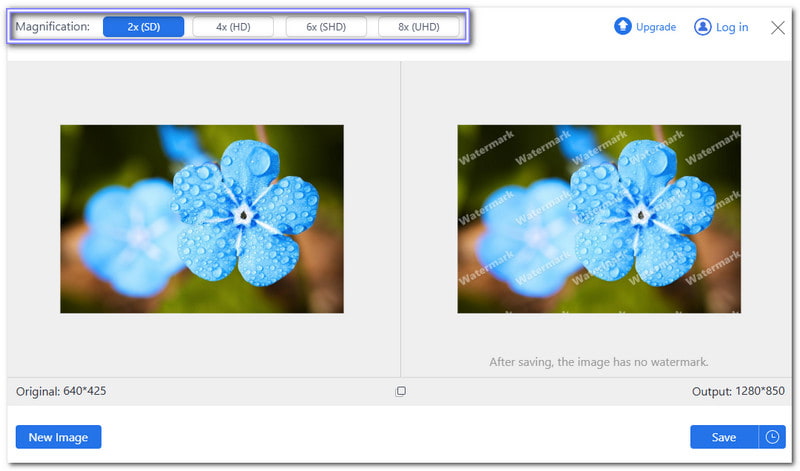
Step 4The AI will resize your image and show a preview on the right side. If you are happy with the result, click the Save button to download the upscaled picture.

2. Pixelcut
Another dependable alternative to upscale your image in seconds is Pixelcut. It uses AI technology to upscale photos, but only by 4×. You can upload PNG, JPG, or HEIC files. It adds pixels to photos, removes blurriness, and restores details that get lost when resizing. Moreover, it supports batch upscaling, allowing you to enhance multiple images at once. It is a time-saver for photographers, designers, and businesses.
Step 1Go to Pixelcut's official website and import your image by clicking the Upload image button.
Step 2Once your image is loaded, choose your upscale level, 2× or 4×.
Step 3Enable the Enhance Details option to improve the photo's clarity and overall look. However, this option requires you to upgrade your plan.
Step 4Press the Upscale button and download the upscale image.
We are glad that you reached this part, and we expect that you have learned how to upscale an image without losing quality using GIMP.
What about its alternative? Have you tried them? If so, we want you to use AVAide Image Upscaler to upscale your image online. We assure you it will exceed your expectations. You can upscale your image up to 8×! The fact that it is free, simple, and does not add a watermark is already a plus.

Our AI technology will automatically enhance the quality of your images, remove noise and fix blurry images online.
PROCESS NOW