배우고 싶어하는 안드로이드 사용자 안드로이드에서 오디오를 녹음하는 방법 이 글에서는 여러분에게 필요한 모든 간단한 방법을 다룰 예정이니, 제대로 찾아오셨습니다.
이 글에서는 음성 및 주변 소리와 같은 외부 오디오를 녹음하는 방법과 전화 시스템의 내부 오디오를 캡처하는 방법을 다룹니다. 또한 일반적인 녹음 문제를 해결하는 데 도움이 되는 기본적인 문제 해결 가이드도 제공합니다.
파트 1. 외부 오디오 녹음 (음성 및 주변 소리)
1. 내장 음성 녹음 앱 사용하기
이 방법은 대부분의 안드로이드 폰에 이미 탑재된 음성 및 소리 캡처 기능을 활용하여 안드로이드 폰에서 오디오를 녹음하는 방법을 쉽게 익힐 수 있도록 도와줍니다.
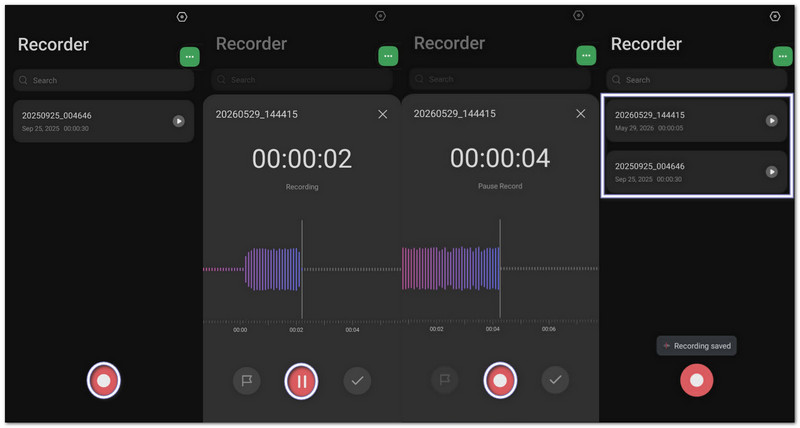
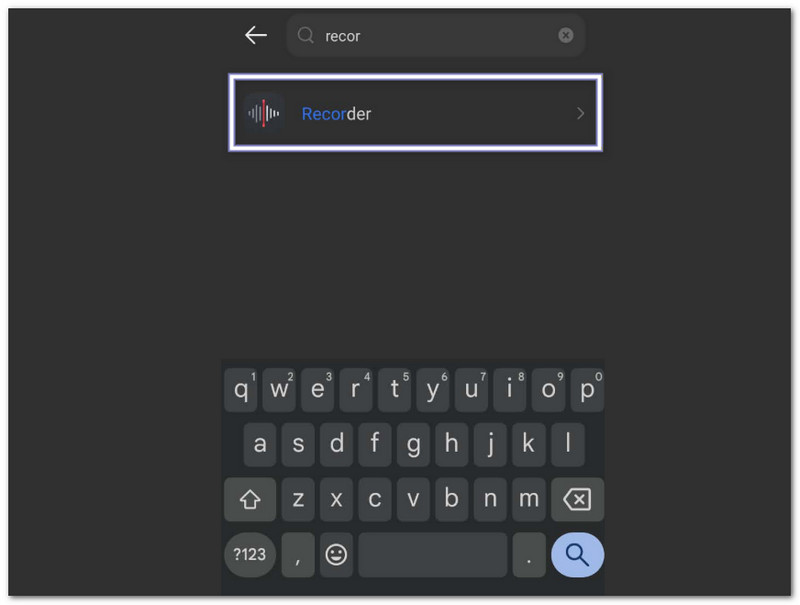
1 단계앱 서랍을 열고 찾아보세요 녹음기.
2 단계빨간색을 탭하세요 기록 음성 또는 주변 소리 녹음을 시작하려면 버튼을 누르세요.
3단계수도꼭지 정지시키다 잠시 휴식이 필요하시면 탭하세요. 재개하다 계속하다.
4단계수도꼭지 구하다 녹음이 완료되면 오디오 파일은 '파일' 또는 '내 파일' 앱에 저장됩니다. 대부분의 녹음 파일은 MP3 또는 M4A 형식으로 저장됩니다.
2. 앱 없이 외부 오디오 녹음하기
이 방법을 사용하면 별도의 녹음 앱을 설치하지 않고도 휴대폰의 내장 기능을 이용하여 안드로이드 기기에서 즉시 음성을 녹음할 수 있습니다.
A. 구글 레코더 위젯
1 단계홈 화면의 빈 공간을 길게 누르세요.
2 단계수도꼭지 위젯 그리고 찾아 구글 레코더 위젯.
3단계홈 화면으로 드래그하세요.
4단계위젯을 탭하면 언제든지 한 번의 탭으로 녹화를 시작할 수 있습니다.
B. 구글 어시스턴트
1 단계말하다 "헤이 구글"또는 보유하세요 힘 단추.
2 단계말하다 "내 목소리를 녹음해 주세요" 또는 "음성 녹음을 시작하세요."
3단계Google 어시스턴트가 녹음기를 열고 소리 녹음을 시작합니다.

C. 빠른 설정 타일
1 단계화면 상단에서 아래로 스와이프하세요.
2 단계찾아보다 녹음기 또는 스크린 레코더 빠른 설정에서.
3단계탭하면 즉시 녹화가 시작됩니다.
4단계녹화가 끝나면 녹화를 중지하고 파일을 저장하세요.
3. 타사 앱을 이용한 녹화 (더 나은 화질 및 기능 제공)
Dolby On과 같은 타사 앱을 사용하여 녹음하면 모든 유형의 오디오 요구 사항에 맞춰 더욱 선명한 음질과 향상된 제어 기능을 제공합니다. 이 앱을 사용하면 스마트폰이 음성, 음악 및 비디오를 녹음할 수 있는 간편한 녹음 스튜디오로 변모합니다.
이 앱은 노이즈 감소, EQ 및 스튜디오 효과를 통해 더욱 깨끗하고 전문적인 오디오를 제공합니다. 삼성 및 기타 안드로이드 브랜드 기기에서 오디오를 녹음하는 방법을 배우고 싶을 때 매우 유용합니다.
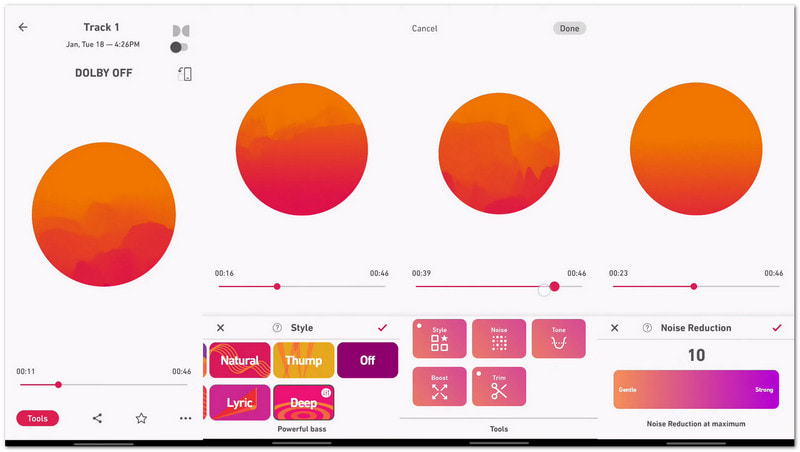
1 단계설치 돌비 온 구글 플레이 스토어에서 다운로드하세요.
2 단계앱을 열고 누르세요 기록 단추.
3단계음성, 음악 또는 배경음을 녹음하세요. 앱이 자동으로 노이즈를 줄이고 음질을 향상시켜 줍니다.
4단계내장된 오디오 편집 도구를 사용하여 녹음을 편집한 후 저장하거나 공유하세요.
파트 2. 내부 오디오 녹음 (휴대폰 시스템에서)
1. 내장 화면 녹화 기능 사용하기
이는 안드로이드의 공식 학습 기능입니다. 안드로이드 기기에서 내부 오디오를 녹음하는 방법또한 시스템 소리와 화면 활동을 안정적으로 함께 녹음합니다.
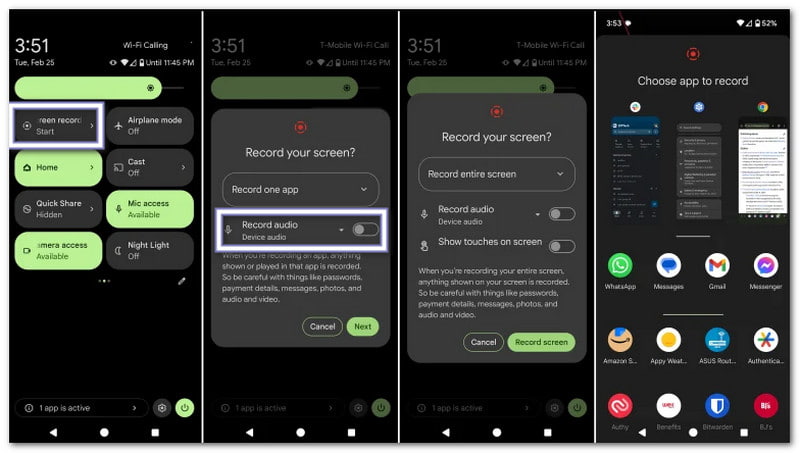
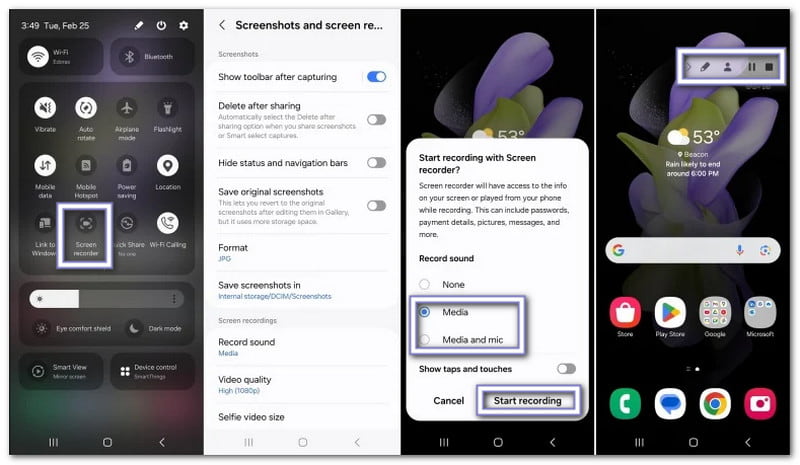
1 단계화면 상단에서 아래로 두 번 스와이프하여 여세요. 빠른 설정.
2 단계찾다 스크린 레코더만약 없다면, 을 누르세요. 연필 또는 편집하다 버튼을 누르고 먼저 추가하세요.
3단계수도꼭지 스크린 레코더 그리고 선택 기기 오디오 또는 미디어 그리고 마이크로폰 음원으로서.
4단계녹화를 시작하고 캡처하려는 앱, 게임 또는 비디오를 엽니다. 완료되면 녹화를 중지하세요.
2. 타사 앱을 사용하여 영상 없이 순수 내부 오디오만 녹음하기
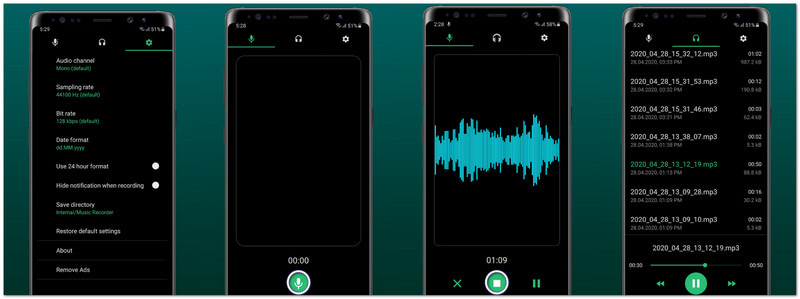
안드로이드에서 오디오만 녹음하는 방법을 찾고 있다면 Jaya Zone Tech에서 개발한 Music Recorder - Song Recorder가 간단한 해결책입니다.
이 음성 녹음 앱 앱, 게임, 음악 플레이어에서 고품질 사운드를 캡처합니다. 비트 전송률, 샘플링 속도를 설정하고 모노 또는 스테레오를 선택하여 더욱 향상된 출력을 얻을 수 있습니다. 일시 정지, 재개, 편집, 공유 기능은 물론, 유연한 사용을 위한 숨겨진 녹음 모드까지 지원합니다.
1 단계설치 음악 녹음기 - 노래 녹음기 구글 플레이 스토어에서 앱을 다운로드하고 실행하세요.
2 단계필요한 권한을 허용하세요 마이크로폰 그리고 저장소 접근.
3단계열려있는 설정 그리고 변경하세요 녹음 소스 ~에서 마이크 에게 내부 오디오. 선택할 수도 있습니다 MP3 또는 WAV 체재.
4단계수도꼭지 기록 캡처하려는 오디오, 게임 또는 비디오를 재생하세요. 이 앱은 내부 소리만 녹음합니다.
파트 3. 안드로이드에서 외부 마이크를 사용해야 하는 경우
스마트폰 마이크는 간단한 녹음에는 충분합니다. 하지만 더 선명한 음질, 잡음 감소, 또는 더 큰 음성 녹음을 원한다면 외장 마이크가 큰 도움이 될 수 있습니다.
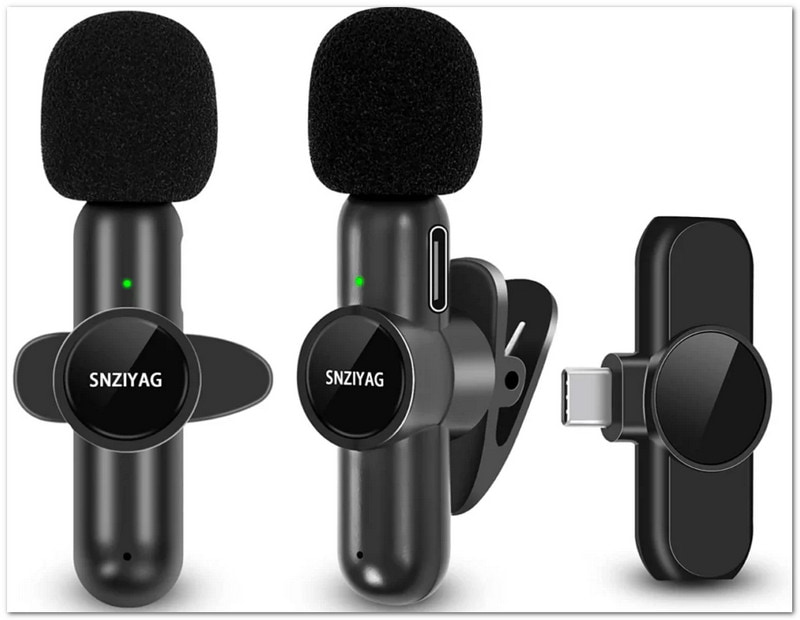
옵션 A: USB-C 마이크
USB-C 마이크는 사용이 간편하고 빠릅니다. 스마트폰의 USB-C 포트에 꽂기만 하면 바로 녹음을 시작할 수 있으며, 대부분의 안드로이드 스마트폰은 자동으로 인식합니다. 내장 마이크보다 깨끗하고 선명한 음질을 제공하는 경우가 많아 콘텐츠 제작자, 학생, 모바일 영상 촬영에 적합합니다.
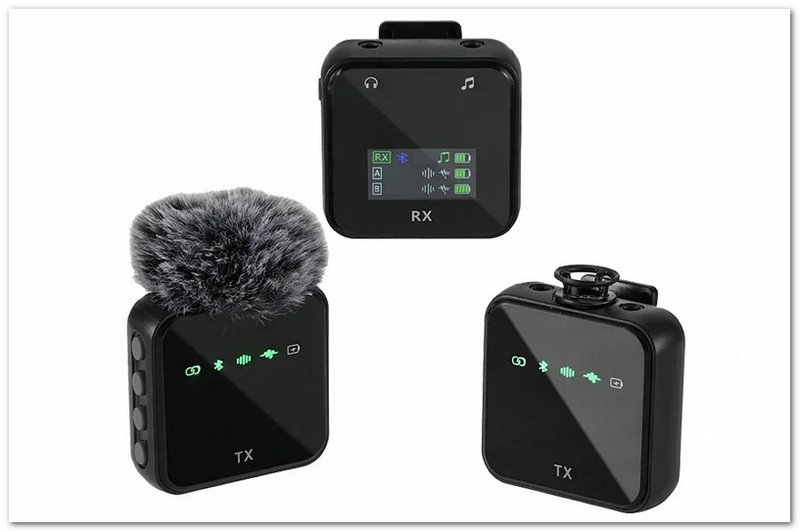
옵션 B: 무선 블루투스 마이크
블루투스 마이크는 선 없이 녹음할 수 있게 해줍니다. 스마트폰의 블루투스 설정에 연결하면 바로 녹음을 시작할 수 있습니다. 촬영이나 발표 중에 이동해야 할 때 유용합니다. 휴대성이 뛰어나 브이로그, 프레젠테이션, 야외 영상, 인터뷰 등 다양한 용도로 많이 사용됩니다.
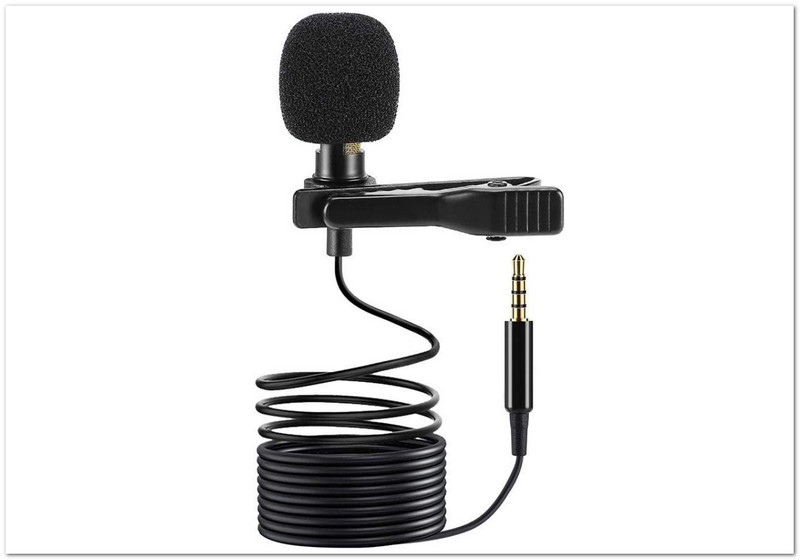
옵션 C: 3.5mm 마이크
3.5mm 마이크는 안드로이드 스마트폰의 헤드폰 잭에 연결됩니다. 만약 스마트폰에 헤드폰 잭이 없다면 USB-C-3.5mm 어댑터를 사용할 수 있습니다. 이 마이크들은 가격이 저렴하고 음성 메모, 학교 과제, 통화, 간단한 녹음 등에 사용하기 편리합니다. 또한, 큰 비용을 들이지 않고 더 나은 음질을 원하는 초보자에게도 좋은 선택입니다.
파트 4. 일반적인 문제 해결
안드로이드에서 오디오 녹음하는 법을 배우셨습니다. 하지만 예상치 못한 문제가 발생하면 어떻게 해야 할까요? 해결 방법을 알고 계신가요?
특히 초보자라면 어렵게 느껴질 수 있습니다. 하지만 걱정하지 마세요. 저희가 여러분을 혼자 두지 않을 겁니다. 아래와 같은 문제에 직면했을 때 믿고 의지할 수 있는 간단한 해결책도 알려드리겠습니다.
1. 내장 오디오 옵션이 비활성화됨
안드로이드는 일부 앱에서 내부 오디오를 차단합니다. 저작권 규정으로 인해 제한될 수도 있습니다. 내장 오디오를 사용하세요. 스크린 레코더 ~에서 빠른 설정시스템 사운드에 더 효과적입니다. 가능하면 오디오 설정을 다음과 같이 하세요. 기기 오디오 또는 미디어 그리고 마이크.
2. 외부 마이크가 인식되지 않음
휴대전화가 마이크를 인식하지 못할 때 발생합니다. 마이크를 켜세요. OTG 입력 설정 ~을 위한 USB-C 마이크. 확인하다 케이블 그리고 어댑터 지원과 DAC 칩앱을 실행하기 전에 마이크를 먼저 연결하세요. 카메라 열기 필요한 경우.
3. 음성 녹음기가 나타나지 않음
앱이 숨겨져 있거나 비활성화되어 있을 수 있습니다. 열기 앱 서랍 검색 기록계. 이동 설정 > 앱 비활성화되어 있으면 활성화합니다.
4. 백그라운드 녹음 중지
Android는 배터리 절약을 위해 앱을 종료할 수 있습니다. 설정 배터리 최적화 에게 무제한앱을 잠그세요 최근 앱 그래서 계속 열려 있어요.
5. 녹화 파일이 저장되지 않음
저장 공간이나 권한 문제인 경우가 많습니다. 허용하세요. 저장 또는 파일 권한저장 공간이 가득 찼는지 확인하고, 비우세요. 은닉처 다시 시도해 보세요.
보너스: 더 나은 화질을 제공하는 최고의 안드로이드 화면 녹화 앱
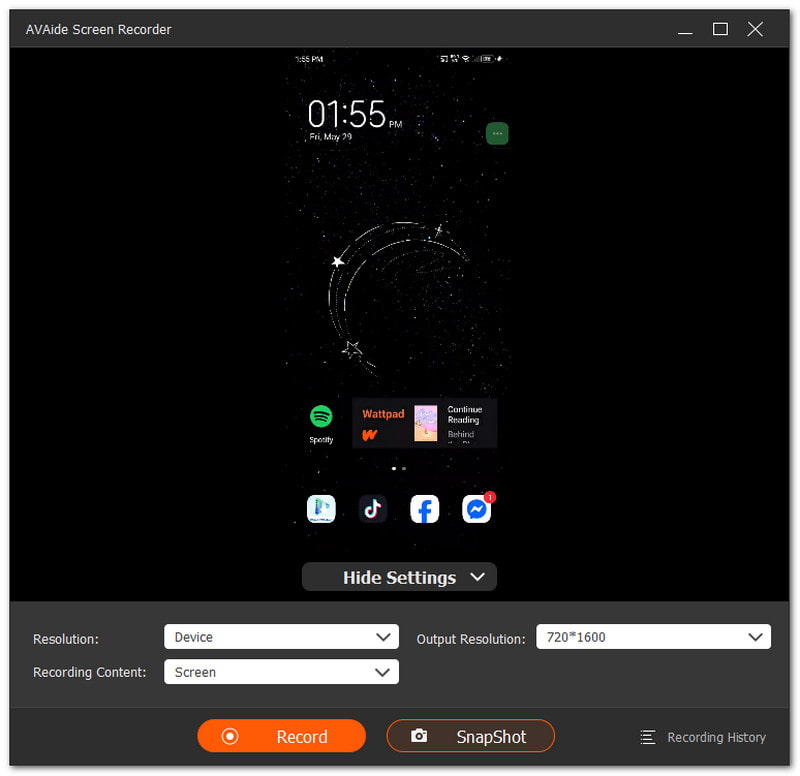
AVAide 스크린 레코더 안드로이드 기기에서 사용할 수 있는 음성 녹음 기능을 제공합니다. 최대 4K 해상도를 지원하여 선명하고 깨끗한 영상을 출력할 수 있습니다. 또한 스마트폰 마이크, 컴퓨터 스피커 또는 둘 다를 동시에 녹음할 수 있습니다. 뿐만 아니라 녹음 중에도 스냅샷을 찍어 즉시 확인할 수 있습니다. 모바일 게임, 앱 사용법, 화상 통화 등에 매우 유용합니다.
- 아이폰으로 오디오 녹음하기안드로이드, 윈도우, 맥에서 사용 가능합니다.
- 스마트폰 화면을 고화질 해상도로 캡처합니다.
- 자르기, 병합, 변환 및 오디오 증폭과 같은 편집 기능을 제공합니다.
- MP4, WMV, AVI, GIF, MP3 등의 형식을 지원합니다.

 안전한 다운로드
이제 알았죠 안드로이드에서 소리를 녹음하는 방법 문제가 발생했을 때 어떻게 해야 하는지도 알려드립니다. 문제가 생기면 설정, 권한, 녹화 도구를 확인하세요.
더 나은 결과를 얻으려면 다음과 같은 강력한 도구를 사용할 수도 있습니다. AVAide 스크린 레코더이 제품은 안드로이드 사용자뿐 아니라 윈도우 및 맥 사용자에게도 부드러운 녹음과 선명한 출력을 제공합니다.
저자 소개

오디오, 온라인 회의, 게임 플레이 비디오, 음악, 웹캠 등으로 화면 활동을 캡처합니다.