Il registratore schermo integrato di Android potrebbe non avere abbastanza funzionalità. Tuttavia, ci sono alcuni consigli pratici che puoi imparare per realizzare registrazioni dello schermo del tuo telefono più semplici e versatili. Questo post ti mostrerà in dettaglio come fare. Registrazione schermo Android Tutorial.
Se preferisci la registrazione avanzata dello schermo per giochi, tutorial o demo professionali, possiamo aiutarti a districarti tra le numerose opzioni e a scoprire i migliori metodi e app per la registrazione dello schermo Android disponibili oggi, completi di tutorial passo passo per ottenere risultati nitidi e in alta definizione.
- Parte 1: Come utilizzare il registratore schermo integrato di Android
- Parte 2: Alcuni strumenti di registrazione Android specifici per marca
- Parte 3: 4 modi più versatili per registrare lo schermo su Android
- Bonus: Registra lo schermo su computer e cellulare con la migliore qualità
- Parte 4: Domande frequenti su come registrare lo schermo su Android
Parte 1: Come utilizzare il registratore schermo integrato di Android
La maggior parte dei dispositivi con Android 11 o versioni successive include un'app nativa per la registrazione dello schermo, accessibile tramite le Impostazioni rapide. È sufficiente utilizzarla per registrare lo schermo del telefono.
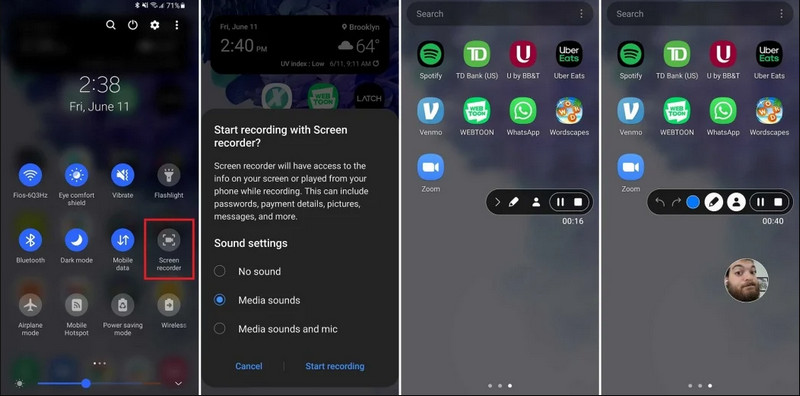
Passo 1Accedi alle impostazioni rapide
Scorri due volte verso il basso dalla parte superiore dello schermo per espandere il menu completo delle Impostazioni rapide.
Passo 2Seleziona Registratore schermo
Cercare Registrazione dello schermo. Se non lo vedi, tocca il Modificare Fai clic sul pulsante (con l'icona di una matita) e trascina il riquadro Registrazione schermo nella griglia attiva.
Passaggio 3Configurare le impostazioni di registrazione
Quando trovi l'Android Registratore dello schermo Con questo strumento, hai a disposizione diverse opzioni di registrazione. Scegliere quella giusta può rendere efficace la registrazione dello schermo del tuo dispositivo Android.
- Nessun suono: Registra solo lo schermo del telefono, senza audio di sistema o suoni esterni.
- Suoni multimediali: Registra lo schermo con tutti i suoni di sistema, inclusi i suoni di tutte le app presenti sul telefono.
- Suoni multimediali e microfono: Registra sia i suoni di sistema che i suoni esterni (microfono integrato del telefono o microfono degli auricolari).
Passaggio 4Avviare e interrompere la registrazione dello schermo
Fai la tua scelta e tocca il Inizia la registrazione pulsante. Nella barra di stato apparirà un conto alla rovescia. Per interrompere la registrazione dello schermo Android, toccare il pulsante. Fermare pulsante (se è presente una barra di stato della registrazione) oppure scorri verso il basso il riquadro delle notifiche e tocca il pulsante rosso Fermare pulsante.
Parte 2: Alcuni strumenti di registrazione Android specifici per marca
Molti produttori di telefoni Android offrono registratori dello schermo proprietari con funzionalità avanzate come la sovrapposizione della fotocamera frontale. Scopri le speciali funzionalità di registrazione di alcuni popolari marchi Android:
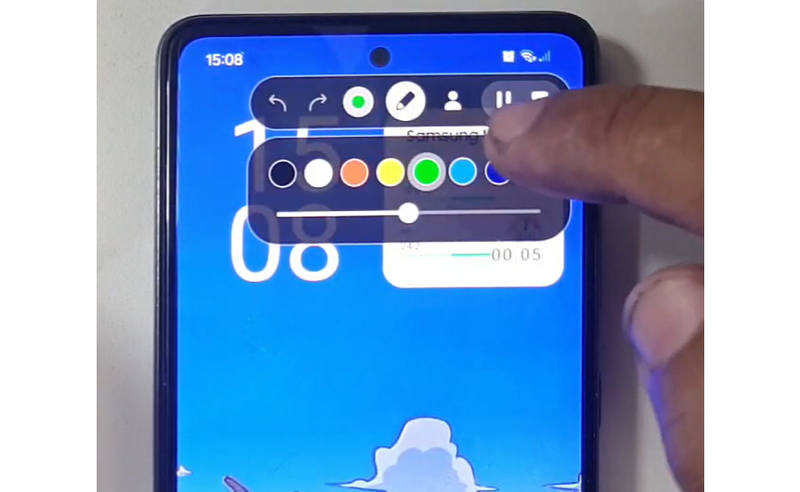
Samsung (One UI): Include un programma di registrazione dello schermo con una barra degli strumenti che consente di disegnare sullo schermo in tempo reale.
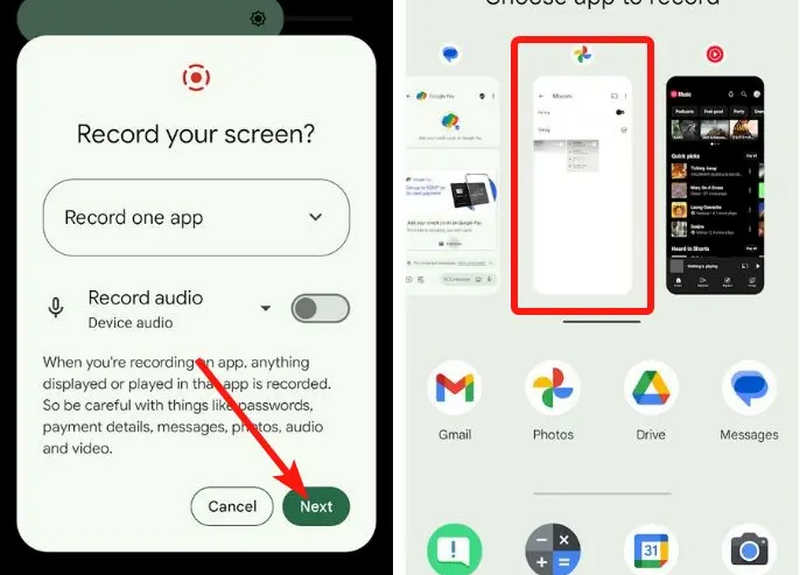
Google Pixel: È possibile selezionare un'app specifica (ad esempio, un'app bancaria o WhatsApp) da registrare. Se si esce dall'app o si abbassa il pannello delle notifiche durante la sessione, queste azioni non saranno visibili nel video finale.
Xiaomi (MIUI/HyperOS): Include un'app dedicata "Registratore schermo" con ampie possibilità di personalizzazione per frame rate (FPS) e bitrate.
Huawei e Honor (HarmonyOS / MagicOS): Un'integrazione hardware-software unica che permette di avviare o interrompere una registrazione semplicemente colpendo due volte lo schermo con le nocche.
OPPO, vivo e realme (ColorOS / OriginOS): Quando si avvia un gioco, il programma di registrazione dello schermo ottimizza automaticamente le risorse di CPU/GPU per garantire che la registrazione di una clip in 4K/60FPS non causi rallentamenti o cali di frame rate durante il gioco.
Parte 3: 4 modi più versatili per registrare lo schermo su Android
Se il tuo telefono Android non offre funzionalità di registrazione schermo soddisfacenti, puoi dare un'occhiata a queste quattro app per la registrazione dello schermo. Possono offrire alcune funzioni comode e pratiche.
1. Registratore dello schermo AZ
Registratore dello schermo AZ è un'app di registrazione schermo per Android molto popolare sul Play Store. Permette di registrare video ad alta risoluzione dello schermo del tuo telefono Android. L'applicazione consente inoltre di regolare la risoluzione, il frame rate e il bitrate a seconda delle diverse esigenze di registrazione.
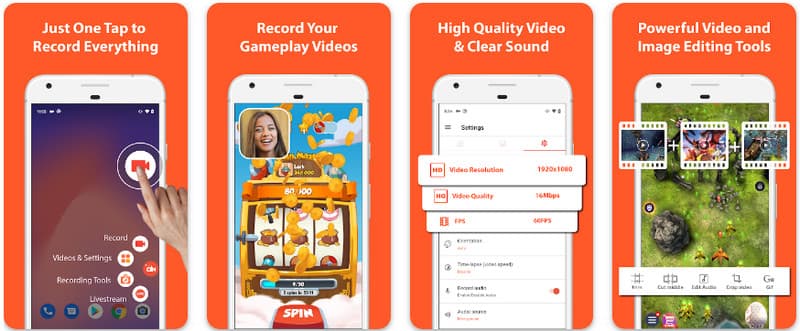
Inoltre, AZ Screen Recorder consente agli utenti di registrare l'audio riprodotto sul dispositivo tramite un microfono. Ciò rende possibile la registrazione anche delle registrazioni più complesse e di alto livello. La sua semplice disposizione dei pulsanti e le prestazioni costanti rendono l'app una delle preferite da molti. Scopri come registrare uno schermo Android con questo utilizzando il tutorial qui sotto.
Passo 1Dopo aver scaricato l'app sul tuo Android, avviala. Quindi, fai clic su telecamera pulsante per accedere alla funzione di registrazione dello schermo.
Passo 2Rubinetto Parti ora Per avviare la registrazione dello schermo sul tuo dispositivo Android, verrà visualizzato un conto alla rovescia.
Passaggio 3Per interrompere la registrazione dello schermo sul tuo telefono Android, tocca Disco di nuovo il pulsante. Con questa app puoi anche registra lo schermo del tuo iPhone con suoni attivato.
2. Registratore dello schermo Mobizen
Registratore dello schermo Mobizen Mobizen è un'altra app per registrare lo schermo su Android, disponibile gratuitamente sul Play Store, che promette registrazioni facili e di alta qualità. Offre opzioni per la registrazione in alta definizione con parametri regolabili e una funzione di registrazione pulita per rimuovere le filigrane. Inoltre, Mobizen include anche la registrazione audio interna, utilizzabile per la registrazione, la webcam e la creazione di GIF, che possono arricchire ulteriormente la registrazione. L'app si distingue anche per l'interfaccia intuitiva e i comandi semplici che consentono all'utente di avviare la registrazione dello schermo su Android o di modificarne il contenuto senza difficoltà. Scopri come registrare lo schermo su Android utilizzando questa app.
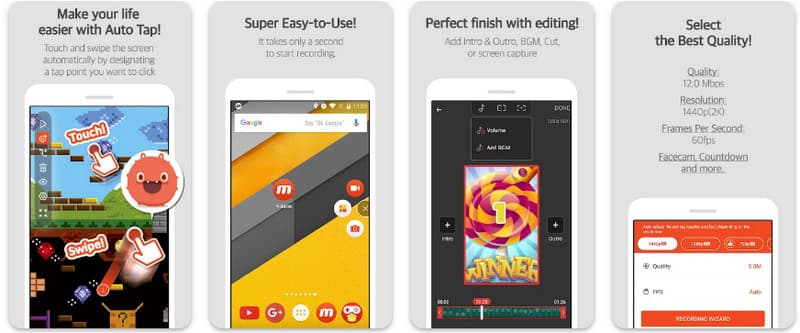
Passo 1Scaricala subito sul tuo Android e apri l'app.
Passo 2Esegui la configurazione richiesta prima di poter utilizzare il registratore dello schermo. Sullo schermo apparirà una barra di registrazione mobile. Tocca la telecamera pulsante, quindi Parti ora per avviare la registrazione dello schermo.
Passaggio 3Quando hai finito, tocca M e il fermare pulsante per interrompere la registrazione dello schermo sul tuo telefono Android.
3. Registratore dello schermo - XRecorder di Inshot
Registratore dello schermo - XRecorder è una potente utility Android completa che semplifica l'acquisizione dello schermo offrendo registrazioni ad alta definizione, fino a 1080p a 60 FPS, senza richiedere l'accesso root o imporre watermark. Come metodo di prim'ordine per la registrazione dello schermo su Android 17/16, offre un'esperienza utente fluida grazie a una finestra di controllo mobile che consente di avviare, mettere in pausa e disegnare sullo schermo in tempo reale utilizzando uno strumento pennello integrato. Oltre alla semplice acquisizione video, supporta la registrazione audio interna, le sovrapposizioni della webcam per gli streamer e l'editing video integrato, rendendola la scelta ideale per chiunque abbia bisogno di creare tutorial professionali, clip di gioco o dimostrazioni chiare direttamente dal proprio dispositivo mobile.
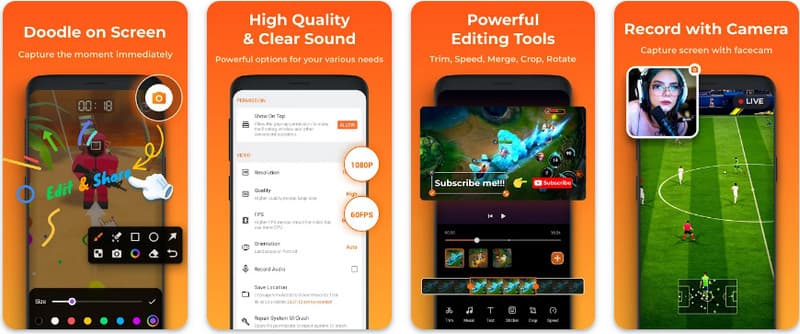
Passo 1Una volta completato il download di XRecorder, aprilo e tocca Abilita icona mobile.
Passo 2Successivamente, tocca il Disco pulsante per avviare la registrazione e Parti ora per confermare.
Passaggio 3Come puoi vedere, la lunghezza della registrazione appare come un'icona mobile; tocca l'icona fermare pulsante per salvare la registrazione.
4. Super registratore dello schermo
Super registratore dello schermo Super Screen Recorder è una soluzione di alto livello per chiunque cerchi un modo professionale per registrare lo schermo su Android con la massima flessibilità. Questa potente app offre acquisizioni in alta definizione e si distingue per l'assenza di watermark anche nella versione gratuita, garantendo che i tuoi contenuti rimangano puliti e professionali. Include una webcam integrata per catturare le reazioni in tempo reale e un versatile strumento pennello che ti permette di disegnare sullo schermo durante la registrazione, una funzione essenziale per creare tutorial o guide coinvolgenti. Che tu sia un principiante o un utente esperto, Super Screen Recorder offre le solide opzioni di personalizzazione necessarie per padroneggiare la registrazione dello schermo su Android con facilità.
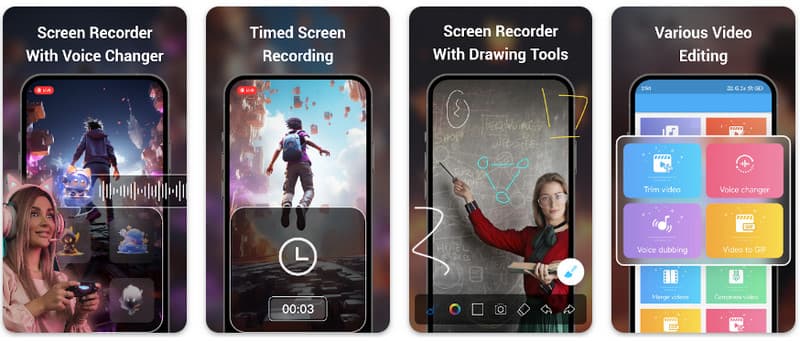
Passo 1Apri Super Screen Recorder sul tuo Android, quindi abilita la funzionalità mobile dell'app per utilizzarlo.
Passo 2Sullo schermo, tocca telecamera pulsante, confermare le impostazioni e toccare Parti oraQuindi, apparirà un conto alla rovescia di tre secondi prima che la registrazione abbia inizio.
Passaggio 3Clicca il piazza per terminare la registrazione e salvarla sul tuo dispositivo Android.
Bonus: Registra lo schermo su computer e cellulare con la migliore qualità
Credi sia possibile registrare lo schermo del tuo telefono Android su un computer? AVAide Screen Recorder È progettato principalmente per la registrazione dello schermo su Windows e Mac. Tuttavia, può anche registrare l'intero schermo del tuo telefono Android. Questo è particolarmente utile quando devi creare un tutorial su determinate operazioni su Android e poi modificare direttamente il video sul tuo Mac o Windows.
Per la registrazione dello schermo su Windows e Mac, AVAide Screen Recorder supporta i codec AV1 e HEVC, che consentono un'elevata compressione del risultato della registrazione mantenendo un'ottima qualità video. L'accelerazione hardware completa permette di registrare video lunghi con un utilizzo minimo della CPU. Ancora più interessante è il microfono migliorato che aumenta la nitidezza eliminando i rumori di fondo e l'eco. Il software realizza registrazioni eccellenti con una navigazione semplice e funzioni di editing intuitive, come il ritaglio e le annotazioni. Sebbene sia un software costoso, è altamente raccomandato perché può essere utilizzato sia per scopi personali che professionali.
- Registra video dal tuo dispositivo Android o iOS con la migliore qualità possibile.
- Realizza facilmente video tutorial con funzionalità di disegno e annotazione.
- Supporta i codec di output AV1 e HEVC per comprimere al massimo il video in uscita.
- Offre funzionalità di editing video facili da usare per modificare le tue registrazioni su Android.
Passo 1Ora puoi scaricare lo screen recorder sul tuo PC spuntando il pulsante di download qui. Quindi, installa l'app seguendo le istruzioni sullo schermo e avviala per procedere al passaggio successivo.

DOWNLOAD GRATUITO Per Windows 7 o successivo
 Download sicuro
DOWNLOAD GRATUITO Per Mac OS X 10.13 o successivo
Download sicuroPasso 2Ora che è già in esecuzione nel tuo sistema, posiziona il frame di registrazione nell'area in cui vuoi iniziare la registrazione. Qui, puoi registrare l'intero schermo selezionando l'opzione Schermo intero invece dell'opzione Regione.

Passaggio 3Successivamente, se necessario, è possibile impostare la registrazione del sistema e del microfono. Se si desidera aggiungere il proprio volto alla registrazione, attivare l'opzione Webcam qui. Quindi, fare clic su REC per avviare il conto alla rovescia e iniziare la registrazione.

Passaggio 4Una volta terminata la registrazione, fare clic su fermare pulsante, che è un quadrato rosso. Nella finestra successiva che appare, puoi modificare la registrazione che hai fatto in precedenza con le opzioni disponibili qui, quindi posiziona il cursore sulla registrazione e premi il pulsante Scarica pulsante per salvarlo. Questa app dimostra il suo valore come miglior registratore open source disponibile.

Parte 4: Domande frequenti su come registrare lo schermo su Android
Dove posso trovare la funzione di registrazione schermo nelle impostazioni?
Per accedere alla funzione integrata registrazione dello schermo su Android senza app di terze parti, scorri due volte verso il basso dalla parte superiore dello schermo per aprire l' Impostazioni rapide pannello e cercare il Registrazione dello schermo (o l'icona "Registrazione schermo"). Se non è visibile, tocca l'icona Modificare (Pietra) il pulsante per trascinare l'interruttore di registrazione dello schermo nei riquadri attivi. Una volta aggiunto, puoi semplicemente toccare l'icona, scegliere le tue preferenze audio, come la registrazione dei suoni interni del sistema o del microfono, e premere Avvia per iniziare a catturare lo schermo direttamente dalle impostazioni di sistema.
Perché non trovo la funzione di registrazione schermo sul mio Android?
L'assenza di un'opzione nativa per la registrazione dello schermo su Android è solitamente dovuta al fatto che il dispositivo utilizza un sistema operativo più vecchio, poiché la funzionalità integrata è stata standardizzata solo con Android 11Se il tuo software è aggiornato, l'interruttore potrebbe semplicemente essere nascosto dal tuo Impostazioni rapide menu; in genere puoi visualizzarlo toccando il Modificare pulsante nel pannello delle notifiche e trascina il riquadro "Registrazione schermo" nella visualizzazione attiva. Inoltre, alcuni dispositivi "Go Edition" di fascia bassa o specifiche interfacce utente del produttore potrebbero disabilitare questa funzione per risparmiare risorse di sistema; in tal caso, l'utilizzo di un'app di terze parti come XRecorder o Super Screen Recorder rappresenta la soluzione più efficace.
Perché è scomparso il pulsante per la registrazione dello schermo?
Il pulsante di registrazione dello schermo di solito scompare perché è stato spostato accidentalmente fuori dall'area attiva delle Impostazioni rapide; spesso è possibile ripristinarlo toccando il pulsante Modifica (icona a forma di matita) nella barra delle notifiche e trascinando indietro il riquadro. Potrebbe anche essere nascosto a causa della modalità di risparmio energetico, limitato da un profilo di lavoro o semplicemente richiedere un riavvio del sistema per aggiornare l'interfaccia utente dopo un aggiornamento software.
Utilizzando il tutorial elencato qui, hai imparato come registrare lo schermo su Android Samsung. Questo tutorial ti sarà di grande aiuto per quanto riguarda la tua attività di registrazione dello schermo, soprattutto se sei un utente Android. Condividi queste informazioni con il tuo amico utente Android per dargli un'idea di come farlo.
INFORMAZIONI SULL'AUTORE

Registra schermo, audio, webcam, gameplay, riunioni online e schermo iPhone/Android sul tuo computer.
Registrazione dello schermo
- Registrazione schermo su Windows
- Registra Instagram Live
- Copia video da Tubi
- Converti i video di YouTube in MP3
- Scarica video da Fansly
- Scaricare i video di JW Player
- Scarica i video di Bilibili
- Scarica i video di Patreon
- Scarica i video di SpankBang
- Scarica i video di Discord
- Scarica il video di DoodSream