In game development, where optimized texture formats are crucial for performance and visual quality, converting JPG to DDS is a common process. While JPG files are compressed in a lossy format, DDS or DirectDraw Surface is a dedicated format desired for fast GPU loading. It supports features including alpha channels, texture compression, and mipmaps. Doing this conversion helps artists and developers reduce memory usage, improving rendering speeds. Therefore, if you are into Unity, Unreal Engine, DirectX-based applications and the like, this conversion is for you. If you are ready to learn for your game, simulation, or 3D project, read through the entire post.
Part 1: JPG vs DDS - What's Their Difference?
Before we dive into the guide on how to convert JPG to DDS, understanding these two formats will help you learn about their characteristics and their purposes.
Joint Photographic Group or JPG
JPG, short for Joint Photographic Group, is a go-to format for web page graphics and photographs as it uses lossy compression while maintaining the balance between file size and quality. This process can sometimes be reversed or enhanced with the help of AI image upscalers. Aside from that, this image format enables users to view it on different devices and platforms, making it a perfect solution for those who are looking to eliminate the issue of compatibility. However, JPG lacks support for advanced rendering features and transparency, making it unsuitable for real-time applications.
DirectDraw Surface or DDS
DDS, short for DirectDraw Surface, on the other hand, is a specialized GPU-friendly format developed to work specifically on game textures and 3D rendering to support features, including hardware-accelerated compression, alpha channels, and mipmapping. In addition, DDS files can maintain their quality through native GPU support for superior performance in engines such as Unreal and Unity 3D.
It is safe to say that if you need universal compatibility, go with JPG. On the other hand, go with DDS for optimized real-time rendering.
Part 2: Convert JPG to DDS in the Best Image Quality
AVAide Video Converter is an intuitive tool designed to transform your JPG images into high-quality DDS textures in less than a minute. You can use it if you are a game developer, 3D artist, or digital creator who converts textures into video graphics. IT ensures maintaining exceptional clarity and detail while supporting industry-standard DDS compression formats, including DXT1, DXT3, DXT5, and BC7, contributing to optimal performance in rendering and gaming applications. Also, you can customize settings like the resolution and file size to strike the perfect balance between efficiency and quality. Meanwhile, it streamlines everyone's workflow with its batch conversion capabilities. You can process many JPG files into DDS format simultaneously. For fast, high-quality, and reliable texture conversions, follow the steps below:
Step 1Begin by downloading the program's installer through the Free Download buttons given below. Click the most suitable download link for your OS and install it. Once the app is installed, launch it on your computer.

FREE DOWNLOAD For Windows 7 or later
 Secure Download
FREE DOWNLOAD For Mac OS X 10.13 or later
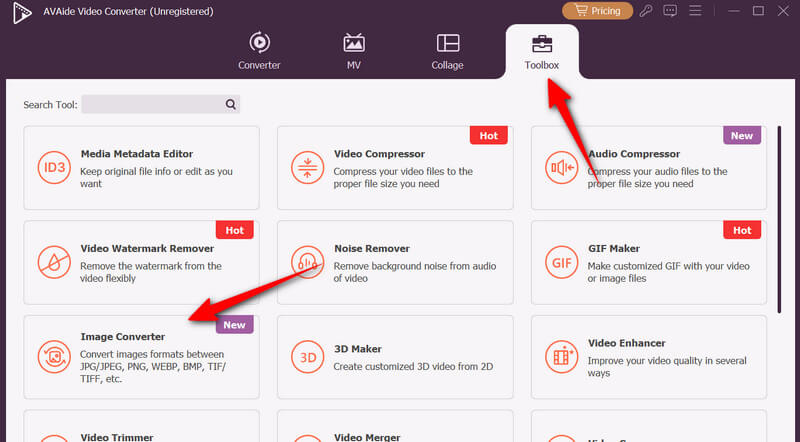
Secure DownloadStep 2Next, go to the More Tools tab and look for the Image Converter from here. You can look it up using the search bar or scrolling through the set of tools.
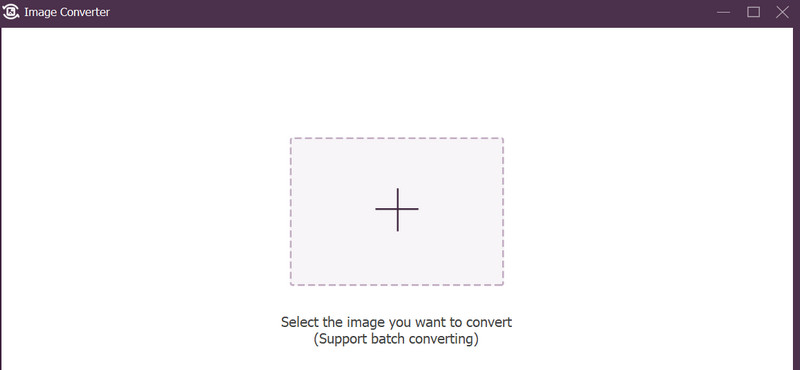
Step 3This time, click the plus button in the Image Converter upload area. Next, check your files and click on which photos to convert from JPG to DDS.
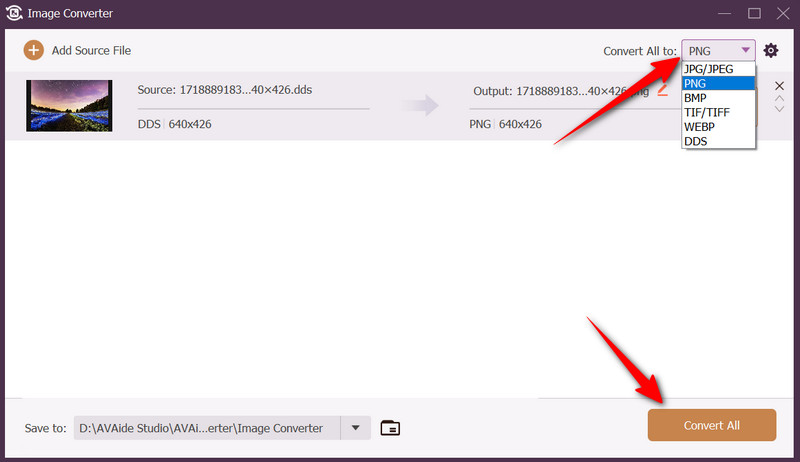
Step 4You should see your selected photos on the interface. From here, click on the Profile option and choose DDS as the output format. When everything is set, click the Convert All button to initiate the conversion process.
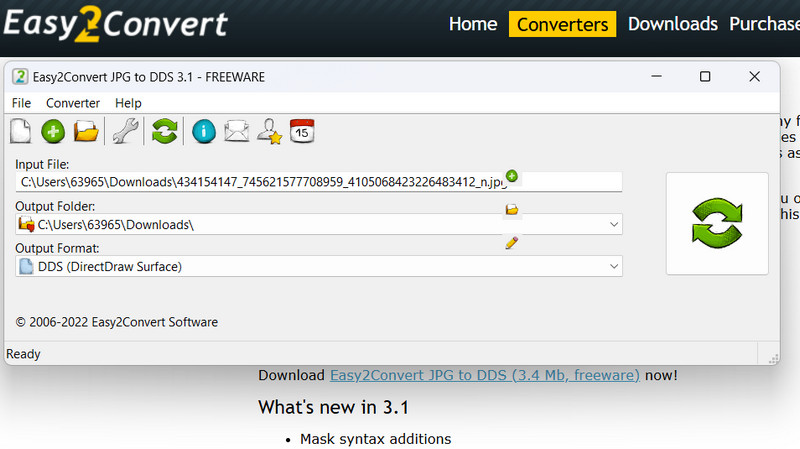
Part 3: Convert JPG to DDS with Easy2Convert
Another tool that offers a straightforward process for converting image files is Easy2Convert. This lightweight software is mostly useful for graphic designers and 3D artists who are into preparing textures for real-time rendering. Similarly, this program ensures high-quality output while keeping the details of the photo. Learn how to convert JPG to DDS with the instructions below:
Step 1First, download the program by visiting the official site and downloading its installer. Install and launch it afterward. Next, select JPG to DDS among the available conversion choices.
Step 2Hit Add File to upload your JPG into the program, or drag and drop it. Then, configure DDS settings by choosing your compression format. Also, you may modify the output resolution when needed.
Step 3Finally, click Convert to commence the conversion process and wait for it to complete.
Step 4After the conversion, your DDS file will be ready for use in 3D software and game engines.
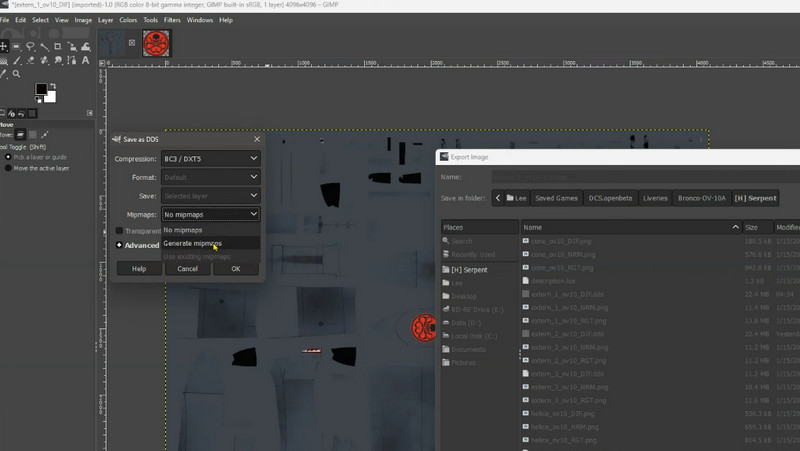
Part 4: Convert JPG to DDS with GIMP
If you are looking for a professional image editing that does not break the bank, look no other than GIMP. This open-source software is rich in a set of tools, offering you layer-based editing, customizable brushes, selection tools, and support for various file formats. One feature that makes it versatile is its plugin support. This tool can export DDS textures for game development when infused with NVIDIA's DDS plugin. To learn more about its capabilities from photo retouching to digital painting, check out a full GIMP photo editor review to see the breakdown of its workflow efficiency and suitability. Nonetheless, follow the guide below to convert JPG to DDS with GIMP.
Step 1Download and install GIMP on your computer. Then, launch it.
Step 2Get the NVIDIA DDS plugin by visiting NVIDIA's official webpage. Then, extract the files and copy the dds.exe and dds folder to GIMP's plugins directory. Restart GIMP to activate the plugin afterward.
Step 3This time, open your JPG file in GIMP by going to File > Open. After that, edit the image file's alpha channels, layers, etc.
Step 4At last, export the file by navigating to File > Export As. Next, select DDS as the output format and hit Export.
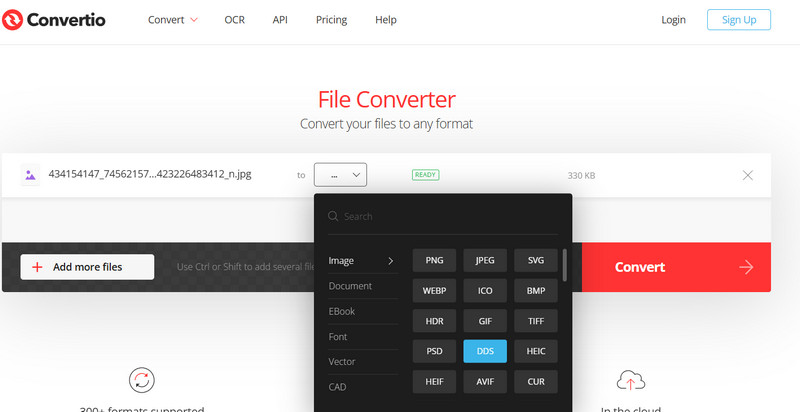
Part 5: Convert JPG to DDS with Convertio
For those looking for an online tool, you will never go wrong with Convertio. It can also transform JPG images into DDS texture photos. Besides that, it supports 300 file formats while providing a straightforward approach to conversion processes. This cloud-based platform is helpful mostly for quick conversions. Here is how to use the tool:
Step 1Access the website using any browser on your computer and upload a JPG file you wish to convert to DDS by clicking Choose Files.
Step 2Choose an output format from the dropdown menu and select DDS as the target format.
Step 3Optionally, you can adjust the settings if necessary. Then, hit Convert to begin the process.
Learning how to convert JPG to DDS is a piece of cake. Finding the right tool to get this conversion done is what makes it challenging. Throughout this article, we've explored multiple conversion approaches. The best tool depends primarily on your needs. Whether you want to prioritize quality and features, speed and simplicity, or batch processing. Whichever tool you end up using, each program ensures your DDS textures are game-ready.
Your complete video toolbox that supports 350+ formats for conversion in lossless quality.