试图弄明白 如何在Mac上录制音频 当你需要录制课堂讲座、保存视频通话、录制播客或快速创建语音内容时,这种情况经常发生。幸运的是,macOS 内置了录音工具,此外还有一些第三方软件可以帮助你轻松录制高质量的麦克风音频和内部音频。
方法一:使用 QuickTime Player
几乎每个人的 macOS 系统上都安装了 QuickTime。QuickTime 提供直观的界面、可靠的麦克风录音功能以及无需其他应用程序即可快速导出音频文件的功能。这项技术适用于配音、讲座、在线会议,甚至基本的播客录制。
第1步可以从“应用程序”文件夹启动 QuickTime Player,也可以通过 Spotlight 搜索启动。
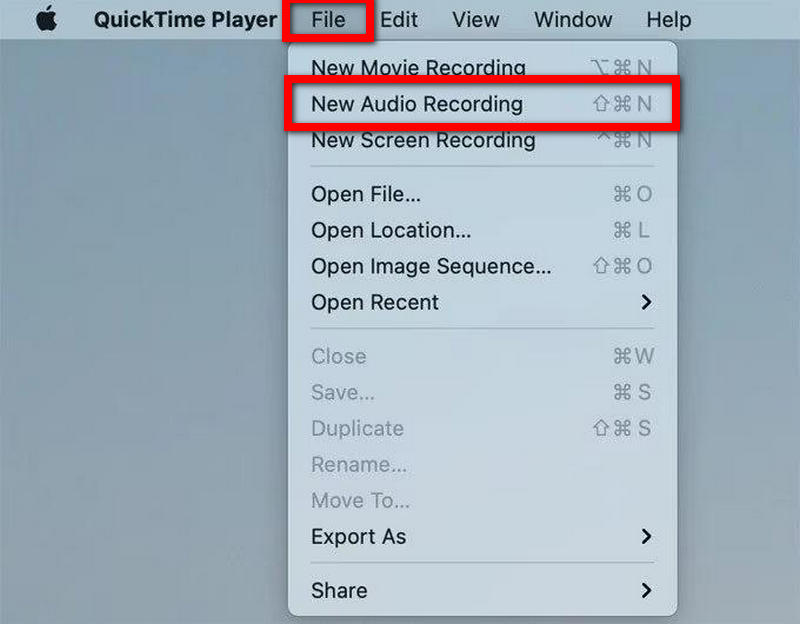
第2步前往 文件 从顶部菜单栏选择菜单。
第 3 步点击 新的录音.
第四步按下旁边的小箭头 记录 按下此按钮可指定要使用的麦克风。
第 5 步如有必要,请调整输入音量。
第 6 步要开始录制,请按 记录 按钮。
第 7 步 对着麦克风说话。
第 8 步按 停止 按下此按钮即可结束录制。
步骤9要将录音保存到您的 Mac,请转到 文件 并选择 保存.
方法二:使用语音备忘录
语音备忘录是一款专为快速录音而设计的应用。它非常适合制作个人提醒、头脑风暴记录、录制简短的讲座和音频。录制的语音备忘录会自动通过 iCloud 同步,因此所有 Apple 设备均可访问这些录音。
第1步在 Mac 上启动语音备忘录。
第2步按 记录 按钮。
第 3 步对着麦克风说话。
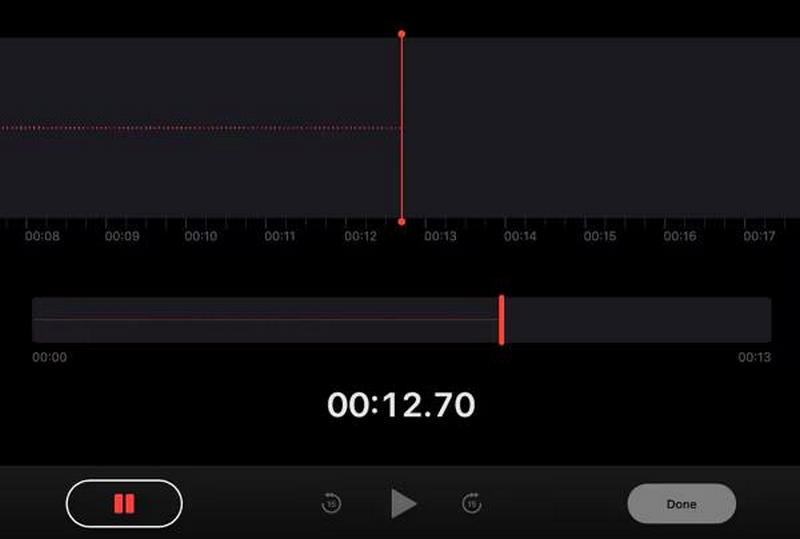
第四步如果您需要暂时停止录制,请选择 暂停.
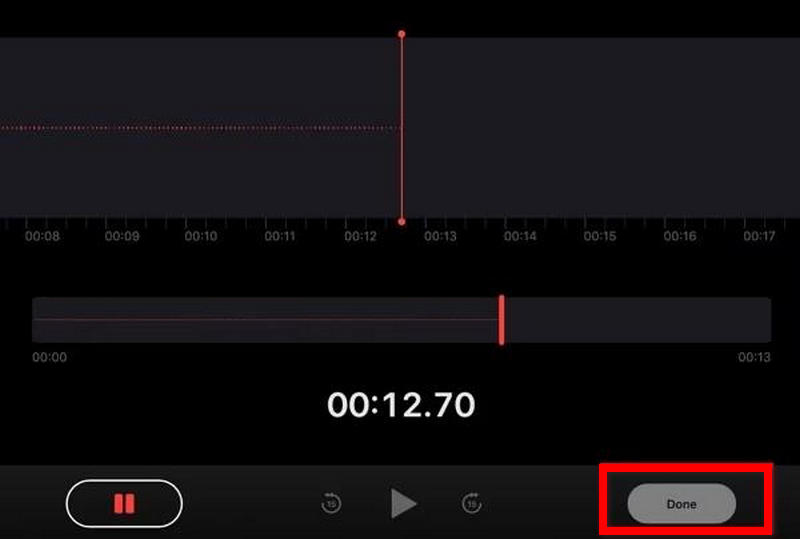
第 5 步按 完毕 完成录音。
第 6 步为了方便查找录音,请选择 改名 选项。
第 7 步要共享、复制或导出录制内容,请右键单击该文件。
为什么 macOS 本身不支持内部音频录制
macOS 默认允许使用麦克风。但是,内置功能无法录制系统内部音频,包括应用程序中播放的媒体、音乐和浏览器声音。macOS 设置这些限制是出于隐私、版权保护和系统安全的考虑。
与麦克风音频不同,内部音频可能包含受保护的媒体或来自应用程序的私密通信。因此,除非用户安装额外的软件,否则苹果会限制对内部音频通道的访问。
由于这些问题,像 QuickTime 这样的工具无法录制内部音频,但可以通过麦克风录制外部音频。
这些问题的例子:
- 录制游戏视频及音频。
- 录制一节在线课程。
- 在线录制音频和视频。
- 录制网络视频的音频。
- 使用计算机内部音频录制教学视频。
方法三:使用 BlackHole + QuickTime Player
BlackHole 是一款免费的虚拟音频驱动程序,它允许将系统音频内部路由到录音软件。如果将此驱动程序与 QuickTime 配合使用,Mac 用户可以录制内部音频和外部麦克风音频。该驱动程序使用户能够录制在线会议、教程、视频游戏、网络研讨会、播客和浏览器音频,所有这些都能获得高质量、清晰的音频。
第1步从官方网站下载并安装 BlackHole 到您的 Mac,然后打开音频 MIDI 设置。
第2步创建多输出设备,并同时启用 Mac 扬声器或耳机和 BlackHole。
第 3 步 在声音设置中,将多输出设备设置为默认音频输出。
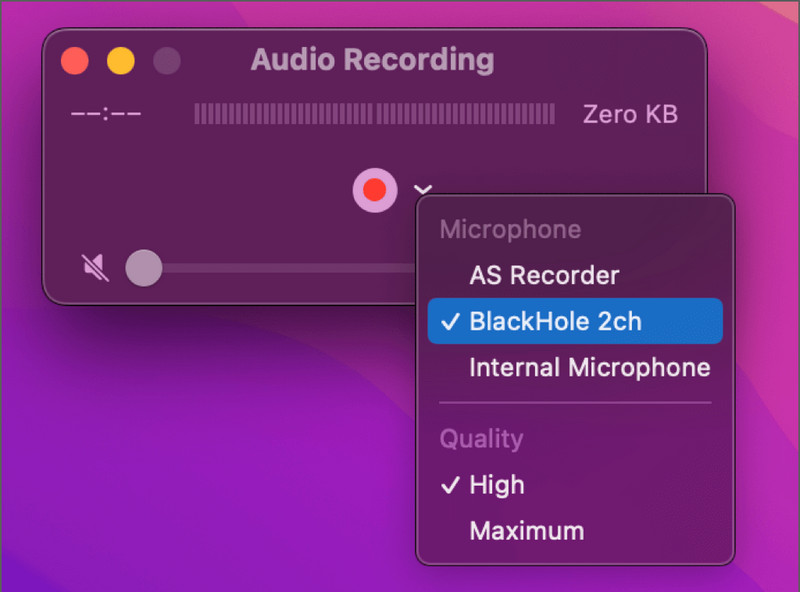
第四步打开 QuickTime Player,选择 文件 > 新的录音,然后选择 黑洞 作为麦克风或音频源。
第 5 步点击 记录 按下按钮,播放要录制的音频,完成后停止并保存录制内容。
方法四:使用专用第三方软件
1. AVAide 屏幕录像机
AVAide 屏幕录像 AVAide 非常适合想要一款简单易用且功能强大的录音工具的 Mac 用户。除了屏幕录制,AVAide 还可以录制来自麦克风、系统扬声器、网络摄像头以及手机屏幕的音频。AVAide 的一大亮点在于它兼顾了初学者和高级用户,因此对于任何需要在 Mac 上录音的人来说,它都是一个绝佳的选择。
- 同时录制麦克风音频和系统音频。
- 支持高质量音频录制,延迟极低。
- 支持全屏、窗口或自定义区域录制。
- 包括用于教程和播客的网络摄像头录制功能。
- 支持多种导出格式,例如 MP3、AAC、FLAC、M4A 等。

 安全下载
安全下载
第1步下载并安装软件
请访问 AVAide 网站下载软件。按照屏幕上的安装说明进行操作,即可成功安装软件。
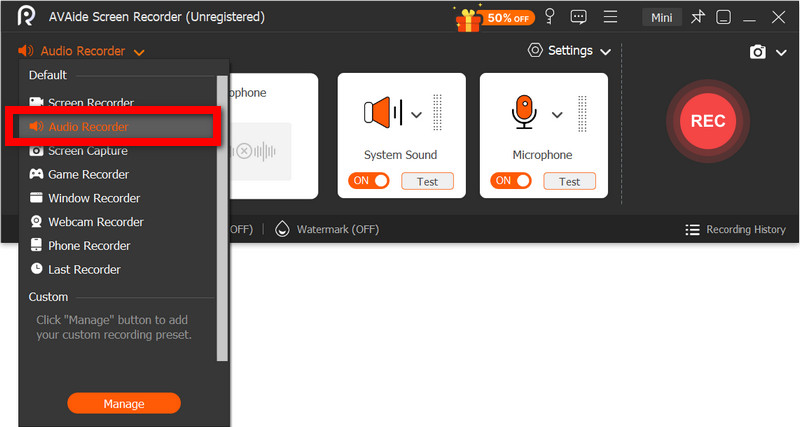
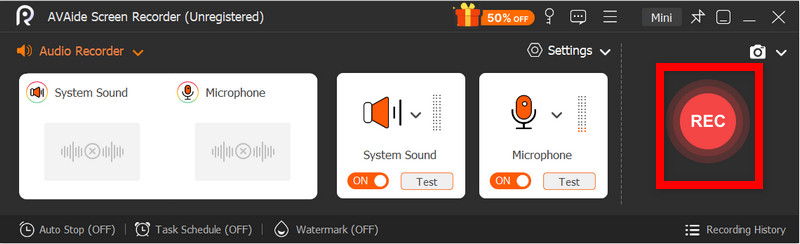
第2步选择录音机
打开软件,然后在主页上选择 录音机 仅录制语音。
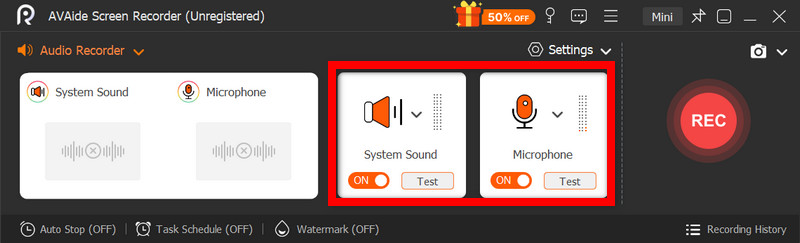
第 3 步启用麦克风和系统声音
激活 麦克风 启用清晰录音功能。 系统声音 录制Mac电脑的内部音频。
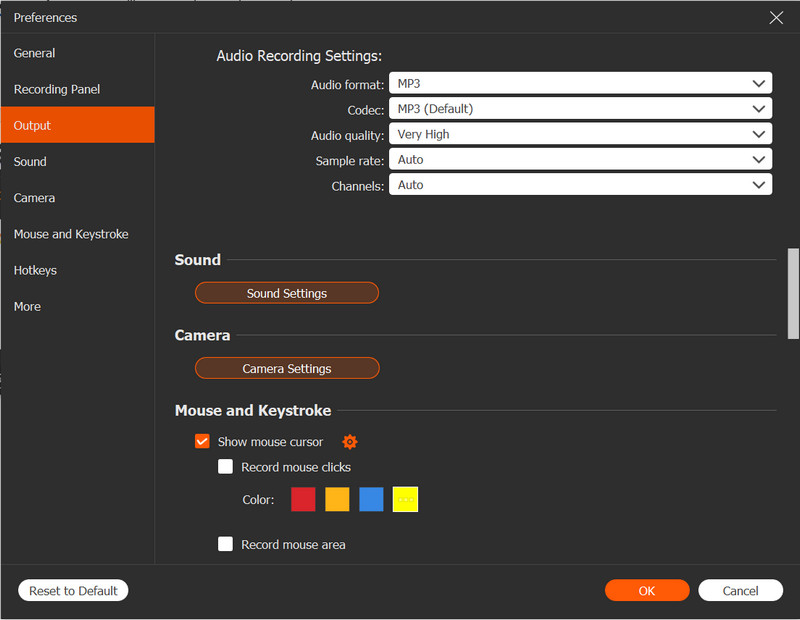
第四步调整录制设置
来自 设置 在菜单中,选择您喜欢的音频格式和输出质量。确定保存位置并调整麦克风和系统音频的音量。
第 5 步开始录制
选择 录音 您可以选择开始录音。录音过程中,您可以暂停、继续录音或添加备注。
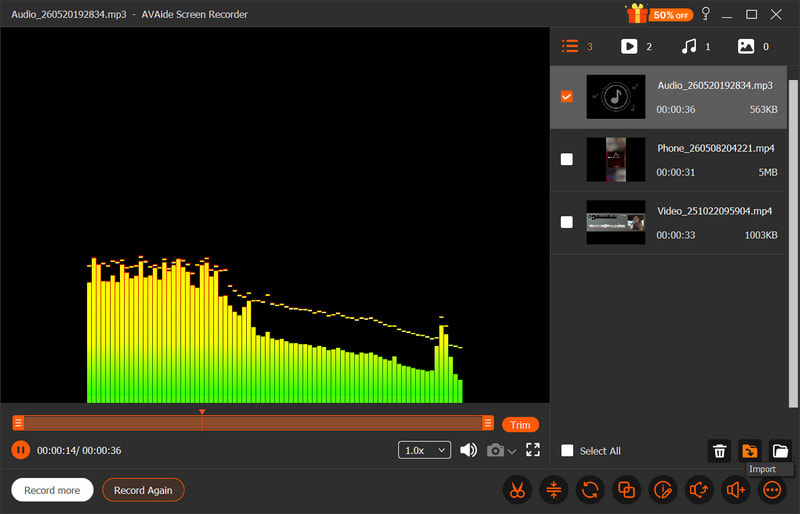
第 6 步保存并预览
选择 停止 您可以选择结束录音。之后,您可以剪辑音频并将录制的音频保存到您的 Mac 上。
2. 使用 Audacity
Audacity 是一款易于使用、功能强大的免费 Mac 音频录制和编辑软件。由于其简洁的工作流程和专业的降噪、剪辑、音频增强等功能,它常常优于其他同类软件,成为播客和音乐项目的首选。即使拥有如此丰富的功能,Audacity 的用户界面依然简洁易懂,使其成为初学者的理想之选。
第1步下载 Audacity 并将其安装到您的 Mac 上。安装完成后,打开该应用程序。
第2步选择音频输入源。将输入源设置为您的音频设备,并调整拾音电平。
第 3 步准备录音时,按下 记录 按下按钮,然后对着麦克风说话。
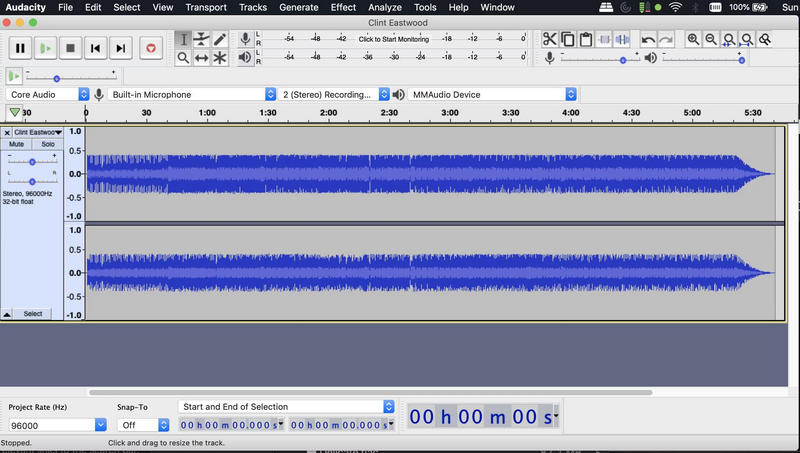
第四步录制完成后,按下 停止 按钮。
第 5 步录制完成后,请选择要导出的项目,方法是: 文件 > 出口.选择 MP3, WAV或者其他音频导出选项。
3. 使用 GarageBand
GarageBand 是 Audacity 的绝佳替代品,它是苹果公司预装在所有 Mac 电脑上的专有应用程序。GarageBand 拥有 Audacity 的所有功能,甚至更多,例如音乐工具和音频效果。GarageBand 在音乐制作方面表现更佳,并被广泛用于…… 录制播客 录音、配音和高质量音频项目,并具备专业的声音控制能力。
第1步启动 GarageBand 并选择“新建项目”,然后选择该选项 嗓音.
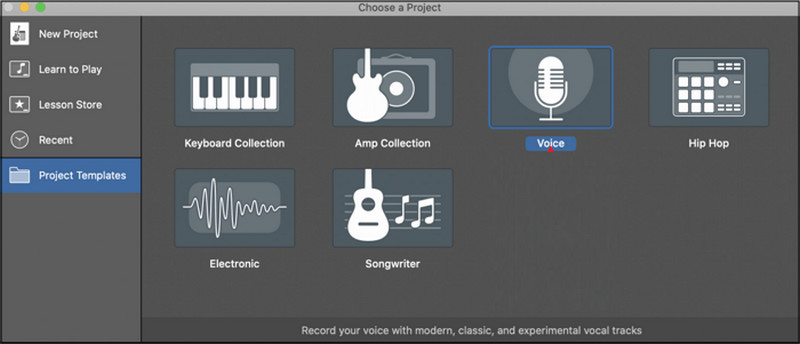
第2步选择您要录音的输入源。如果您愿意,可以启用音频监听功能,以便在录音时听到自己的声音。
第 3 步打 记录 开始您的会话。
第四步录制完成后,按下 停止 按钮。使用 GarageBand 中的编辑和声音调整功能来完善您的录音。
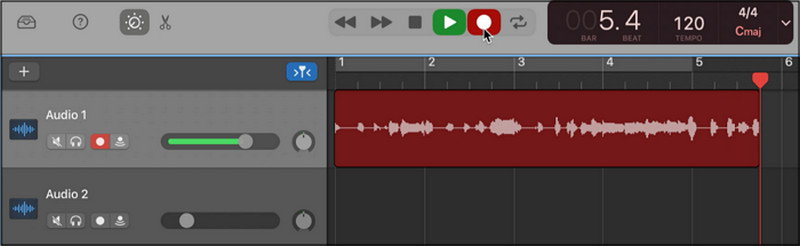
第 5 步将完成的音频项目以所需的质量和格式导出到您的 Mac。
额外提示
1. 如何在Mac上录制YouTube音频
要在 Mac 上录制 YouTube 音频、在线课程、网络研讨会以及播客和音乐的播放,您可以使用 OBS Studio,这是一款免费的屏幕视频和直播录制软件。由于 OBS Studio 能够高质量地录制系统声音,因此它是一个不错的选择。
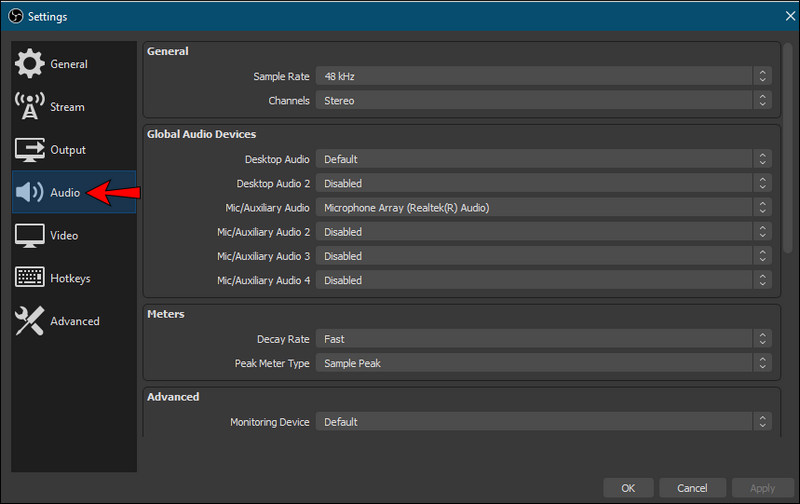
第1步在您的 Mac 上下载并安装 OBS Studio,安装完成后打开该软件。
第2步在以下位置创建一个新源 声音的 选择“选项”并选择您的系统音频设备或虚拟音频驱动程序。
第 3 步在浏览器中打开 YouTube,加载你想录制的视频/音频。
第四步打 开始录制 按下按钮,然后正常播放 YouTube 视频/音频。
第 5 步等到你想录制的音频录制完毕,然后按下 停止 按下按钮并找到音频文件,该文件现在已保存在您的 Mac 上。
2. 如何在Mac上使用外接麦克风录制音频
大多数情况下,外接麦克风的音频质量比Mac内置麦克风更高。USB麦克风可以直接连接到Mac。但是,XLR麦克风可能需要音频接口才能获得更好的音质和更低的噪音。 Mac 最佳屏幕录制软件 在同时进行音频和视频任务时,还可以帮助录制更清晰的音频和视频。
第1步将你选择的麦克风连接到你的 Mac,打开 系统设置,前往 声音并将刚刚连接的麦克风设置为输入设备。
第2步调整麦克风输入音量并测试声音,确保能够清晰地检测到你的声音。
第 3 步打开您常用的录屏软件,例如 AVAide 屏幕录像机。
第四步在软件设置中选择外置麦克风,然后开始录制您的语音或音频会话。
第 5 步停止录音,检查音质,并将最终音频文件保存或导出到您的 Mac。
录制 Mac 语音 您可以轻松使用内置工具(例如 QuickTime 和语音备忘录)或高级软件进行专业品质的录音。无论您需要录制内部音频、播客旁白还是在线讲座,这些方法都能为您提供可靠的途径,在 Mac 上高效地捕捉清晰的声音。
关于作者

通过音频、在线会议、游戏视频、音乐、网络摄像头等捕捉屏幕活动。