If you are a Mac user and you need to record your screen and audio, there is no need to look anywhere else. Everything you need is already there with QuickTime Player.
Trong này QuickTime Screen Recording guide, we will teach you how to use it from start to end. From opening the tool to stopping and saving your recording. Let us start now!
Part 1. A Quick Introduction to QuickTime Screen Recording
QuickTime Player is a free program on the Mac operating system. It comes pre-installed so that you can use it right away. While it is known as a media player, it also works as a ghi màn hình cho Mac. Because of this, you can capture your screen without third-party applications. In addition, the interface is simple, so it is easy to follow.
1. Core Capabilities
- Can Record
For everyday use, it covers the basics. You can record the full screen. You can also pick a selected area. At the same time, you can record webcam video using "New Movie Recording." It also lets you capture audio from a microphone. Plus, it can show mouse clicks on the screen. - Cannot Record (Natively)
Unfortunately, it cannot record system sound. It is due to the Mac operating system's security. Also, it cannot record the screen and webcam together. - Hạn chế
Because it is a basic Trình phát video 4K and recorder, some features are missing. For one, it saves videos only in .mov format. As a result, file sizes can be large. In addition, it has no advanced editing features. So, there is no timeline editing. You also cannot add annotations or effects.
Part 2. How to Start a Screen Recording with QuickTime
If you want to know how to use QuickTime Player to record the screen with sound, it only takes a simple setup before you begin.
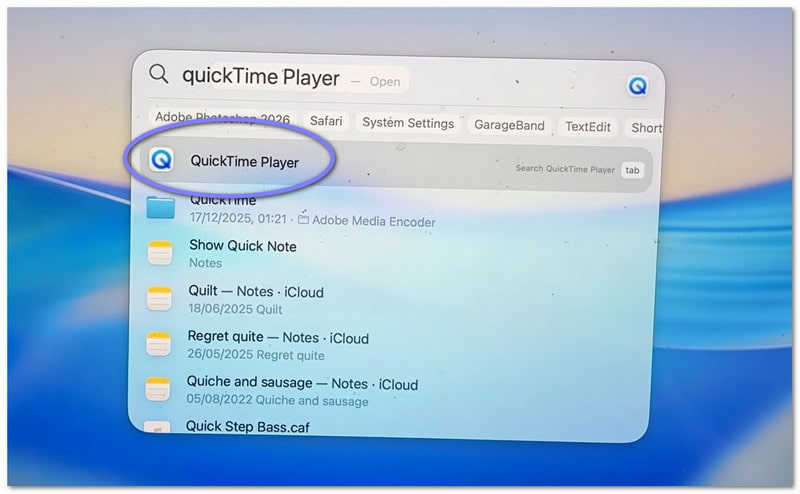
Bước 1First, go to your Các ứng dụng folder and open the program. If you want a faster way, use Spotlight search. Press Yêu cầu + Không gian, then type Trình phát QuickTime. Nhấn đi vào để mở nó.
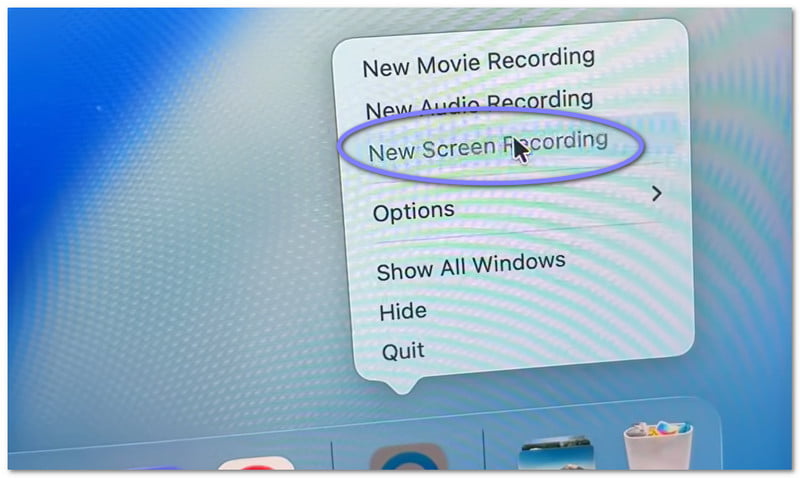
Bước 2Once the program is open, move to the top menu bar. Click Tập tin, sau đó chọn Ghi màn hình mới. You will see a small recording display appear. If you want a shortcut, press Yêu cầu + Điều khiển + N. It opens the screen recording program right away.
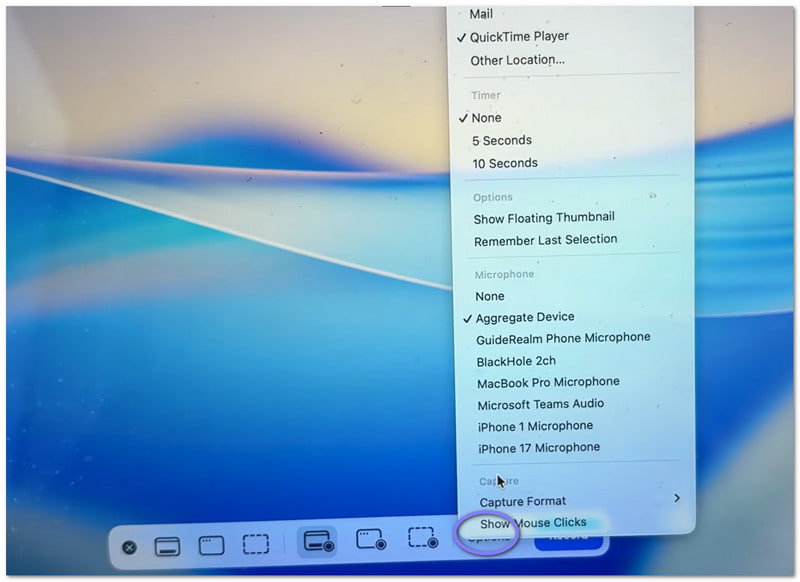
Bước 3Before you start, take a moment to check the settings. Click the Tùy chọn button on the recording panel. Here, you can choose your microphone if you want to record your voice. You can also set a short timer if you need time to prepare. In addition, pick where you want to save the file after recording.
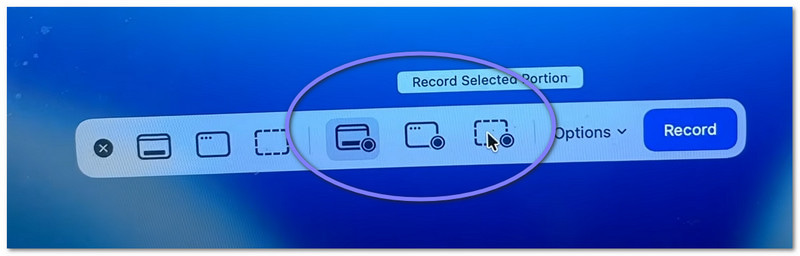
Bước 4Now, decide what you want to capture. If you want everything, just click anywhere on the screen. It will record the full screen. If you only need a part, select and drag your mouse to select an area.
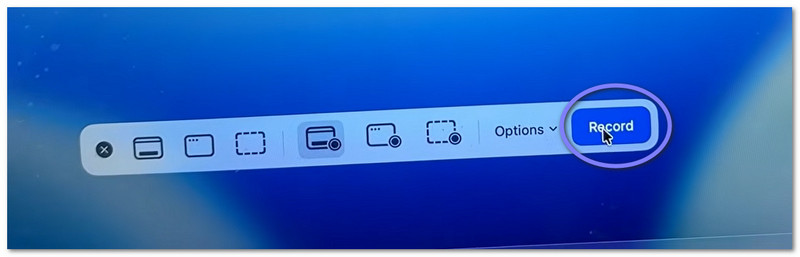
Bước 5Cuối cùng, nhấp vào Ghi button to begin. After a short delay, your recording will start. While recording, do your task as needed.
Part 3. How to Stop and Save a QuickTime Recording
Below, we will teach you how to stop recording the screen with QuickTime, as well as save your file properly:
Bước 1First, move your cursor to the top right of your screen. Look for the Ngừng lại button. It looks like a circle with a small square inside. Click it to end the recording. As another option, you can press Yêu cầu + Điều khiển + Thoát ra trên bàn phím của bạn.

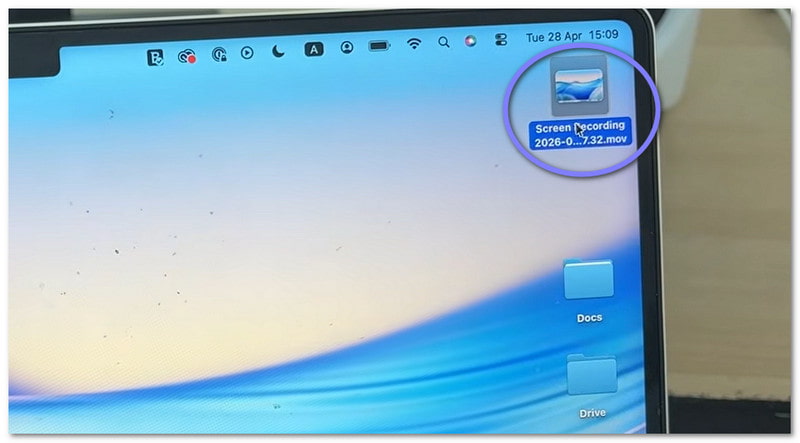
Bước 2After you stop, a small preview may appear at the corner of your screen. It is your recording. You can click it right away if you want to open and review the video. If you ignore it, the file will still be saved automatically.
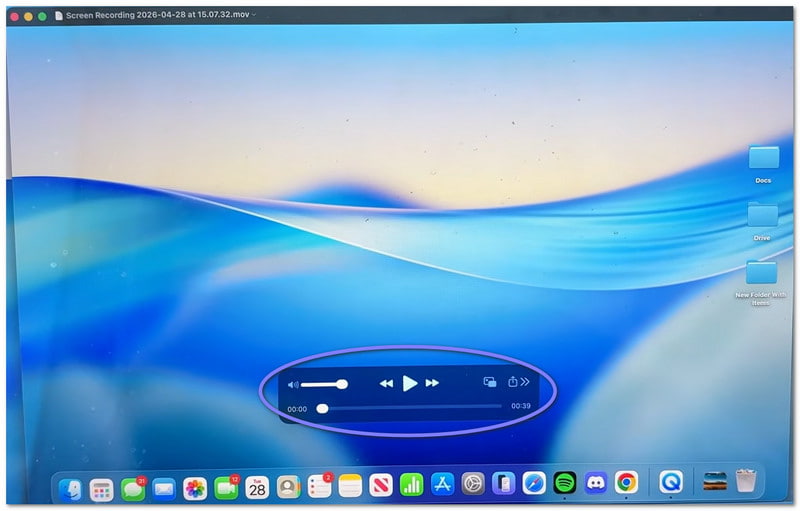
Bước 3By default, the video saves to your Desktop or your chosen location. If you want to save it yourself, open the video first. Then, head to the menu bar and click Tập tin, sau đó Cứu. After that, type a name for your file. Choose where you want to keep it, then click Cứu.
Bước 4Once the video opens, you can do simple edits. For example, you can trim the start or end. You can also rotate the video if needed. In addition, you can share it directly from the application.
Part 4. Troubleshooting
Sometimes, screen recording does not go as planned. Small issues can happen. The good part is that most of them are easy to fix in QuickTime Player.
1. "QuickTime Player encountered an error while recording your screen."
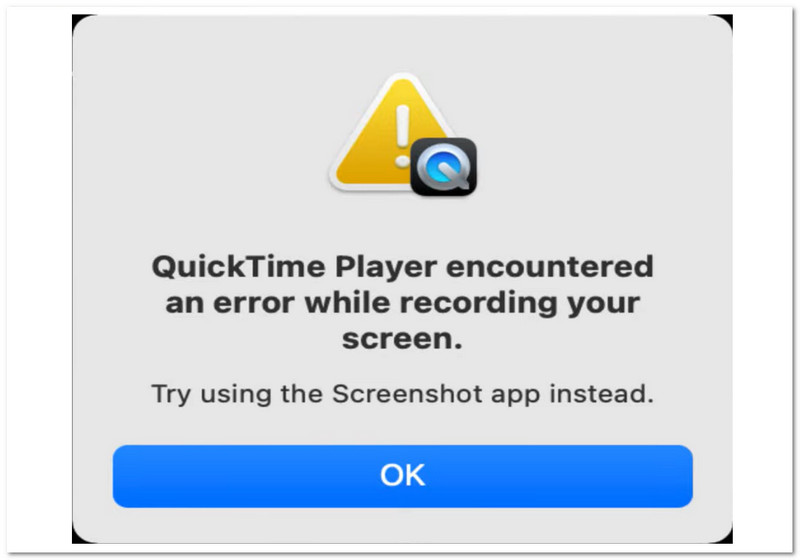
There are a few basic reasons why this "QuickTime Player encountered an error while recording your screen" error can appear.
First, check your save location. If you are saving to an external drive, try switching to your Desktop. It often fixes the problem. Next, check your storage. If your disk is full, recording may fail.
Also, make sure permissions are on. Go to Cài đặt hệ thống > Privacy & Security > Ghi màn hình. Then, check if QuickTime Player is allowed.
2. My QuickTime Recording Has No Sound!
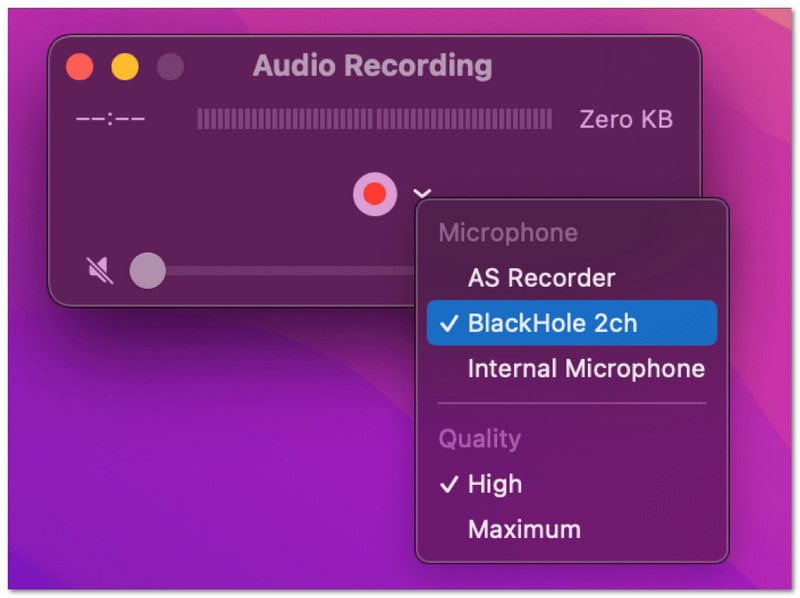
If your video has no sound, check the settings before recording. Open the Tùy chọn menu. Then, choose a microphone, like "Built-in Microphone." If no mic is selected, no sound will be recorded. Also, test your mic first to make sure it works.
3. QuickTime Won't Record System Audio

It is normal. QuickTime Player cannot record system sound by default. It is due to the Mac operating system rules. To record system audio, you need extra tools. For example, you can use Background Music or Loopback.
Part 5. Is There a QuickTime Alternative for Windows
Yes, there is a QuickTime to record screen alternative for Windows. And that is none other than AVAide Screen Recorder.

TẢI VỀ MIỄN PHÍ Đối với Windows 7 trở lên
 An toàn tải
TẢI VỀ MIỄN PHÍ Dành cho Mac OS X 10.13 trở lên
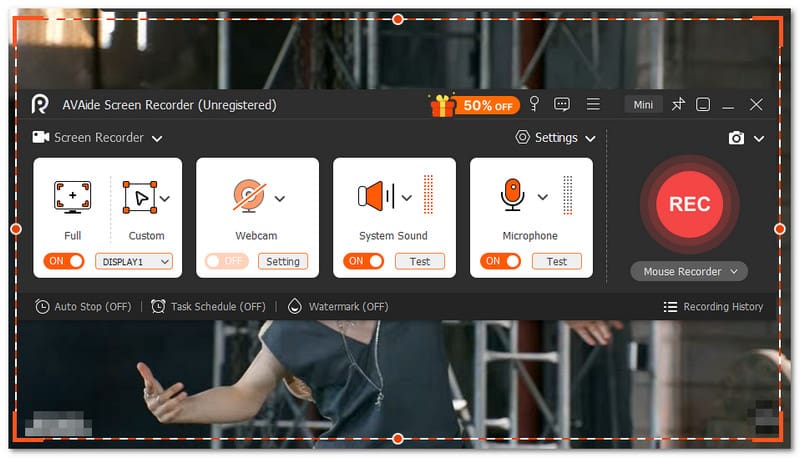
An toàn tảiWith this tool, you can easily choose full-screen or custom screen recording. You can also turn on the webcam, system sound, and microphone. You do not need a complex setup. You just enable what you need with one click. Even better, it lets you record screen video in high quality with no lag. It supports up to 4K resolution. So, everything looks clear and smooth.
So whatever you record, like tutorials, gameplay, meetings, or online videos, it can capture them with good clarity and steady performance.
Các tính năng chính:
- You can set a time for the tool to start and stop recording automatically.
- You can record for long hours smoothly without lag or performance issues.
- You can watch your recording right after and re-record if you are not satisfied.
- You can add text, images, whiteboard, and focus marks while recording to highlight key points.
- You can trim, cut, compress, merge, convert videos, and adjust or boost audio after recording.
How was learning how to use QuickTime Player to record the screen? It is just easy, right? You can start fast and finish with no trouble.
The only issue is that it has limited features. It does not have the power of a full recorder like AVAide Screen Recorder.
So, if you are a Windows user or even a Mac user, you can also rely on AVAide Screen Recorder. So, download it now and enjoy its features and smooth recording experience!
GIỚI THIỆU VỀ TÁC GIẢ

Ghi lại khoảnh khắc đẹp nhất với AVAide Screen Recorder. Screencast, tùy chỉnh và chia sẻ trong vài giây.