एंड्रॉइड उपयोगकर्ता जो सीखना चाहते हैं एंड्रॉइड पर ऑडियो कैसे रिकॉर्ड करें आप बिल्कुल सही जगह पर हैं, क्योंकि इस लेख में आपको आवश्यक सभी सरल विधियों के बारे में बताया जाएगा।
हम आपको बताएंगे कि बाहरी ऑडियो, जैसे आवाज और परिवेश की ध्वनियाँ, कैसे रिकॉर्ड करें, साथ ही अपने फोन सिस्टम से आंतरिक ऑडियो कैसे कैप्चर करें। साथ ही, हम आपको रिकॉर्डिंग से जुड़ी आम समस्याओं को हल करने में मदद करने के लिए एक बुनियादी समस्या निवारण गाइड भी देंगे।
- भाग 1. बाहरी ऑडियो रिकॉर्ड करना (आवाज और परिवेश की ध्वनियाँ)
- भाग 2. आंतरिक ऑडियो रिकॉर्ड करना (आपके फ़ोन के सिस्टम से)
- भाग 3. यदि आपको एंड्रॉइड के साथ बाहरी माइक्रोफ़ोन का उपयोग करने की आवश्यकता हो
- भाग 4. सामान्य समस्याओं का निवारण
- बोनस। बेहतर गुणवत्ता आउटपुट वाला सर्वश्रेष्ठ एंड्रॉइड स्क्रीन रिकॉर्डर।
भाग 1. बाहरी ऑडियो रिकॉर्ड करना (आवाज और परिवेश की ध्वनियाँ)
1. बिल्ट-इन वॉयस रिकॉर्डर ऐप का उपयोग करना
यह विधि एंड्रॉइड फोन पर ऑडियो रिकॉर्ड करने का एक आसान तरीका प्रदान करती है, जिसमें अधिकांश एंड्रॉइड फोन में पहले से मौजूद एक बुनियादी सुविधा का उपयोग करके आवाज और ध्वनि को कैप्चर किया जाता है।
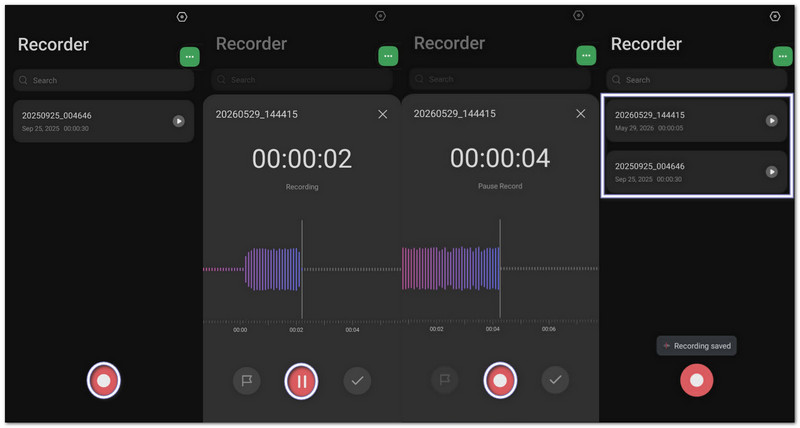
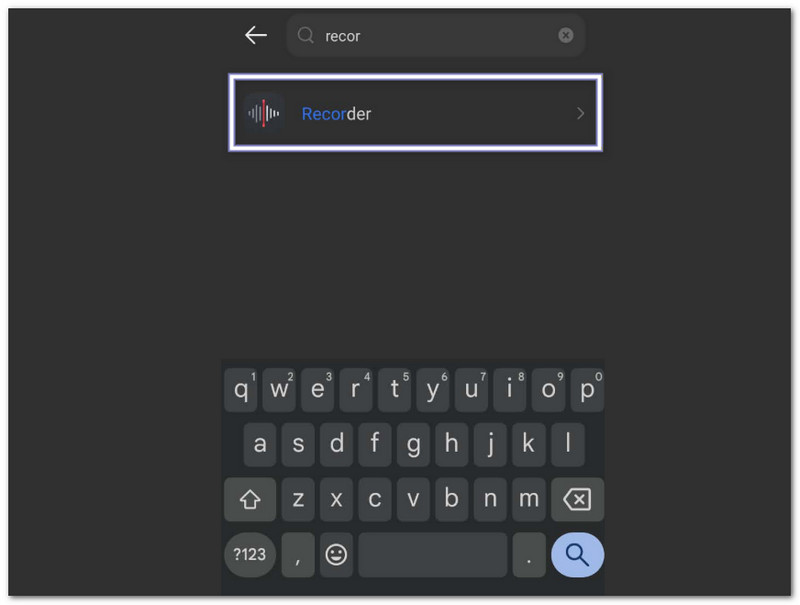
स्टेप 1अपना ऐप ड्रॉअर खोलें और खोजें वोईस रिकॉर्डर.
चरण दोलाल बटन पर टैप करें अभिलेख अपनी आवाज या आस-पास की आवाज़ों को रिकॉर्ड करना शुरू करने के लिए बटन दबाएं।
चरण 3नल ठहराव अगर आपको थोड़े समय के लिए आराम चाहिए, तो टैप करें। फिर शुरू करना जारी रखने के लिए।
चरण 4नल सहेजें रिकॉर्डिंग पूरी होने के बाद, आपकी ऑडियो फ़ाइल आपके फ़ाइल या माई फ़ाइल ऐप में सेव हो जाएगी। ज़्यादातर रिकॉर्डिंग MP3 या M4A फ़ाइल फॉर्मेट में सेव होती हैं।
2. बिना किसी ऐप के बाहरी ऑडियो रिकॉर्ड करना
यह तरीका एंड्रॉइड पर वॉयस रिकॉर्डिंग की सुविधा देता है, जिससे बिना किसी इंस्टॉल किए गए रिकॉर्डिंग ऐप को खोले, फोन की अंतर्निहित सुविधाओं का उपयोग करके तुरंत ऑडियो कैप्चर किया जा सकता है।
ए. गूगल रिकॉर्डर विजेट
स्टेप 1अपनी होम स्क्रीन पर किसी खाली जगह पर दबाकर रखें।
चरण दोनल विजेट और ढूंढो गूगल रिकॉर्डर विजेट।
चरण 3इसे खींचकर अपनी होम स्क्रीन पर ले जाएं।
चरण 4रिकॉर्डिंग शुरू करने के लिए किसी भी समय विजेट पर टैप करें।
बी. गूगल असिस्टेंट
स्टेप 1कहना "हे गूगलया पकड़ो शक्ति बटन।
चरण दोकहना "मेरी आवाज़ रिकॉर्ड करें" या "ऑडियो रिकॉर्डिंग शुरू करें।"
चरण 3गूगल असिस्टेंट रिकॉर्डर खोलेगा और ध्वनि रिकॉर्ड करना शुरू कर देगा।

सी. त्वरित सेटिंग टाइल
स्टेप 1अपनी स्क्रीन के ऊपर से नीचे की ओर स्वाइप करें।
चरण दोदेखो के लिए ऑडियो रिकॉर्डर या स्क्रीन अभिलेखी त्वरित सेटिंग में।
चरण 3रिकॉर्डिंग तुरंत शुरू करने के लिए इसे टैप करें।
चरण 4रिकॉर्डिंग पूरी होने पर उसे रोकें और फ़ाइल को सेव करें।
3. बेहतर गुणवत्ता और सुविधाओं के लिए तृतीय-पक्ष ऐप से रिकॉर्डिंग करना
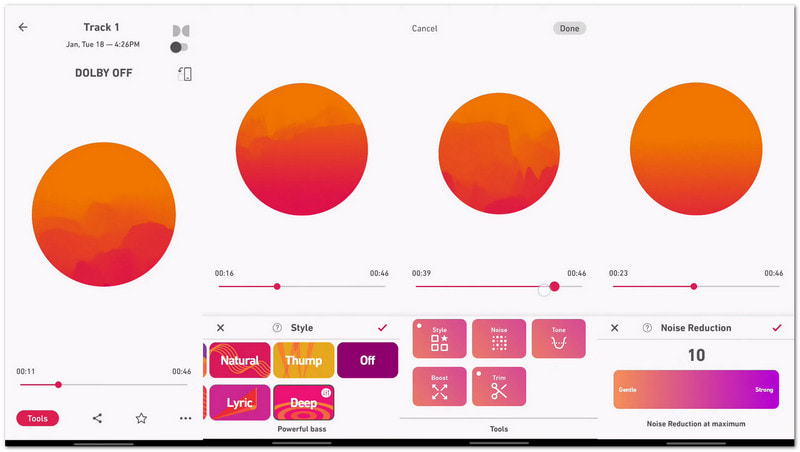
डॉल्बी ऑन जैसे थर्ड-पार्टी ऐप से रिकॉर्डिंग करने पर बेहतर साउंड क्लैरिटी और सभी प्रकार की ऑडियो ज़रूरतों के लिए ज़्यादा कंट्रोल मिलता है। यह आपके फ़ोन को आवाज़, संगीत और वीडियो के लिए एक सरल रिकॉर्डिंग स्टूडियो में बदल देता है।
यह नॉइज़ रिडक्शन, EQ और स्टूडियो इफ़ेक्ट्स के साथ ध्वनि को बेहतर बनाता है, जिससे साफ़ और अधिक पेशेवर ऑडियो मिलता है। सैमसंग और अन्य एंड्रॉइड ब्रांड्स पर ऑडियो रिकॉर्डिंग सीखने के लिए यह वास्तव में उपयोगी है।
स्टेप 1इंस्टॉल डॉल्बी ऑन गूगल प्ले स्टोर से।
चरण दोऐप खोलें और दबाएं अभिलेख बटन।
चरण 3अपनी आवाज़, संगीत या बैकग्राउंड साउंड रिकॉर्ड करें। ऐप अपने आप शोर कम कर देता है और आवाज़ की स्पष्टता बढ़ा देता है।
चरण 4अंतर्निहित ऑडियो टूल का उपयोग करके संपादन के बाद रिकॉर्डिंग को सहेजें या साझा करें।
भाग 2. आंतरिक ऑडियो रिकॉर्ड करना (आपके फ़ोन के सिस्टम से)
1. अंतर्निर्मित स्क्रीन रिकॉर्डर का उपयोग करना
यह सीखने के लिए आधिकारिक एंड्रॉइड सुविधा है। एंड्रॉइड पर आंतरिक ऑडियो कैसे रिकॉर्ड करेंऔर यह स्क्रीन गतिविधि के साथ-साथ सिस्टम की ध्वनि को भी स्थिर तरीके से रिकॉर्ड करता है।
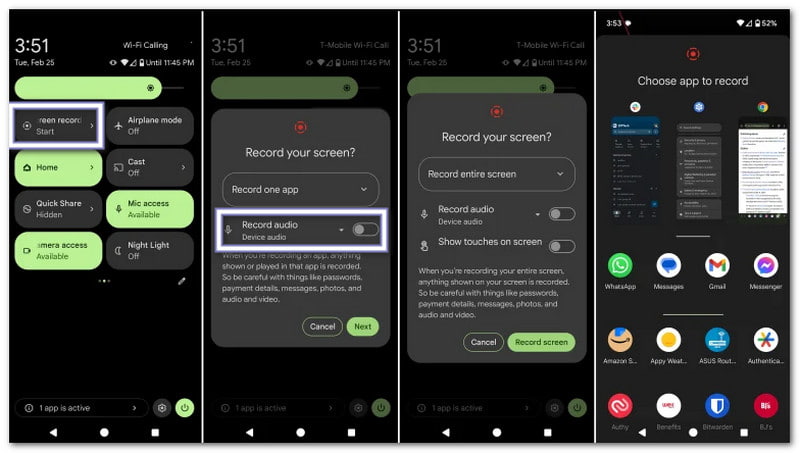
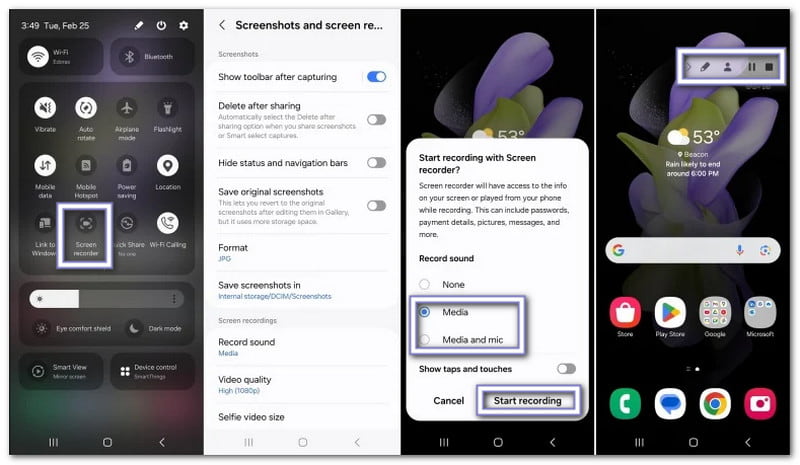
स्टेप 1इसे खोलने के लिए अपनी स्क्रीन के ऊपर से दो बार नीचे की ओर स्वाइप करें। त्वरित सेटिंग.
चरण दोपाना स्क्रीन अभिलेखीयदि यह अनुपस्थित है, तो दबाएँ। पेंसिल या संपादित करें बटन को पहले जोड़ें।
चरण 3नल स्क्रीन अभिलेखी और चुनें डिवाइस ऑडियो या मीडिया तथा माइक्रोफ़ोन ध्वनि स्रोत के रूप में।
चरण 4रिकॉर्डिंग शुरू करें और वह ऐप, गेम या वीडियो खोलें जिसे आप रिकॉर्ड करना चाहते हैं। रिकॉर्डिंग पूरी होने पर उसे बंद कर दें।
2. तृतीय-पक्ष ऐप का उपयोग करके केवल आंतरिक ऑडियो रिकॉर्ड करना (वीडियो नहीं)।
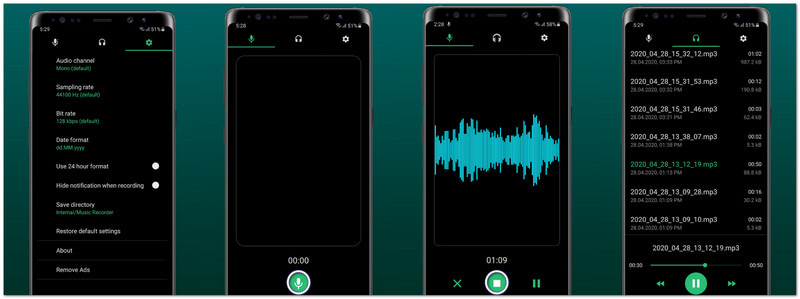
यदि आप एंड्रॉइड पर केवल ऑडियो रिकॉर्ड करने का तरीका ढूंढ रहे हैं, तो जया जोन टेक द्वारा विकसित म्यूजिक रिकॉर्डर - सॉन्ग रिकॉर्डर एक सरल समाधान है।
इस वॉयस रिकॉर्डर ऐप यह ऐप्स, गेम्स और म्यूजिक प्लेयर्स से उच्च गुणवत्ता वाली ध्वनि कैप्चर करता है। आप बिटरेट, सैंपल रेट को कॉन्फ़िगर कर सकते हैं और बेहतर आउटपुट के लिए मोनो या स्टीरियो का विकल्प चुन सकते हैं। यह पॉज़, रिज्यूम, एडिटिंग, शेयरिंग और लचीले उपयोग के लिए हिडन रिकॉर्डिंग मोड को भी सपोर्ट करता है।
स्टेप 1इंस्टॉल संगीत रिकॉर्डर - गीत रिकॉर्डर इसे गूगल प्ले स्टोर से डाउनलोड करें और ऐप खोलें।
चरण दोआवश्यक अनुमतियाँ प्रदान करें माइक्रोफ़ोन तथा भंडारण पहुंच.
चरण 3खुला हुआ समायोजन और बदलें रिकॉर्डिंग स्रोत से माइक प्रति आंतरिक ऑडियोआप यह भी चुन सकते हैं एमपी 3 या WAV प्रारूप।
चरण 4नल अभिलेख और वह ऑडियो, गेम या वीडियो चलाएं जिसे आप रिकॉर्ड करना चाहते हैं। ऐप केवल आंतरिक ध्वनि रिकॉर्ड करता है।
भाग 3. यदि आपको एंड्रॉइड के साथ बाहरी माइक्रोफ़ोन का उपयोग करने की आवश्यकता हो
साधारण रिकॉर्डिंग के लिए आपका फ़ोन माइक्रोफ़ोन ठीक काम करता है। लेकिन अगर आप स्पष्ट आवाज़, कम शोर या तेज़ आवाज़ रिकॉर्ड करना चाहते हैं, तो एक बाहरी माइक्रोफ़ोन बहुत मददगार साबित हो सकता है।
विकल्प ए: यूएसबी-सी माइक्रोफोन
USB-C माइक्रोफ़ोन इस्तेमाल करने में आसान और तेज़ होते हैं। आपको बस इन्हें अपने फ़ोन के USB-C पोर्ट में लगाना है और रिकॉर्डिंग शुरू कर देनी है। ज़्यादातर Android फ़ोन इन्हें अपने आप पहचान लेते हैं। ये अक्सर फ़ोन के बिल्ट-इन माइक्रोफ़ोन से ज़्यादा साफ़ आवाज़ और बेहतर वॉइस क्लैरिटी देते हैं। ये कंटेंट क्रिएटर्स, स्टूडेंट्स और मोबाइल वीडियो रिकॉर्डिंग के लिए बेहतरीन हैं।
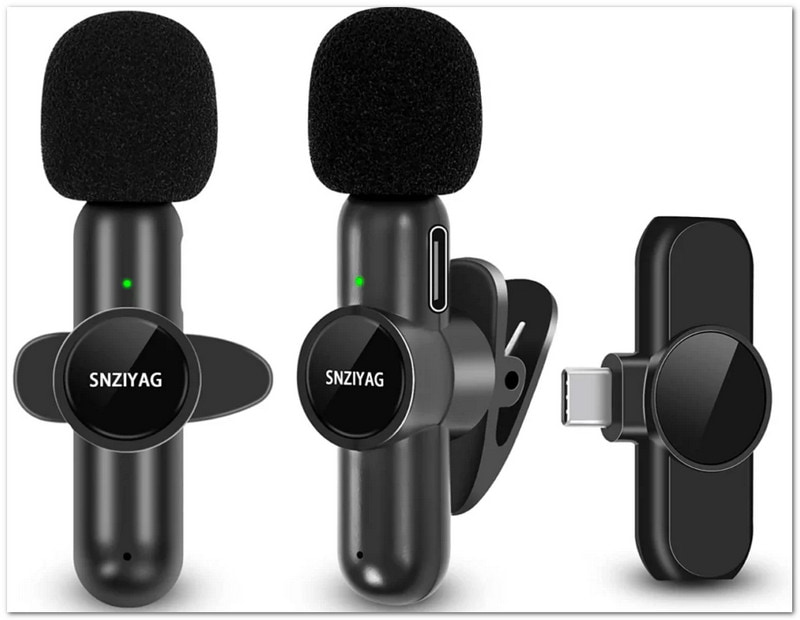
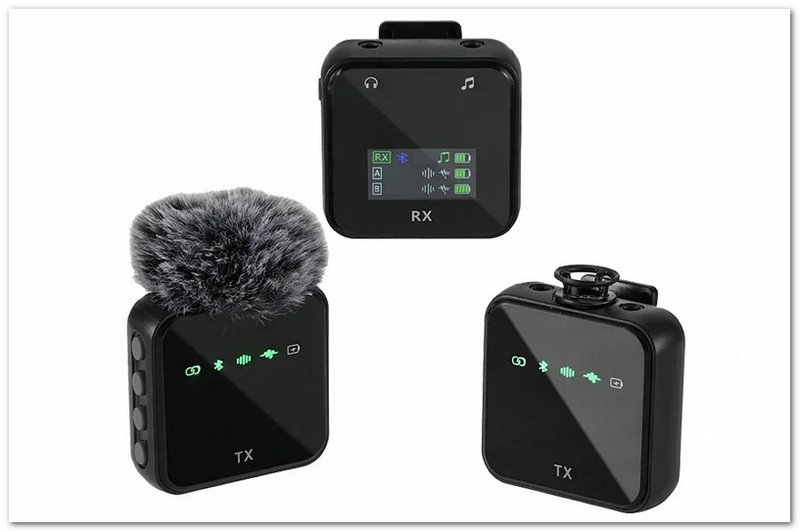
विकल्प बी: वायरलेस ब्लूटूथ माइक्रोफोन
ब्लूटूथ माइक्रोफोन की मदद से आप बिना तारों के रिकॉर्डिंग कर सकते हैं। इन्हें अपने फोन की ब्लूटूथ सेटिंग से कनेक्ट करें और सामान्य तरीके से रिकॉर्डिंग शुरू करें। अगर आप वीडियो बनाते या बोलते समय इधर-उधर घूमते हैं तो ये बहुत उपयोगी होते हैं। कई लोग इनका इस्तेमाल व्लॉग, प्रेजेंटेशन, आउटडोर वीडियो और इंटरव्यू के लिए करते हैं क्योंकि ये पोर्टेबल और ले जाने में आसान होते हैं।
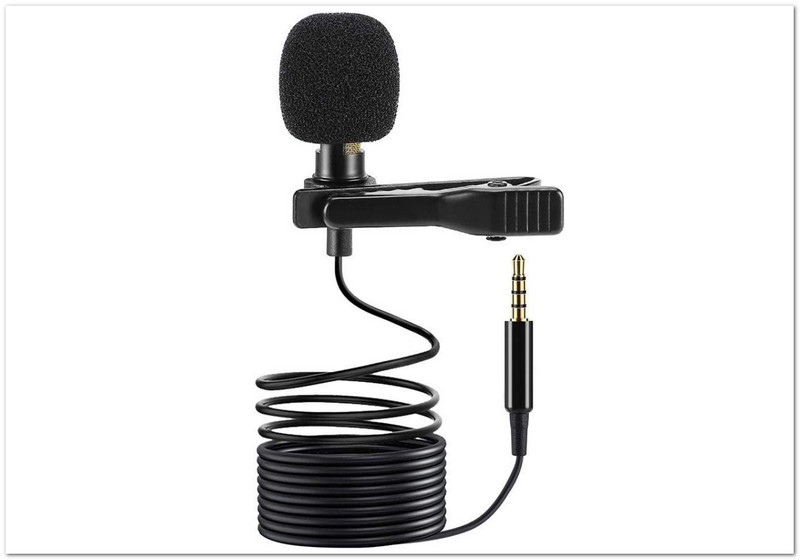
विकल्प C: 3.5 मिमी माइक्रोफोन
3.5 मिमी माइक्रोफ़ोन आपके एंड्रॉइड फ़ोन के हेडफ़ोन जैक के ज़रिए कनेक्ट होते हैं। अगर आपके डिवाइस में हेडफ़ोन जैक नहीं है, तो आप USB-C से 3.5 मिमी एडाप्टर का इस्तेमाल कर सकते हैं। ये माइक्रोफ़ोन किफ़ायती हैं और वॉइस नोट्स, स्कूल प्रोजेक्ट, कॉल और साधारण रिकॉर्डिंग के लिए इस्तेमाल करने में आसान हैं। बेहतर ऑडियो क्वालिटी चाहने वाले शुरुआती लोगों के लिए भी ये एक अच्छा विकल्प हैं, वो भी ज़्यादा पैसे खर्च किए बिना।
भाग 4. सामान्य समस्याओं का निवारण
आपने एंड्रॉइड पर ऑडियो रिकॉर्डिंग सीख ली है। लेकिन अगर आपको अप्रत्याशित समस्याओं का सामना करना पड़े तो क्या होगा? क्या आप जानते हैं कि ऐसे में क्या करना चाहिए?
यह थोड़ा मुश्किल लग सकता है, खासकर अगर आप शुरुआती हैं। लेकिन चिंता न करें। हम आपको बीच में नहीं छोड़ेंगे। अगर आपको कभी नीचे दी गई जैसी समस्याओं का सामना करना पड़े, तो हम आपको आसान समाधान भी देंगे जिन पर आप भरोसा कर सकते हैं।
1. आंतरिक ऑडियो विकल्प असंतुलित दिखाई दे रहा है।
एंड्रॉइड कुछ ऐप्स में आंतरिक ऑडियो को ब्लॉक कर देता है। कॉपीराइट नियमों के कारण भी यह प्रतिबंधित हो सकता है। बिल्ट-इन ऑडियो का उपयोग करें। स्क्रीन अभिलेखी से त्वरित सेटिंगयह सिस्टम साउंड के लिए बेहतर काम करता है। यदि संभव हो, तो ऑडियो को इस पर सेट करें। डिवाइस ऑडियो या मीडिया तथा माइक.
2. बाहरी माइक्रोफ़ोन पहचाना नहीं गया
ऐसा तब होता है जब फोन माइक को डिटेक्ट नहीं कर पाता। इसे चालू करें ओटीजी में समायोजन के लिए यूएसबी-सी माइक। जाँच करना केबल तथा एडेप्टर समर्थन और एक के लिए डीएसी चिपऐप खोलने से पहले माइक को प्लग इन करें। कोशिश करें कैमरा खोलें यदि ज़रूरत हो तो।
3. वॉयस रिकॉर्डर दिखाई नहीं दे रहा है
ऐप छिपा हुआ या निष्क्रिय हो सकता है। खोलें एप्लिकेशन बनाने वाला और खोजें रिकॉर्डर. के लिए जाओ समायोजन > ऐप्स और यदि यह अक्षम है तो इसे सक्षम करें।
4. बैकग्राउंड रिकॉर्डिंग बंद हो जाती है
बैटरी बचाने के लिए Android ऐप्स बंद कर सकता है। बैटरी अनुकूलन प्रति अप्रतिबंधितऐप को लॉक करें हाल के ऐप्स इसलिए यह खुला रहता है।
5. रिकॉर्डिंग सेव नहीं हो रही हैं
यह अक्सर स्टोरेज या अनुमति संबंधी समस्या होती है। अनुमति दें भंडारण या फ़ाइल अनुमतिस्टोरेज फुल है या नहीं, यह चेक करें। यदि फुल है तो उसे खाली करें। कैश और दोबारा कोशिश करें।
बोनस: बेहतर गुणवत्ता आउटपुट वाला सर्वश्रेष्ठ एंड्रॉइड स्क्रीन रिकॉर्डर
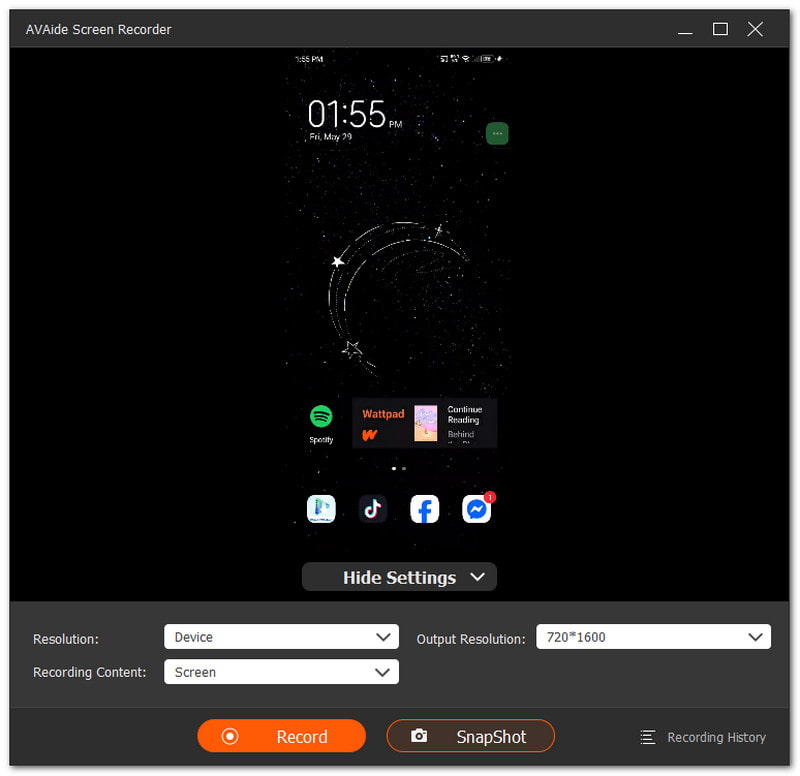
AVAide स्क्रीन रिकॉर्डर इसमें एंड्रॉइड डिवाइसों के लिए फ़ोन रिकॉर्डर फ़ीचर मौजूद है। यह साफ़ और स्पष्ट वीडियो आउटपुट के लिए 4K रिज़ॉल्यूशन तक सपोर्ट करता है। यह आपको अपने फ़ोन के माइक्रोफ़ोन, कंप्यूटर स्पीकर की आवाज़ या दोनों को एक साथ रिकॉर्ड करने की सुविधा भी देता है। इसके अलावा, आप रिकॉर्डिंग के दौरान स्नैपशॉट ले सकते हैं ताकि तुरंत रिकॉर्डिंग हो सके। यह मोबाइल ऐप गेम्स, ऐप ट्यूटोरियल और वीडियो कॉल के लिए बेहद उपयोगी है।
- iPhone पर ऑडियो रिकॉर्ड करता हैएंड्रॉइड, विंडोज और मैक।
- यह फोन की स्क्रीन को उच्च गुणवत्ता वाले रिज़ॉल्यूशन में कैप्चर करता है।
- यह ट्रिम, मर्ज, कन्वर्ट और ऑडियो बूस्ट जैसे संपादन कार्यों की अनुमति देता है।
- यह MP4, WMV, AVI, GIF और MP3 जैसे फॉर्मेट को सपोर्ट करता है।

 सुरक्षित डाऊनलोड
अब आप जानते हैं एंड्रॉइड पर ध्वनि कैसे रिकॉर्ड करें और समस्या आने पर क्या करना है। अगर कोई समस्या आती है, तो बस अपनी सेटिंग्स, अनुमतियां और रिकॉर्डिंग टूल की जांच करें।
बेहतर परिणामों के लिए, आप एक शक्तिशाली उपकरण का भी उपयोग कर सकते हैं जैसे कि AVAide स्क्रीन रिकॉर्डरयह एंड्रॉइड उपयोगकर्ताओं के साथ-साथ विंडोज और मैक उपयोगकर्ताओं के लिए भी सुचारू रिकॉर्डिंग और उच्च-स्पष्टता वाला आउटपुट प्रदान करता है।
लेखक के बारे में

ऑडियो, ऑनलाइन मीटिंग, गेमप्ले वीडियो, संगीत, वेब कैमरा आदि के साथ स्क्रीन गतिविधियों को कैप्चर करें।