Quieres tu propio tono de llamada personalizado. No uno de cualquier sitio. Algo que hayas creado tú mismo para tus llamadas y alertas.
Estamos aquí para ayudarte con eso. Te mostraremos diferentes maneras de grabar un tono de llamada en diferentes sistemas. También compartiremos consejos sencillos para obtener mejores resultados. Así que, prepara tu voz o sonido para un tono de llamada personalizado.
Parte 1. Cómo grabar un tono de llamada en el iPhone
1. Convertir una nota de voz en tono de llamada (la forma más sencilla)
La aplicación Notas de Voz graba sonido y lo convierte inmediatamente en un tono de llamada personalizado y utilizable con herramientas básicas de edición. Esta sección te enseñará exactamente cómo convertir una grabación de voz en un tono de llamada en un iPhone.
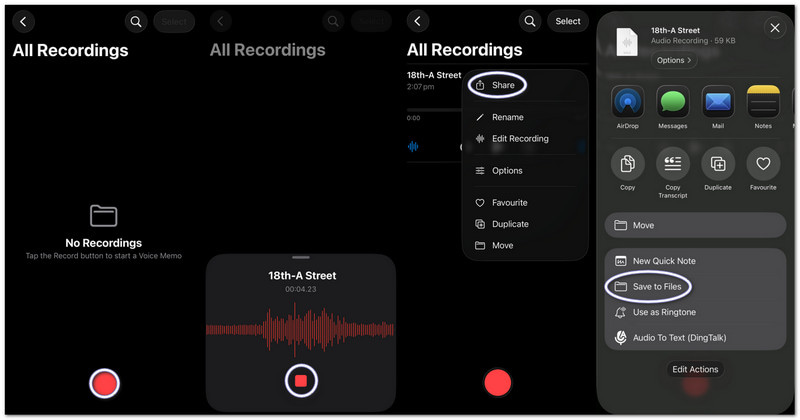
Paso 1Inicia la aplicación Notas de Voz en tu iPhone.
Paso 2Toca el rojo Registro pulsa el botón y reproduce o habla tu audio.
Paso 3Grifo Detener Cuando hayas terminado.
Etapa 4Toque en el tres puntos (...) en tu grabación.
Paso 5Escoger Guardar en archivos para guardar tu audio y usarlo más tarde como tono de llamada.
2. Cualquier archivo de audio (MP3/M4A) para tono de llamada
Los archivos de audio MP3 o M4A almacenados desde descargas o aplicaciones de música se pueden seleccionar y configurar como tono de llamada en un iPhone.
Paso 1Descarga tu archivo MP3 o M4A y guárdalo en la Archivos aplicación.
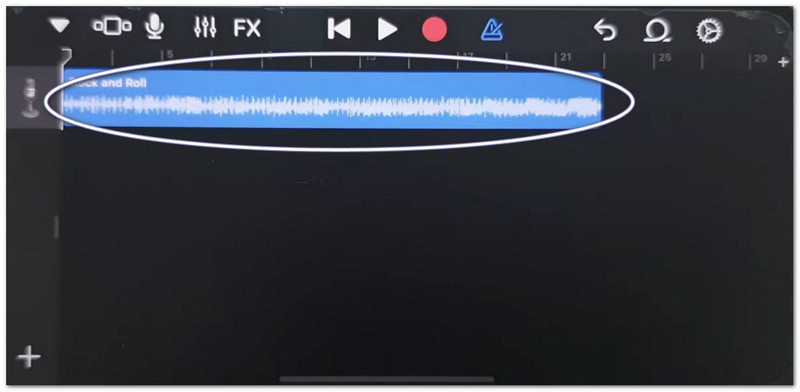
Paso 2Correr Banda de garage y escoger Grabador de audio.
Paso 3Localiza tu audio en Archivos, luego arrástralo a la línea de tiempo.
Etapa 4Ir ArchivosBusca tu audio y arrástralo a la línea de tiempo.
Paso 5Recórtalo a menos de 30 segundos y luego pulsa Cuota > Tono de llamada > Exportar.
3. Uso de GarageBand (para versiones antiguas de iOS)
GarageBand edita clips de audio con controles precisos, lo que permite a los usuarios cortar, organizar y exportar tonos de llamada personalizados fácilmente, lo que simplifica la comprensión de cómo configurar una grabación de voz como tono de llamada en un iPhone.
Paso 1Abierto Banda de garage y seleccione Grabador de audio.
Paso 2Toque en el Vista de las pistas, luego abre el Navegador de bucles.
Paso 3Importa tu nota de voz o archivo de audio guardado.
Etapa 4Arrástralo a la línea de tiempo y recórtalo a 30 segundos o menos.
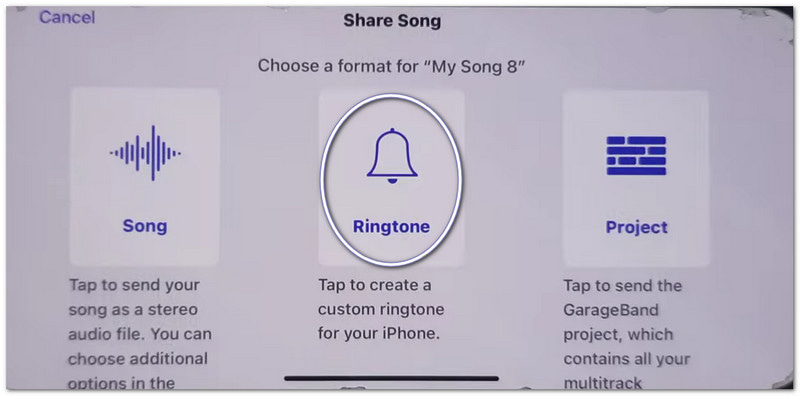
Paso 5Grifo Mis canciones, entonces Cuota > Tono de llamada > Exportar.
Solución de problemas: "La función Compartir notas en iPhone no funciona"
Si la función Compartir se congela, se bloquea o no muestra las aplicaciones al compartir notas de voz o archivos de GarageBand, pruebe estas soluciones.
Soluciones rápidas:
- Reinicio forzado: Presione Subir volumen y Bajar volumenA continuación, mantén pulsado el botón de encendido hasta que aparezca el símbolo de Apple.
- Actualizar iOS: Ir a Ajustes > General > Actualización de software. Instale las actualizaciones. Corrigen los errores del sistema.
- Activar/desactivar AirDrop: Abrir Centro de control Para desactivar AirDrop, desactívalo y vuelve a activarlo. La función de compartir se actualizará.
Correcciones del sistema
- Libera espacio de almacenamiento: Mantén al menos 2 gigabytes de espacio libre. Elimina archivos o videos que no uses. El poco espacio de almacenamiento puede impedir que la función Compartir funcione correctamente.
Solución final
- Restablecer todos los ajustes: Ir a Ajustes > General > Transferir o Reiniciar iPhone > Restablecer todos los ajustesNo elimina tus datos. Solo restablece la configuración del sistema y puede solucionar problemas con la función Compartir.
Parte 2. Cómo grabar un tono de llamada en Android
1. Usar una aplicación para crear tonos de llamada (la más recomendada)
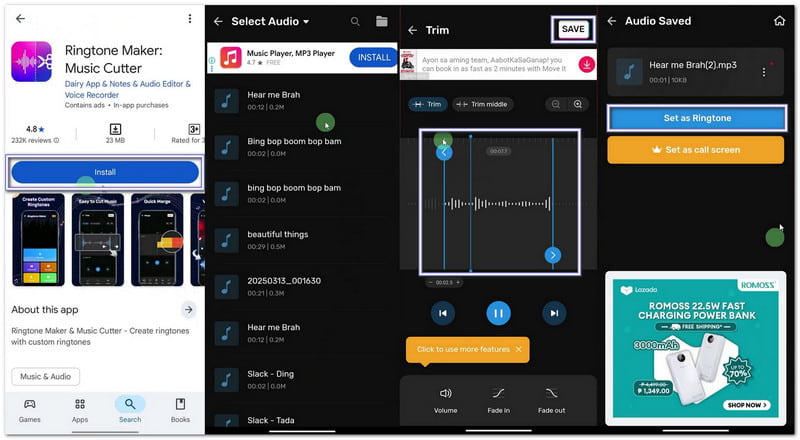
Si quieres aprender a grabar tu propio tono de llamada, puedes usar Maker: Music Cutter en Google Play Store. Su objetivo principal es ayudarte a recortar canciones, cortar fragmentos de audio exactos y configurarlos al instante como tonos de llamada personalizados en teléfonos Android.
Paso 1Abre Google Play Store. Busca Creador de tonos de llamada: Cortador de músicaInstálalo. Luego, presiona Abierto.
Paso 2Grifo Empezar. Elegir Recorte de audioConcede los permisos necesarios para que la aplicación pueda acceder a tus archivos.
Paso 3Selecciona una canción o un archivo de audio de tu teléfono. Desliza los controles para elegir el inicio y el final de tu tono de llamada.
Etapa 4 Grifo Cortar o AhorrarSeleccione el nivel de claridad si es necesario. Pulse Confirmar. Luego, haga clic Establecer como tono de llamadaPermita el acceso a la configuración del sistema y elija el tono de llamada predeterminado.
2. Ajustes integrados (para audio descargado)
La configuración de Android permite seleccionar directamente los archivos de audio guardados y asignarlos como tonos de llamada sin necesidad de aplicaciones o herramientas adicionales.
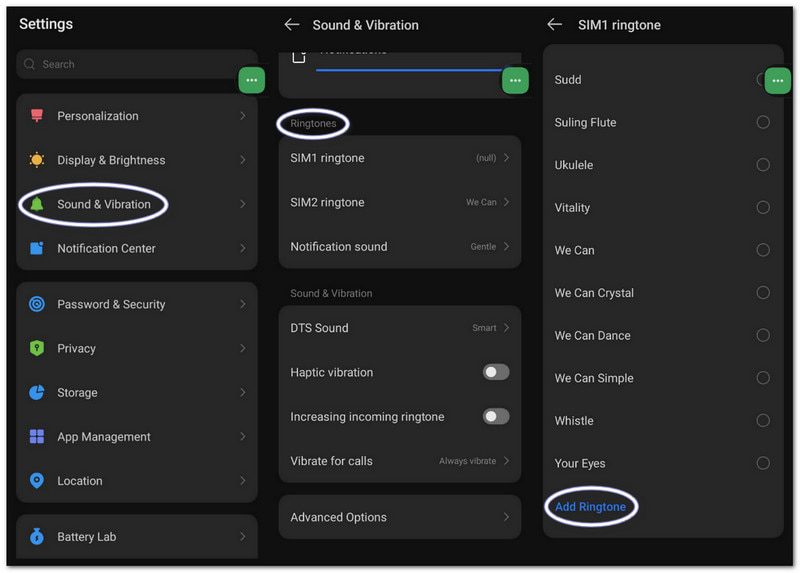
Paso 1Ve a la configuración de tu teléfono. Toca Sonido y vibración o Sonar.
Paso 2Grifo tono de llamada del teléfono para ver las opciones disponibles.
Paso 3Toque en el Más botón o el Agregar tono de llamada botón en la parte superior.
Etapa 4Explora tu almacenamiento. Selecciona tu archivo de audio. Toca HechoA continuación, confirma para establecerlo como tono de llamada predeterminado.
Parte 3. Cómo convertir una grabación de pantalla en un tono de llamada.
También puedes convertir una grabación de pantalla en un tono de llamada en una computadora Windows o Mac usando Grabador de pantalla AVAideCuenta con un modo de grabación de audio que captura el sonido de tu sistema y tu voz, lo que facilita la grabación de un tono de llamada.
También ofrece ajustes de sonido, donde puedes subir o bajar el volumen, activar la cancelación de ruido y recibir una advertencia cuando no se detecta audio. Por supuesto, puedes exportar tu tono de llamada en formatos compatibles como MP3 y M4A, que funcionan bien en dispositivos móviles.
Paso 1Descarga e instala AVAide Screen Recorder en tu ordenador Windows o Mac.

DESCARGA GRATUITA Para Windows 7 o posterior
 Descarga segura
DESCARGA GRATUITA Para Mac OS X 10.13 o posterior
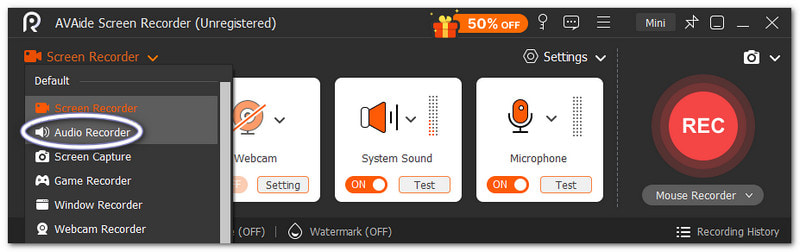
Descarga seguraPaso 2Se inicia en modo Grabador de pantalla. Haga clic en el menú desplegable. Seleccione Grabador de audio para una mejor captura de sonido.
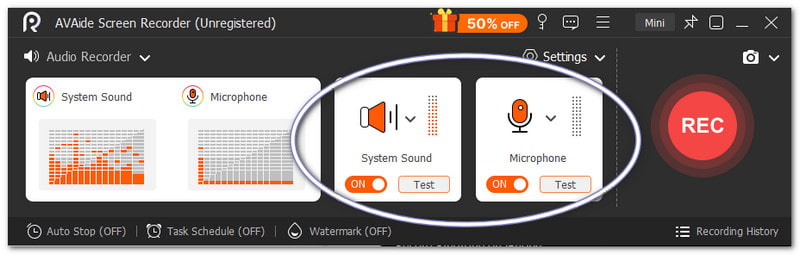
Paso 3Encender Sonido del sistema para grabar audio interno. Encienda el Micrófono Si quieres que se añada tu voz. También puedes ajustar el volumen si es necesario.
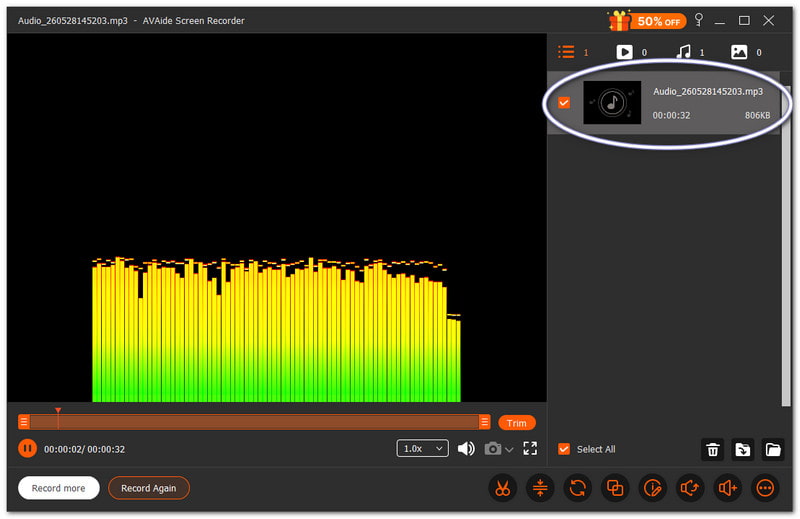
Etapa 4Golpear REC Para empezar, espere a que termine la cuenta atrás. Una vez iniciada, reproduzca el sonido que desee. Pulse el botón. Detener Pulsa el botón una vez que hayas terminado. Después, el archivo se guarda automáticamente. También puedes recortarlo o editarlo antes de usarlo como tono de llamada.
No hay duda de que este Mac y Grabadora de audio de Windows puede ayudarte a crear un tono de llamada que te guste y que se ajuste a tus preferencias personales para tu dispositivo.
Parte 4. Pasos específicos de Samsung
1. Uso de la grabadora de pantalla integrada
Samsung Screen Recorder captura el audio de los vídeos y ayuda a convertir los sonidos grabados en tonos de llamada utilizables.
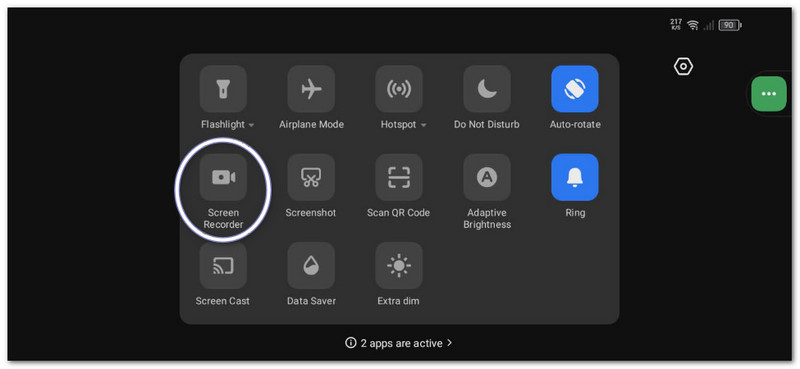
Paso 1En el Panel rápido, desliza hacia abajo. Presiona el Grabador de pantalla botón. Antes de comenzar, seleccione el Sonidos de los medios.
Paso 2Reproduce el vídeo o la música que quieras grabar. Deja que la grabadora de pantalla lo grabe con sonido.
Paso 3Cuando termines, deja de grabar. El archivo se guardará en tu galería. Usa una aplicación para convertir vídeo a MP3 para extraer el audio.
Etapa 4Mueva el archivo MP3 a su Almacenamiento interno > Carpeta de tonos de llamada para que pueda usarse más adelante.
Este método muestra Grabación de pantalla de SamsungPor lo tanto, asegúrese de convertir el video grabado a solo audio para que pueda usarse como tono de llamada.
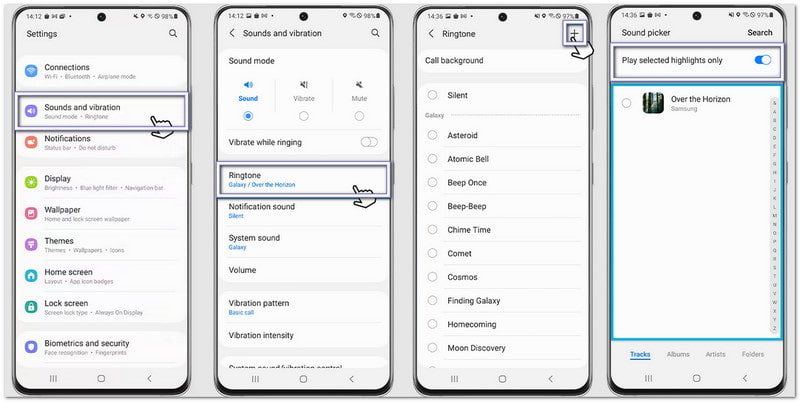
2. Creador de tonos de llamada integrado
La configuración de tonos de llamada de Samsung permite a los usuarios elegir canciones, recortar fragmentos destacados y asignarlas instantáneamente como tono de llamada predeterminado del teléfono.
Paso 1Abre tu teléfono y ve a Ajustes. Grifo Sonidos y vibraciones. Luego, seleccione Tono de llamada.
Paso 2Toque en el Agregar pulsa el botón y selecciona una canción o grabación guardada en tu teléfono.
Paso 3Permitir Reproducir solo los momentos más destacados seleccionados. Si está disponible, Samsung recortará automáticamente la mejor parte del audio.
Etapa 4Confirma tu selección y el sonido se establecerá como tono de llamada predeterminado.
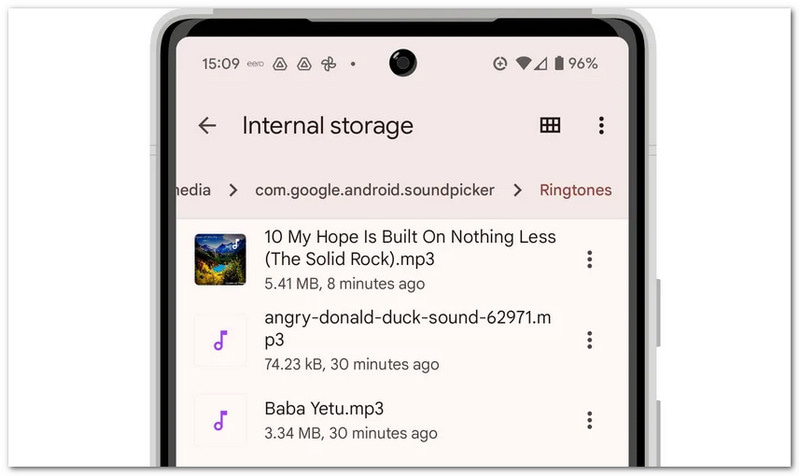
3. Método del administrador de archivos
El administrador de archivos de Samsung organiza los archivos de audio y permite copiarlos directamente a la carpeta de tonos de llamada para la detección automática de tonos.
Paso 1Lanzar el Mis archivos aplicación en tu teléfono Samsung.
Paso 2Ir Descargas o Audio Carpeta. Localiza el sonido grabado o descargado.
Paso 3Mantén pulsado el archivo. Toca Dupdo. Luego, ve a Almacenamiento interno > tonos de llamada.
Etapa 4Pega el archivo dentro de la carpeta Tonos de llamada. Luego, regresa a la configuración de Sonido. Tu archivo aparecerá ahora en la lista de tonos de llamada.
Parte 5. Consejos profesionales para obtener los mejores resultados.
Antes de configurar tu tono de llamada, te recomendamos seguir algunos consejos sencillos. Esto hará que tu tono suene nítido y funcione mejor en tu teléfono.
Consejo #1: Sé breve.
Configura tu tono de llamada para que dure solo entre 30 y 40 segundos. Así se mantendrá fluido y totalmente compatible con teléfonos Android.
Consejo #2: Utilice el formato correcto.
Utiliza archivos MP3 o M4A siempre que sea posible. Estos formatos funcionan correctamente en la mayoría de los dispositivos Android sin errores.
Consejo #3: Compruebe primero el volumen.
Reproduce el tono de llamada antes de configurarlo. Asegúrate de que no sea ni demasiado alto ni demasiado bajo. Así evitarás sorpresas cuando alguien te llame.
Has aprendido Cómo grabar un tono de llamada en un iPhone, Android y ordenador de escritorio. Así que, independientemente del dispositivo que uses, puedes crear tu propio tono de llamada personalizado en cualquier momento.
Para usuarios de Windows y Mac, Grabador de pantalla AVAide Esto facilita el proceso. Puedes grabar tu propia voz o capturar el audio de tu sistema. También puedes recortar el archivo después de grabar. Así, conservarás solo la mejor parte para tu tono de llamada.
SOBRE EL AUTOR

Capture actividades de pantalla con audio, reuniones en línea, videos de juegos, música, cámara web, etc.
Grabación de audio