Chcesz mieć swój własny, spersonalizowany dzwonek. Nie jakiś znikąd. Coś, co sam stworzysz, do połączeń i powiadomień.
Jesteśmy tu, żeby Ci w tym pomóc. Pokażemy Ci różne sposoby nagraj dzwonek Na różnych systemach. Podzielimy się również prostymi wskazówkami, jak uzyskać lepsze rezultaty. Przygotuj więc swój głos lub dźwięk na spersonalizowany dzwonek.
Część 1. Jak nagrać dzwonek na iPhonie
1. Z notatki głosowej na dzwonek (najprostszy sposób)
Aplikacja Voice Memos nagrywa dźwięk i natychmiast przekształca go w użyteczny, niestandardowy dzwonek za pomocą podstawowych narzędzi przycinania. W tej części dowiesz się, jak przekształcić nagranie głosowe w dzwonek na iPhonie.
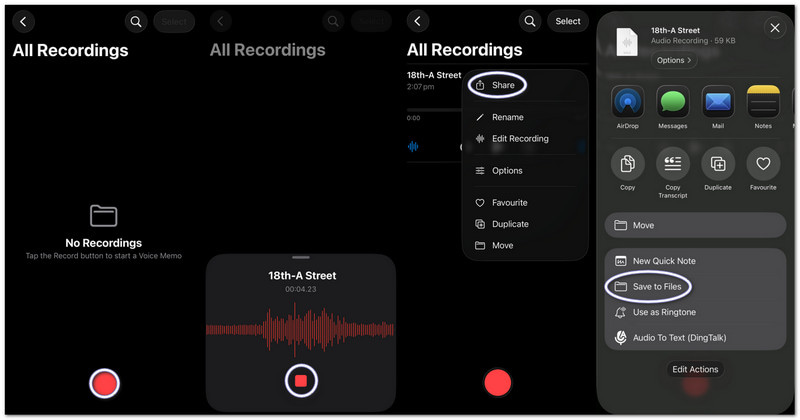
Krok 1Uruchom aplikację Notatki głosowe na swoim iPhonie.
Krok 2Kliknij czerwony Nagrywać naciśnij przycisk i rozpocznij odtwarzanie lub odtwarzanie dźwięku.
Krok 3Uzyskiwać Zatrzymać kiedy skończysz.
Krok 4Stuknij w trzy kropki (...) na Twoim nagraniu.
Krok 5Wybierać Zapisz do plików aby zapisać plik audio i użyć go później jako dzwonka.
2. Dowolny plik audio (MP3/M4A) na dzwonek
Zapisane pliki audio MP3 lub M4A pobrane ze stron lub aplikacji muzycznych można wybrać i ustawić jako dzwonek na iPhonie.
Krok 1Pobierz plik MP3 lub M4A i zapisz go w Akta aplikacja.
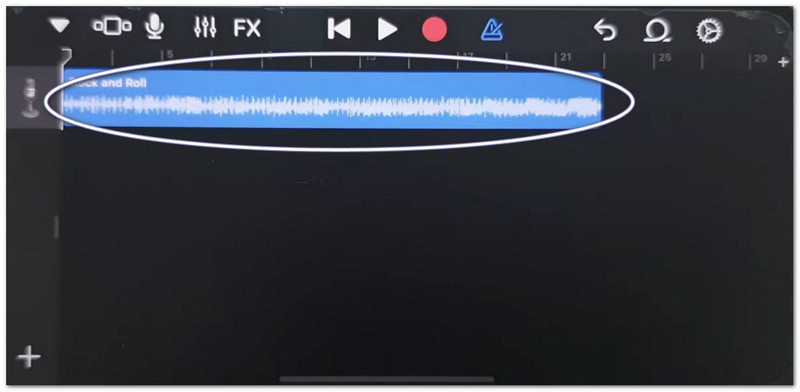
Krok 2Uruchomić GarageBand i wybierz Rejestrator dźwięku.
Krok 3Znajdź swój dźwięk w Akta, a następnie przeciągnij go na oś czasu.
Krok 4Iść do Akta, znajdź swój plik audio i przeciągnij go na oś czasu.
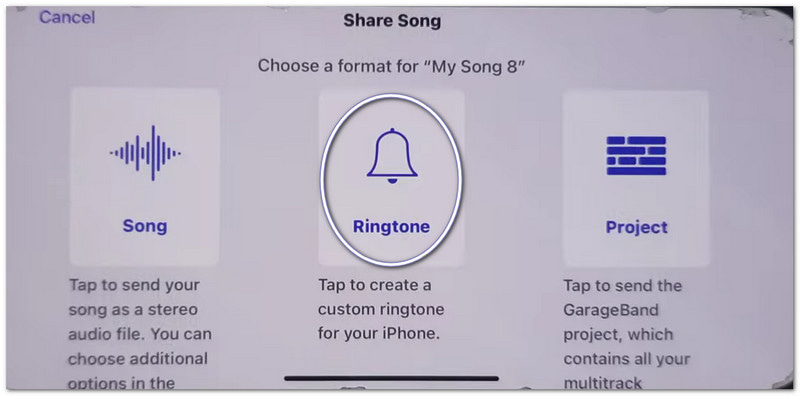
Krok 5Przytnij do mniej niż 30 sekund, a następnie stuknij Udział > Dzwonek > Eksport.
3. Korzystanie z GarageBand (dla starszych wersji iOS)
GarageBand umożliwia edycję klipów audio za pomocą precyzyjnych elementów sterujących, umożliwiając użytkownikom łatwe przycinanie, układanie i eksportowanie niestandardowych dzwonków. Dzięki temu łatwo jest ustawić nagranie głosowe jako dzwonek w telefonie iPhone.
Krok 1otwarty GarageBand i wybierz Rejestrator dźwięku.
Krok 2Stuknij w Widok utworów, a następnie otwórz Przeglądarka pętli.
Krok 3Zaimportuj zapisaną notatkę głosową lub plik audio.
Krok 4Przeciągnij go na oś czasu i przytnij do 30 sekund lub mniej.
Krok 5Uzyskiwać Moje piosenki, następnie Udział > Dzwonek > Eksport.
Rozwiązywanie problemów z niedziałającą funkcją „Udostępnianie notatek na iPhonie”
Jeśli Arkusz udostępniania zawiesza się, ulega awarii lub nie wyświetla aplikacji podczas udostępniania notatek głosowych lub plików GarageBand, wypróbuj poniższe rozwiązania.
Szybkie poprawki:
- Wymuś ponowne uruchomienie: Naciśnij Zwiększ głośność oraz Zmniejszenie głośnościNastępnie przytrzymaj przycisk zasilania, aż pojawi się symbol Apple.
- Aktualizacja iOS: Przejdź do Ustawienia > Ogólny > Aktualizacja oprogramowaniaZainstaluj wszystkie aktualizacje. To naprawi błędy systemowe.
- Przełącz AirDrop: Otwórz Centrum Kontroli Aby wyłączyć AirDrop. Wyłącz i ponownie włącz AirDrop. Udostępnianie zostanie odświeżone.
Naprawy systemu
- Zwolnij miejsce: Zachowaj co najmniej 2 gigabajty wolnego miejsca. Usuń nieużywane pliki lub filmy. Mała ilość miejsca może uniemożliwić działanie Arkusza Udostępniania.
Ostateczna poprawka
- Zresetuj wszystkie ustawienia: Przejdź do Ustawienia > Ogólny > Przenosić lub Zresetuj iPhone'a > Zresetuj wszystkie ustawieniaNie usuwa danych. Resetuje jedynie ustawienia systemowe i może rozwiązać problemy z Arkuszem udostępniania.
Część 2. Jak nagrać dzwonek na Androidzie
1. Korzystanie z aplikacji do tworzenia dzwonków (najbardziej polecane)
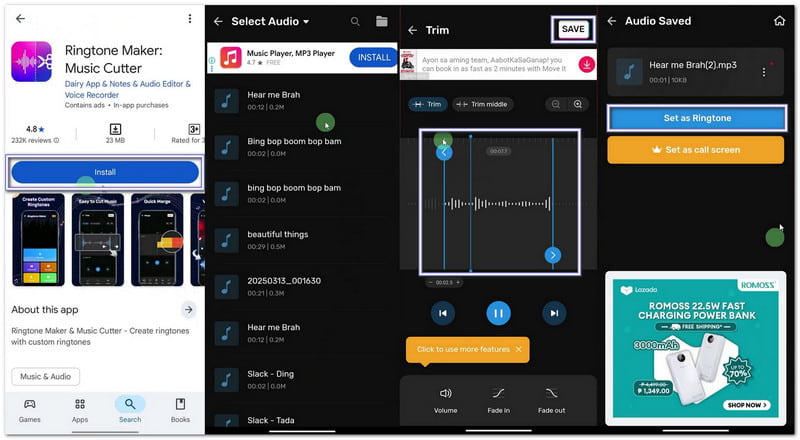
Jeśli chcesz nauczyć się nagrywać własne dzwonki, skorzystaj z aplikacji Maker: Music Cutter dostępnej w sklepie Google Play. Jej głównym celem jest pomoc w przycinaniu utworów, wycinaniu konkretnych fragmentów audio i natychmiastowym ustawianiu ich jako dzwonków na telefonach z Androidem.
Krok 1Otwórz sklep Google Play. Wyszukaj Ringtone Maker: Music CutterZainstaluj. Następnie naciśnij otwarty.
Krok 2Uzyskiwać Zaczynaj. Wybierać Przytnij dźwięk. Zezwól aplikacji na dostęp do plików.
Krok 3Wybierz utwór lub plik audio z telefonu. Przesuń suwaki, aby wybrać początek i koniec dzwonka.
Krok 4 Uzyskiwać Skaleczenie lub ZapisaćWybierz klarowność, jeśli to konieczne. Naciśnij Potwierdzać. Następnie kliknij Ustaw jako dzwonek. Zezwól na dostęp do ustawień systemowych i wybierz domyślny dzwonek.
2. Ustawienia wbudowane (dla pobranego dźwięku)
Ustawienia Androida umożliwiają bezpośredni wybór zapisanych plików audio i przypisanie ich jako dzwonków bez konieczności instalowania dodatkowych aplikacji lub narzędzi.
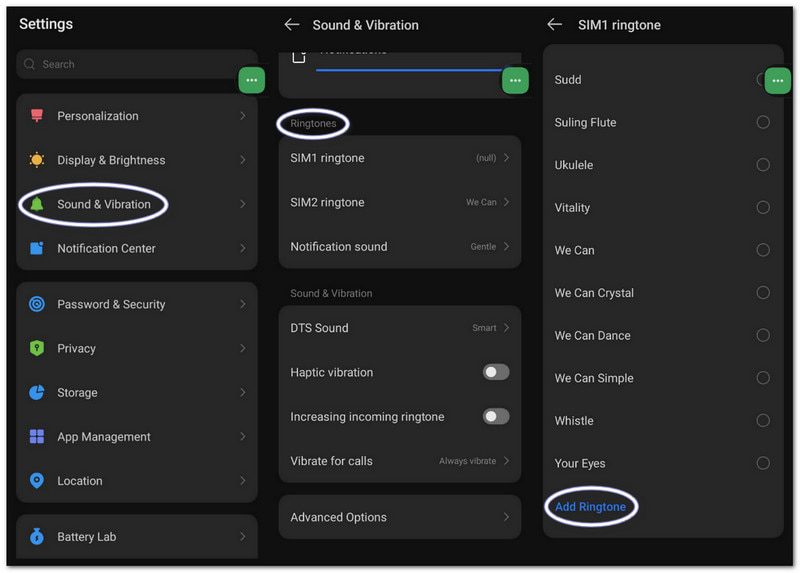
Krok 1Przejdź do ustawień telefonu. Dotknij Dźwięk i wibracje lub Dźwięk.
Krok 2Uzyskiwać Dzwonek telefonu aby zobaczyć dostępne opcje.
Krok 3Stuknij w Plus przycisk lub Dodaj dzwonek przycisk na górze.
Krok 4Przeglądaj swoją pamięć. Wybierz plik audio. Dotknij GotoweNastępnie potwierdź, aby ustawić go jako domyślny dzwonek.
Część 3. Jak zamienić nagranie ekranu w dzwonek
Nagranie ekranu można również przekształcić w dzwonek na komputerze z systemem Windows lub Mac, korzystając z Rejestrator ekranu AVAidePosiada tryb rejestratora audio, który przechwytuje dźwięki z Twojego systemu i Twój głos, dzięki czemu możesz łatwo nagrać dzwonek.
Oferuje również ustawienia dźwięku, w których można zmniejszyć lub zwiększyć głośność, włączyć redukcję szumów i wyświetlić ostrzeżenie o braku dźwięku. Oczywiście dzwonek można wyeksportować w obsługiwanych formatach, takich jak MP3 i M4A, które dobrze działają na urządzeniach mobilnych.
Krok 1Pobierz i zainstaluj AVAide Screen Recorder na swoim komputerze z systemem Windows lub Mac.

BEZPŁATNE POBIERANIE W systemie Windows 7 lub nowszym
 Bezpieczne pobieranie
BEZPŁATNE POBIERANIE Dla systemu Mac OS X 10.13 i nowszych
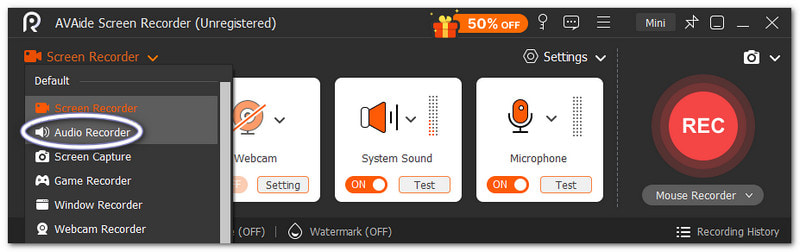
Bezpieczne pobieranieKrok 2Uruchamia się w trybie Rejestratora Ekranu. Kliknij menu rozwijane. Wybierz Rejestrator dźwięku dla lepszego przechwytywania dźwięku.
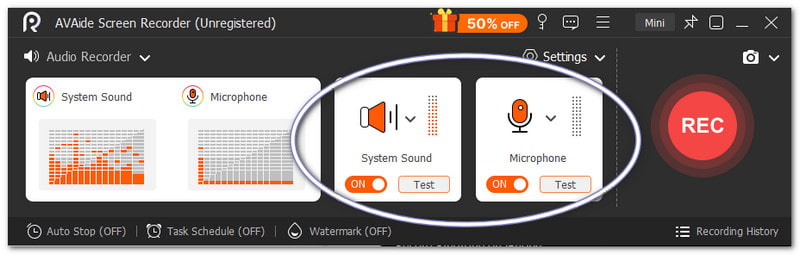
Krok 3Włączyć coś Dźwięk systemowy aby nagrać wewnętrzny dźwięk. Włącz Mikrofon Jeśli chcesz, aby Twój głos został dodany. W razie potrzeby możesz również dostosować głośność.
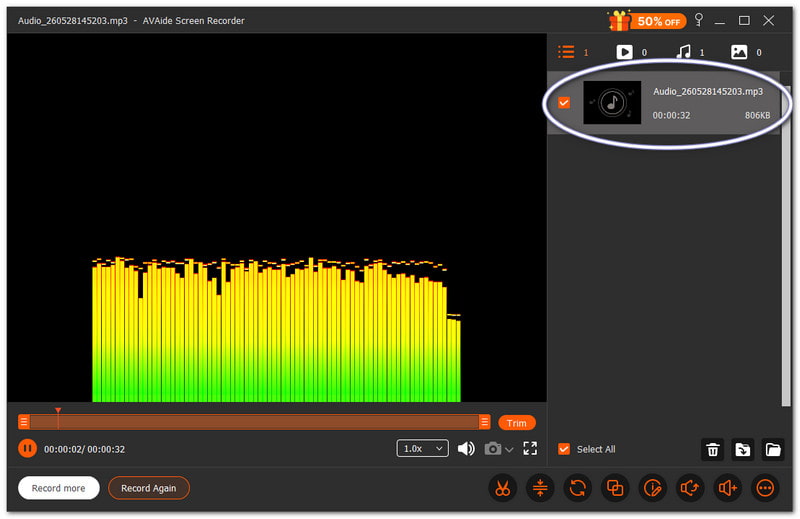
Krok 4Uderzyć REC Aby rozpocząć, i poczekaj na odliczanie. Po rozpoczęciu odtwórz wybrany dźwięk. Naciśnij Zatrzymać Po zakończeniu kliknij przycisk. Następnie plik zostanie automatycznie zapisany. Możesz go również przyciąć lub edytować przed użyciem jako dzwonka.
Nie ma wątpliwości, że ten Mac i Rejestrator dźwięku Windows pomoże Ci stworzyć dzwonek, który Ci się podoba i który będzie pasował do Twojego urządzenia.
Część 4. Kroki specyficzne dla Samsunga
1. Korzystanie z wbudowanego rejestratora ekranu
Samsung Screen Recorder przechwytuje dźwięk z filmów i pomaga przekształcić nagrane dźwięki w użyteczne dzwonki.
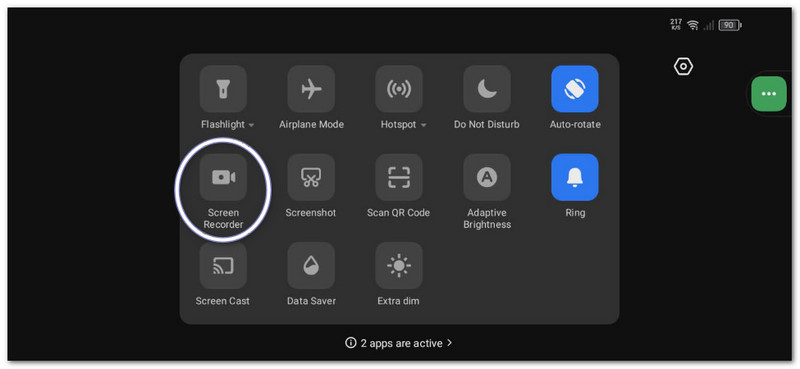
Krok 1w Szybki panel, przesuń palcem w dół. Naciśnij Nagrywarka ekranu przycisk. Przed rozpoczęciem wybierz Dźwięki mediów.
Krok 2Odtwórz wideo lub muzykę, którą chcesz nagrać. Pozwól, aby rejestrator ekranu nagrał ją z dźwiękiem.
Krok 3Zatrzymaj nagrywanie po zakończeniu. Plik zostanie zapisany w Twojej galerii. Użyj aplikacji do konwersji wideo na MP3, aby wyodrębnić dźwięk.
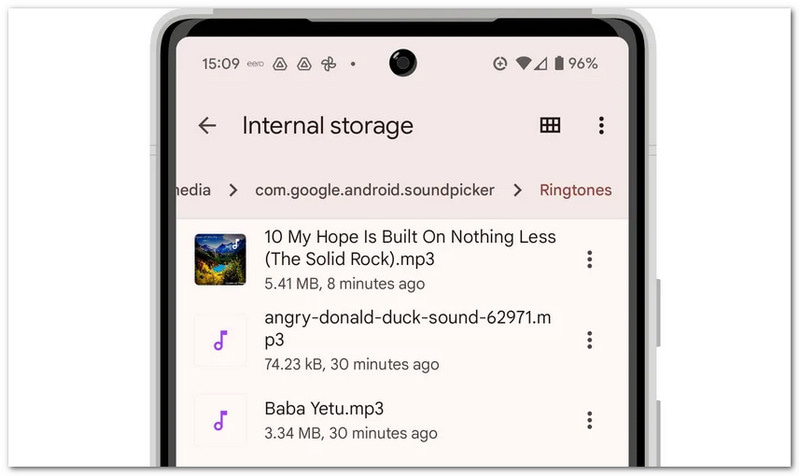
Krok 4Przenieś plik MP3 do swojego Pamięć wewnętrzna > Folder dzwonków aby można było z niego skorzystać później.
Ta metoda pokazuje Nagrywanie ekranu Samsunga. Dlatego pamiętaj, aby przekonwertować nagrany film wyłącznie do formatu audio, aby można go było użyć jako dzwonka.
2. Wbudowany generator dzwonków
Ustawienia dzwonków Samsunga umożliwiają użytkownikom wybieranie utworów, przycinanie ich fragmentów i natychmiastowe przypisywanie ich jako domyślnych dzwonków telefonu.
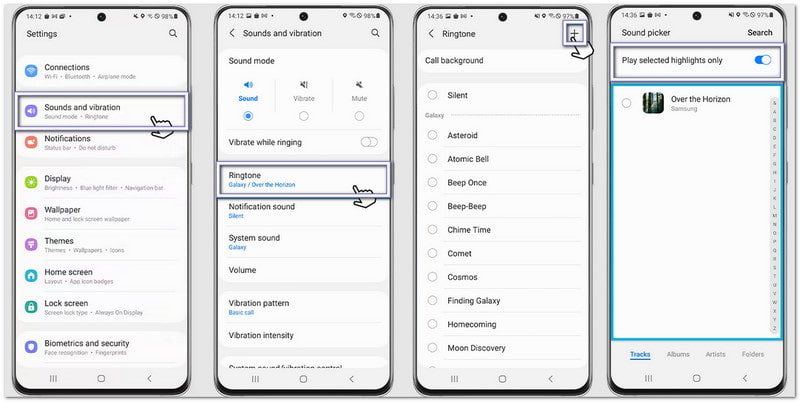
Krok 1Otwórz telefon i przejdź do Ustawienia. Uzyskiwać Dźwięki i wibracje. Następnie wybierz Dzwonek.
Krok 2Stuknij w Dodać i wybierz zapisany utwór lub nagranie z telefonu.
Krok 3Włączać Odtwórz tylko wybrane fragmenty jeśli to możliwe. Samsung automatycznie przytnie najlepszą część dźwięku.
Krok 4Potwierdź swój wybór, a dźwięk zostanie ustawiony jako domyślny dzwonek.
3. Metoda Menedżera Plików
Menedżer plików Samsung porządkuje pliki audio i umożliwia bezpośrednie kopiowanie do folderu Dzwonki w celu automatycznego wykrywania dzwonka.
Krok 1Uruchom Moje pliki aplikację na telefonie Samsung.
Krok 2Iść do Pliki do pobrania lub Audio folder. Znajdź nagrany lub pobrany dźwięk.
Krok 3Naciśnij i przytrzymaj plik. Stuknij KopiujNastępnie przejdź do Pamięć wewnętrzna > Dzwonki.
Krok 4Wklej plik do folderu Dzwonki. Następnie wróć do Ustawień dźwięku. Twój plik pojawi się na liście dzwonków.
Część 5. Profesjonalne porady dla uzyskania najlepszych rezultatów
Zanim ustawisz dzwonek, warto zastosować się do kilku prostych wskazówek. Dzięki nim dzwonek będzie brzmiał wyraźnie i lepiej będzie działał na Twoim telefonie.
Wskazówka #1: Pisz krótko.
Ustaw dzwonek na 30–40 sekund. Dzięki temu będzie płynny i w pełni kompatybilny z telefonami z Androidem.
Wskazówka #2: Użyj właściwego formatu.
W miarę możliwości używaj plików MP3 lub M4A. Te formaty działają bezproblemowo na większości urządzeń z Androidem.
Wskazówka #3: Najpierw sprawdź głośność.
Odtwórz dzwonek przed ustawieniem. Upewnij się, że nie jest zbyt głośny ani zbyt cichy. Dzięki temu unikniesz niespodzianek, gdy ktoś zadzwoni.
Nauczyłeś się jak nagrać dzwonek na iPhonie, Android i komputer stacjonarny. Dzięki temu, niezależnie od tego, jakiego urządzenia używasz, możesz w każdej chwili utworzyć własny, spersonalizowany dzwonek.
Dla użytkowników systemów Windows i Mac, Rejestrator ekranu AVAide Ułatwia to cały proces. Możesz nagrać własny głos lub przechwycić dźwięk z systemu. Możesz również przyciąć plik po nagraniu. Dzięki temu zachowasz tylko najlepszą część dzwonka.
O AUTORZE

Przechwytuj działania na ekranie z dźwiękiem, spotkaniami online, filmami z gry, muzyką, kamerą internetową itp.