Trying to figure out how to screen record on a Dell while capturing a tutorial, gameplay, or meeting can feel confusing without the right tool. Whether you need something quick or more advanced, this guide walks you through simple, effective methods for recording your screen smoothly.
Part 1. The Easiest Way: Using the Xbox Game Bar
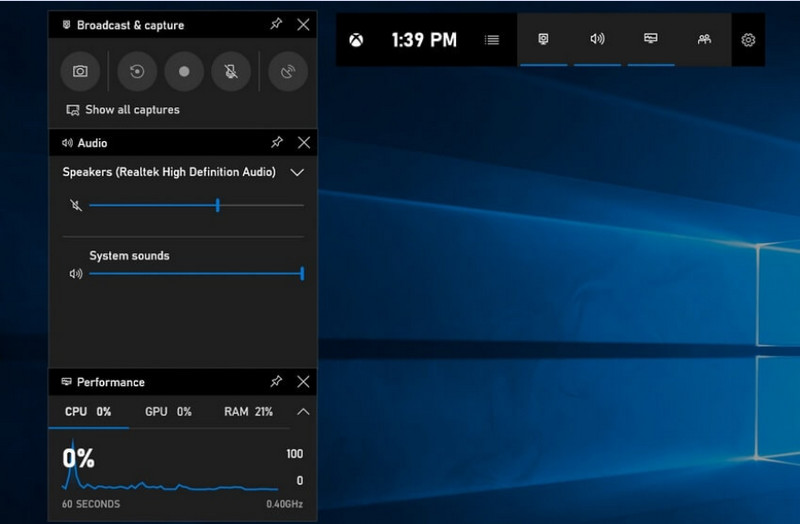
The Xbox Game Bar is primarily designed for recording gameplay, but can also be used for daily screen recording. It lets you record your screen and audio, and save clips immediately. Nevertheless, it cannot capture your desktop or File Explorer; it can only capture active application windows.
1. lépésTo open the Xbox Game Bar overlay, press the Windows + G keys on your keyboard. If the question is about whether it is a game, respond affirmatively.
2. lépésAz Elfog panel is in the overlay. If you are unable to see it, a Widgets menu will be created, and the Capture option will be selected.
3. lépésTo start recording your screen, click the Record (●) gombot, ill Windows + Alt + R. The tool will automatically capture a snapshot of the active window.
4. lépésMicrophone recording can be enabled by clicking the Mikrofon button before or during recording.
5. lépésTo quit recording, press Windows + Alt + R a second time or press the Stop (■) button on the floating bar.
6. lépésVideos you record are automatically stored in the Videók > Rögzítések folder of your computer.
Part 2. The Professional Choices
1. Using OBS Screen Recorder
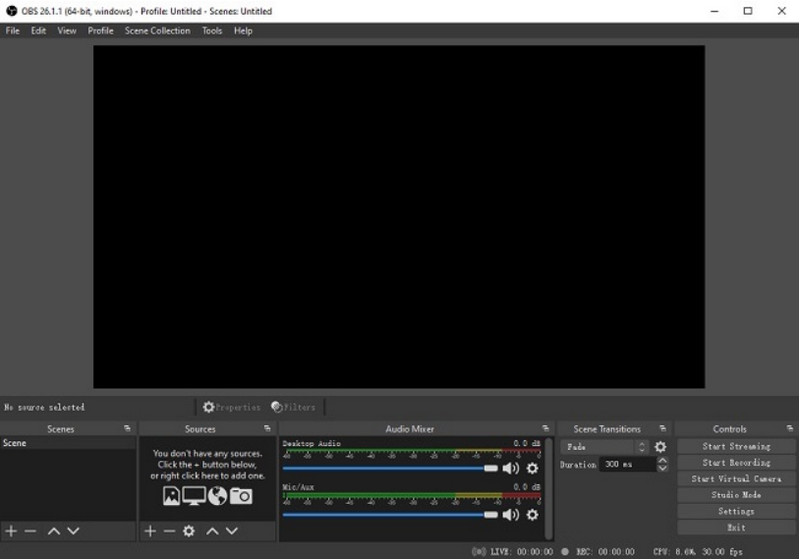
OBS Screen Recorder is a free, open-source screen recorder commonly used for both recording and streaming live content. And it provides a customizable arrangement that lets you record your entire display, a distinct window, or multiple sources simultaneously. Its powerful video and audio controls make it an effective option for users who are not only interested in the simplest type of screen recording.
Teljesítmény:
OBS Screen Recorder is a software with hardware acceleration that delivers reliable performance, enabling smooth 1080p 60fps recording. Once installed, it can operate effectively, with consistent output and little latency, during extended recording sessions on compatible systems.
1. lépésGo to the official OBS Screen Recorder site, download the installer, and complete the installation.
2. lépésNyisd ki OBS Screen Recorder. You will be presented with the main interface with panels such as Jelenetek és Források.
3. lépésIn the Scenes panel, click the + button and give your scene a name.
4. lépésYou can add a display capture or window capture (to capture a particular app) by clicking + ban,-ben Források panel and selecting Display Capture vagy Window Capture.
5. lépésTest the Audio keverő by enabling and adjusting the microphone and system sound.
6. lépésmegnyomni a Felvétel megkezdése button on the right-hand side of the interface.
7. lépésWhen completed, click Felvétel leállítása. This video will automatically be put in your default folder.
2. Using AVAide Screen Recorder
AVAide Screen Recorder is a simple yet efficient tool for recording screen activity in high quality. It is aimed at users who require an easy-to-use recording system with clear audio, a flexible capture system with minimal configuration, and intuitive controls.
Teljesítmény:
AVAide Screen Recorder is optimized to record smoothly and stably, even during lengthy sessions. It can support high-resolution output to 4K/1080p with minimal latency in common applications. The software can effectively manage simultaneous screen and audio recording to ensure system sound and microphone input stay in sync.
- Records screen in high quality with smooth, lag-free performance.
- Captures system sound and microphone simultaneously with clear audio output.
- Supports webcam recording with adjustable picture-in-picture overlay.
- Allows recording of the full screen, a selected window, or a custom region.
- Includes built-in editing tools for trimming, enhancing, and exporting videos.

 Biztonságos letöltés
1. lépésTöltse le és telepítse az eszközt
Go to the official AVAide Screen Recorder website. Get the installer for your Windows system and follow the installation process.
2. lépésIndítsa el a szoftvert
Installation can be followed by opening the program. On the main interface, you can choose Képernyőrögzítő to start with.
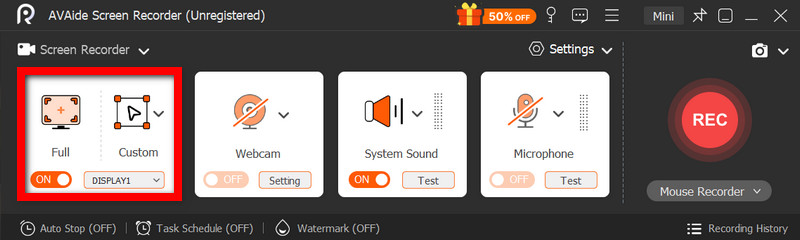
3. lépésChoose Recording Area
Válasszon közülük Teljes és Egyedi recording modes based on your needs.
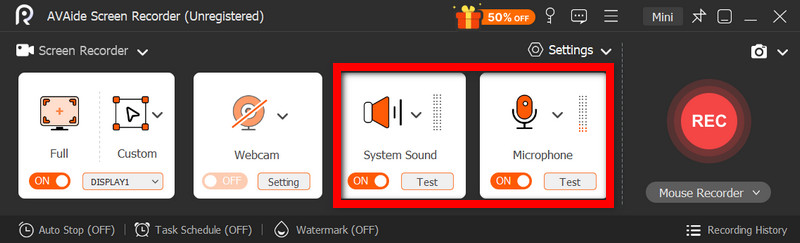
4. lépésSet up Audio and Webcam
Engedélyezés System Audio és a Mikrofon if you require audio. The webcam can also be turned on to record faces.
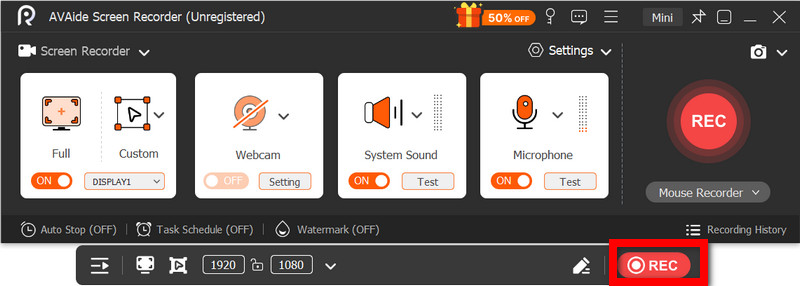
5. lépésFelvétel megkezdése
To start recording your screen, press the REC button. Annotations can be added during recording if necessary.
6. lépésA felvétel leállítása és mentése
Kattints a Álljon meg button when finished. The recording will be saved automatically, and you can preview or edit it right away.
Part 3. Other Free & Simple Methods
1. Using Snipping Tool (Windows 11)
The Snipping Tool in Windows 11 includes built-in screen recording, providing a simple, quick way to capture screen activity without installing extra software. It is most effective with short clips, tutorials, and simple recording work.
Teljesítmény:
The Snipping Tool is suitable for lightweight recordings and offers smooth capture of small captures. Nonetheless, it lacks features, does not support advanced settings, and might not effectively handle long or high-performance recordings as efficiently as specific tools.
1. lépésOpen the Snipping tool by clicking on the Rajt menü.
2. lépésTo use the toolbar, click the Rekord.
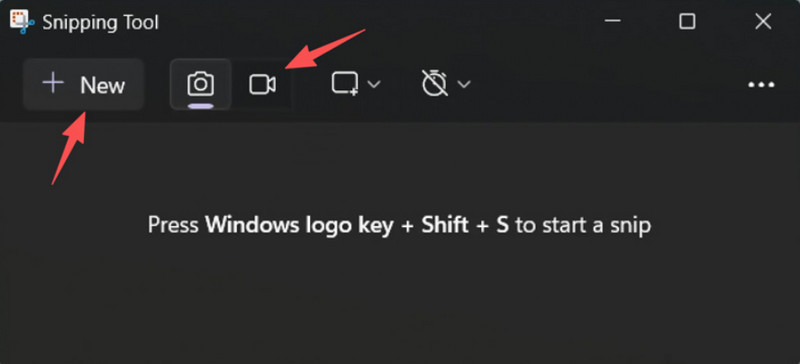
3. lépésTo record a new recording, select Új.
4. lépésSelect the area of the screen that you desire to capture.
5. lépésKattintson Rajt a felvétel elindításához.
6. lépésKattintson Álljon meg when finished and save your recording.
2. Using Microsoft PowerPoint (All Windows Versions)
Microsoft PowerPoint includes a screen recording feature that lets you capture a screenshot and incorporate it into a presentation. It is also an easy alternative to developing tutorials, demonstrations, or teaching slides without requiring additional recording software.
Teljesítmény:
PowerPoint provides consistent results in simple screen recording, particularly for presentations and short demonstrations. Although it offers reasonable video quality, it lacks advanced controls and might not be suitable for the quality of videos captured during long-duration recordings.
1. lépésLaunch Microsoft PowerPoint and prepare a new or an existing presentation.
2. lépésClick the Insert tab, then Képernyőfelvétel.
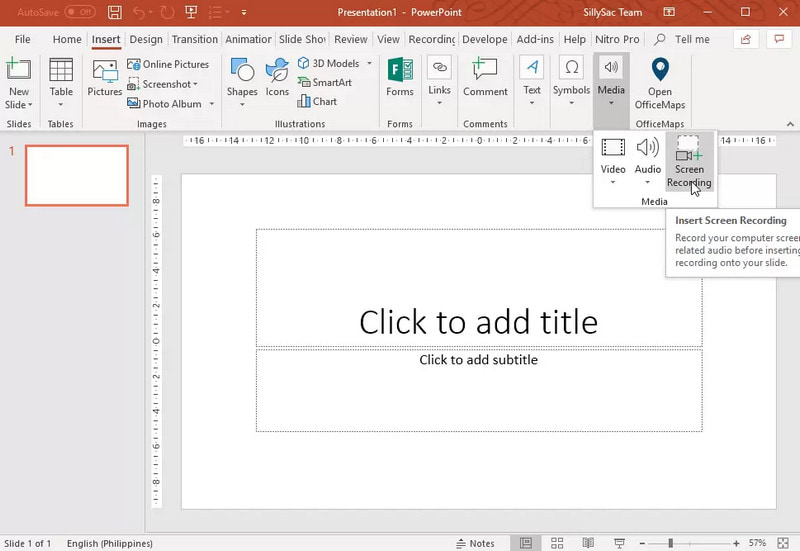
3. lépésChoose the part of the screen that you wish to capture.
4. lépésAllow the audio or pointer recording when necessary.
5. lépésKattintson Rekord to begin recording your screen.
6. lépésTo end recording, press Windows + Shift + Q.
7. lépésTo save the recording, right-click the video and select Save Media As.
Part 4. Troubleshooting Common Problems
| Problem | Megoldás |
| Game Bar would not open or record. | In settings, you can switch off the Xbox Game Bar. Go to Beállítások > Szerencsejáték > Game Bar és fordítsd meg TOVÁBB. Attempting to press Windows + G again, and restarting your PC (where necessary). |
| The recording has no sound. | Make sure that system audio and microphone are turned on in Game Bar settings. Also, make sure your sound device is not muted or incorrectly selected in Windows Sound Settings. |
| My Dell laptop is running slow during recording. | Use Close or Minimize to reduce unnecessary applications and browser tabs. Switch to High Performance mode in power settings and reduce the recording resolution when necessary to improve performance. |
| The recorded video quality is poor. | Set the recording quality to the best available setting in the Game Bar, especially when recording Google Meet sessions. Set your display to its native resolution and update your graphics drivers to make it sharper and more stable. |
Tanulás how to screen record on a Dell laptop will give you flexibility for tutorials, meetings, or even playing games. Whether it is an inbuilt tool or sophisticated software, choosing the right method will ensure the recording is made with ease and high quality, and that the workflow is streamlined.
A SZERZŐRŐL

Rögzítsen képernyőt, hangot, webkamerát, játékmenetet, online találkozókat, valamint iPhone/Android képernyőt a számítógépén.
Képernyőfelvétel
- Képernyőfelvétel Windows rendszeren
- Instagram élő felvétele
- Rip videók a Tubi-ból
- YouTube-videók konvertálása MP3-ba
- Videók letöltése a Fansly-ről
- JW Player videók letöltése
- Bilibili videók letöltése
- Patreon videók letöltése
- Töltsd le a SpankBang videókat
- Discord videók letöltése
- DoodSream videó letöltése