Mac-Nutzer können problemlos alles auf ihrem Bildschirm aufnehmen. Ob für die Arbeit, die Schule oder den privaten Gebrauch – es gibt eine einfache Lösung.
In diesem Leitfaden über Wie man auf dem Mac einen Screenshot erstelltHier lernen Sie alles, was Sie brauchen. Von grundlegenden Screenshot-Tastenkombinationen bis hin zu Scroll- und Ganzseiten-Screenshots. Sie erfahren außerdem, wie Sie Ihre Screenshots drucken, speichern und verwalten. Bei Bedarf können Sie sie sogar bearbeiten und löschen.
Wenn Sie also Screenshots auf dem Mac beherrschen möchten, finden Sie hier alle wichtigen Schritte.
- Teil 1. Grundlegende Screenshot-Tastenkombinationen auf dem Mac
- Teil 2. Wo werden Screenshots auf dem Mac gespeichert?
- Teil 3. So erstellen Sie Scroll- und Ganzseiten-Screenshots auf dem Mac
- Teil 4. Wie man Screenshots bearbeitet, zuschneidet und mit Anmerkungen versieht
- Teil 5. So drucken Sie einen Screenshot auf dem Mac
- Teil 6. Wie man Screenshots verwaltet und löscht
- Teil 7. Fehlerbehebung
Teil 1. Grundlegende Screenshot-Tastenkombinationen auf dem Mac
Der Mac verfügt über integrierte Screenshot-Funktionen. Mit einfachen Tastenkombinationen können Sie den gesamten Bildschirm, einen ausgewählten Bereich, ein Display oder sogar die Touch Bar aufnehmen. Die meisten Screenshots werden automatisch auf Ihrem Schreibtisch gespeichert, sodass Sie sie direkt nach der Aufnahme wiederfinden.
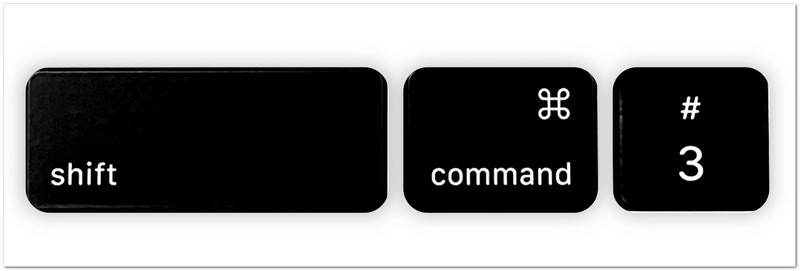
Methode 1: Den gesamten Bildschirm erfassen
Mit dieser Methode können Sie in einem einzigen Schritt einen vollständigen Screenshot von allem, was auf Ihrem Mac-Bildschirm sichtbar ist, erstellen.
Schritt 1Öffnen Sie den Bildschirm, den Sie aufnehmen möchten.
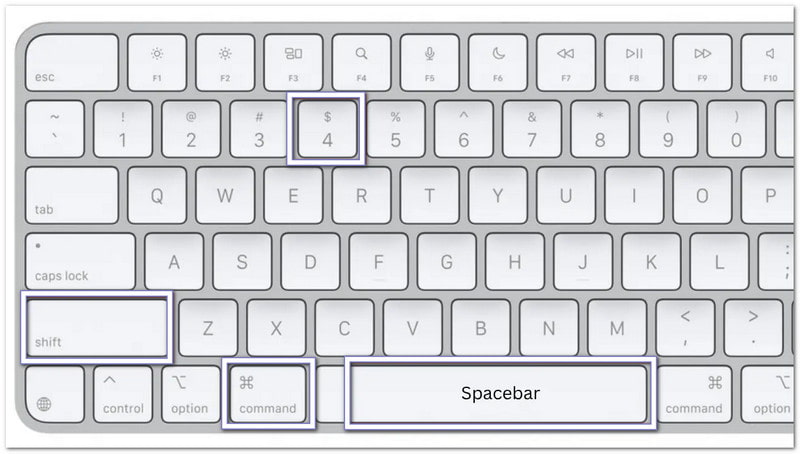
Schritt 2Drücken Sie Schicht + Befehl + 3 gleichzeitig auf Ihrer Tastatur.
Schritt 3Ihr Mac erstellt sofort einen Screenshot von allem, was auf Ihrem Bildschirm angezeigt wird.
Schritt 4In der Ecke des Bildschirms erscheint möglicherweise eine kleine Miniaturansicht. Klicken Sie darauf, um schnelle Änderungen vorzunehmen.
Schritt 5Wenn Sie nicht auf das Vorschaubild klicken, wird der Screenshot automatisch als Bilddatei auf Ihrem Desktop gespeichert.
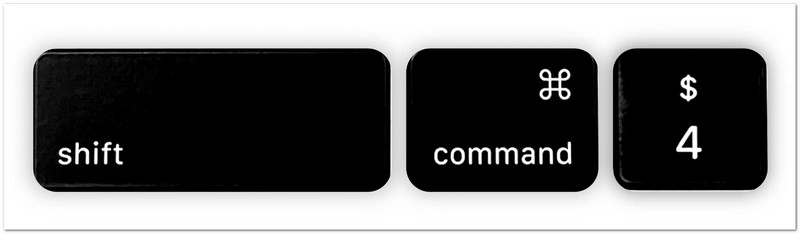
Methode 2: Einen ausgewählten Bereich aufnehmen (Teil-Screenshot)
Mit dieser Option können Sie mithilfe eines Mac-Teil-Screenshots nur einen bestimmten Teil Ihres Bildschirms auswählen und aufnehmen, indem Sie den Cursor ziehen.
Schritt 1Gehen Sie zu der Seite, App oder dem Inhalt, den Sie erfassen möchten.
Schritt 2Drücken Sie Schicht + Befehl + 4 zusammen.
Schritt 3Der Mauszeiger verwandelt sich in ein Fadenkreuz. Klicken und ziehen Sie ihn über den Bereich, von dem Sie einen Screenshot erstellen möchten.
Schritt 4Passen Sie die Auswahl so an, dass sie genau den benötigten Bereich abdeckt.
Schritt 5Klicken Sie die Option ab. Maus Knopf bzw Trackpad Um einen Screenshot zu erstellen. Das Bild wird dann automatisch gespeichert.
Zusätzlicher Tipp: Halten Sie die Leertaste Ziehen Sie den ausgewählten Bereich, falls Sie ihn verschieben müssen. Esc Wenn Sie abbrechen und von vorne beginnen möchten.
Methode 3: Ein bestimmtes Fenster erfassen
Diese Methode konzentriert sich auf ein geöffnetes Fenster und erfasst nur diese Anwendung oder dieses Fenster klar und deutlich, ohne zusätzliche Bildschirmteile.
Schritt 1Öffnen Sie das Display, das Sie aufnehmen möchten.
Schritt 2Drücken Sie Schicht + Befehl + 4 auf deiner Tastatur.
Schritt 3Drücken Sie die LeertasteIhr Cursor verwandelt sich in ein Kamerasymbol.
Schritt 4Bewegen Sie das Kamerasymbol über den Bildschirm, das Menü oder das Dock, das Sie aufnehmen möchten. Es wird hervorgehoben, sobald Sie bereit sind.
Schritt 5Klicken Sie einmal, um einen Screenshot zu erstellen. Das aufgenommene Fenster wird anschließend als Bilddatei gespeichert.
Zusätzlicher Tipp: Halten Sie die Möglichkeit Halten Sie die Taste gedrückt, während Sie klicken, wenn Sie den Schatten um das Fenster entfernen möchten.
Methode 4: Touch Bar aufnehmen (falls Ihr Mac über eine verfügt)
Diese Funktion erfasst den Inhalt der MacBook Touch Bar, um die aktuelle Anzeige zu speichern oder zu teilen.
Schritt 1Stellen Sie sicher, dass Ihr MacBook Pro über eine Touch Bar verfügt.
Schritt 2Zeigen Sie die Schaltflächen, Bedienelemente oder Inhalte, die Sie erfassen möchten, auf der Touch Bar an.
Schritt 3Drücken Sie Schicht + Befehl + 6 gleichzeitig.
Schritt 4Ihr Mac erstellt sofort einen Screenshot von allem, was aktuell auf der Touch Bar angezeigt wird.
Schritt 5Der Screenshot wird automatisch auf Ihrem Desktop gespeichert, sodass Sie ihn später ansehen oder teilen können.

Diese Tastenkombinationen sind der schnellste Weg, um Screenshots auf einem Mac zu erstellen. Sie funktionieren ohne die Installation eines zusätzlichen Programms und helfen Ihnen, genau das, was Sie benötigen, in nur wenigen Sekunden festzuhalten.
Teil 2. Wo werden Screenshots auf dem Mac gespeichert?
Nachdem Sie auf Ihrem Mac einen Screenshot erstellt haben, fragen Sie sich vielleicht, wo dieser gespeichert wird. Mac speichert Screenshots automatisch und bietet Ihnen verschiedene Möglichkeiten, diese schneller zu finden oder den Speicherort zu ändern. Befolgen Sie die unten stehenden Methoden, um Ihre Screenshots ganz einfach zu verwalten!
1. Standard-Speicherort
Screenshots werden nach jeder Aufnahme automatisch an einem Standardort auf Ihrem Mac gespeichert, um einen schnellen Zugriff zu ermöglichen.
Schritt 1Erstellen Sie einen Screenshot mit einer beliebigen Screenshot-Tastenkombination auf Ihrem Mac.
Schritt 2Gehen Sie zu Ihrem Desktop und suchen Sie nach der soeben erstellten neuen Bilddatei.
Schritt 3Suchen Sie eine Datei mit dem Namen "Screenshot [Datum] um [Uhrzeit]"Mac speichert Screenshots standardmäßig als PNG-Dateien.
Schritt 4Doppelklicken Sie auf die Datei, wenn Sie Ihren Screenshot öffnen, ansehen, bearbeiten oder teilen möchten.
Schritt 5Wiederholen Sie diesen Vorgang immer dann, wenn Sie Screenshots suchen müssen, die am Standardspeicherort gespeichert sind.

2. So ändern Sie den Speicherort für Screenshots auf dem Mac
Sie können die Einstellungen anpassen, um den Speicherort für Screenshots auf dem Mac zu ändern und einen neuen Ordner auszuwählen, in dem alle Screenshots automatisch gespeichert werden.
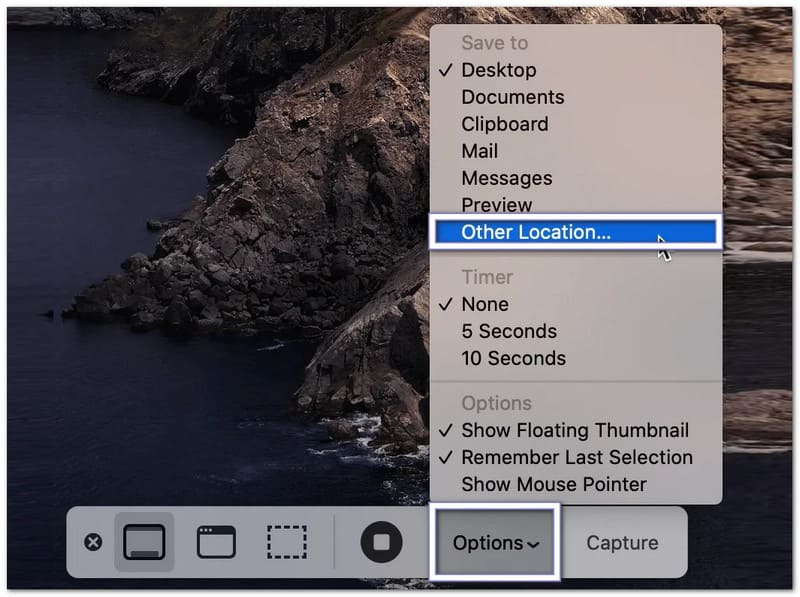
Schritt 1Drücken Sie Befehl + Schicht + 5 Drücken Sie auf Ihrer Tastatur, um die Screenshot-Symbolleiste zu öffnen.
Schritt 2Klicken Optionen Klicken Sie unten in der Symbolleiste, um die Screenshot-Einstellungen zu öffnen.
Schritt 3Wählen Anderer Standort Im Menü wählen Sie einen Ordner wie „Dokumente“ oder „Downloads“. Sie können auch einen neuen Ordner für Ihre Screenshots erstellen.
Schritt 4Bestätigen Sie den ausgewählten Ordner und kehren Sie zur Screenshot-Symbolleiste zurück.
Schritt 5Erstellen Sie einen neuen Screenshot eines Fensters oder eines ausgewählten Bereichs. Ihr Mac speichert zukünftige Screenshots nun im ausgewählten Ordner.
3. So finden Sie schnell die neuesten Screenshots
Es hilft beim Erlernen der Suche nach Screenshots auf dem Mac, da es Sie anleitet, Ihre neuesten Screenshots schnell mithilfe der Finder-Tools oder der Sortieroptionen für zuletzt verwendete Dateien zu finden.
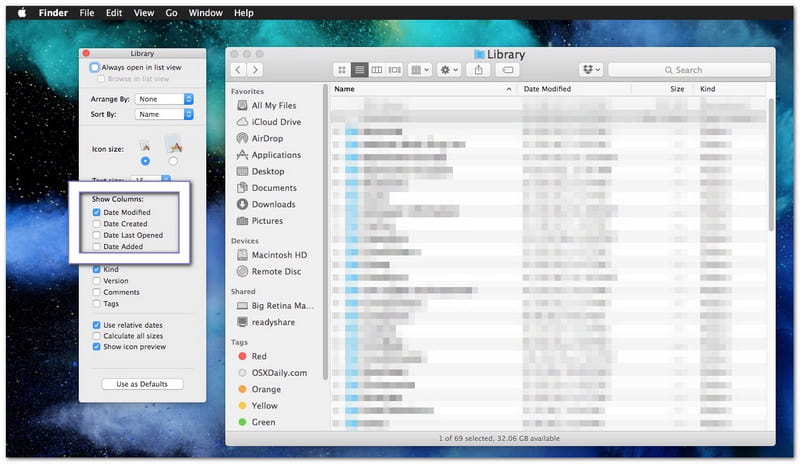
Schritt 1Offen Finder von Ihrem Dock aus.
Schritt 2Klicken Aktuelles In der linken Seitenleiste finden Sie Ihre zuletzt verwendeten Dateien.
Schritt 3Sortieren Sie die Dateien nach Erstellungsdatum Falls erforderlich. Es hilft dabei, Ihre neuesten Screenshots oben anzuzeigen.
Schritt 4Sieh dir die Liste an und suche den Screenshot, den du öffnen möchtest.
Schritt 5Doppelklicken Sie auf die Datei, um sie anzuzeigen, oder verschieben Sie sie zur besseren Organisation in einen anderen Ordner.
Teil 3. So erstellen Sie Scroll- und Ganzseiten-Screenshots auf dem Mac
Ein normaler Screenshot erfasst nur den sichtbaren Bildschirminhalt. Um eine ganze Webseite, einen längeren Artikel, einen Chatverlauf oder ein Dokument zu speichern, benötigen Sie auf einem Mac einen Screenshot, der scrollt oder die gesamte Seite einnimmt. Mac bietet hierfür integrierte Funktionen in Webbrowsern; für andere Apps stehen außerdem Tools von Drittanbietern zur Verfügung.
Methode 1: Screenshot der gesamten Webseite in Safari erstellen
Safari verfügt über eine integrierte Funktion, mit der Sie eine komplette Webseite speichern können, ohne mehrere Screenshots anfertigen zu müssen.
Schritt 1Starten Sie Safari und rufen Sie die Webseite auf, die Sie aufnehmen möchten.
Schritt 2Getroffen haben Datei aus der Menüleiste oben auf dem Bildschirm.
Schritt 3Wählen Als PDF exportieren aus dem Dropdown-Menü.
Schritt 4Wählen Sie den Speicherort für die Datei und geben Sie ihr gegebenenfalls einen Namen.
Schritt 5Getroffen haben SpeichernSafari erstellt eine PDF-Datei, die die gesamte Webseite von oben bis unten enthält.

Methode 2: Screenshot der gesamten Webseite in Chrome/Firefox
1. Erstellen Sie einen Screenshot einer gesamten Webseite in Google Chrome.
Google Chrome enthält eine versteckte Funktion, mit der man eine komplette Webseite als Screenshot auf dem Mac erfassen kann.
Schritt 1Öffnen Sie die Webseite, die Sie aufnehmen möchten, in Chrome.
Schritt 2Drücken Sie Befehl + Möglichkeit + I, um die Entwicklertools zu öffnen.
Schritt 3Drücken Sie Befehl + Schicht + P um das Befehlsmenü zu öffnen.
Schritt 4Geben Sie „Screenshot“ in das erscheinende Suchfeld ein.
Schritt 5Wählen Screenshot in voller Größe aufnehmenChrome erstellt und lädt automatisch ein vollständiges Bild der Webseite herunter.

2. Erstellen Sie einen Screenshot einer gesamten Webseite in Firefox.
Firefox macht das Erstellen von Screenshots ganzer Seiten einfach, da diese Funktion in das Browsermenü integriert ist.
Schritt 1Öffnen Sie die Webseite, die Sie aufnehmen möchten.
Schritt 2Klicken Sie mit der rechten Maustaste auf eine leere Stelle der Seite. Wenn Sie ein Trackpad verwenden, können Sie auch bei gedrückter Strg-Taste klicken.
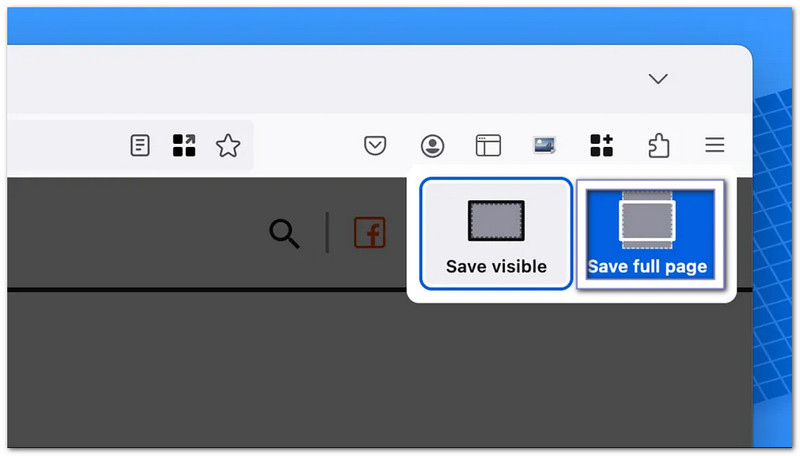
Schritt 3Wählen Einen Screenshot machen aus dem Menü.
Schritt 4Klicken Seite speichern alles auf der Webseite erfassen.
Schritt 5Laden Sie das Bild herunter und speichern Sie es auf Ihrem Mac.
Methode 3: Scrollaufnahme in jeder App
Mit AVAide Screen RecorderSie sind nicht auf das Scrollen von Screenshots auf dem Mac beschränkt, sondern können diese Funktion in jeder beliebigen App auf Ihrem Mac nutzen. Sie funktioniert für Chats, E-Mails, Dokumente, Notizen und lange App-Seiten.
Es verfügt über einen integrierten Bildschirmaufnahmemodus, der Scroll-Screenshots in einem einzigen, übersichtlichen Bild ermöglicht. Nach der Aufnahme können Sie das Bild kopieren und schnell in Anwendungen wie Word oder Notizen einfügen. Alternativ können Sie es direkt in Ihrem lokalen Ordner speichern, um später einfach darauf zugreifen zu können.
Schritt 1Laden Sie AVAide Screen Recorder herunter und installieren Sie es auf Ihrem Mac. Öffnen Sie das Programm nach der Installation, damit es sofort einsatzbereit ist.

KOSTENLOSER DOWNLOAD Für Windows 7 oder höher
 Sicherer Download
KOSTENLOSER DOWNLOAD Für Mac OS X 10.13 oder höher
Sicherer DownloadSchritt 2Öffnen Sie die App, Webseite, den Chat oder das Dokument, das Sie aufnehmen möchten. Stellen Sie sicher, dass der gesamte Inhalt auf dem Bildschirm geladen ist, bevor Sie beginnen.
Schritt 3Wählen Sie in der Hauptschnittstelle BildschirmaufnahmeWählen Sie dann Scrollender Screenshot als Aufnahmemodus.
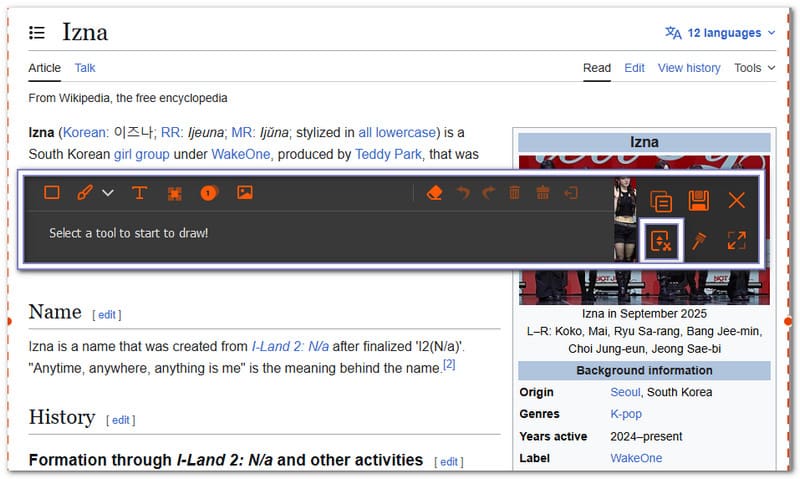
Schritt 4Wählen Sie das Fenster aus, das Sie aufnehmen möchten. Verwenden Sie das Mausrad, die Leertaste oder das Scrollen, um durch die Seite zu navigieren. AVAide Screen Recorder folgt dem Scrollen und zeichnet alles auf. Drücken Sie Esc Wenn Sie aufhören wollen
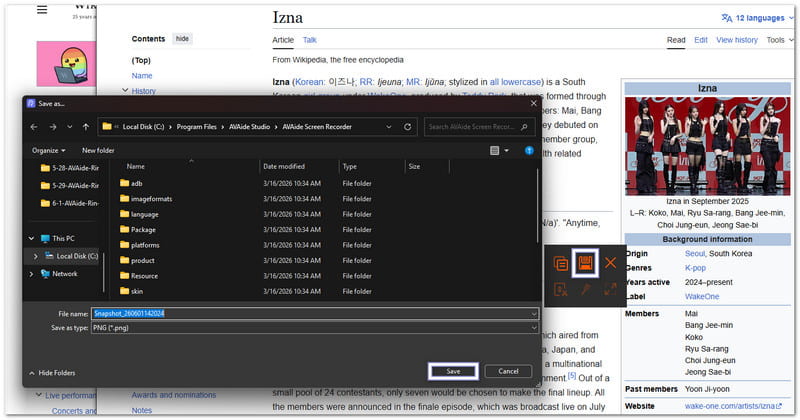
Schritt 5Nachdem die Aufnahme abgeschlossen ist, klicken Sie auf Speichern Klicken Sie auf die Schaltfläche. Wählen Sie den Speicherort für Ihren Ordner und speichern Sie anschließend den fertigen Screenshot auf Ihrem Mac.
Teil 4. Wie man Screenshots bearbeitet, zuschneidet und mit Anmerkungen versieht
Zu lernen, wie man auf einem Mac-Desktop Screenshots erstellt, ist nur der erste Schritt. Was aber, wenn man unerwünschte Teile abschneiden, Notizen hinzufügen, Pfeile zeichnen oder wichtige Details hervorheben möchte?
Die gute Nachricht: Macs verfügen über integrierte Tools, mit denen sich Screenshots schnell und einfach bearbeiten lassen. Für komplexere Funktionen können Sie auch Apps von Drittanbietern nutzen.
1. Sofortige Bearbeitung nach der Aufnahme
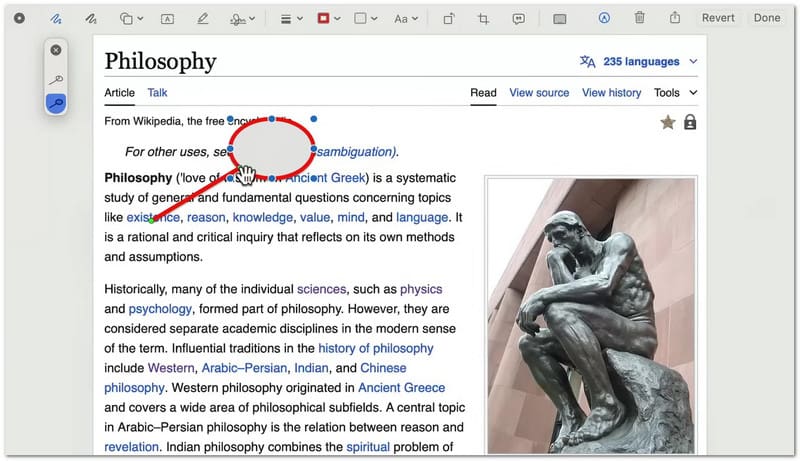
Auf dem Mac können Sie einen Screenshot direkt nach der Aufnahme bearbeiten. Das ist eine der schnellsten Möglichkeiten, Änderungen vorzunehmen, ohne eine weitere App öffnen zu müssen.
Schritt 1 Erstellen Sie einen Screenshot mit Schicht + Befehl + 4 oder Schicht + Befehl + 5.
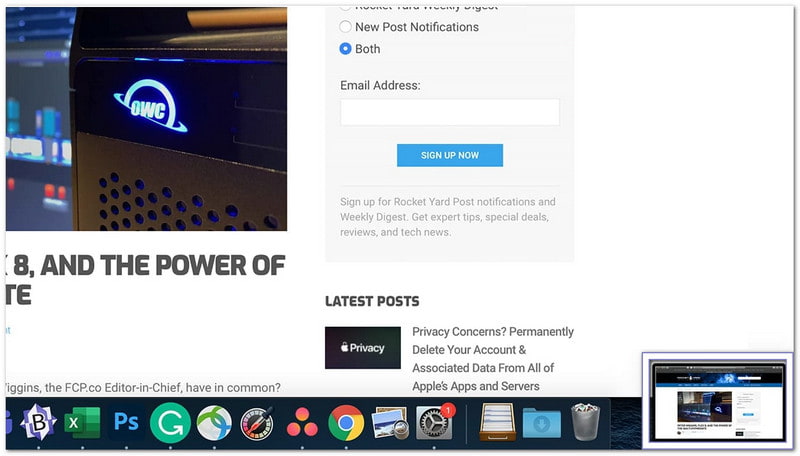
Schritt 2Achten Sie auf das schwebende Miniaturbild, das in der unteren rechten Ecke Ihres Bildschirms erscheint.
Schritt 3Klicken Sie auf das Vorschaubild, bevor es verschwindet. Dadurch wird der Screenshot im Markup-Bearbeitungsfenster geöffnet.
Schritt 4Über die Werkzeugleiste oben können Sie Text, Pfeile, Formen, Linien oder Hervorhebungen hinzufügen. Mit dem Freistellungswerkzeug können Sie unerwünschte Bildteile entfernen.
Schritt 5Klicken Fertig Um Ihre Änderungen zu speichern, klicken Sie bitte auf die Schaltfläche Teilen Klicken Sie auf diese Schaltfläche, wenn Sie den Screenshot per E-Mail, Nachrichten oder einer anderen App senden möchten.
2. Vorhandene Screenshots mit der Vorschau zuschneiden
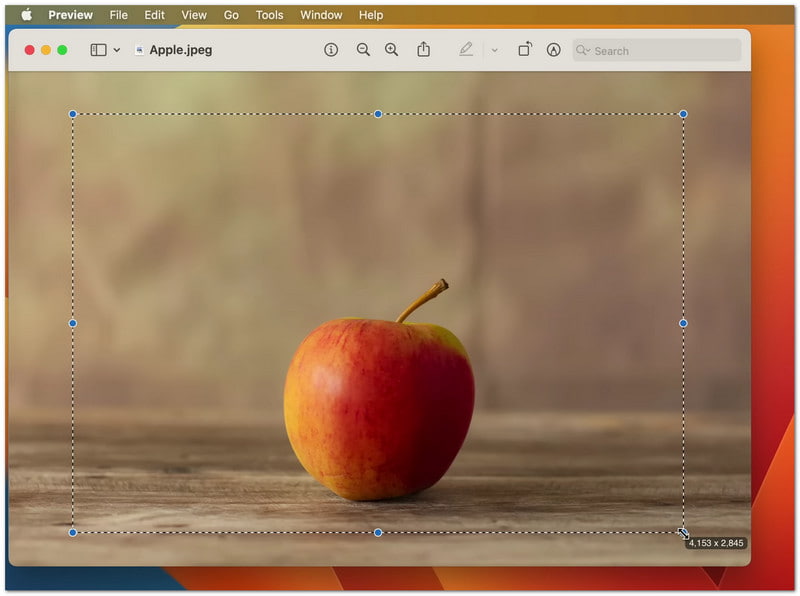
Wenn der Screenshot bereits auf Ihrem Mac gespeichert ist, können Sie ihn später mit der integrierten Vorschau-App zuschneiden; außerdem können Sie ihn auch verwenden, um Video zuschneiden.
Schritt 1Suchen Sie die Screenshot-Datei und doppelklicken Sie darauf, um sie in der Vorschau zu öffnen.
Schritt 2Prüfen Sie, ob die Markup-Symbolleiste sichtbar ist. Falls sie nicht angezeigt wird, klicken Sie auf „Ansicht“ und wählen Sie dann „Auswählen“. Markup-Symbolleiste anzeigen.
Schritt 3Klicken und ziehen Sie den Mauszeiger über den Bereich, den Sie behalten möchten. Dadurch wird eine Auswahl um den wichtigen Teil des Bildes erstellt.
Schritt 4Drücke den Ernte Schaltfläche in der Symbolleiste. Die Vorschau entfernt alles außerhalb des ausgewählten Bereichs.
Schritt 5Drücken Sie Befehl + S um den bearbeiteten Screenshot zu speichern.
3. Externe Bildbearbeitungsprogramme
Wenn die in Mac integrierten Tools nicht ausreichen, können Drittanbieter-Tools zum Einsatz kommen. Bildbearbeiter Sie helfen Ihnen, mehr aus Ihren Screenshots herauszuholen. Sie dienen zum Bearbeiten, Verbessern und Organisieren von Bildern, nachdem Sie diese auf Ihrem Mac aufgenommen haben. Jedes Tool hat je nach Ihren Bedürfnissen unterschiedliche Stärken!
1. Skitch
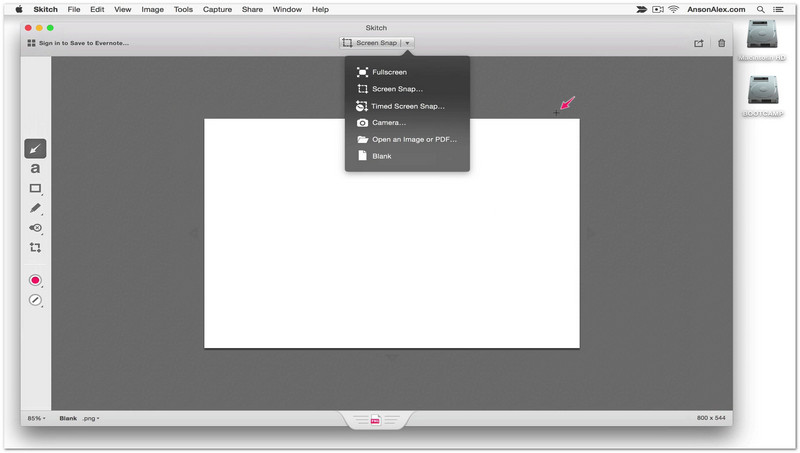
Skitch wurde für die schnelle Bearbeitung von Screenshots mit einfachen Werkzeugen entwickelt. Öffnen Sie einen Screenshot und markieren Sie ihn sofort mit Pfeilen, Stempeln oder kurzen Textnotizen. Es ist besonders praktisch, wenn Sie nur wichtige Bereiche schnell hervorheben möchten. Die Bearbeitung bleibt unkompliziert und wird nicht durch komplexe Funktionen überladen.
2. Canva
Wenn Sie aus Screenshots einfache visuelle Designs erstellen möchten, können Sie Canva verwenden. Screenshots lassen sich in Vorlagen einfügen, mit anderen Formen oder Bildern kombinieren und mit Titeln versehen. Das Tool eignet sich hervorragend für Social-Media-Posts, Präsentationen und Schulreferate. Außerdem können Sie Screenshots ganz einfach für verschiedene Layouts skalieren.
3. Photoshop
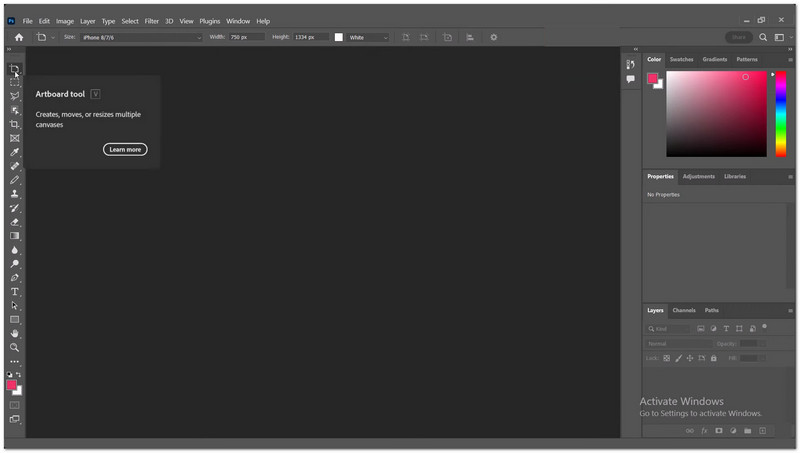
Adobe Photoshop bietet umfassende Kontrolle über die Bearbeitung von Screenshots. Sie können mit mehreren Ebenen arbeiten, unerwünschte Objekte entfernen, die Beleuchtung anpassen und präzise zuschneiden. Für professionelle Arbeiten, bei denen klare und detailreiche Screenshots erforderlich sind, ist es sehr hilfreich. Es bietet die größte Bearbeitungsmöglichkeit, erfordert aber etwas Übung.
Teil 5. So drucken Sie einen Screenshot auf dem Mac
Sie können die Schritte zum Drucken eines Screenshots auf einem Mac verwenden, um diesen direkt von einem gespeicherten Bild auszudrucken. Alternativ können Sie ihn auch zuerst kopieren und in ein Dokument einfügen, bevor Sie ihn drucken. Beide Methoden sind einfach und eignen sich gut für Schule, Beruf oder den privaten Gebrauch.
Methode 1: Drucken eines gespeicherten Screenshots mithilfe der Vorschau
Mit den integrierten Druckfunktionen des Mac können Sie einen gespeicherten Screenshot in der Vorschau öffnen und ihn sofort ausdrucken.
Schritt 1Sie finden Ihren Screenshot auf dem Desktop oder in dem Ordner, in dem er gespeichert wurde. Es handelt sich üblicherweise um eine PNG-Datei mit dem Namen „Screenshot [Datum] um [Uhrzeit]“.
Schritt 2Doppelklicken Sie auf die Screenshot-Datei. Sie wird in der Vorschau-App geöffnet. Dies ist der Standard-Bildbetrachter auf dem Mac.
Schritt 3Überprüfen Sie das Bild sorgfältig. Stellen Sie sicher, dass es sich um den richtigen Screenshot handelt, den Sie ausdrucken möchten.
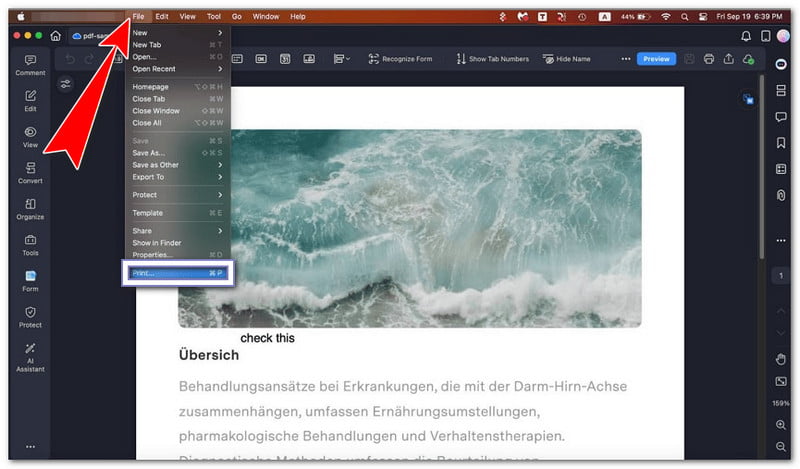
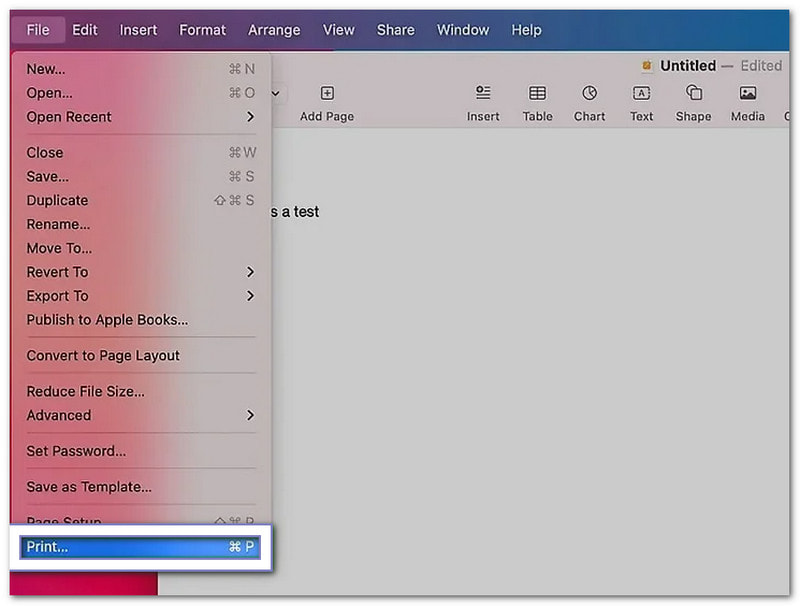
Schritt 4Drücken Sie Befehl + P auf Ihrer Tastatur. Sie können auch klicken Datei im oberen Menü dann auswählen Drucken.
Schritt 5Wählen Sie Ihren Drucker aus der Liste aus. Passen Sie die Einstellungen gegebenenfalls an. Klicken Sie anschließend auf „Drucken“, um den Druckvorgang zu starten.
Methode 2: Screenshot vor dem Drucken in ein Dokument einfügen
Mit dieser Methode lernen Sie, wie man einen Screenshot auf einem Mac einfügt, indem Sie zuerst einen Screenshot in ein Dokument einfügen und ihn dann gegebenenfalls mit zusätzlichen Inhalten ausdrucken.
Schritt 1Drücken Sie Kontrolle + Schicht + Befehl + 3 Einen Screenshot erstellen und direkt in die Zwischenablage kopieren.
Schritt 2Öffnen Sie eine Textverarbeitungs-App wie Pages, Word oder Notizen. Gehen Sie zu einer leeren Seite oder einem leeren Abschnitt.
Schritt 3Drücken Sie Befehl + V um den Screenshot in das Dokument einzufügen.
Schritt 4Verschieben oder verkleinern Sie das Bild gegebenenfalls, damit es gut auf die Seite passt.
Schritt 5Drücken Sie Befehl + P Um das Druckfenster zu öffnen, wählen Sie Ihren Drucker aus und klicken Sie dann auf „Drucken“. Drucken.
Teil 6. Wie man Screenshots verwaltet und löscht
Screenshots können sich auf Ihrem Mac schnell ansammeln. Deshalb ist es hilfreich, sie zu verwalten. Sie können die Dateigröße ändern, das Dateiformat wechseln und unerwünschte Screenshots löschen, um Ihren Desktop übersichtlich und ordentlich zu halten.
1. Einstellungen für Screenshot-Größe und Dateiformat
Mithilfe dieser Einstellungen können Sie steuern, wie groß Ihre Screenshots sind und in welchem Dateityp sie gespeichert werden.
Screenshot-Dateigröße reduzieren
Diese Option hilft dabei, Screenshots zu verkleinern, sodass sie weniger Speicherplatz auf Ihrem Mac belegen.
Schritt 1Erstellen Sie nur Screenshots von dem, was Sie benötigen. Drücken Sie Befehl + Schicht + 4 Ziehen Sie, um einen kleinen Bereich auszuwählen. So vermeiden Sie große Vollbilddarstellungen.
Schritt 2Nach dem Speichern klicken Sie mit der rechten Maustaste auf die Screenshot-Datei auf Ihrem Mac.
Schritt 3Wählen Schnelle Aktionen > Bild konvertierenSie können das Format in JPG oder HEIF ändern. Diese Formate verkleinern die Datei.
Schritt 4Speichern Sie die neue Version. Dadurch sparen Sie Speicherplatz auf Ihrem Mac.
Ändern des Screenshot-Dateiformats über das Terminal
Mit dem Terminal können Sie zwischen Screenshot-Formaten wie PNG, JPG oder anderen unterstützten Dateitypen wechseln.
Schritt 1Offen Terminal auf Ihrem Mac. Drücken Sie Befehl + RaumGeben Sie "Terminal" ein und drücken Sie dann Zurückkehren.
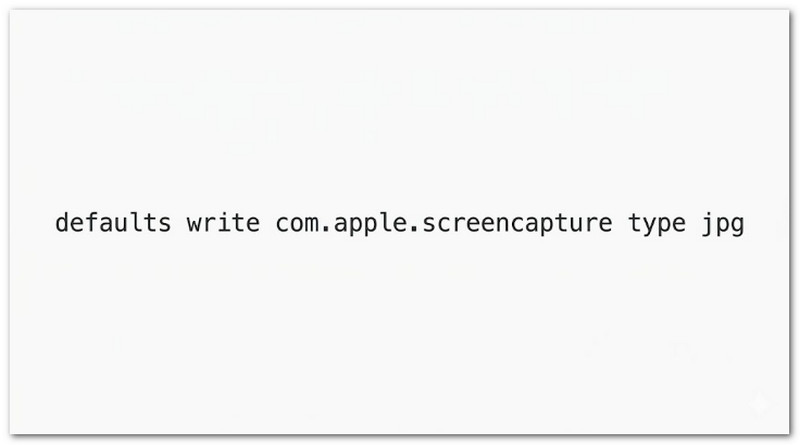
Schritt 2Geben Sie diesen Befehl exakt ein: defaults write com.apple.screencapture type jpg.
Schritt 3Drücken Sie Eingeben Um den Befehl anzuwenden, wird das Screenshot-Format in JPG geändert.
Schritt 4Starten Sie Ihren Mac neu. Oder geben Sie Folgendes ein: killall SystemUIServer und drücke Eingeben um die Änderung sofort zu aktivieren.
Schritt 5Erstellen Sie einen neuen Screenshot. Dieser wird nun im von Ihnen gewählten neuen Format gespeichert.
2. So löschen Sie Screenshots
In diesem Abschnitt wird erklärt, wie Sie Screenshots auf dem Mac mit verschiedenen Methoden löschen können, um unerwünschte Bilder zu entfernen und Ihren Mac-Speicher sauber zu halten.
Screenshots aus dem Vorschaubild löschen.
Sie können einen Screenshot direkt nach der Aufnahme schnell wieder löschen, indem Sie das schwebende Vorschaufenster nutzen.
Schritt 1Erstellen Sie einen Screenshot mit einer beliebigen Tastenkombination auf dem Mac.
Schritt 2Schauen Sie sich das schwebende Miniaturbild an, das in der Ecke Ihres Bildschirms erscheint.
Schritt 3Klicken Sie auf das Vorschaubild, bevor es verschwindet. Dadurch öffnet sich das Bearbeitungsfenster.
Schritt 4Drücke den Müll Schaltfläche im Fenster, um den Screenshot sofort zu löschen.
Schritt 5Schließen Sie das Fenster, wenn Sie fertig sind.
Screenshots vom Desktop oder Finder löschen.
Diese Methode entfernt Screenshots manuell von Ihrem Desktop oder Finder, indem sie in den Papierkorb verschoben werden.
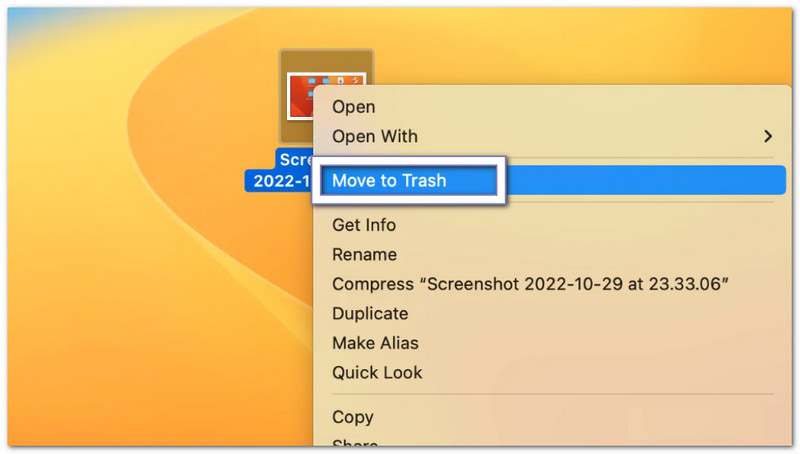
Schritt 1Gehen Sie zu Ihrem Desktop oder öffnen Sie den Finder und suchen Sie Ihre Screenshot-Datei.
Schritt 2Klicken Sie einmal auf den Screenshot, um ihn auszuwählen.
Schritt 3Ziehen Sie die Datei in den Müll im Dock.
Schritt 4Oder drücken Befehl + Löschen um es schnell in den Papierkorb zu verschieben.
Schritt 5Leeren Sie den Mülleimer, wenn Sie ihn endgültig entfernen möchten.
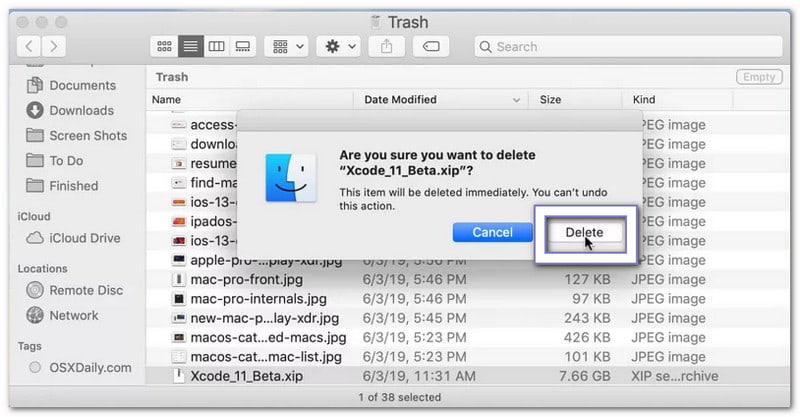
Einen Screenshot endgültig löschen.
Diese Option löscht Screenshots sofort, ohne sie zur Wiederherstellung in den Papierkorb zu verschieben.
Schritt 1Wählen Sie die Screenshot-Datei auf Ihrem Mac aus.
Schritt 2Drücken Sie Möglichkeit + Befehl + Löschen auf deiner Tastatur.
Schritt 3Es erscheint eine Warnung, die zur Bestätigung auffordert.
Schritt 4Bestätigen Sie die Aktion, um die Datei sofort zu löschen.
Schritt 5Der Screenshot wird entfernt, ohne in den Papierkorb zu gelangen.
Teil 7. Fehlerbehebung
Manchmal funktionieren Screenshots auf einem Mac nicht wie erwartet. Sie lassen sich möglicherweise nicht verschieben, werden nicht gespeichert oder sind schwarz. Diese Probleme treten häufig auf und lassen sich mit einfachen Überprüfungen beheben.
1. Screenshots können nicht mehr per Drag & Drop verschoben werden.
Wenn Sie das Problem haben, dass Sie auf Ihrem Mac keine Screenshots mehr per Drag & Drop verschieben können, gehen Sie zu Systemeinstellungen > Trackpad oder Maus Stellen Sie außerdem sicher, dass „Klicken und Ziehen“ aktiviert ist, da das Ziehen sonst nicht funktioniert. Öffnen Sie dann Finder, halten Sie die Umschalttaste, drücke den Apfel Menü und wählen Sie aus Force-Quit-Finder, dann klick NeustartFalls es immer noch nicht funktioniert, öffnen Sie die Miniaturansicht des Screenshots und verwenden Sie die Teilen Klicken Sie stattdessen auf die Schaltfläche oder speichern Sie die Datei zuerst und verschieben Sie sie dann vom Desktop.
2. Screenshots werden nicht gespeichert
Falls die Screenshots nicht auf Ihrem Desktop angezeigt werden, drücken Sie Befehl + Schicht + 5Klicken Sie auf „Optionen“ und überprüfen Sie den Speicherort, da dieser möglicherweise falsch eingestellt ist. Stellen Sie sicher, dass Desktop oder Unterlagen ist ausgewählt. Wenn Sie verwenden Dropbox oder Eine FahrtÜberprüfen Sie deren Einstellungen, da Ihre Dateien möglicherweise in der Cloud gespeichert werden. Falls es weiterhin nicht funktioniert, starten Sie den Computer neu. Finder Oder starten Sie Ihren Mac neu, um das Problem zu beheben.
3. Die Screenshots sind leer/schwarz.
Die App blockiert möglicherweise Ihren Screenshot, wenn dieser schwarz ist. Screenshots funktionieren nicht mit Streaming-Apps wie Netflix oder Apple TV, da diese DRM-Schutz verwenden. Deaktivieren Sie diese Option. Hardware-Beschleunigung Falls das Problem auftritt, ändern Sie die Einstellungen Ihres Browsers. Überprüfen Sie außerdem, ob die Berechtigung zum Erstellen von Screenshots unter folgendem Link erteilt wurde: Systemeinstellungen > Datenschutz und Sicherheit > Bildschirmaufnahme.
Ich hoffe, diese Anleitung hilft Ihnen. Einen Screenshot auf einem Mac erstellen Ganz einfach. Jetzt können Sie jederzeit unkompliziert Ihren Bildschirm aufnehmen.
Sollten Sie jemals lange Seiten oder Chats erfassen müssen, zögern Sie nicht, … zu verwenden. AVAide Screen RecorderEs erleichtert das Scrollen durch Screenshots in verschiedenen Apps. Sie können Ihre Aufnahmen auch direkt in Ihrem lokalen Ordner speichern.
ÜBER DEN AUTOR

Erfassen Sie die besten Momente mit AVAide Screen Recorder. Screencast, anpassen und in Sekundenschnelle teilen.
Bildschirmaufnahme
- Bildschirmaufnahme unter Windows
- Instagram Live aufnehmen
- Rippen Sie Videos von Tubi
- Konvertieren Sie YouTube-Videos in MP3
- Laden Sie Videos von Fansly herunter
- Herunterladen von JW Player-Videos
- Laden Sie Bilibili-Videos herunter
- Patreon-Videos herunterladen
- SpankBang-Videos herunterladen
- Discord-Videos herunterladen
- DoodSream-Video herunterladen