The built-in Android screen recorder may not have enough features. However, there are some practical tips you can learn to make easier and more versatile recordings on your phone screen. This post will show you comprehensive Android screen recording tutorial.
If you prefer advanced screen recording for gaming, tutorials, or professional demos, we can also help you bypass the clutter to bring you the best Android screen recording methods and apps available today, complete with step-by-step tutorials to help you achieve crisp, high-definition results.
Part 1: How to Use the Built-in Android Screen Recorder
Most devices running Android 11 or higher come with a native screen recording app located in the Quick Settings panel. You can just use it to record your phone's screen.
Trin 1Access Quick Settings
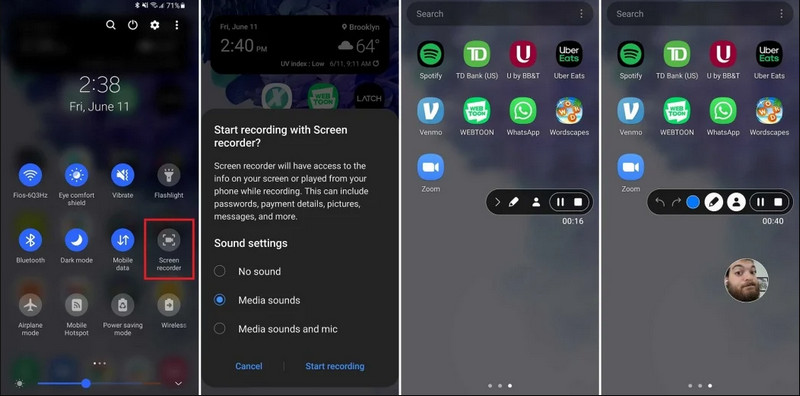
Swipe down twice from the top of your screen to expand the full Quick Settings menu.
Trin 2Select Screen Recorder
Se efter Skærmoptagelse. If you don't see it, tap the Redigere button (with a Pencil icon) and drag the Screen Record tile into your active grid.
Trin 3Konfigurer optagelsesindstillinger
When you find the Android Skærmoptager tool, you have multiple recording options. Choosing a proper one can make your Android screen recording effective.
- No sound: Record only the phone screen without system audio or external sound.
- Media sounds: Record the screen with all system sounds, including sound from all apps within your phone.
- Media sounds and mic: Record both system sounds and external sounds (phone's built-in mic or the mic from your earphones).
Trin 4Start and Stop Screen Recording
Make your choice and tap the Start Recoding button. A countdown will appear in the status bar. To stop Android screen recording, tap the Hold op button (if there's a recording status bar) or swipe down the notification shade and tap the red Hold op knap.
Part 2: Some Brand-Specific Android Recorder Tools
Many Android phone manufacturers provide proprietary screen recorders with advanced features like Selfie Camera overlays. Check some popular Android brands' special recording features:
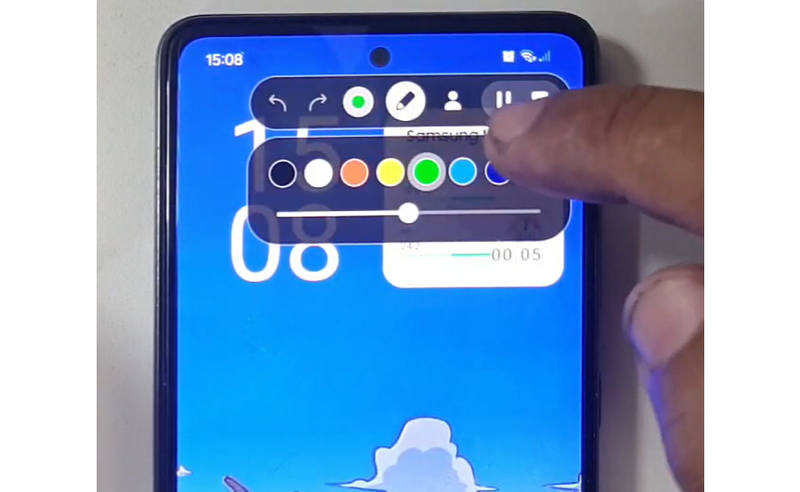
Samsung (One UI): Includes a Screen Recorder with a toolbar that allows you to draw on the screen in real-time.
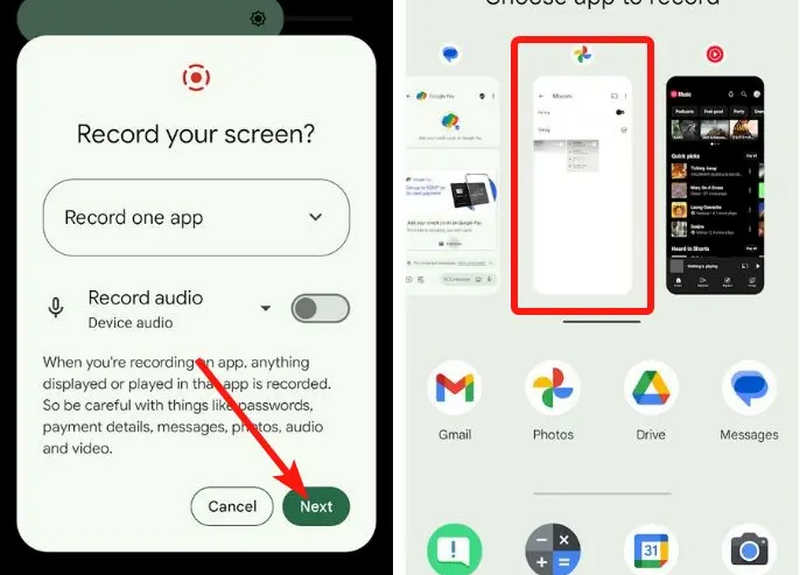
Google Pixel: You can select a specific app (e.g., a Banking app or WhatsApp) to record. If you exit the app or pull down your notification shade during the session, those actions will not appear in the final video.
Xiaomi (MIUI/HyperOS): Features a dedicated "Screen Recorder" app with deep customization for frame rates (FPS) and bitrates.
Huawei & Honor (HarmonyOS / MagicOS): A unique hardware-software integration where you can start or stop a recording simply by double-knocking the screen with two knuckles.
OPPO, vivo, & realme (ColorOS / OriginOS): When a game is launched, the screen recorder automatically optimizes CPU/GPU resources to ensure that recording a 4K/60FPS clip doesn't cause in-game lag or frame drops.
Part 3: 4 More Versatile Ways to Screen Record on Android
If your Android phone doesn't have satisfied screen recording features, you can check the four Android screen recorder apps. They can provide some convenient and practical features.
1. AZ Skærmoptager
AZ skærmoptager is a very popular Android screen recorder app in the Play Store. It can record high-res video on your Android phone screen. The application also allows you to adjust the resolution, frame rate, and bit rate depending on different recording purposes.
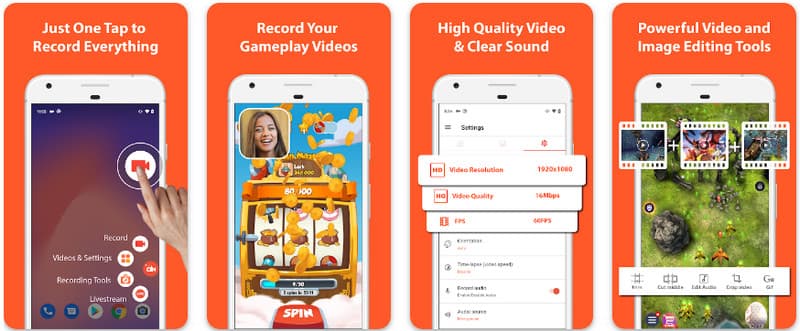
Desuden lader AZ Screen Recorder brugere optage lyden, der afspilles på enheden ved hjælp af en mikrofon. Dette gør det muligt at optage selv de mest indviklede optagelser af høj standard. Dens enkle arrangement af knapper og ensartede ydeevne gør appen til en favorit for mange. Lær, hvordan du optager en Android-skærm med dette ved at bruge vejledningen nedenfor.
Trin 1Når du har downloadet appen på din Android, skal du starte den. Klik derefter på kamera knappen for at få adgang til skærmoptagelsesfunktionen.
Trin 2Tryk på Start nu to begin the screen recording on your Android, and a countdown will appear on your screen.
Trin 3To stop the screen recording on your Android phone, tap the Optage button again. With this app, you can also skærmoptagelse på din iPhone med lyde aktiveret.
2. Mobizen Screen Recorder
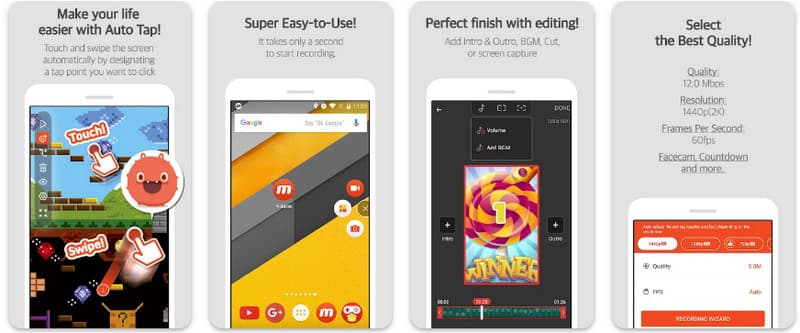
Mobizen skærmoptager is another app to screen record on Android that is freely available on the Play Store and promises easy and high-quality recording. It provides options for high-definition recording with adjustable parameters and clean recording to remove watermarks. Further, Mobizen also has internal sound recording, which can be used for the recording, as well as face cam and GIF, which can add more to the recording. It also makes use of straightforward arising of the different features and controls that help the user to start Android screen recording or edit the content without much fumbling about the app. Find out how to screen record with Android using this app.
Trin 1Download den nu på din Android og åbn appen.
Trin 2Do the setup that it requires you to do before you can use the screen recorder. A floating recorder bar will appear on your screen. Tap the kamera knap, så Start nu to initiate the screen recording.
Trin 3Når du er færdig, skal du trykke på M og hold op button to stop the screen recording on your Android phone.
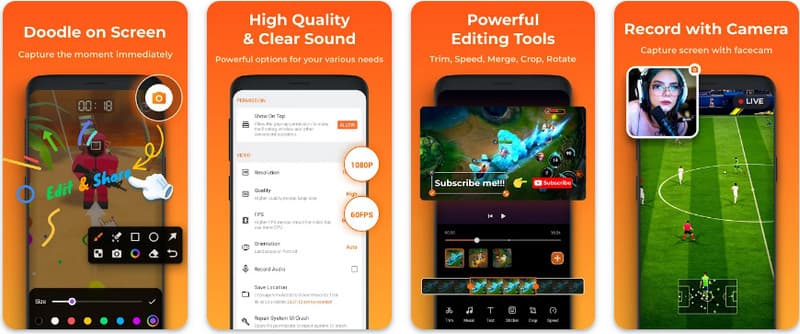
3. Skærmoptager - XRecorder fra Inshot
Screen Recorder - XRecorder is a powerful, all-in-one Android utility that simplifies screen capturing by offering high-definition recording, up to 1080p at 60FPS, without requiring root access or imposing watermarks. As a premier method for screen recording on Android 17/16, it provides a seamless user experience through a floating control window that allows you to start, pause, and draw on your screen in real-time using a built-in brush tool. Beyond simple video capture, it supports internal audio recording, facecam overlays for streamers, and integrated video editing, making it an ideal choice for anyone needing to create professional tutorials, gameplay clips, or clear demonstrations directly from their mobile device.
Trin 1Når download af XRecorder er færdig, skal du åbne den og trykke på Aktiver flydende ikon.
Trin 2Tryk derefter på Optage knappen for at starte optagelse og Start nu at bekræfte.
Trin 3Som du kan se, vises længden af optagelsen som et flydende ikon; tryk på hold op knappen for at gemme optagelsen.
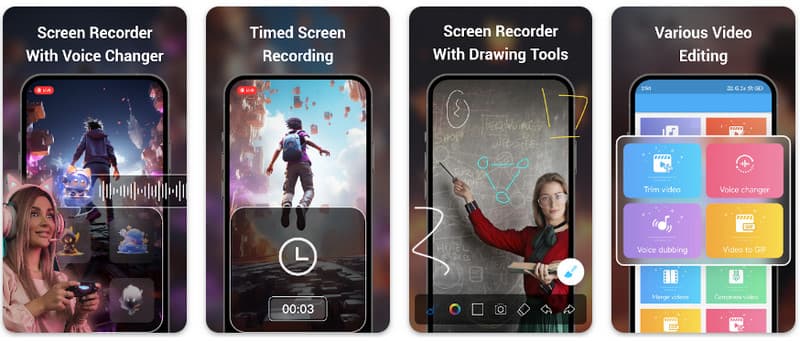
4. Super Screen Recorder
Super skærmoptager is a top-tier solution for anyone looking for a professional way to screen record on Android with maximum flexibility. This powerful app delivers high-definition capture and stands out by offering a watermark-free experience even in its free version, ensuring your content remains clean and professional. It features an integrated facecam for capturing real-time reactions and a versatile brush tool that allows you to draw on the screen during recording, an essential function for creating engaging tutorials or walkthroughs. Whether you are a beginner or an advanced user, Super Screen Recorder provides the robust customization needed to master Android screen recording with ease.
Trin 1Åbn Super Screen Recorder på din Android, og aktiver derefter appens flydende funktion for at bruge den.
Trin 2Tryk på på din skærm kamera knappen, bekræft indstillingerne, og tryk på Start nu. Derefter vises en nedtælling på tre sekunder, før optagelsen begynder.
Trin 3Tryk på firkant knappen for at afslutte optagelsen og gemme den på din Android-enhed.
Bonus: Record Screen on Desktop and Mobile Phone with the Best Quality
Do you believe that you can record your Android phone's screen on a computer? AVAide skærmoptager is primarily designed for screen recording on Windows and Mac. But it can also record your Android phone's full screen. This is especially helpful when you need to create a tutorial of certain operations on Android and then directly edit the video on your Mac or Windows.
For screen recording on Windows and Mac, AVAide Screen Recorder supports AV1 and HEVC codecs, which can highly compress the recording result while keeping the best video quality. The full hardware acceleration can let you record long videos with very low CPU usage. Even more interesting is that it has an improved microphone that enhances clarity by canceling background and echo sounds. The software makes excellent recordings With simple navigation and editing features, like trimming and annotations. While it is costly software, it is highly recommended because it can be used for personal and business purposes.
- Record your Android or iOS device with the best video quality.
- Easily make tutorial recordings with drawing and annotation features.
- Support AV1 and HEVC output codecs to highly compress the output video.
- Offer easy-to-use video editing features to edit your recordings on Android.
Trin 1Du kan nu downloade skærmoptageren på din pc ved at markere download-knappen her. Installer derefter appen ved at følge prompten på din skærm og start den for at gå videre til næste trin.

GRATIS DOWNLOAD Til Windows 7 eller nyere
 Sikker download
GRATIS DOWNLOAD Til Mac OS X 10.13 eller nyere
Sikker downloadTrin 2Nu hvor det allerede kører ind i dit system, skal du placere optagelsesrammen i det område, hvor du vil starte optagelsen. Her kan du optage hele din skærm ved at vælge indstillingen Fuld skærm i stedet for indstillingen Region.

Trin 3Dernæst kan system- og mikrofonoptagelsen sættes op, hvis det er nødvendigt. Hvis du vil tilføje dit ansigt til optagelsen, skal du aktivere indstillingen Webcam her. Klik derefter REC for at starte nedtællingen og begynde optagelsen.

Trin 4Når du afslutter optagelsen, skal du klikke på hold op knap, som er en rød firkant. Til det næste vindue, der vises, kan du redigere den optagelse, du tog tidligere med de tilgængelige muligheder her, og derefter placere din markør på optagelsen og trykke på Hent knappen for at gemme den. Denne app beviser sit værd som bedste open source-optager tilgængelig.

Part 4: FAQs of How to Screen Record on Android
Where can I find the screen record on my settings?
To access the built-in feature to skærmoptagelse på Android without third-party apps, swipe down twice from the top of your screen to open the Hurtige indstillinger panel og se efter Skærmoptagelse (or "Screen Recording") icon. If it isn't visible, tap the Redigere (pencil) button to drag the screen record toggle into your active tiles. Once added, you can simply tap the icon, choose your audio preferences, such as recording internal system sounds or your microphone, and hit start to begin capturing your screen directly from your system settings.
Why can't I find screen recording on my Android?
The absence of a native option to screen record on Android is usually due to your device running an older operating system, as the built-in feature was only standardized with Android 11. If your software is up to date, the toggle might simply be hidden from your Hurtige indstillinger menu; you can typically reveal it by tapping the Redigere button in the notification shade and dragging the "Screen Record" tile into your active view. Additionally, some entry-level "Go Edition" devices or specific manufacturer skins may disable this feature to save system resources, in which case using a third-party app like XRecorder or Super Screen Recorder is the most effective workaround.
Why did the screen record button disappear?
The screen record button usually disappears because it was accidentally moved out of the Quick Settings active area; you can often restore it by tapping the Edit (pencil icon) in your notification shade and dragging the tile back. It may also be hidden due to Power Saving Mode, restricted by a Work Profile, or simply requires a system restart to refresh the UI after a software update.
Ved at bruge selvstudiet, der er anført her, har du lært hvordan man screen record på Android Samsung. Denne tutorial vil i høj grad gavne dig med hensyn til din skærmoptagelsesopgave, især hvis du er en Android-bruger. Del disse oplysninger med din Android-brugerven for at give dem en idé om, hvordan det skal gøres.
OM FORFATTEREN

Optag skærm, lyd, webcam, gameplay, onlinemøder, samt iPhone/Android-skærm på din computer.
Skærmoptagelse